Amerigo Vespucci Mantua/Panart 1:84

At last!
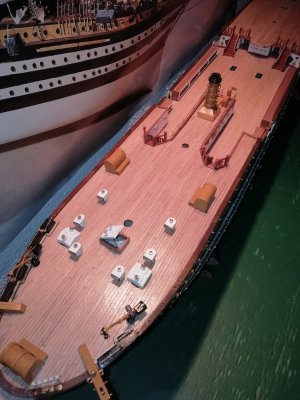
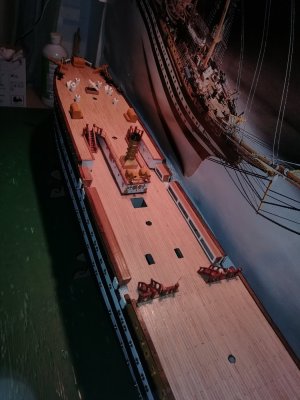
I have come to the end of instruction book 3 without further incident. There was one additional contradition between the instruction book and drawing: that was the position of the bayling pin racks which were show in different positions on each. I went with the photo in the book as it felt and looked better. I don't think it will matter as the lines from the bowsprit will suit either position as far as I can tell at this stage.
Somehow I have been very slow on this stage of the build, Summer and other things happening I suppose. IMG_20241012_190416.jpgIMG_20241012_190427.jpg
Now on to book 4, tomorrow...
 
At last!
I have come to the end of instruction book 3 without further incident. There was one additional contradition between the instruction book and drawing: that was the position of the bayling pin racks which were show in different positions on each. I went with the photo in the book as it felt and looked better. I don't think it will matter as the lines from the bowsprit will suit either position as far as I can tell at this stage.
Somehow I have been very slow on this stage of the build, Summer and other things happening I suppose. View attachment 477082View attachment 477083

Now on to book 4, tomorrow...
Well done
Congrats
 
At last!
I have come to the end of instruction book 3 without further incident. There was one additional contradition between the instruction book and drawing: that was the position of the bayling pin racks which were show in different positions on each. I went with the photo in the book as it felt and looked better. I don't think it will matter as the lines from the bowsprit will suit either position as far as I can tell at this stage.
Somehow I have been very slow on this stage of the build, Summer and other things happening I suppose. View attachment 477082View attachment 477083

Now on to book 4, tomorrow...
Good morning. Way to go. Lovely work on a beautiful ship. Cheers Grant
 
Progressing nicely but I do find the instructions confusing when they don't match up with the drawing or reality.
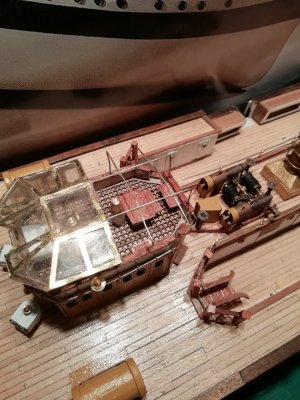
One recent issue is the support pillars for the chart house glass roofwhich they say should be 26mm but that means the plastic moulding they supply will sit hight that the pictures and drawing show, leaving a gap between the window frames and the rail. I opted to cut them down by 2mm which makes the moulding fit better. The scale headroom is a bit tight at just over 2 metres but I am happy with the overall look.
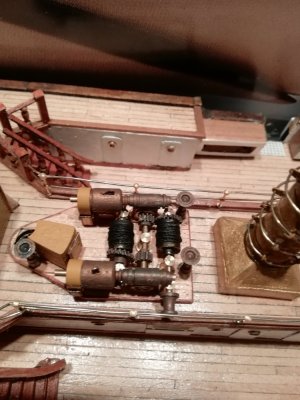
Another issue I had was that the winding mechanism pictures show cogs and drums on 3 spindles but the exploded view drawing show 4, one of which is 45mm long, thats the same as the total width of the deck! The central spindle, as far as I can tell needs to be 25mm. At first I though it must be a misprint but the spindles suppled are 3 at 30mm, 1 at 45 and 2 for the motors at 35mm. So I cut one of the 30mm to 25 and now have a 45mm left over. I also had to file off the boss on one of the cogs to get it to fit between the spindle supports.
I am not so experienced to have the confidence to make such changes to the instructions without a lot of fretting about it, and it slows me down a lot to check and double check my conclusions and to consider possible knock-on effects.
Any way, right or wrong, I am happy with the overall job in the end.IMG_20241029_152122.jpgIMG_20241029_152132.jpg
So now just the ladders to fit to the chart house and then work moves to the stern...
 
I am getting increasingly frustrated by the small mistakes in the manufacture of this kit and discrepencies in the instructions . I am finding that I am having to spend a disproportionate amount of time rectifying tiny errors such as now, trying to build the machine guns for the fore deck:
The U-shaped swivel does not fit over its spindle and had to be drilled out from 1mm to 1.2mm dia.
The central laser cut wood panel had no hole drilled at all. Not sure I have it in the exact right place now but it is not critical as far as I can tell.
The two laser cut side wood brackets have no holes drilled at all.
The base brass barrels are shown with a small central pin for location in the (non existing) hole in the central panel. mine do not have that. (The upper barrel does have one so I still need the hole).
The more experieced of you may be able to overcome such problems quickly but my inexperience means that I have no confidence to assume the mistake is Mantua's and not mine, so spend a disproportionate amount of time checking, looking ahead in the instructions, checking the drawings, my photos, and other build logs before I make irrevocable alterations to the kit.
A case in point was when making the deck rope cross shaped fixings (P35). the instructions don't say how many to make but there are parts enough for 6, fine so I make 6. Where do the go? The photo shows only two but searching the deck drawing I find 8! Checking the parts list I see that Kit number 5 provides 4 more. So that make 10 altogether. Maybe it will become clear when I build the 5th part but meanwhile I have spent another fruitless few hours.
Have I got a rogue kit or have others experienced these difficulties with Mantua kits?
Rant over! I'll now get on with the second day building the deck guns.
Hi Barcomad
I agree with you that the Mantua instructions are not that great (especially the last booklet which is clearly bad)
However, I don't recall having the same issues as those you describe
Good luck in overcoming these problems
Best
 
Hi Barcomad
I agree with you that the Mantua instructions are not that great (especially the last booklet which is clearly bad)
However, I don't recall having the same issues as those you describe
Good luck in overcoming these problems
Best
Thanks GilbertM, I refer to your log a lot and regard it as the "gold standard" for this model.
When I was having the problem of understanding why my kit is 1cm longer that all others, I wrote to Mantua to check that the kit I have is genuine and they assure me that it is. I can only think that it came from old stock and that later versions have improved.
Not looking forward to Book 8
 
At the very next stage I find the same problem again. The gun sights (if that is what they are) don't fit through the holes in the support bracket:
IMG_20241212_185340.jpg
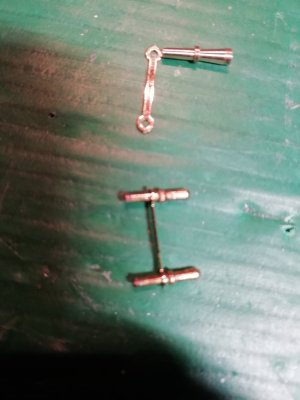
The shank of the sight is nearly 2mm dia and the hole is about 1.3mm (top of picture).
There is not enough "meat" around the hole to be able to drill it out and I don't have a lathe to reduce the shank size so...
Luckily I have some metal pins from a previous kit that form an acceptable (for me) substitute (lower picture).
I don't think I'll be buying another mantua kit!
I will stop the rant now and just get on with it!
 
Back
Top