• Ships of Scale has incorportated an extra level of security when you log In. Please follow on-screen prompts to acknowledge that you are not a robot via a "Check Box" or a "Pictorial Check Box Puzzle". This is needed due to higher level of AI Activity Security.
  • SUBSCRIBE TO SHIPS IN SCALE TODAY!

    The beloved Ships in Scale Magazine is back and charting a new course for 2026!
    Discover new skills, new techniques, and new inspirations in every issue.

    NOTE THAT OUR NEXT ISSUE WILL BE July/August 2026
  • Win a Free Custom Engraved Brass Coin!!!
    As a way to introduce our brass coins to the community, we will raffle off a free coin during the month of August. Follow link ABOVE for instructions for entering.

Another Airfix 1/72 Golden Hind Build Review – Part 1

Good day,

You are right about easy and rapid access to the fore and aftercastles from main deck, this could be suggested from modern point of vew I could guess :)))

But absence of such ladders on the contemporary galleon pictures could be explained by contrary purpose - to make this eccess as much difficult as posible for enemy boarding team, which was very common tactics in that time of XVI th for Spanish Navy especially, to board enemy vessel after one broad artillery shot and to attempt amborcation enemy vessel and continue fighting on board to get it as prize...

In my signature there is a link to museum site with plenty galleon pictures of Dutch, Spanish and other origins... no these kind of ladders could be seen

From other point of vew, to have such details as ledders on the ship model make it more attractive for vewing...I ve heard that Mayflower II galleon replica had even steering wheel installed instead of whipstaff and ladders as well , during her cross atlantic voyage...so what... :))) this is just our plastic models which we could assemble in any way we prefer with more or less artisric license...
Galleons existed first in the Northern European navies, then in Spain. English Galleons differed somewhat from those of Spain. At the time of the Golden Hind/Pelican, the English tended to avoid any situation in which Spanish soldiers were allowed or enabled to board, and soon developed stand off techniques that focused on long-range gunnery, later developing the race-built Galleons that relied on speed as well. To me, it is important to consider that each Navy that operated Galleons emphasized different qualities from each other depending on tactical thinking at the respective times.

My source is a book by the German author and historian Peter Kirsch called The Galleon: The Great Ships of the Armada Era.
 
Good day Bill,
I have this book as well, and it is one of my lovely source of information about galleons , but it is not clear for me why You citated my post here?
If it is regarding to my suggestion why there are no evidances nor contemporary pictures of 16-17 th vessels which demonstrated open ladders from forecastle deck and quaterdecks to the weist as shown on dicsussed model than I do not see supported arguments to show them on galleon models , doesn't matter of their origin, England or continental Europe contries..
I understand that in that period english fleet try to avoid situation when spanish could be able to board their vessels and prefer long range gunnery but spanish fleet had contrary tactic which they prefer and how many times they were sucseed in boarding english galleons in close combat if it happened? There is well known story with Revenge as example of such success... By the way Peter Kirsch's model of english galleon has no such open ladders...
Beside english and spanish galleons fightings there were many other sea combats between other nations Navies ,or pirates > merchant galleons... when boarding enemy vessel was preferable to catch prize but not to sink vessel, in such situation abcense of easy access between open decks would be very helpfull...mybe that why we do not see such arrangement with open ladders on galleon decks on the contemporary pictures - there are a lot of them could be watching following link to Rijks museum in my signature...
All the best!
 
Kirill,

I meant no disrespect. I only cited your post to illustrate that when discussing Galleons, people automatically focus on Spanish Galleons when this is actually a much more complex topic than that. I meant to highlight that point. To add to the mix, I am working on a very old Bluejacket model of the Dutch Half Moon which does not resemble either a Spanish or an English Galleon, nor does it resemble anything from the Mediterranean. Many early Galleons from the Med were even equipped with oars, a nod to these differences. The issue of ladders must be considered a long these lines. That was all.

Again, I meant no disrespect to you at all.

Bill
 
Good day Bill, gents,
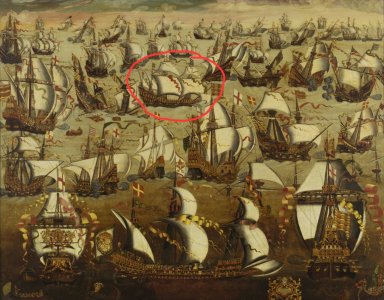
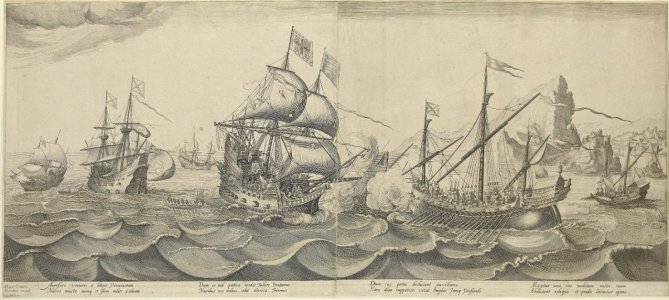
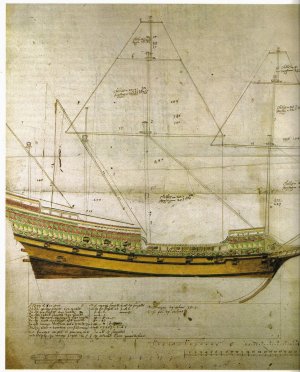
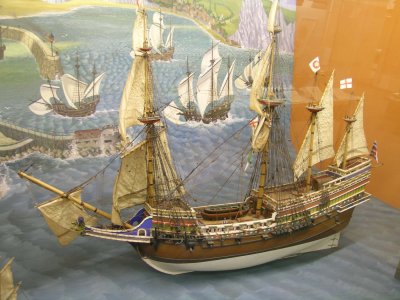
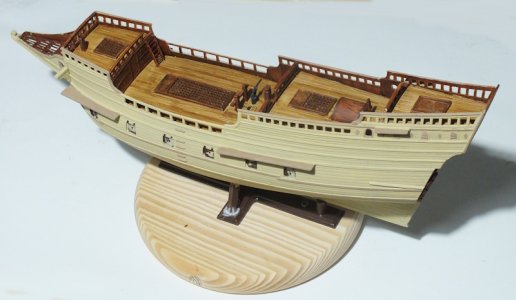
I'm sorry if my message looks aggressive or whatever when You read it, this could be happend due to my poor English :) do not kill me for that , actualy it was absolutely neitral in meaning, no emotions involved , this is very limitited area of discussion from my side about why do we need or do not to show open type ladders on the galleon models... when I assembling my kit of spanish galleon I liked very much these ladders ,and the way how they were shown in the kit , and I reproduced them on the model without any doubts, but later on while I searching and getting more and more information about galleons , reading books and closely examing available ancient art drawings where galleons were depicted, I have more doubts that they could have right place here :))) but that time it was already too late to make necessary corrections on my model due to masts and some rigging were fitted allready... but I noted this in my mind and it was triggered when I saw Steve desided to show them on his model... in this respect ,by my opinion, kit makers were quite historical accurate when they didn't show these open style ladders(doors only are OK) on the model of elizabethian galleon they called GH... as seems to me, it more looks like copy of Elizabeth Jonas galleon model (as I understood which was made according to famous shipwright Bakker's galleon drawing)model from Science Museum than actual small Frencis Dreik's galleon could be looks like.. but there is very dark area of pure suggestion and aproximations :))) at least I m very glad that this plastic kit is quite big in size for making any kind of scratch build additions and it is very handy due to big scale for making accurate and full deck fittings and complete sails and rigging without scale compromises... and it very similar in siluete to this \ circled on the drawing and to famous Bakker drawing

English_Ships_and_the_Spanish_Armada,_August_1588_RMG_BHC0262.jpg

Sesimbra.1602.jpg

Revenge by Matthew Baker.jpg

2.jpg

1.jpg
 
Last edited:
Please allow me to make a small recommendation. I use hot water to correct any warps. It's easy. It's permanent, And, it works. But, you are doing a magnificent job!
Thanks for the encouragement!

I wish I had thought of using hot water to help straighten the warped deck. Instead, I left the deck part clamped in place and with weights for a couple of days. That did straighten it out, but when I came to install it later, it had warped again! I guess that using hot water would have achieved a more permanent result...
 
Kirill,

Your English is much better than my Russian! I also remember your model by Imai/Lee. etc. very well. It was outstanding! The one posted above looks to be one of the Revell kits as well (although not the large scale monstrosities!) It is also outstanding! I admire your building very much!

Bill
 
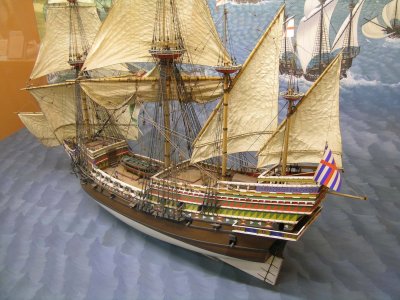
Airfix 1/72 Golden Hind (A09258V) Build Review Part 3: Hull Exterior Painting

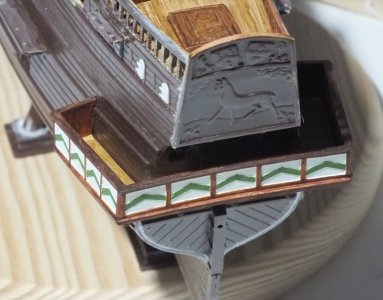
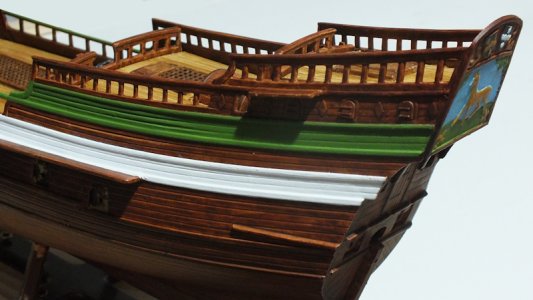
I begin by painting the rear gallery. I use white and green for the coloured chevrons on a white background, to match the lower row of coloured triangles on the hull. It’s all hand painted and I try to add some contrast by framing the coloured rectangles in plain wood for the handrails and for the structure and interior of the gallery. It looks OK as long as you don’t get too close, Here it is temporarily in position on the hull.

ghb39.jpg

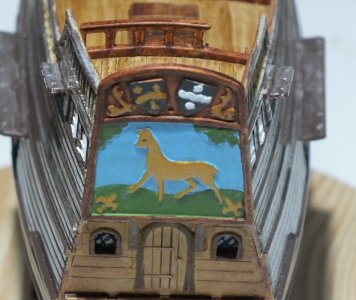
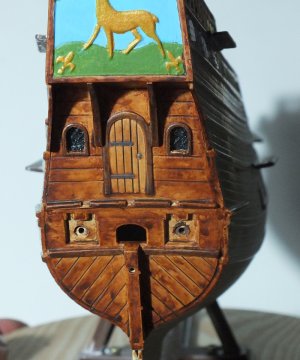
Next, I paint the golden hind detail on the stern. I’m not at all sure how historically accurate this is. This ship set sail under the command of Francis Drake as the Pelican, but was re-named Golden Hind(e) at some point during its long voyage. It seems unlikely that the crew would have had the time, materials and ability to carve such an elaborate sternpiece as they fought Spanish forces and circumnavigated the globe. It was briefly planned to put the Golden Hind on permanent public display in London when it returned from its voyage, and, though this did not happen, it’s possible that stern decoration might have been added after its return to England. I suspect this moulding may be a bit of artistic licence on the part of Airfix, but I like the way that it looks so I’ll be keeping it.

ghb40.jpg

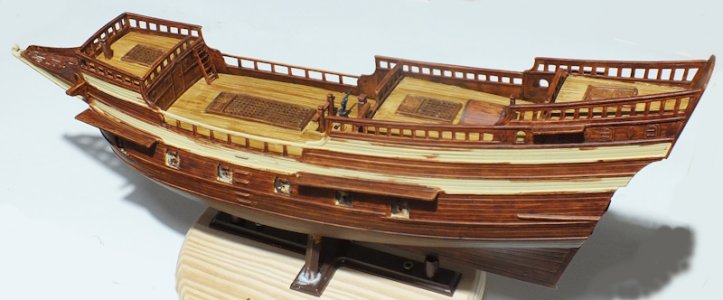
I paint the rest of the stern using the same method I used for the bulkheads and other parts on the deck: using a base of Vallejo Dark Sand with raised elements picked out in a darker colour and everything finished with several thinned washes of Mahogany Ink. The result is somewhat blotchy and uneven, but I feel that it does look (a little...) like aged wood.

ghb41.jpg

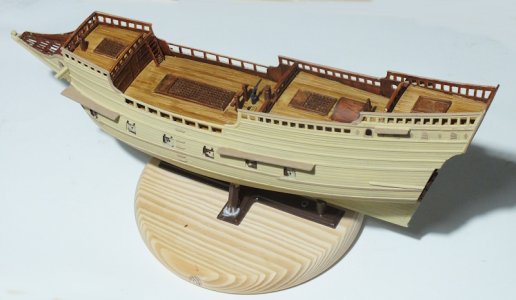
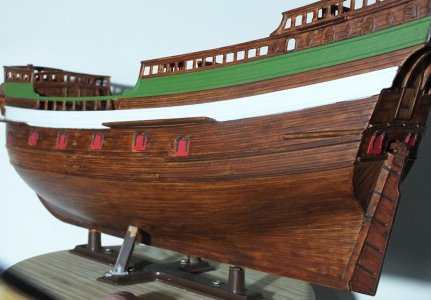
Then, it’s on to the painting of the sides of the hull. I begin by giving the whole structure several thinned coats of Dark Sand and picking out the detail in a darkened shade of the same colour.

ghb41b.jpg

Next, I give the uncoloured part of the hull several thinned washes with Mahogany Ink, which helps to highlight the planking detail and, hopefully, makes the main hull structure look something like wood. Just like the stern, the outcome is far from uniform, but that’s partly what I’m aiming for. Unpainted wood isn’t a single colour: it’s a whole range of tones and colours that provide visual depth and warmth. To me, just painting something brown, no matter what colour is used, just doesn’t look like wood. This technique may look a bit messy, but I hope it does capture something of the impression of aged, unpainted wood. I have developed this technique to deal with small wooden parts in the AFV kits I build, but this is the first time I have attempted it on such a large area.

ghb42.jpg

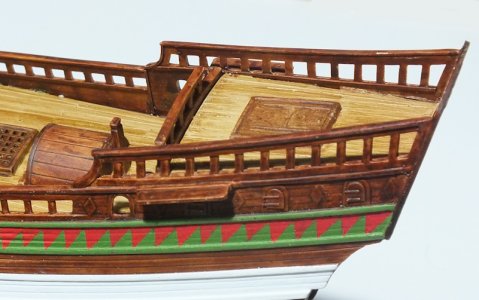
Then I mask and paint the coloured bands that will feature the triangles of contrasting colour.

ghb43.jpg

Next, I tried to add the coloured triangles themselves, and that wasn’t a happy story… I used small strips of Tamiya masking tape to define them, but the tape doesn’t stick particularly well because of the raised planking detail and a fair amount of the pattern ended up hand-painted. Another issue is that the moulded guidelines that Airfix provide for the triangles. The mouldings are inconsistent, and I’d guess that 60% of the lines simply aren’t visible under a coat of paint. The last straw was that the horizontal spacing on the vertical lines varies by as much as 2mm. That may not sound like much, but I tried following the Airfix lines, and the completed pattern of triangles just looked wrong. As a result, I ended up sanding off the Airfix guidelines (and my first attempt at painting the triangles…) and adding my own pencil guidelines to the repainted base coat. And the result was… not particularly satisfactory.

ghb44.jpg

No matter how carefully I mask and paint, the tiny triangles aren’t perfect and aren’t all precisely the same size. The result, as you can see above, is, well, a bit wibbly. And that wasn’t what I had in mind at all. After spending a couple of days trying (and failing) to paint just one row of these triangles, I was losing the will to live. So, I sanded the paint off once more and considered just forgetting this whole sailing ship thing and going back to building tank kits, which rarely involve brightly coloured decoration.

But never fear, for I have a cunning plan! Well, a plan anyway… But it’ll take a bit of time to get the materials I need, so I’ll return to the cursed triangles in the next part of this build.

In the meantime, I added the rudder and the gunport covers on the hull sides and stern. I plan to show these covers closed, mainly because I don’t like the way that the provided cannon barrels are simply placed on flat plates. Ideally, if you wanted to show these ports open and the guns run out, you’d have complete cannon placed on a gundeck inside. But you’d have to create those things yourself: a massive task and one that I’m not confident to tackle. The gunport covers on the hull fit well but the two on the stern don’t and need to be sanded a fair bit before they will fit neatly into the openings.

ghb45.jpg

That’s it for this instalment. In the next part of the build, I’ll be adding the lower parts of the main masts and the deck cannon and finding out if my cunning plan for doing those coloured triangles actually works…

Thanks for reading. You can also see this third stage of the build on my blog site:

https://modelkitworld49141446.wordp...v-build-review-part-3-hull-exterior-painting/

ghb41b.jpg
 
Good day Steve!
Maybe it will help, how
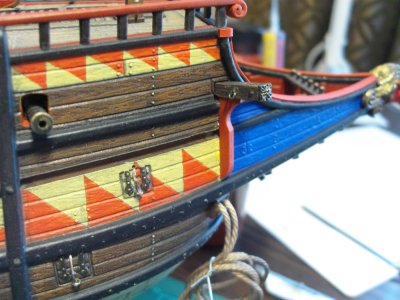
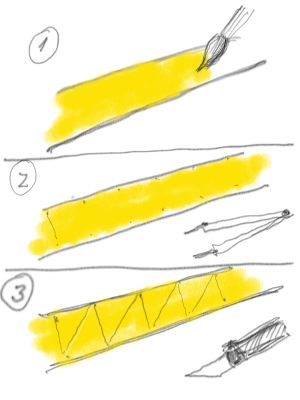
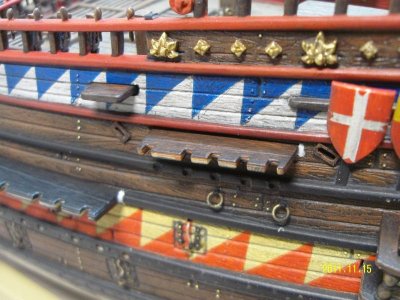
I managed to paint these triangles by this way:
as example - I want to have red and yellow triangles
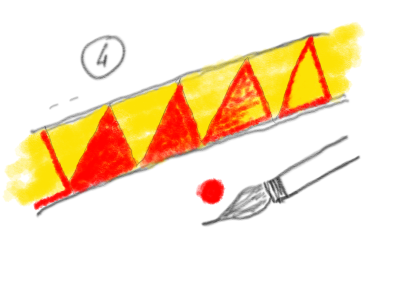
* first - I painted a yellow uniform strip all along the hull
*second - I fixed borders of each red triangle on this belt using very sharp khife and dividers, first I made needle points at equal distance on the yellow belt and secondary using sharp razor knife I connected thesee needled points between themself, thus I had kind of cutted paterns on the uniform colored belt on the hull...
*third - by using very fine brush and extra deluted red acrylic paint I started to apply this paint follow by cutted paterns ... there will act cappilar effect and red color paint will be applied by itself along cutted lines and didn't cross cutted line - this need to be done in series of many fine strokes along cutted line till the moment when You will get closed red color triangle , after that You can freely to fill remaining yellow area by using red paint...

SDC14673.JPG
 
Steve,

You are doing a beautiful job so far!

I paint the details differently. I use permanent colored markers but I also use Tamiya masking tape. I believe that the markers give me greater control of the colors while the tape provides a backup should I make a mistake. This method works for the triangles as well as the Wales, the gun port hinges, etc. I airbrush the larger areas.

Your wood effects are great!

Kirill, I still love your galleon! To my eye, it looks far better than most wood ones.
 
Good day Steve!
Maybe it will help, how
I managed to paint these triangles by this way:
as example - I want to have red and yellow triangles
* first - I painted a yellow uniform strip all along the hull
*second - I fixed borders of each red triangle on this belt using very sharp khife and dividers, first I made needle points at equal distance on the yellow belt and secondary using sharp razor knife I connected thesee needled points between themself, thus I had kind of cutted paterns on the uniform colored belt on the hull...
*third - by using very fine brush and extra deluted red acrylic paint I started to apply this paint follow by cutted paterns ... there will act cappilar effect and red color paint will be applied by itself along cutted lines and didn't cross cutted line - this need to be done in series of many fine strokes along cutted line till the moment when You will get closed red color triangle , after that You can freely to fill remaining yellow area by using red paint...

View attachment 646803
Your painting of those triangles is simply superb! But I'm not sure I have the patience or the ability to use the same technique. Thanks for the advice - hopefully I can soon show and example of how I have chosen to tackle the dreaded triangles...
 
Steve,

You are doing a beautiful job so far!

I paint the details differently. I use permanent colored markers but I also use Tamiya masking tape. I believe that the markers give me greater control of the colors while the tape provides a backup should I make a mistake. This method works for the triangles as well as the Wales, the gun port hinges, etc. I airbrush the larger areas.

Your wood effects are great!

Kirill, I still love your galleon! To my eye, it looks far better than most wood ones.
Thanks for that.

I do use Tamiya masking tape, and it's notably better than most other brands. But even then, I seem incapable of getting the triangles consistent in size and placement...
 
Good day Steve,
Actualy there is nothing complicated as it could be sounds from my explanations - key point here is how cappilar effect works / thin cut+liquid paint ...the rest is a matter of physical process... You can try it on the waist piece of painted plastic... there need to be very fine and light cut ( scratch line)of the paint coat only not involving plastic beneat of it...

7551f1c4-5741-4ce5-9b9e-45a5c98a435f.png

c0b15c60-92a4-494f-bf9a-9933f44e8c7c.png

SDC16867.JPG
 
Last edited:
Good day , Steve, John,
Please consider said bellow as kind of joke or mostly rytoric questions Of my "internal dialog with myself"...:
...The only question remains here for me,
not entirely understandable - where we need to stop, depending on our expectations and aesthetic preferences?
Consider situation while we are busy with assembling the model of the vessel, which supposed to be a model of Elizabethian galleon, for example, and how do not finish in the end with creation of some fantastic sailing ship as a result of more and more historical inaccuracies accumulated because of authors preferences or lack of knowledges?
... as an example - these beautiful models, should represent galleons in theory, and they have hull made very close to some of the famous votive models , but for some reason they were rigged in style of much more modern period than supposed to be belongs to Galleon's Golden Age and as results they looks like funny fantasy models than serious museum models ...?
There is very thin line sometimes , by my opinion, between historic accurace and our rich imagination switched on when we are busy with our models, line which could be easily broken up ...
But we are lucky nowdays, there are a lot of information we have presently as a results of many archeological researches and findings of last decades about galleons construction and rigging specifics etc. which are in common public access now...and note, were not in such extends but much more less in the days of Anderson and other classic authors when they wrote their world famous books of ship modelling!..
There are excellent books straight connected to these, galleon questions, I have mentioned at least 3 of them - R.C .Anderson " Rigging in the days of...", https://drive.google.com/file/d/1u9Mx4BgjJCHFg3W_Xc8XHYxupB1LxQr1/view?usp=drivesdk
"Mayflower and other colonial vessels" by Baker
with many technical details approached when they were busy with design and building end of 16th english galleon replica and moreover, there is given a list of all, totally completed list of riging lines with their names and sizes( which could be copied for GH model rigging but need to be scaled proportionaly) - it is very helpfull for galleon rigging understanding when reading together with R.C.Anderson book, You can easily follow description of each rigging line described in Anderson book and see how it was introduced on Mayflower replica!
Very interesting and fastinating process...
and 3rd, most juicy book by my opinion it is "The Galleon The Great Ships of the Armada Era" by Peter Kirsch...it is just great to read it and to watch illustrations!
I have to mention 4th one more book - "Susan Constant 1605 anatomy " by Brian Lavery - very good souce of information about many aspects of galleon ship construction , works well in combination with Baker's book" Mayflower and other colonial..." and RC Anderson book...
Mondfeld gives very good GH rigging plan with bellaying point of riiging lines in his model ship making enciclopedia, this plan later on many times reproduced in various shipmodelling books, and as far as I can see , Radek also using his rigging drawings when he offers various rigging staff in his ship modelling shop...
There is one more very good book , close description of which could be named Dutch style galleon , Ship of Abel Tasman written by Ab Hoving, it would be very interesting, in respect of how to rigg your galleon model, most of the rigging lines are common for England and Europian styles, and a few different , and Hoving gives step by step guide how to rigg vessel ...

View attachment 638006


View attachment 638012

This is great research. I couldn't get any of the links to work. Maybe the wifi is slow here at the VA Medical Center. I'll try later at home. Interesting post, please keep.upnthe good work
 
Back
Top