Armed Pinnace 1800 - Panart 1:16

Joined
Feb 27, 2016
Messages
930
Points
343

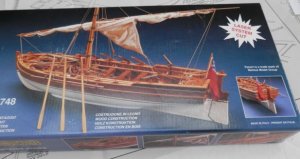
My next build will be the Panart Armed Pinnace "Lancia Armata" 1800 1:16.

Information says the model is '... an exact reproduction of a 10 meters long armed launch, which was used by the different navies during the 19th century.
These launches were armed with naval guns of different calibre and type; in the bow section a cannon or carronade was installed while in the stern two more light, small cannons were placed to be aimed by hand.

Usually, these boats were employed in coastal patrols or in escort services, but also demonstrated their wartime capacity in surprise actions attacking craft in difficulty,anchored or at roadstead. Due to their remarkable manoeuvrability, they were also employed in great numbers during landing actions, preceeding the main fleet which moved slower and was more vulnerable.

The bow cannon, placed on a wooden structure, attached to the first benches, slid back and forth, recoiling on two slits made on the two carrying guides and was manoeuvred by two forward and aft placed tackles. The marksman occupied himself to raise the cannon while the helmsman was responsible to align the bow at the target.
Mast and sail during the surprise actions were lowered on the benches and oars used.'

Specifications:
Scale 1:16
Length 620mm
Height: 457mm

In summary it is the armed assault vessel of its day. I chose this model because a. it will fit on the bookcase, b. it is different & looks like a fun build and c. I need a break from the complexities of rigging before my next build - probably the Agamemnon.

Interestingly, it is triple planked because after completing the layers of planking the centre frames are removed; if you like planking this is the model for you. There is a multi-lingual instruction book with an English section (sort of) and two sheets of plans which are well drawn, however, all annotations are in Italian. I suspect I am going to become very familiar with Google Translate on this build, but you never know - I might even learn some Italian.

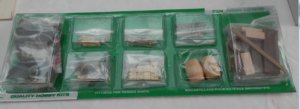
Let's have a look in the box:-

P2190077.JPGP2190078.JPGP2190079.JPGP2190080.JPG
 
WOW ! that's gonna be nice !!

Since I am building a Panart myself, please read several pages ahead and make sure they do not leave out any steps or add too many steps. My case, they have parts located on the hull of which should not even be there. I hope the best for your build, I will be looking in.

Donnie
 
Hi
There is a build for this kit in the Keith Julier book Period ship handbook 2. He warns that the sequence in the instructions is out of order and you need to read all doco & plans before you start. Hmm Gun Section, San Filippe... seems that there is a common issue,

Sorry Donny but Keith dos not do the San fillipe, however his 4 volume set plus the new edition are awesome books. Shame he passed away this past year.

His books are avail on Amazon, Book Depository & second hand on Abe books. They go for very little but are worth a fortune in advice.

Paul
 
Thanks Donnie, I follow your log and note some of the disappointing problems you have had. Why don't kit manufacturers give a few of a new kit to a forum like ours, just give them for free, and get useful feedback? My build is not a complicated one, but good advice on reading forward. I have done that - but will do it again.

Thanks Paul, I ordered that book this evening from Amazon and appreciate the pointer.
 
I have all of the books from Keith Julier, they are very nice reading materials, I am going to watch this build too.

Zoltan
 
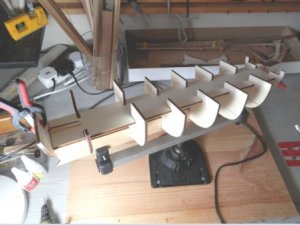
Off we go, then. The frames slot onto the keel nicely and are a good fit without any fettling. A template then slots over the top of the frames to keep all in alignment. Again a good fit - photo a.
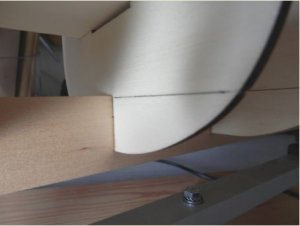
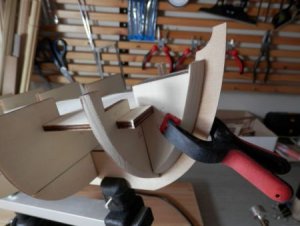
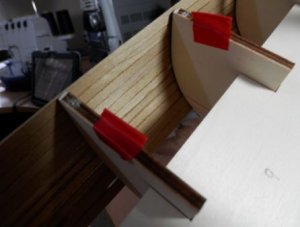
Frames 2 to 6 are removed when the hull planking is complete. To enable this, the instructions recommend to wax the edges so that the glue does not adhere to them - this seems to work well. These frames are already cut across and also almost through near the bottom (see photo b) and the theory is that the frames are removed when planking is complete, the bottom bit cut off and then that piece put back in place to form the deck support. I don't much see the point of that, so I scored the wood at the end of the cuts and then CA'd them to the keel. Fixing it to the keel means I also will have something to pin to when I get to planking towards the keel and below the level of the deck, and when planking is complete the frames will simply(?) snap off. Hope I don't live to eat my own words.

P2210076.JPGP2210077.JPGP2210076.JPGP2210077.JPG
 
There is very little shaping of the frames to be done to aid the lay of the planks, it is mainly at the front end.

On to the first of the three layers of planking. I want to make a good job of the planking which will be visible inside the boat when the frames are removed. A good edge-to-edge fit is necessary, however, I can't pin into the removable frames as that would leave a hole. If it looks good I will stain and lacquer it, if it's a dog's dinner I will paint it. Trouble is I won't know until the frames come out; oh, the suspense!

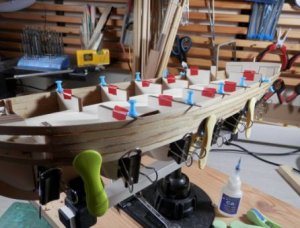
The upper levels of the planking are going on. A couple of things to point out here:-
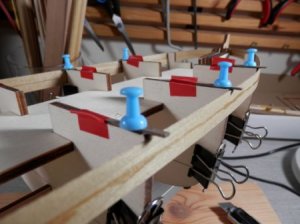
1.The red tape is to remind me not to glue to these frames.
2.When I laid the second plank on I found that in pushing it up to get a tight edge fit I was pushing the first plank up beyond the level of the frame. The blue pins fix a piece of scrap in place to prevent this upward movement.

Some progress

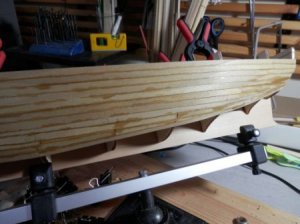
A quick peek inside. Some of the CA glue has leeched through and that will need to be sanded off in order to take a stain.

P2210078.JPGP2210079.JPGP2210080.JPGP2220081.JPGP2230082.JPG
 
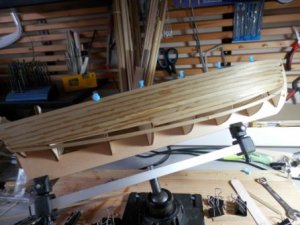
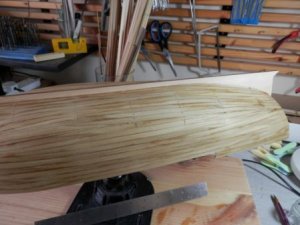
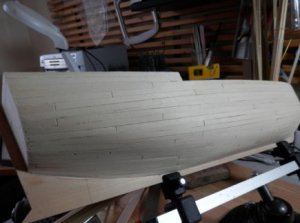
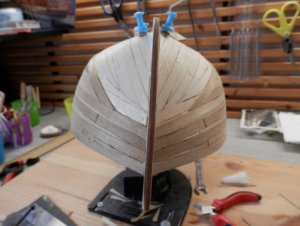
The first layer of planking is now complete; it is 1mm x 7mm walnut. The back of the boat is a couple of planks higher but there is nothing in the drawings (they are not scale plans) which gives a length for these, so it is one of those 'looks about right' fits we all sometimes have to make - This first layer was given a light sanding and then a coat of lacquer to seal it -

I didn't go too hard on the sanding because I will also need to sand the inside to get that flatter and the last thing I want to do is go through it. The second layer is limewood and will be sanded back as hard as necessary to get a perfect surface for the final outer planking.
I'll kick off on layer 2 tomorrow - the fun just never stops sometimes!

P2230084.JPGP2280076.JPGP2280079.JPGP2280080.JPG
 
Looking good! Picking up on the Keith Julier books, I bought quite a few newbie books, but for me the Period Ship Kit Builder's Manual is the one helping the most with my first build. Would highly recommend it to other noobs for being straightforward and full of 'do this now or have problems later' type advice which really helps.

I shall be back to study your planking again Graham, you have the look I want to develop for the Pearl, it is very similar to how the ship used for the movies was planked.
 
I agree..I hope that my planking will look this good.

Donnie
 
Thanks guys, I appreciate your comments.
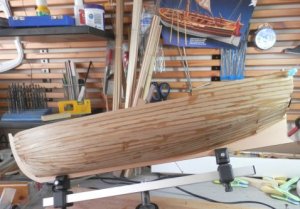
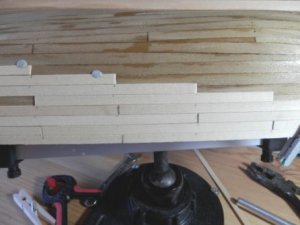
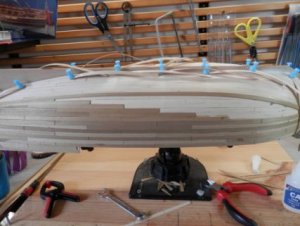
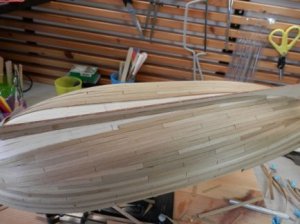
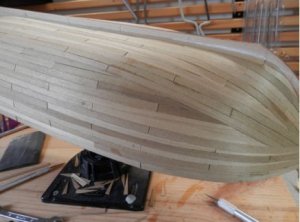
So, on with the second layer of three. Since this layer will never be seen I could slap the planks on, all pretty rough, use a lot of filler and have it done in a day. However, any planking experience is good experience and I do need to get better at some aspects - tapering any stealers, bending etc. And I have been doing some reading - always a dangerous thing to do. I would like to add a bit of realism to the outer layer and will do a butt shift system, which is how the planks have a stepped appearance rather like bricks in a wall - I know that is a massive over-simplification, but you get the idea. I looked at 3 butt shifts and 4 butt shifts. In the end I opted for something simpler on this layer and this is 'Graham's butt shift system' with a simple overlap one quarter plank length shift. I have opted for a plank length of 8 inches which gives a scale length of 12 ft. That might be wrong, I don't know, but I like the look.

Learning point: It is useful now and again to lay on and fix a full uncut plank, but marked via a wedge shaped cut at the appropriate plank length chosen - they'll never know. This isn't so much cheating as putting a complete and uncut plank length in place in order to get back a straight edge to work to and keep the edge fits tight - I fear a buildup of tolerances of any edge gaps which might result in some pretty funky shaped in-fill pieces later.
Ever onward, we'll see how this ends up.

P3020076.JPG
 
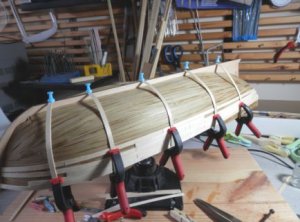
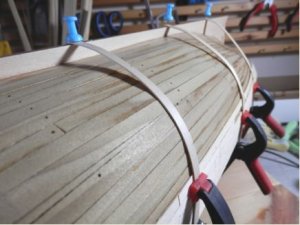
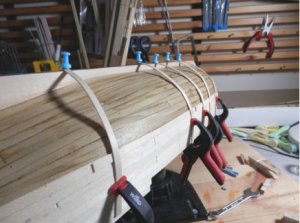
It seems to be going OK. I can not pin to the frames for reasons previously explained, so the curve and twist of the planks takes some time (I use a heated bender) in order for them to lay flat and not spring. The problem comes in that as I work towards the keel I am now beyond the reach of the clamps I have and although I use CA it is pretty boring holding each plank in place while the glue sets. The solution I came up with was to bend some planks, pin them to the underside of the keel, then clamp them such that they press on the plank being glued. As I move up the hull they can be re-shaped or packers used in order that the contact point is over the plank being glued in place, and they can be swung over to work on the opposite side of the hull when necessary.
It seems to work pretty well, so I thought I'd share it with you.

P3030077.JPGP3030078.JPGP3030079.JPG
 
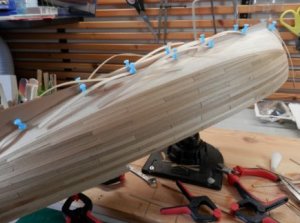
Further progress on the second layer of planking.

Second layer completed...

... and sanded

Not really anything to report to you on special techniques or anything, it's just a case of a steady plod and careful measuring. As my Dad used to say 'Measure twice, cut once'; wise words, indeed.
 

Attachments

  • P3160076.JPG
    P3160076.JPG
    34.6 KB · Views: 295
  • P3170078.JPG
    P3170078.JPG
    29.8 KB · Views: 288
  • P3170080.JPG
    P3170080.JPG
    21.5 KB · Views: 291
Graham said:
It seems to be going OK. I can not pin to the frames for reasons previously explained, so the curve and twist of the planks takes some time (I use a heated bender) in order for them to lay flat and not spring. The problem comes in that as I work towards the keel I am now beyond the reach of the clamps I have and although I use CA it is pretty boring holding each plank in place while the glue sets. The solution I came up with was to bend some planks, pin them to the underside of the keel, then clamp them such that they press on the plank being glued. As I move up the hull they can be re-shaped or packers used in order that the contact point is over the plank being glued in place, and they can be swung over to work on the opposite side of the hull when necessary.
It seems to work pretty well, so I thought I'd share it with you.

Hi Graham,

Hull planking looks amazing. By the way, i can suggest you to use rubbers to keep planks in place while glue sets in your next build. It maybe more convenient for you. Have a great day.

Mustafa
 
Another suggestion if you want to carry-on with CA, get some kicker, apply it to the opposite surface to where you have applied the glue, will shorten the time you need to hold it considerably

https://www.amazon.co.uk/Zap-Products-Kicker-Pump-PT-715/dp/B000H7H4OQ
 
Thanks to everyone for sharing your planking tips. It's been around three months since I touched the ship due to a long holiday trip in the caravan (Scotland) and while we were away She Who Must Be Obeyed came up with a list of jobs to be done around the house and garden, so I cleared those off when we got home.

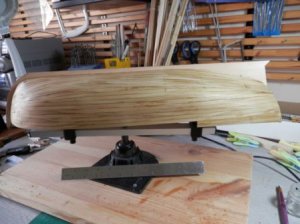
Time to finish off the third layer of planking. I ran a long strip stem to stern and spaced it off by six planks; the masking tape is to keep those six planks together rather than having to grow another thumb -


Spacing planks removed and the gap being filled -


........ and towards the keel -


Finished, yet to be sanded -


All sanded smooth. As you can see I have planked the transom on the diagonal. I saw this on Zoltan's build, so thanks for the idea. It probably is not in keeping with the period but I like the look.

P6220148.JPGP6220149.JPGP6220150.JPGP6230151.JPGP6230152.JPGP6240153.JPGP6240154.JPGP6240156.JPGP6260166.JPGP6260167.JPG
 
G'day Graham, beautiful build, nice and clean, I will have to go back to the start of the build and read it through.

I deleted your email after reading it as I thought there would be a reply on here, I was mistaken, I left the pins in the solution for approx 10 minutes and they were ready,

best regards John.
 
Back
Top