Armed Pinnace 1800 - Panart 1:16

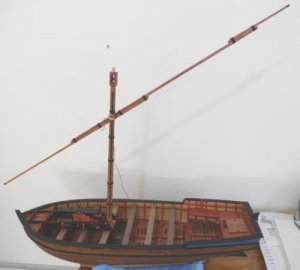
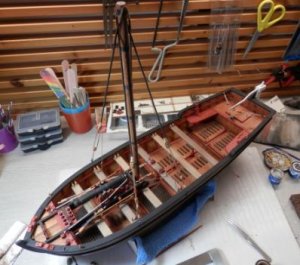
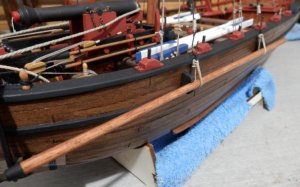
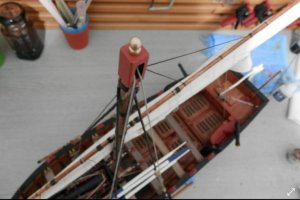
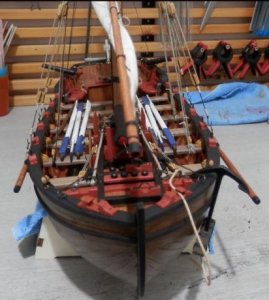
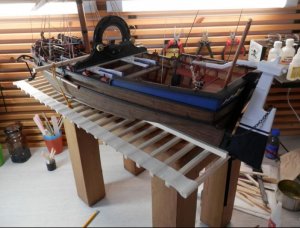
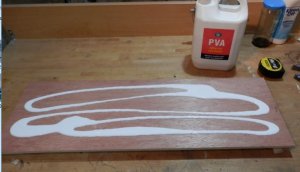
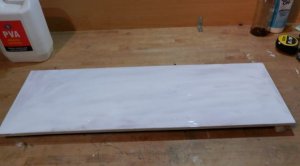
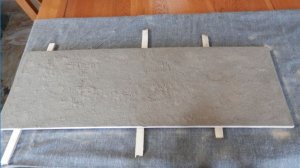
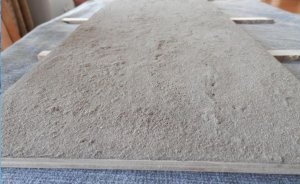
All missing photos re-posted and we're back on with the build.
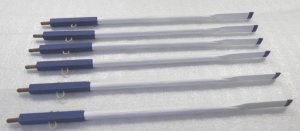
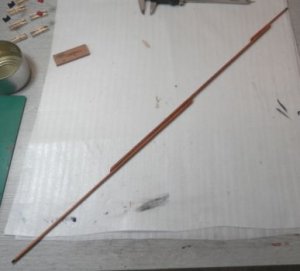
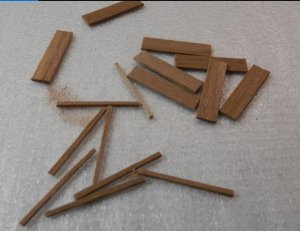
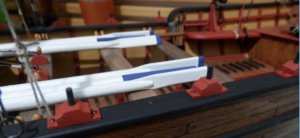
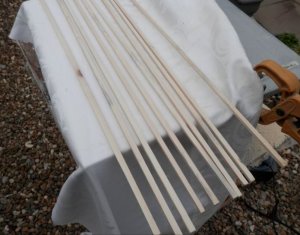
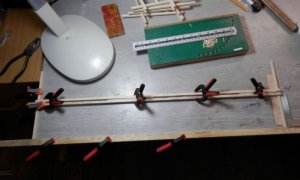
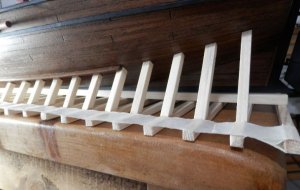
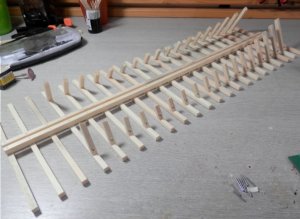
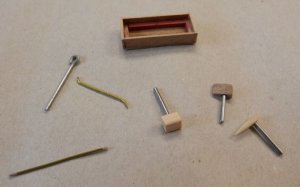
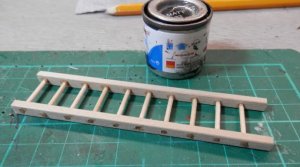
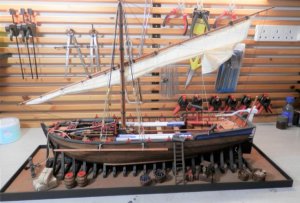
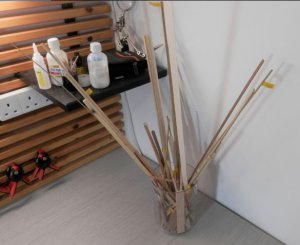
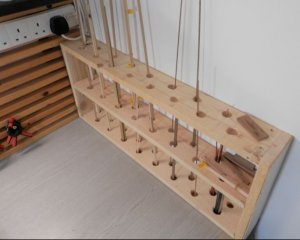
Further work on the oars. Component parts now done -

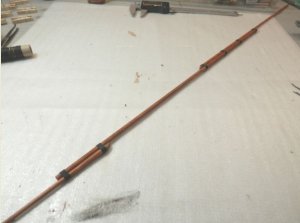
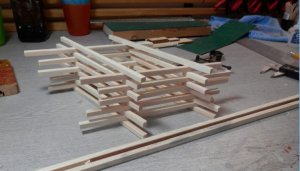
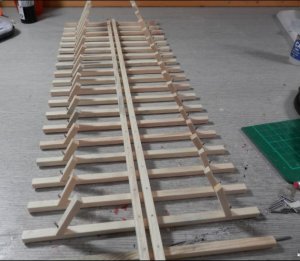
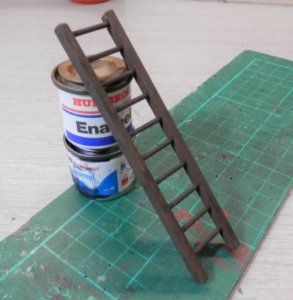
Assembled and final paint -


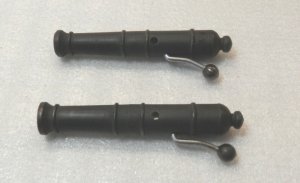
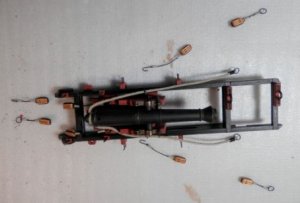
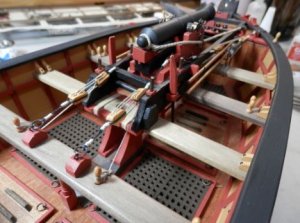
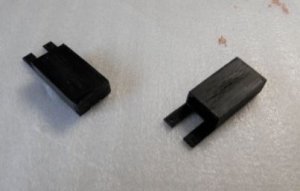
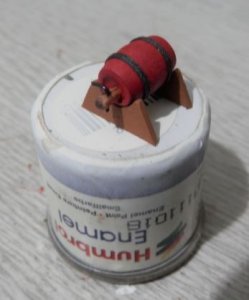
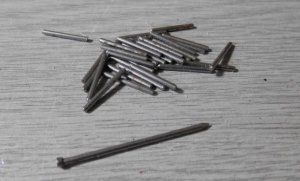
The smaller cannon have a bar underneath and a ball which would have acted as a counterweight. The bar is 2mm brass rod but this is missing from the kit, so I bent a couple of nails -
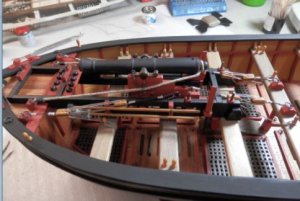
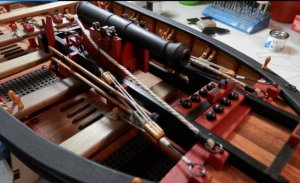
... and painted -


Anchor 
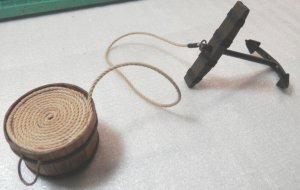
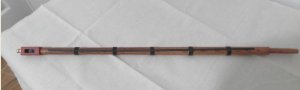
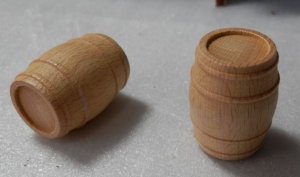
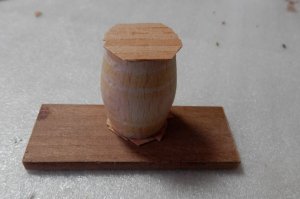
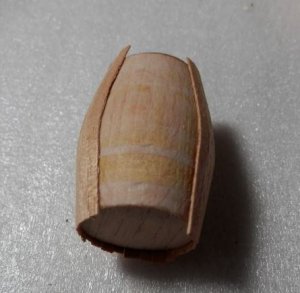
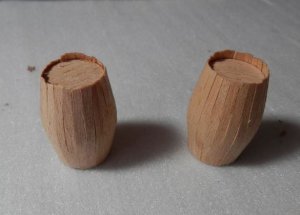
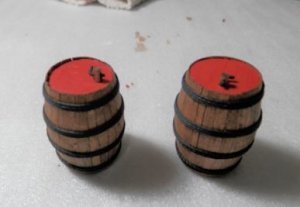
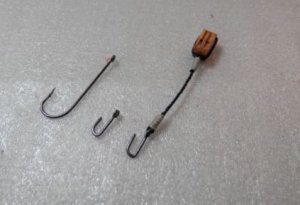
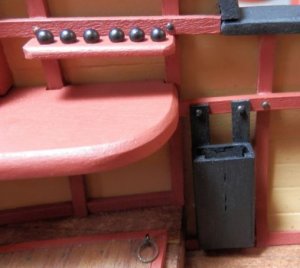
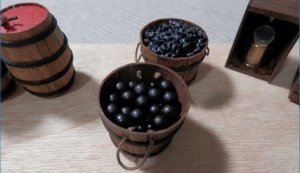
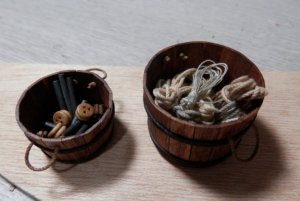
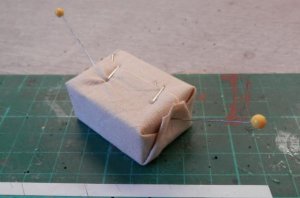
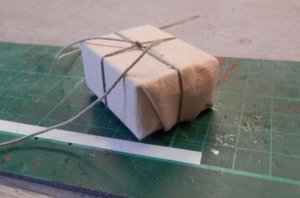
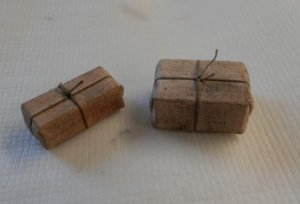
and rope bucket now finished -

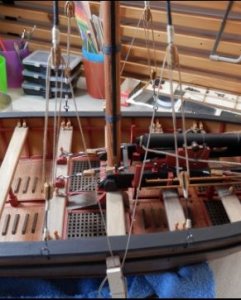
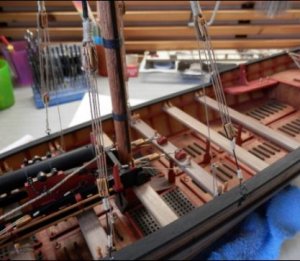
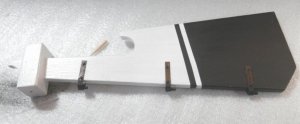
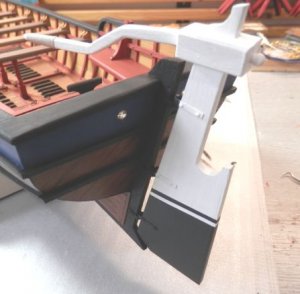
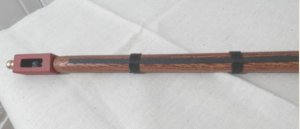
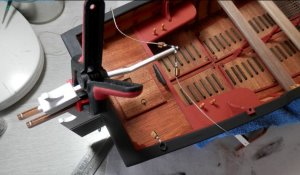
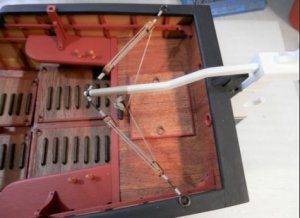
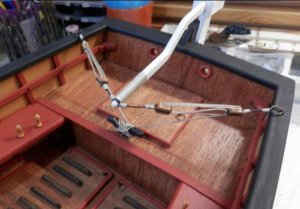
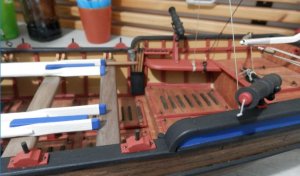
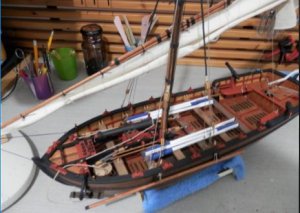
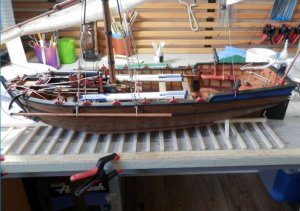
Rudder is work in progress; some paint work still to do and tiller arm yet to fit -
 

Attachments

  • PA070115.JPG
    PA070115.JPG
    52.7 KB · Views: 343
  • PA070116.JPG
    PA070116.JPG
    66.8 KB · Views: 337
  • PA070117.JPG
    PA070117.JPG
    64.6 KB · Views: 338
  • PA070119.JPG
    PA070119.JPG
    63.3 KB · Views: 337
  • PA070121.JPG
    PA070121.JPG
    81.7 KB · Views: 338
  • PA090118.JPG
    PA090118.JPG
    67 KB · Views: 332
Great work and images of all the details are nice but I would like to see an image of what the whole boat currently looks like.
 
Thanks you all for your comments, very kind.

The rudder is now finished and awaiting rigging -

On to the mast and spar. The top of the mast has a part which houses a couple of pulley wheels over which run the lines to raise the spar. So, the dreaded square hole must be cut -

I think I got away with it this time. I don't have a lathe, so for the knob on the top I turned a piece of dowel by clamping it in a drill. I had made it originally for the forward hatch but, as you will note from earlier posts, I fitted ring pulls instead, so it came in handy for this.

There is also some whipping on the mast -


The spar is made from three separate parts which I pinned together. These are then whipped; nice to be doing a bit of ropework for a change.

I read your comment, Bob, and had a chuckle when you said you would like to see the full boat. I have been working on the myriad of detail parts for so long I have forgotten myself what the hull looks like! Here you go -
 

Attachments

  • PA120125.JPG
    PA120125.JPG
    34.3 KB · Views: 322
  • PA110116.JPG
    PA110116.JPG
    31.3 KB · Views: 318
  • PA110118.JPG
    PA110118.JPG
    31.9 KB · Views: 312
  • PA110119.JPG
    PA110119.JPG
    18.9 KB · Views: 310
  • PA120120.JPG
    PA120120.JPG
    21.6 KB · Views: 311
  • PA120121.JPG
    PA120121.JPG
    34 KB · Views: 308
  • PA130115.JPG
    PA130115.JPG
    17.1 KB · Views: 303
  • PA130120.JPG
    PA130120.JPG
    13.6 KB · Views: 335
  • PA120124.JPG
    PA120124.JPG
    17.7 KB · Views: 345
There are a couple of large barrels in the kit which look like this-

When I did the barrels on The Snake I scored lines to represent the staves, but I don't think I would have got away with that method on this large scale. So, I decided to get some 3.0mm x 0.5mm strip and wrap them. I carved off the banding and first did the tops -

Tops sanded flush and on to the sides -

In the rough -
 

Attachments

  • PA170119.JPG
    PA170119.JPG
    33.5 KB · Views: 234
  • PA170120.JPG
    PA170120.JPG
    39.5 KB · Views: 232
  • PA170125.JPG
    PA170125.JPG
    34.5 KB · Views: 234
  • PA170126.JPG
    PA170126.JPG
    34.9 KB · Views: 235
That's the two water barrels finished. The plans call for the tops to be painted red and I suppose that marks them as being for water, so I made a couple of taps from a piece of toothpick and some bent wire -

Rigging the tiller. I found it easier to clamp it as it kept lifting off the pins -


I have ordered some 5mm and 3mm ball bearings off Amazon for the cannonballs which are missing from the kit but they are taking a while to get here. I note they are being shipped from China; obviously on a slow boat. I need them to finish the shot racks on the main cannon, so I can't yet fix the cannon in place until those are glued on. In the meantime I have finished the component parts of the rigging.
First thing is to make some hooks, for which I modified some fishing hooks. This type of hook with a long shank is called an Aberdeen hook -


Pulleys finished -
 

Attachments

  • PA270126.JPG
    PA270126.JPG
    19.7 KB · Views: 289
  • PA210119.JPG
    PA210119.JPG
    66.3 KB · Views: 298
  • PA210120.JPG
    PA210120.JPG
    32.2 KB · Views: 300
  • PA210121.JPG
    PA210121.JPG
    52.5 KB · Views: 296
  • PA220123.JPG
    PA220123.JPG
    25.4 KB · Views: 299
  • PA220124.JPG
    PA220124.JPG
    24.5 KB · Views: 285
Looking great! I’m into my third layer of planking. Your log has been incredibly helpful.....Allan
 
Thanks Allan, I'm really pleased to hear that. I hope you can post some pictures of your own build at it develops because it is always interesting to see the different ideas and finishes as a builder puts their own interpretation into a model. There is no right or wrong in this game and it is great to pick up on different methods and techniques; I personally get the most out of that, and that's why this is a great site. Cheers.
 
The cannonballs have arrived so I got those sprayed up. Shot garlands added to the front of the main gun and the rigging can now be done -


Now the main shrouds. I have put a serving on these since they would have been abraded by the sail -

For the swivel guns I made up a box for the cannon loading bits since I did not want them strewn around the ship -

I also added a shot garland for each gun. Not on the drawing, but I figure if I were the loader I'd want them close at hand; boxes in place -


Now the sail which I sub-contracted to my Good Lady. I think you'll agree she has made a great job of it -


Tying on to the spar. I used knots to represent half hitches as I think that in action they would want to get the sail down pretty quickly -
 

Attachments

  • PB020123.JPG
    PB020123.JPG
    61.4 KB · Views: 407
  • PB030142.JPG
    PB030142.JPG
    39.7 KB · Views: 410
  • PB030143.JPG
    PB030143.JPG
    42.5 KB · Views: 407
  • PB030144.JPG
    PB030144.JPG
    78.3 KB · Views: 415
  • PB040146.JPG
    PB040146.JPG
    33.1 KB · Views: 408
  • PB040147.JPG
    PB040147.JPG
    39.4 KB · Views: 415
  • PB040150.JPG
    PB040150.JPG
    39 KB · Views: 408
  • PB040148.JPG
    PB040148.JPG
    52.7 KB · Views: 397
  • PB050152.JPG
    PB050152.JPG
    47.5 KB · Views: 371
  • PB070123.JPG
    PB070123.JPG
    19.1 KB · Views: 369
  • PB070125.JPG
    PB070125.JPG
    33.9 KB · Views: 370
  • PB070126.JPG
    PB070126.JPG
    43.7 KB · Views: 377
  • PB070127.JPG
    PB070127.JPG
    33.1 KB · Views: 372
  • PB070128.JPG
    PB070128.JPG
    39.8 KB · Views: 366
  • PB080147.JPG
    PB080147.JPG
    38.3 KB · Views: 377
  • PB080148.JPG
    PB080148.JPG
    37 KB · Views: 377
Outstanding work Graham,you actually gave me many ideas and “how to do tips”.Thank you.
 
Thanks Zoltan, I appreciate your kind comments.
A few more bits fitted ; the rowlocks and cannon tompions -


The two bowsprits (different lengths) lashed to the sides -


Spar now hoisted -


Finishing up on the fittings. I have a small barrel left over from the Snake build, so in order to avoid a potential mutiny this is now the grog barrel -


A bit of trivia - 'Grog' is named after Admiral Edward Vernon following his 1740 order that his sailors' rum should be diluted with water. The sailors called the new drink "grog" after Vernon's nickname "Old Grog", attributed to his habitual wearing of a grogram coat - a sort of boat cloak.


Some leftover chain in the back bucket, 3mm and 5mm cannon shot in the nearer bucket -


A bucket of spare brass rod and pulleys; the other with hanks of rope of various diameters -


So, I think that's it. I now need to have a think about how to display her and am considering something along the lines of a slipway, so I need to do a bit of reading. I'll keep you posted.
 

Attachments

  • PB160124.JPG
    PB160124.JPG
    57.5 KB · Views: 352
  • PB160122.JPG
    PB160122.JPG
    41.6 KB · Views: 355
  • PB160123.JPG
    PB160123.JPG
    67.6 KB · Views: 355
  • PB160119.JPG
    PB160119.JPG
    38.3 KB · Views: 368
  • PB160120.JPG
    PB160120.JPG
    50.8 KB · Views: 370
  • PB160121.JPG
    PB160121.JPG
    44.7 KB · Views: 368
  • PB160125.JPG
    PB160125.JPG
    23.5 KB · Views: 363
  • PB160126.JPG
    PB160126.JPG
    54.6 KB · Views: 346
  • PB160127.JPG
    PB160127.JPG
    51.3 KB · Views: 352
Thanks guys, I really appreciate your comments.

On with the slipway. I haven't drawn anything out, just a feeling of what might look OK, so we're winging it a bit here. Firstly, due to the scale I will need quite a bit of wood which I think would work out quite expensive. In the end I decided to rip strips from some pallet wood I have stacked in the garage, so we started here -


-and ended up with a number of 8mm x 8mm strips -


After some sanding and cutting to length. The two long (keel) pieces are 60 cm, the twenty two cross pieces are 20 cm -


I want to peg them together, so out come the toothpicks again -


Lining up with a straight edge clamped to the table -


And off we go using a square, a spacer between the cross members and pieces of scrap ply from the sheet which the keel was cut from to provide the appropriate space for the keel to sit in -


All the pieces now pinned together and the toothpick pegs (dab of CA before driving them home) make a very solid job -

Now I need to get her to a height on the bench where I can work without breaking my back or cricking my neck, so I clamped the whole lot to a small table -


First supports fixed in place, the angle is 60 degrees, the masking tape is to give me a line to work from -
 

Attachments

  • PB170119.JPG
    PB170119.JPG
    74.1 KB · Views: 254
  • PB170120.JPG
    PB170120.JPG
    60.9 KB · Views: 250
  • PB180122.JPG
    PB180122.JPG
    56.3 KB · Views: 244
  • PB180126.JPG
    PB180126.JPG
    39.2 KB · Views: 246
  • PB180128.JPG
    PB180128.JPG
    44.8 KB · Views: 247
  • PB190130.JPG
    PB190130.JPG
    59.4 KB · Views: 272
  • PB190131.JPG
    PB190131.JPG
    72.6 KB · Views: 287
  • PB190132.JPG
    PB190132.JPG
    70.3 KB · Views: 282
  • PB200133.JPG
    PB200133.JPG
    62.2 KB · Views: 269
Some updates and this will appear a bit disjointed as I work on several bits because things are drying and hardening off; stick with me, there is a logic!
For the slipway I figure the supporting pieces were pegged in place, so I made some by cutting down a few panel pins -


With the ship lifted out this is the slipway so far, ready for painting -


The base has been cut to size, so spreading PVA on it -


Even it out -


Spread on the topping. I was going to use sand, but must have used that on a garden project. Anyway, I have half a bag of cement, so on with that and tamp it down -


Leave to dry overnight then sweep off the excess -


While that is drying I wanted a couple of other things for the diorama, so I started on a toolbox -

There is a scrap of sailcloth left over, so I made a couple of bundles as follows -


The cloth has been dyed with cold tea. I wanted to weather it a bit, so used pastel chalks. Tip - I find it best to rub the chalk between my thumb and forefinger and then rub the workpiece. Applying the chalk directly can result in quite strong lines which are difficult to blend unless, of course, that is the look you want.


Back to the slipway now to paint it up.
 

Attachments

  • PB210126.JPG
    PB210126.JPG
    46.8 KB · Views: 167
  • PB210127.JPG
    PB210127.JPG
    59.4 KB · Views: 169
  • PB210128.JPG
    PB210128.JPG
    61.9 KB · Views: 167
  • PC020131.JPG
    PC020131.JPG
    45 KB · Views: 163
  • PC020133.JPG
    PC020133.JPG
    29.5 KB · Views: 161
  • PC020135.JPG
    PC020135.JPG
    34.8 KB · Views: 160
  • PC030143.JPG
    PC030143.JPG
    55.9 KB · Views: 161
  • PC030145.JPG
    PC030145.JPG
    82.8 KB · Views: 164
  • PC030136.JPG
    PC030136.JPG
    39.2 KB · Views: 164
  • PC030137.JPG
    PC030137.JPG
    42.5 KB · Views: 163
  • PC030138.JPG
    PC030138.JPG
    44.7 KB · Views: 160
  • PC030139.JPG
    PC030139.JPG
    46.4 KB · Views: 161
  • PC030140.JPG
    PC030140.JPG
    32.6 KB · Views: 161
  • PC030141.JPG
    PC030141.JPG
    36.4 KB · Views: 161
  • PC030142.JPG
    PC030142.JPG
    28.3 KB · Views: 161
For the slipway I firstly stained a trial piece with Dark Oak stain, but to be honest it just looked too 'new'. So I ended up painting it, a sort of stippling with black and brown acrylics.

I had a trawl on the National Maritime Museum paintings section and found a couple of examples of ships of the line on slipways. There does not seem to be a set configuration for a slipway and they are a combination of supports under the hull and props under the wale. I guess it was up to the individual shipwright, so I finished off the front end with a couple of props -


The toolbox is now finished -


I was explaining to The Boss how the diorama might look and she said it needs a ladder, so -


Back to the base. It has now thoroughly dried so I have edged it -


I am OK with the surface finish, but it is pretty bland -


So I spent some time scrubbing it with various coloured chalks -


Last job will be to build the case, the acrylic sheet is on order, and here's a taster of how the final setup might look -


While I wait for the acrylic sheet it's time for a tidy up ready for the next build. One of the things that has bugged me is that I keep the wood strip in a jar and although I label it by wrapping a piece of masking tape around the various thicknesses it always ends up a bit of a mess as the build progresses -

So I took some pallet wood, drilled some holes and ended up with this -


Much better!
 

Attachments

  • PC050126.JPG
    PC050126.JPG
    50.4 KB · Views: 165
  • PC050129.JPG
    PC050129.JPG
    58.1 KB · Views: 166
  • PC050130.JPG
    PC050130.JPG
    73.5 KB · Views: 159
  • PC060141.JPG
    PC060141.JPG
    34 KB · Views: 152
  • PC050132.JPG
    PC050132.JPG
    48.7 KB · Views: 152
  • PC060139.JPG
    PC060139.JPG
    40 KB · Views: 151
  • PC060142.JPG
    PC060142.JPG
    44.2 KB · Views: 146
  • PC060143.JPG
    PC060143.JPG
    76.3 KB · Views: 150
  • PC060144.JPG
    PC060144.JPG
    64.7 KB · Views: 176
  • PC100148.JPG
    PC100148.JPG
    74.9 KB · Views: 183
  • PC080145.JPG
    PC080145.JPG
    42.2 KB · Views: 180
  • PC080147.JPG
    PC080147.JPG
    46.4 KB · Views: 162
The acrylic sheet has arrived, so I hope to get the case built before Christmas and will post some photos in the 'Completed' section.
Having finished the model, some thoughts on this Panart kit of the Armed Pinnace.

Quality: The laser cutting is good but size-wise the decks (see earlier in this log) were way off. The cannon turnings were well done. Overall the quality of the wood provided is good.
Shortages: Cannon balls, several specific sizes of wood, some lengths of brass bar, a full size piece of sailcloth would have been good.
Cordage: Not much rigging to do, but the larger diameter for the stays was pretty rough and fuzzy; I got around that by putting a serving on it.
Clarity of Plans: You have to hunt around a bit on several views to find all the parts which should be fitted.
Written instructions: No other word for it - abysmal. I would not recommend this as a first build for someone new to ship building.
Enjoyment: Problems and shortages aside I enjoyed building this and because of the larger scale it is possible to put more detail into the build.
Would I buy another Panart/Mantua kit?: No - not unless they kidnap my wife and kids. Seriously, I don't think they deserve any more of my money but, that said, I am pleased with the result.
I hope you have enjoyed this log and thanks for your comments and suggestions. I believe Santa will have the Caldercraft Mary Rose on his sleigh next week, so, ever onward!
 
Back
Top