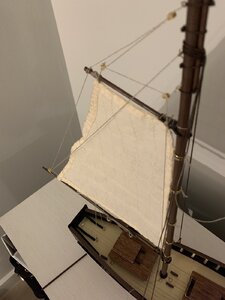
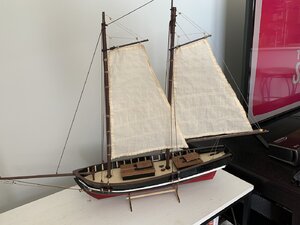
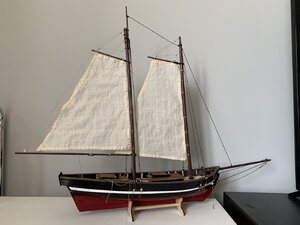
Artesenia Latina - Swift 1805 Build - First Wood Ship Model [COMPLETED BUILD]

Joined
Dec 19, 2019
Messages
27
Points
78

Location
NJ, USA
Hi All,

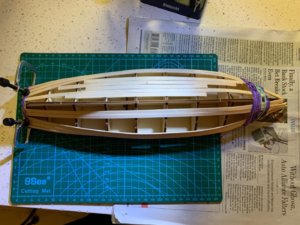
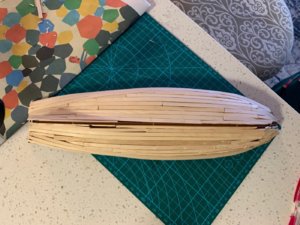
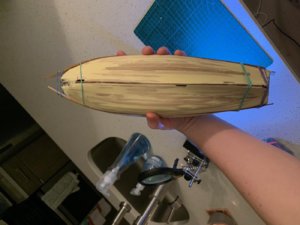
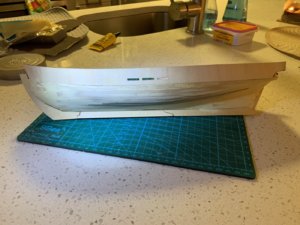
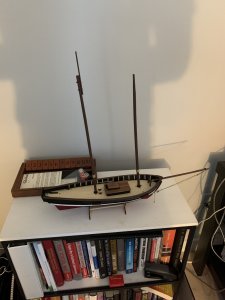
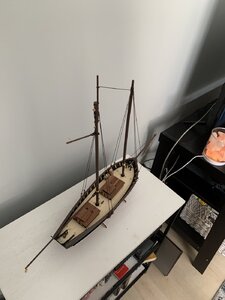
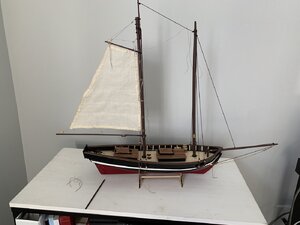
Here it is my progress so far on my first wooden ship build ever.

A couple things right off the bat -- patience. If being patient was 10, I am typically at a 4, which is one of the reasons why I wanted to start this project.
So far my rushing has bitten me in the rear-end on a few steps.

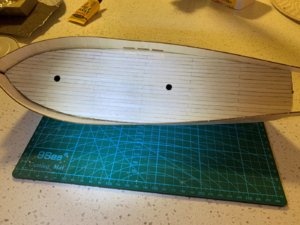
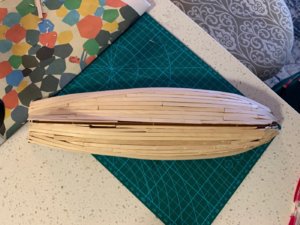
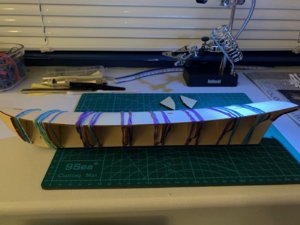
Firstly, I rushed the planking, but holy moly towards the bow it gets quite challenging. I then thought I could repair the mishaps with the planking with wood filler & I used WAY too much. Sanding, sanding, & more sanding. I am almost at a point where I am decently happy with the hull.

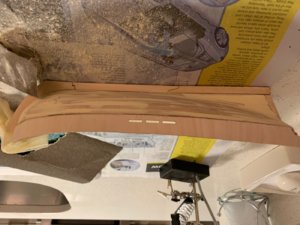
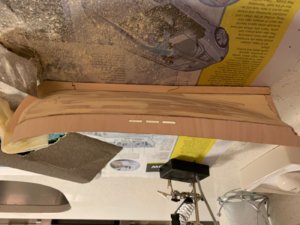
I have some inconsistencies in the continuous smooth curve on the hull.
looking at some of the pictures I have attached, would you recommend double planking the hull? Or will primer & paint "hide" some of the inconsistencies.

ANY feedback (+ or -) is greatly appreciated!
thanks,
-Matt

View attachment 129225IMG_3161.jpgIMG_3211.jpg


IMG_3214.jpgIMG_3248.jpgimh_10.jpgimg_9.jpgIMG_3262.jpg
 

Attachments

  • IMG_3214.jpg
    IMG_3214.jpg
    259.6 KB · Views: 16
  • IMG_3262.jpg
    IMG_3262.jpg
    198.5 KB · Views: 18
Hello Matt, first of all, you show good results considering this is your first model from wood. Double-planking is a great way to learn, and practice IMHO. I usually try to lay the first layer as it would be the only one. If there any small imperfections I can use putty (wood filler) to correct.
Frankly speaking, if you have the intent to paint the hull, the second layer would be unnecessary. However, before you made a decision, please carefully review the kit's manual, as it may require the second planking for further construction. ;)
 
Hi All,

Here it is my progress so far on my first wooden ship build ever.

A couple things right off the bat -- patience. If being patient was 10, I am typically at a 4, which is one of the reasons why I wanted to start this project.
So far my rushing has bitten me in the rear-end on a few steps.

Firstly, I rushed the planking, but holy moly towards the bow it gets quite challenging. I then thought I could repair the mishaps with the planking with wood filler & I used WAY too much. Sanding, sanding, & more sanding. I am almost at a point where I am decently happy with the hull.

I have some inconsistencies in the continuous smooth curve on the hull.
looking at some of the pictures I have attached, would you recommend double planking the hull? Or will primer & paint "hide" some of the inconsistencies.

ANY feedback (+ or -) is greatly appreciated!
thanks,
-Matt

View attachment 129225View attachment 129226View attachment 129227


View attachment 129228View attachment 129230View attachment 129234View attachment 129235View attachment 129233
hi, I build that ship in 19th. have a building log on it, but maybe today out of date. in the net, there is a MORE THN GOOD articles about the start of the building and planking. it can be download free of charge in a PDF FORMAT.
SIMPLE HULL PLANKING TECHNIQUES FOR BEGINNERS
Written, illustrated & edited by Dirk De Bakker (kelvin12) and Greg Brooker (gregb) With assistance from Dave Rogers (heliman41)
This manuscript
To me, it is the Bible. add SIMPLE HULL PLANKING TECHNIQUES FOR BEGINNERS to Goole and it will come. you can now download FREE OF CHARGE in a PDF format. it yourself do not have a PDF READER, LOOK FOR ACROBAT TRADER. You can always free contact me for help- 40 years experience- over here or on my e-mail peandersen@telefonica.net
you are right if you really want to build, close all others problems- both private or in work etc. ONLY Concentrade on the build, and DO NOT HURRY
 
Hi Matt congratulations on making the effort and good luck! I'd echo the comments above about the sources for planking guidance and especially Jimksy's comment about trying to lay down the first layer as if it will be the final. And although not everyone would agree with me, if you are planning to build more ships it wouldn't be a bad idea to invest in an electric plank bender which makes doing curves a lot easier.

My first kit model was the AL Swift and there were times I walked away from it for a few months because I thought I'd never get it right--keep at it, you'll be amazed how good it looks when you're done!
 
From your photos the first layer planking effort is good. The imperfections are minor really. You could leave as is and have a good satisfactory first effort. The real question is how you want to "finish" your model...stain, paint, natural with a coating of poly? Staining a darker wood tone will blend so called imperfections a bit but not necessarily hide them. Painting of course will cover all. If you want to have a natural wood finish with a coat of clear poly then what you see now is what you will see when done. My suggestion is to consider what you want the total finished model to look like. If you stai the hull for example, you will want to carry that over the rest of the model. If you paint then you will want to paint everything else as well. Bottom line the hull looks good...only double plank if you want to carry the natural wood finish throughout the model. Well done!!
 
hi, I build that ship in 19th. have a building log on it, but maybe today out of date. in the net, there is a MORE THN GOOD articles about the start of the building and planking. it can be download free of charge in a PDF FORMAT.
SIMPLE HULL PLANKING TECHNIQUES FOR BEGINNERS
Written, illustrated & edited by Dirk De Bakker (kelvin12) and Greg Brooker (gregb) With assistance from Dave Rogers (heliman41)
This manuscript
To me, it is the Bible. add SIMPLE HULL PLANKING TECHNIQUES FOR BEGINNERS to Goole and it will come. you can now download FREE OF CHARGE in a PDF format. it yourself do not have a PDF READER, LOOK FOR ACROBAT TRADER. You can always free contact me for help- 40 years experience- over here or on my e-mail peandersen@telefonica.net
you are right if you really want to build, close all others problems- both private or in work etc. ONLY Concentrade on the build, and DO NOT HURRY
Thank you for the heads-up on the manual. I hope that this will help me get passed being “stuck.”
 
thanks for the feedback guys... i plan on painting the hull.

would like to prime & then paint this weekend.
will keep you all updated as i've been MIA for a couple weeks.

onwards!
-matt
 
hi all;

first and foremost, I hope you & your families are all staying safe & healthy in these uncertain times.

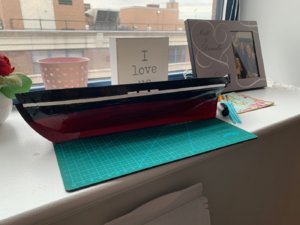
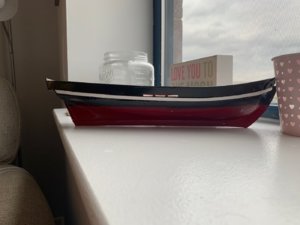
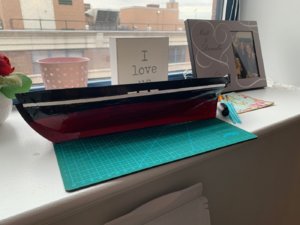
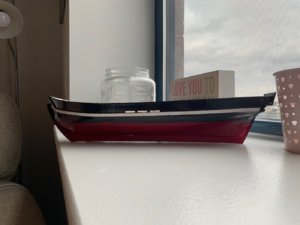
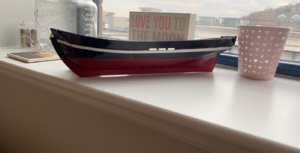
I finally got around to completing the painting of the hull. Marking the waterline was quite tricky & another great learning experience.

Check out the pictures & lemme know what you guys think. Please disregard the shelf decorations courtesy of my better half.

Onwards again!
-Matt

IMG_3266.jpgIMG_3268.jpg
 

Attachments

  • IMG_3266.jpg
    IMG_3266.jpg
    198.2 KB · Views: 14
  • IMG_3267.jpg
    IMG_3267.jpg
    156.1 KB · Views: 14
  • IMG_3269.JPG
    IMG_3269.JPG
    100.8 KB · Views: 14
Hi All,

Thanks for the continued feedback!
Couple updates since last time as you can see below.

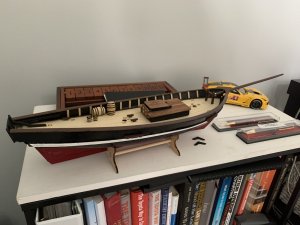
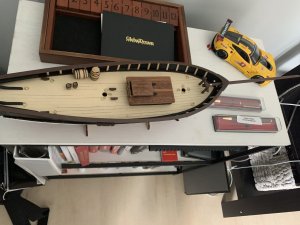
I decided to paint the bulwark black vs. white in the instructions due to some imperfections with the wood. (User error)
Also, added some deck accessories although most barrels, buckets, and cabin aren't glued yet.

Do you guys have any tips with nailing in eyebolts?
I got extremely nervous when the instructions stated to nail in eyebolts onto the deck to secure the rings.

I know further down the build there are more things to be nailed into either the deck, masts, or the hull. And i'm not too comfortable with that yet.


IMG_3739.jpgIMG_3736.jpg


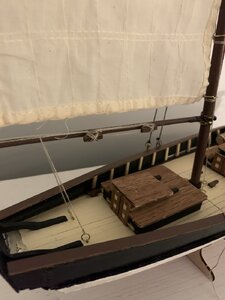
Next, is the start of the rigging.
This is my very first attempt at a wood ship and also my very first attempt at any type of rigging.

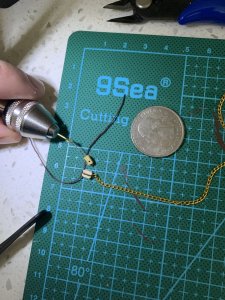
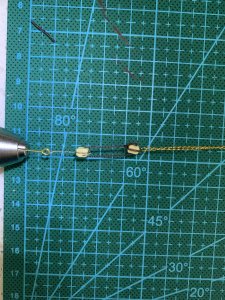
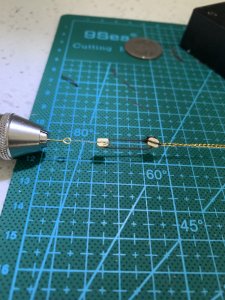
Here are some pictures of my very first attempt at threading a block (not sure of the terminology) and attaching the chain to this one.
I'm pretty happy how it came out although the 2nd block (closest to chain) does not stay as "flat" or in-line with the 1st block as i would've hoped.

In these pictures, i'm adding quite a bit of tension to the end of the chain to make it "flatter".

If you know of any tips, tricks, or resources for this part of the model building, please do let me know.
I found adding a little bit of glue to the end of the thread helps stiffen the thread to make the insertion into the block holes much easier.


IMG_3741.jpgIMG_3742.jpgIMG_3743.jpg


As always, feedback (+/-) welcome!
Thanks guys & stay safe,
-Matt
 
For eye bolts or even belaying pins always drill a hole first.

You will never get much success just pushing an eyebolt into wood.

drill proper size hole first and add drop of glue and insert eyebolt or pins.

Same would go for anything you have to nail down like chain plates on sides.
 
HI Guys,

does anyone have any tips or suggestions on how to efficiently reduce the diameter of the masts?
Have to go from 8mm at the base down to 6mm and then 8mm down to about 2mm.

All i have resource/tool wise, is sandpaper sponge and varying sandpaper, but that would take ages.

Any tips would be appreciated.
thanks!
-Matt
 
If you have an electric drill big enough you can chuck up the big end and lay drill on side with dowel horizontal then lock drill on with clamp or rubber bands and sand as drill spins it. Slower than lathe work but much cheaper
 
Thanks for the tip Kkonrath -- worked well!

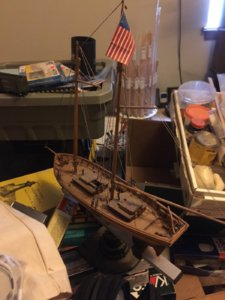
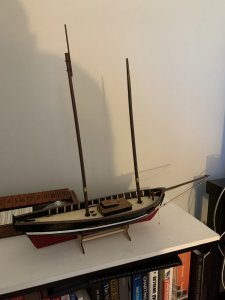
Got the masts up and am starting to notice some missing parts in the kit & the lack of instructions is looking like it will make things slightly difficult moving fowards.
I have to keep looking a few steps ahead to make sure I am setting myself up correctly and won't have to backtrack.

Onwards!

IMG_3767.jpg

IMG_3766.jpg


-Matt
 
I actually have two swift kits, one for myself, which just need final rigging done, and a kit my daughter bought with funds from PT job, she got bulkheads glued in and quit.

What parts or information are you lacking. I a lot of rigging is just based off what the plans show, instruction don't do much into rigging other than basics.

I can look at the instructions and plans I have as both of my kits were from different production periods and instructions are a little different.
 
Hi All,

Here it is my progress so far on my first wooden ship build ever.

A couple things right off the bat -- patience. If being patient was 10, I am typically at a 4, which is one of the reasons why I wanted to start this project.
So far my rushing has bitten me in the rear-end on a few steps.

Firstly, I rushed the planking, but holy moly towards the bow it gets quite challenging. I then thought I could repair the mishaps with the planking with wood filler & I used WAY too much. Sanding, sanding, & more sanding. I am almost at a point where I am decently happy with the hull.

I have some inconsistencies in the continuous smooth curve on the hull.
looking at some of the pictures I have attached, would you recommend double planking the hull? Or will primer & paint "hide" some of the inconsistencies.

ANY feedback (+ or -) is greatly appreciated!
thanks,
-Matt

View attachment 129225View attachment 129226View attachment 129227


View attachment 129228View attachment 129230View attachment 129234View attachment 129235View attachment 129233
Hallo Matt,
we wish you all the BEST and a HAPPY BIRTHDAY
Birthday-Cake
 
Back
Top