-

Win a Free Custom Engraved Brass Coin!!!
As a way to introduce our brass coins to the community, we will raffle off a free coin during the month of August. Follow link ABOVE for instructions for entering.
-

PRE-ORDER SHIPS IN SCALE TODAY!
The beloved Ships in Scale Magazine is back and charting a new course for 2026!
Discover new skills, new techniques, and new inspirations in every issue.
NOTE THAT OUR FIRST ISSUE WILL BE JAN/FEB 2026
You are using an out of date browser. It may not display this or other websites correctly.
You should upgrade or use an alternative browser.
You should upgrade or use an alternative browser.
Artsenia Latina HMS Bounty 1783
- Thread starter yeloowtang
- Start date
- Watchers 19
-
- Tags
- artesania latina bounty
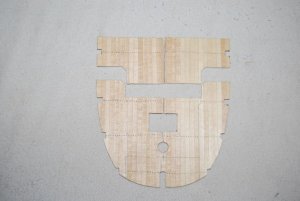
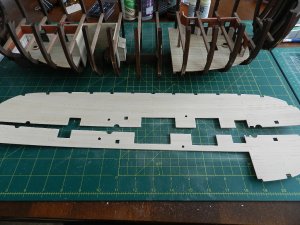
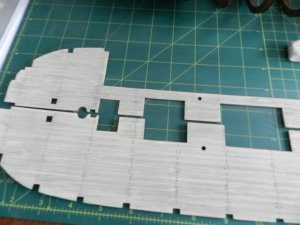
so it's actually cut out that way and not just to show ??
I was looking at that the longest time, figured it was just to show the walls..
how would people enter the end little section ??
that and my walls would need to move up about 1.5 cm to match the floor plan.. I can fix that easy and use the end part of the long wall for the angle section under the beam..
thanks,
I'll see if I can remove or modify it without causing damage or a mess if not, I can live with it that way.
I probably wouldn't have added the extra details and lights without the help here lol just be satisfied with the kit itself.. glad I did, makes it more interesting..
I was looking at that the longest time, figured it was just to show the walls..
how would people enter the end little section ??
that and my walls would need to move up about 1.5 cm to match the floor plan.. I can fix that easy and use the end part of the long wall for the angle section under the beam..
thanks,
I'll see if I can remove or modify it without causing damage or a mess
I probably wouldn't have added the extra details and lights without the help here lol just be satisfied with the kit itself.. glad I did, makes it more interesting..
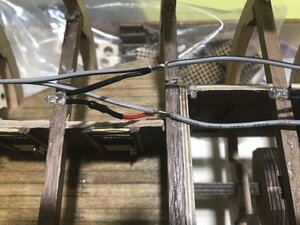
I made two connection points. At the stern, as you can see and on the bow in the cabin. It was easier  For Led i use http://ledcalc.com/#
Draws the branches and the whole scheme nicely.
I hid thebatery 9V in the hold as a larger cargo package with cables long enough to be replaced. It is safer because if the power supply breaks down and the voltage is high,and them kill avery LED. The stabilizer inserted in the circuit warms very deeply so I solve it because I inserted a 9 V battery
Last edited:
Great looking detail.
Morning all,
been working on my ship when ever I have a chance, had a few busy weeks but still got time on weekends.
Didn't post much so not to be boring with just simple little things LOL
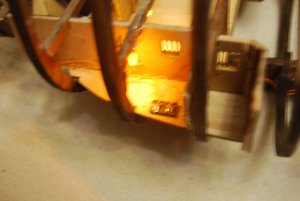
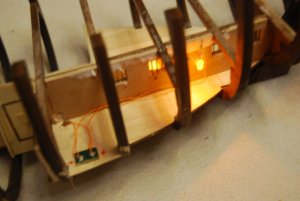
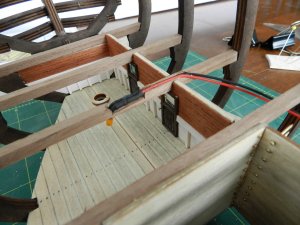
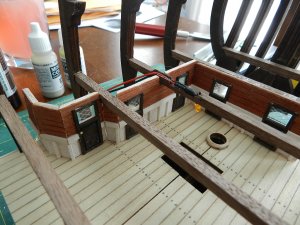
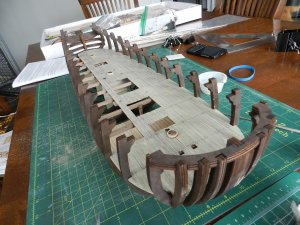
finished adding the wall in the lower deck, didn't risk removing the floor and cutting it like JScolum.. it was well glued in position so, trying would have resulted in damage.. but, it still looks way better with the wall in versus nothing down there to look at.
got lights installed and might add two more behind the walls.
planked the mid deck, practice doing it with actual shorter planks. added some details, weathering and varnish. set the mast rings.
noticed that no where in the instructions they mention to line up and test fit a mast to make sure they sit proper and of course line up so the mast sits how it should.. I did that and adjusted as needed, at least enough that if a slight adjustment is needed, it will be easy once that time comes..
next come the detailing of the mid deck, lights covered with the top deck once all done.. getting there, taking more time because of the extras but
here's a few pictures of the progress.


Great progress!
Hi,
I have the same ship, but from Occre. This will be my next build after the Endeavour and am contemplating installing LEDs into the Bounty as well. A good idea of yours. Probably the yellowish glow in the photos is down to the camera, as you used white LEDs.
Did you connect the LEDs in series or in parallel? I reckon about 15 LEDs will be used. Can these be connected directly to the battery, via a switch or must a resistor be placed into the circuit?
Many thanks.
Kurt Konrath
Kurt Konrath
Parallel is better than series.
In series if one unit goes bad, all lights fail.
In Parallel, only failure of power or broken supply wire kills the whole system.
In series if one unit goes bad, all lights fail.
In Parallel, only failure of power or broken supply wire kills the whole system.
"They were installed in parallel. " I thought so, but wasn't quite sure.
Many thanks for your replies.
Have a good evening.
Many thanks for your replies.
Have a good evening.
I used white LEDs, but glowing yellow so that they were not too visible as they are not available. There were no other light sources like the light from the candle which was yellow. For Resistor use this : http://ledcalc.com/# Check white diode voltage and current
If you want to power it from a transformer, be sure to give it a stabilizer in the model. My friend's power supply broke down. He gave too high voltage and all the lighting of the Black Pearl went with smoke. Remember that after you someone may also want to light up. He would be sorry if he burned.
If you want to power it from a transformer, be sure to give it a stabilizer in the model. My friend's power supply broke down. He gave too high voltage and all the lighting of the Black Pearl went with smoke. Remember that after you someone may also want to light up. He would be sorry if he burned.
Last edited:
What would be the voltage drop across the LED to turn it a dull yellow?
I would put a note near the model or on the transformer noting the voltage required, if the transformer should break down!
I would put a note near the model or on the transformer noting the voltage required, if the transformer should break down!
Hi all,
well my initial plans were to build the ZHL Black Pearl scenario kit, I was just about to place in my order on the weekend when !!!!!!
I decided to visit one of the local Hobby shops I hadn't been in a while.. turned out to be a kid in a candy store situation LOL
to my surprised, most all other shops have 2-3 kits, this store had about every Bilings kit available, some Artsenia and a few Mamoli kits.. Ohhh as well as other RC kits.
turns out they had a few good winter deals, My attention was caught on the Bounty and Billings NORSKE LOVE. the guys at the shop were cool about opening the kits up so I can look at them..
the Artsenia kit has more details and work versus the Billings kit, and I was a little disappointer with all the plastic parts in the Billings kit, beautiful kit by the way, just the plastic didn't do it for me. so I grabbed the Bounty :-D
as for the pricing, the black pearl I want , with the exchange rates, shipping and duty fees, it would run me up at a little over 850$ for parts 1-2 and 3..
the Bounty came up to about 500$ still not a cheap kit, but for my first kit after being away for quite a few years, this one seems like fun, not too many cannon ports to deal with.
The kit also seems to be just a single planking without the thin second planking ( so I'll have to take my time and make it right) LOL
Been reading instructions, looking at plans and soaking up so much good info here that I can't wait to sit down and start the assembly.. looking forward to many more ships if possible, so many nice ones..
On another side note, my good long-term RC friend , we got talking and he gave me the ship he started years ago but lost patience.. it's the exact one I had made , the Artsenia HMS Endeavor .... the hull has 1/3 rd of the second planking done and the upper decks.. the only issue is, he said the box has been knock over a few times and he doesn't know if all the small pieces are there, they seem to be all over the inside of the box.. maybe I'll give it a shot later once I compare the parts list to see what's missing, or just use materials I might need for mine ??? will see. but for now, I'll concentrate on my Bounty..
I'll be back soon View attachment 81088with pictures as this projects gets started and hopefully finished with a respectable ship to show for..
Steph
Hallo Steph alias @yeloowtang
we wish you all the BEST and a HAPPY BIRTHDAY


