Basic starting materials and tools for Constructo Enterprise ship model kit

Joined
May 6, 2021
Messages
16
Points
13

Hi all!
I have bought..
Enterprise - Model Ship Kit by Constructo

Shown below is what I have purchased so far the ship model. Any thoughts or recommendations on paints or something else i may have missed? Thanking in advance!

1) Franklin International 6123 Titebond Trans Glue, 8-Ounce

2) 9pcs Fine Detail Paint Brush Set Miniature Painting Brushes Kit

3) Electric Plank Bender for Hobby Model Ships

4) Exacto Knife Upgrade A4 Self Healing Cutting Mat Precision Carving Craft Knife Hobby Knife,Exacto Knife Kit for Art Hobby Craft Scrapbooking Stencil

5) Model Shipways Set of 6 Hull Clamps

I really appreciate the assistance!
Bill
 
Hi Bill,
PLEASE do not let this list overwhelm you. It is just a list that has grown over time from myself to others ADDING things that they have needed over time. ALL of these things are NOT necessary to build a ship. However, just refer to this list as IDEAS to keep in your mind. When you get to the rigging stage, then you will need some tweezers of some sort. If you have any questions on this, please send me a PM, I will be glad to help you. I Highlighted some things that you probably need to start the process of building the hull frame. The hull frame is a plank on the Bulkhead and has a false keel. The Bulkheads are at 90 degrees and need to be square. make sure you build this nice and true as errors have a tendency to "accumulate" along the way. If you have built a ship before, then you already know most of this.

6" Ratchet Bar Clamp/Spreader
6-pc. Mini Spring Clamp Set

Model Makers Hemostat Set
Hull Planking Clamp set
Alligator Clamps, Insulated, With 1/2" Jaws
Vises of various sizes.
Mechanical Pencils
Colored Pencils
Highlighters
Digital Caliper (does not have to be expensive)
Stainless Steel ruler

Ruler with 0 center marking
Solid Steel Jewelers Block
Drill Bit set from .1mm to 2mm
Drill Bit set from 1/16" to 1/4"
Exacto Knife set with #5 handle
Clamp-on Magnifying lamp with Fluorescent bulb
Metal Triangle
3" Machinist Square ( to hold bulkheads square )
6" Machinist Square

Variable Speed Rotary cordless tool
Rotary tool assortment
Bees Wax
Picks and probes
mini plier set, cutter, nippers, long nose pliers
Mini Hand Plane
Tweezer set
Midwest Miter Box with Saw
Pin Vise
Mandrels
Hobby Hammer
Paintbrush set
Diamond Needle file set
Sandpaper (to fair and shape the frame and hull)

Very small scissors
Wood Glue
Cyanoacrylate (CA) glue
Epoxy
Assorted sizes of wood dowels, small planks to make jigs and fixtures.
Disk Sander
Disk grinder-buffer
Mini Drill Press
Scroll Saw
Band Saw
Mini table saw
Lathe
 
Last edited:
Hi all!
I have bought..
Enterprise - Model Ship Kit by Constructo

Shown below is what I have purchased so far the ship model. Any thoughts or recommendations on paints or something else i may have missed? Thanking in advance!

1) Franklin International 6123 Titebond Trans Glue, 8-Ounce

2) 9pcs Fine Detail Paint Brush Set Miniature Painting Brushes Kit

3) Electric Plank Bender for Hobby Model Ships

4) Exacto Knife Upgrade A4 Self Healing Cutting Mat Precision Carving Craft Knife Hobby Knife,Exacto Knife Kit for Art Hobby Craft Scrapbooking Stencil

5) Model Shipways Set of 6 Hull Clamps

I really appreciate the assistance!
Bill
Most tasks that you will need to perform will only require the simplest of tools. I would suggest that you buy tools as you find that you need them. When buying tools get the best that you can afford. There's nothing worse than wasting money on junk tools.
 
I agree with myavid7. When you first start out on a build it's best to get only the basic tools to get started. X-acto knives and saws, a small mitre box, lots of sandpaper, various glues, small files of various types, some extra wood - basswood works well , and lots of patience. Donnies list is what we all strive to have when it comes to power shop tools, but they can be added as needed as they can get quite expensive. I have been building wooden ship model off and on for over 30yrs and it has taken me almost that long to acquire all the power tools I have - and I still don't have everything I would like to have but can actually do without.
 
I built Constructo's Enterprise as my first build. The primary thing I'd recommend is a rotary tool with some mini drill bits and sanding discs and wheels. Also, some push pins for holding the plank to the hull while the glue sets. A set of needle threaders from the craft store is crucial when it comes to doing rigging. A set of cheap tweezers of different shapes also helps alot when rigging. An Exacto saw and mitre box. A set of small files. I'd also recommend picking up a copy of Frank Mastini's "Ship Modeling Simplified." I don't know if they've improved the instructions for Enterprise since I built her, but I would have been lost without Mastini's book. A good, easy read that really spells things out nicely. I also went to the thrift shop and got a used coffee maker (not the drip kind) to boil my planks, though soaking them works, too.
 
Hi Bill,
PLEASE do not let this list overwhelm you. It is just a list that has grown over time from myself to others ADDING things that they have needed over time. ALL of these things are NOT necessary to build a ship. However, just refer to this list as IDEAS to keep in your mind. When you get to the rigging stage, then you will need some tweezers of some sort. If you have any questions on this, please send me a PM, I will be glad to help you. I Highlighted some things that you probably need to start the process of building the hull frame. The hull frame is a plank on the Bulkhead and has a false keel. The Bulkheads are at 90 degrees and need to be square. make sure you build this nice and true as errors have a tendency to "accumulate" along the way. If you have built a ship before, then you already know most of this.

6" Ratchet Bar Clamp/Spreader
6-pc. Mini Spring Clamp Set

Model Makers Hemostat Set
Hull Planking Clamp set
Alligator Clamps, Insulated, With 1/2" Jaws
Vises of various sizes.
Mechanical Pencils
Colored Pencils
Highlighters
Digital Caliper (does not have to be expensive)
Stainless Steel ruler

Ruler with 0 center marking
Solid Steel Jewelers Block
Drill Bit set from .1mm to 2mm
Drill Bit set from 1/16" to 1/4"
Exacto Knife set with #5 handle
Clamp-on Magnifying lamp with Fluorescent bulb
Metal Triangle
3" Machinist Square ( to hold bulkheads square )
6" Machinist Square

Variable Speed Rotary cordless tool
Rotary tool assortment
Bees Wax
Picks and probes
mini plier set, cutter, nippers, long nose pliers
Mini Hand Plane
Tweezer set
Midwest Miter Box with Saw
Pin Vise
Mandrels
Hobby Hammer
Paintbrush set
Diamond Needle file set
Sandpaper (to fair and shape the frame and hull)

Very small scissors
Wood Glue
Cyanoacrylate (CA) glue
Epoxy
Assorted sizes of wood dowels, small planks to make jigs and fixtures.
Disk Sander
Disk grinder-buffer
Mini Drill Press
Scroll Saw
Band Saw
Mini table saw
Lathe
hmmm trying hard not to have this overwhelm me! lol! thanks so much will definitely concentrate on the bold item first!
 
Also, I highly suggest going to www.micromark.com to buy your tools. All of their stuff is high quality.
once again! Thanks! how about paints specifically though? when i receive the kit.. will it tell me what colors to get? what would be the best (easiest) type of paint to work with?
 
I built Constructo's Enterprise as my first build. The primary thing I'd recommend is a rotary tool with some mini drill bits and sanding discs and wheels. Also, some push pins for holding the plank to the hull while the glue sets. A set of needle threaders from the craft store is crucial when it comes to doing rigging. A set of cheap tweezers of different shapes also helps alot when rigging. An Exacto saw and mitre box. A set of small files. I'd also recommend picking up a copy of Frank Mastini's "Ship Modeling Simplified." I don't know if they've improved the instructions for Enterprise since I built her, but I would have been lost without Mastini's book. A good, easy read that really spells things out nicely. I also went to the thrift shop and got a used coffee maker (not the drip kind) to boil my planks, though soaking them works, too.
wow! great to hear! i was afraid i bite off more than i can chew with just a complex ship.. maybe i can do it after all! LOL drill bits, sanding disc, boiling wood? wow i had no idea there would be so much involved.. but that's cool, sounds like the book will be a great help! do you have a post of the "build".. sounds like people do this on the forum.. Thanks so much!
 
It sounds intimidating at first, but it's really just doing one piece of wood at a time. It is a real feeling of accomplishment when you look at it and it starts to look like a ship.View attachment 232475

It sounds intimidating at first, but it's really just doing one piece of wood at a time. It is a real feeling of accomplishment when you look at it and it starts to look like a ship.View attachment 232475
nice! I hope mine will look half as good as that! or my luck, it will come out perfect, and then my cat destroys it in an instant! LOL thanks for sharing!
 
I'm mostly through my first build (AL Bluenose II, 1990's vintage kit) and agree with the advice to buy as you build. I started with very rudimentary tools (X-Acto set, miter box, needle nose pliers, stainless 6" metric ruler, wood filler, wood glue, CA, and Elmer's glue, plank bender, craft cutting mat) and could get pretty far with that alone. I've added digital calipers, Dremel rotary tool kit (nice but super easy to wreck parts - I have found hand tools and better precision beat spinny power), soldering iron, a double third hand, a small vise, needle files, tiny crochet hooks for rigging, paints & brushes, jeweler's hand drill, and a few helper tools like the clamp-on magnifier w/ LED lighting, clamps, hemostats, tweezers and sundry tidbits and it's going well. Setting up a dedicated workspace would be GREAT and highly recommended but I don't have that so everything goes in a plastic tote that I can 'deploy' when I'm building.

RESEARCH has been the most valuable tool I've used. My old kit came with bad instructions and a VCR build tape but there are tons of resources out there that have helped tremendously like Youtube, modeler's build websites, the Frank Mastini Ship Modeling Simplified book and this site.

As for paints, I didn't buy a Bluenose 'kit' since the paints were expensive. I've just found what I think looks good and as close as possible to accurate but I don't stress about minor differences in shade, or small mistakes on the build that would take hours to fix (if fixable.) Some of my stuff is not to plan (like deck furniture) and lots is custom built either because I didn't like the laser cut parts or wanted to go in a slightly different direction. I'm having a ton of fun doing this and I figure if somebody comes over who doesn't know a thing about building model ships and points out small defects I'll just throw them out :) and if a 'real' model builder sees it we'll have a bunch of interesting things to talk about for my next build. Lots of stuff is 'wrong' but that's ok.

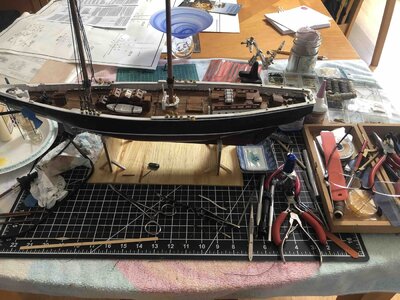
Here's my 'workspace' (dining room table, currently):
bl.jpg

What I'll buy next (besides my next kit :):
- Hull planking clamps
- Hull planking vise
- Head magnifier with loupe
- Precision drill press from Micromark

It's like eating an elephant - you just have to start taking bites! Good luck & HAVE FUN!
 
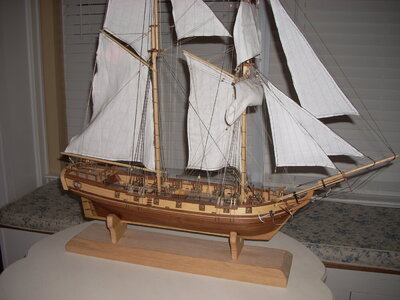
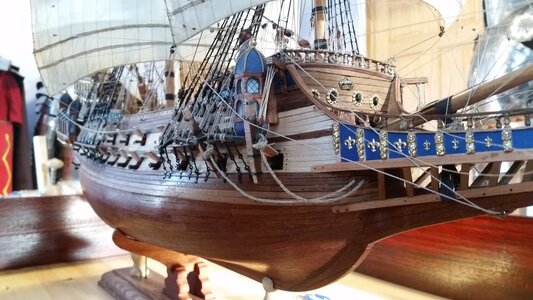
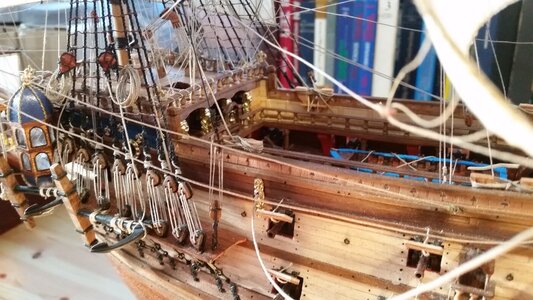
This was my first build, and the list of tools grew very long as the ship was built owing to what I discovered I needed and from tips from fellow board members. It shows you what you can do if you have skilled hands and LOTS of patience. Most of all, you have to love what you are building. Much of this ship was replaced with scratch built parts and added details. It's best to start building your kit, figure out ahead of time what you want to change using internet and book research, and get ideas for methods of making and assembling parts from posts on this forum, and buying tools as you need them. I found that work on the model had to stop several times and wait for a tool I ordered to arrive in the mail. Waiting on tools, lumber, add-on accessories that made the model more detailed did take up some time, but you often have to be patient if you want all the features on your model to turn out the best that you can possibly make them. You can take ANY kit and make it better with a few scratch built parts, like the scratch made sails and rigging on this ship. That makes it YOUR ship. You will develop favorite tools and come up with new ideas no one else has thought of, so please post a build log on this forum with pictures of your progress, and question to other forum members. Everyone here is eager to help you make the best ship you can. And know that the next ship will be at least twice as good as the first, because the learning curve is VERY steep. You will learn so much so fast, it will amaze you.

I am curious which style of model you are going for, the all natural wood look with shiny brass cannon like on the box cover or the photo realistic look, with wavy flags, some weathering of the deck as timbers, blackened cannon barrels, and other details that make it look like a model you could use in a movie scene?

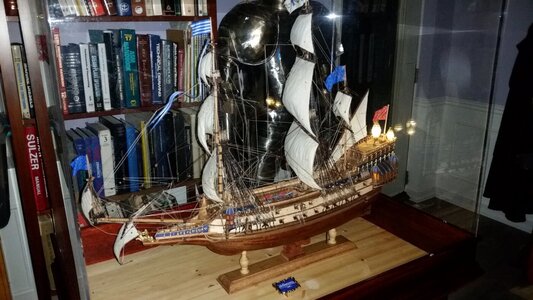
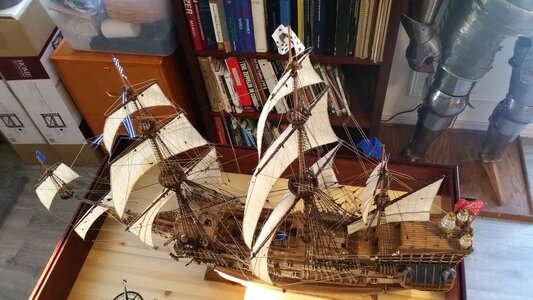
La Couronne 1636
1369 Finished 1.jpg

1375 Completed Photo.jpg

1377 Completed Photo.jpg

1378 Completed Photo.jpg
 
Last edited:
This was my first build, and the list of tools grew very long as the ship was built owing to what I discovered I needed and from tips from fellow board members. It shows you what you can do if you have skilled hands and LOTS of patience. Most of all, you have to love what you are building. Much of this ship was replaced with scratch built parts and added details. It's best to start building your kit, figure out ahead of time what you want to change using internet and book research, and get ideas for methods of making and assembling parts from posts on this forum, and buying tools as you need them. I found that work on the model had to stop several times and wait for a tool I ordered to arrive in the mail. Waiting on tools, lumber, add-on accessories that made the model more detailed did take up some time, but you often have to be patient if you want all the features on your model to turn out the best that you can possibly make them. You can take ANY kit and make it better with a few scratch built parts, like the scratch made sails and rigging on this ship. That makes it YOUR ship. You will develop favorite tools and come up with new ideas no one else has thought of, so please post a build log on this forum with pictures of your progress, and question to other forum members. Everyone here is eager to help you make the best ship you can. And know that the next ship will be at least twice as good as the first, because the learning curve is VERY steep. You will learn so much so fast, it will amaze you.

I am curious which style of model you are going for, the all natural wood look with shiny brass cannon like on the box cover or the photo realistic look, with wavy flags, some weathering of the deck as timbers, blackened cannon barrels, and other details that make it look like a model you could use in a movie scene?

La Couronne 1636
View attachment 232696

View attachment 232697

View attachment 232698

View attachment 232699
wow! an absolute masterpiece! :)
 
wow! an absolute masterpiece! :)
I absolutely love it. Corel kits have pretty good plans, lots of sheet showing rigging and details, but practically NO text. You proceed through the build using the numbered drawings, and add parts of your own as you go. I added sails and the rigging to support them. The rigging belaying plan was a mixture of the Corel plans and Vincenzo Lusci's "Costruiamo insieme il modello de La Couronne". Basically, I had to figure out a custom rigging plan from two sources, one in Italian which I do not speak. You can always make a kit better than just built out of the box. For you ship, start collecting pictures and links to websites and forum thread that discuss it, and you will quickly gather a wealth of information that will give you ideas on how to paint, rig, and detail your ship to you liking and based on more accurate historical sources than the kit instructions. Besides... scratch building stuff is fun.

If you are fitting sails, you may want to make better sewn sails than those provided in the kit. I learned how to make realistic sails from Olha Batchvarov, also on this forum. Check out her video: Sail Making - Olha Batchvarov
 
Last edited:
I agree with all the above comments but would like to add the following.
When it comes to doing the rigging, don't bother with a proprietry rigging tool: knock up your own jig or do the ratlines in situ.
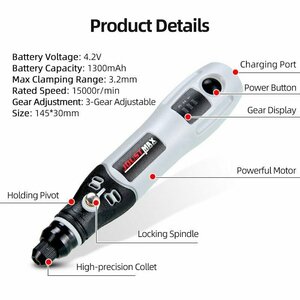
I bought a "mini dremel" rechargeable tool (joustmax pictured below)which is extremely useful. It takes drill bits from
about 0.5 - 3.0 mm and is more instant and less clumsy than its mains powered big brother.
Good for drilling pilot holes for pins, holes to receive eyebolts and cleats etc. And for clearing deadeyes and blocks that have got blocked by careless gluing!
A lot of supplementary kit can be knocked up from scraps of ply and dowel. For example: a needle fixed eye first into a short length of dowel makes and excellent prodder. Fuse wire has all sorts of uses.
Take a look at some build logs and see what sort of devices people are actually using.
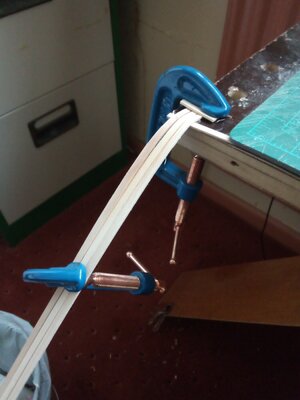
Who needs a plank bender? I bought one but find the following bodge just as effective:
Bender.jpg s-l1600.jpg
After soaking the planks the ends are clamped to the edge of the rable. The second clamp is simply a weight that is
put at a point ro achieve the desired curve. A refinement could be clamping the end over a custom made former.
In principle one could bend about ten planks at once. Re-soaking and adding more weight could achieve progressively tighter curves.
 
I like thereference from Dogbreth to using small crochet hooks. I will get some - or raid SWMBO's sewing box.
Just the sort of useful tip that one picks up on this site.
The hook on an Amati rigging tool I bought is too bulky and aggressive.
 
Back
Top