• Ships of Scale has incorportated an extra level of security when you log In. Please follow on-screen prompts to acknowledge that you are not a robot via a "Check Box" or a "Pictorial Check Box Puzzle". This is needed due to higher level of AI Activity Security.
  • SUBSCRIBE TO SHIPS IN SCALE TODAY!

    The beloved Ships in Scale Magazine is back and charting a new course for 2026!
    Discover new skills, new techniques, and new inspirations in every issue.

    NOTE THAT OUR NEXT ISSUE WILL BE July/August 2026
  • Win a Free Custom Engraved Brass Coin!!!
    As a way to introduce our brass coins to the community, we will raffle off a free coin during the month of August. Follow link ABOVE for instructions for entering.

Black Swan - Black Swan custom VOC-pirate ship conversion / first wooden ship build

Joined
May 15, 2026
Messages
88
Points
78

Hello everyone,
as I mentioned in my introduction post, I have decided to start my first wooden ship model ever with the OcCre Black Swan.
However, my intention is not to build her strictly as the “Black Swan” from the box, and not even to make an exact Black Pearl replica. I would like to use the kit as the base for my own custom pirate ship: something personal, more detailed, more plausible, and inspired by the general atmosphere of late 17th- and early 18th-century pirate/privateer vessels.
In true pirate fashion, I am not against “borrowing” inspiration from different sources: historical ships, East Indiaman / VOC-style armed merchantmen, the Black Pearl, the Walrus from Black Sails, and other fantasy or cinematic references. But the final model should feel like my own ship, not a direct copy of an existing one.
My preferred historical atmosphere would be roughly between 1680 and 1715, within the classic Golden Age of Piracy. I know the OcCre Black Swan is a fantasy pirate kit rather than a strict historical reconstruction, but visually it seems to have something of an armed merchantman or galleon-inspired vessel, possibly close to the kind of ship that could have been captured, modified, and “piratized.”
The kit is officially advertised as 1:75, with a total length of 613 mm, height of 585 mm, and width of 257 mm. However, I am not completely sure how to treat the practical scale of all the accessories and replacement parts. Some details may not read as a strict 1:75, and depending on what reference is used — total length, hull length, figures, gunports, cannons, ship’s boat, doors, stern windows, or deck furniture — the model could visually suggest slightly different scales.
At the moment, my provisional thinking is this:
ReferencePossible interpretationConsequence for the model
Official kit scale1:75This gives a total real-world length of about 46 m if the full 613 mm length is taken literally. That could place the ship in the range of a large armed merchantman or East Indiaman-style vessel.
If treated closer to 1:721:72The real-world length would be about 44 m. This is close enough to 1:75 that many 1:72 figures and accessories might still work, especially if selected carefully.
If treated closer to 1:801:80The real-world length would become about 49 m. This would make the vessel feel larger, closer to a substantial East Indiaman-type ship, but some 1:72 figures or fittings might start looking slightly oversized.
If some details read closer to 1:601:60The same 613 mm would represent only about 37 m. This might make sense for some oversized kit details or fantasy/cinematic elements, but using many 1:60 accessories could easily make the ship look too heavy or inconsistent.
Official width of 257 mmUnclearI am not sure this should be treated as true hull beam. If taken literally as hull width, it would produce a very broad real ship. It may represent the overall model envelope rather than the actual hull beam, so I need to measure the hull itself.
Crew figuresprobably 1:72 / 1:75 / 1:80 rangeI suspect 1:72 figures could work, but I need to check whether they look too tall or too “heroic” on deck.
Cannons and gun carriagesto be verifiedI would like to know whether the kit cannons are acceptable, or whether replacing them with better 1:72 / 1:75 / 1:80 pieces would improve the realism.
Ship’s boat / launchlikely to replaceThis is one of the parts I am least convinced by, so I would like to replace it with a more realistic boat, but I need to choose the right scale and size.
Stern and captain’s cabincustom work plannedI would like to improve windows, lanterns, balcony, decorations, and perhaps make the captain’s cabin more believable or partially visible.
So my current concern is not only “what is the official scale?”, but rather:
What scale should I use in practice when buying or 3D-printing replacement parts for this specific kit?
My main goals for the project are:
  1. Improve the overall realism of the ship, while keeping a dark pirate character.
  2. Improve or rebuild the stern area, especially the windows, balcony, decorative carvings, lanterns, and possibly the name/cartouche area.
  3. Improve the captain’s cabin, perhaps making it partially visible or more believable from the outside.
  4. Add warm lighting, especially in the stern cabin, lanterns, and possibly some lower deck areas.
  5. Consider visible lower decks or interior sections, if this can be done without weakening the structure too much.
  6. Replace or improve some kit fittings, such as cannons, carriages, doors, gratings, ladders, barrels, crates, lanterns, decorations, and other deck details.
  7. Replace the ship’s boat/launch, which seems to be one of the weakest visual parts of the kit.
  8. Possibly use resin 3D-printed accessories, even though I do not own a 3D printer myself, so I would need to order prints from a service or from someone with a good resin printer.
  9. Keep the model historically plausible enough, even if it remains a fantasy/pirate interpretation.
Since this is my first wooden ship model, I know that the project may be ambitious. For that reason, I would like to proceed carefully and ask questions before making irreversible modifications.
My first questions for the community are:
1. For this kit, would you recommend treating the scale strictly as 1:75, or choosing details case by case between 1:72, 1:75, and 1:80?
2. Are there any parts of the OcCre Black Swan that you would definitely replace completely rather than simply improve?
3. Are the kit cannons and gun carriages acceptable for a late 17th- / early 18th-century pirate vessel, or would better replacements make a noticeable difference?
4. Is it realistic to create partially visible lower decks or interior sections on this kind of plank-on-bulkhead kit, or would that create too many structural problems for a beginner?
5. If I want to modify the captain’s cabin and stern, what should I plan before starting the hull planking?
6. Do you know any build logs, suppliers, 3D-printing sources, or historical references that would be useful for a custom pirate ship based on this kit?

At this stage I am still studying the kit, the plans, and other build logs. I would prefer to make a clear plan before cutting, replacing, or gluing important parts.
Any advice, criticism, or suggestions will be very welcome.
Best regards,
Stefano
 
Last edited:
Hello everyone,

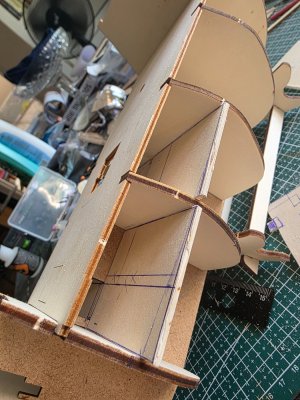
I am working on the kit and I would like to modify the interior so that part of the lower/second deck can remain visible.

Before doing anything irreversible, I would like to ask for advice on how to determine the correct height and safe cutting line for opening the spaces between the bulkheads/formers.

My concern is that if I cut too much material from the kit-supplied bulkheads or deck supports, I could weaken the structure or permanently ruin the original shapes provided by the kit.

In practice, I would like to create openings/voids in the lower deck area, but I am not sure how much material can safely be removed, or whether it is better to make replacement parts first and test the modification on those, and at what height I should draw the interior cut points considering I am not yet sure what is the actual size if 1/75 or 1/72 of the ship also considering the miniatures available to fit on it .

I have also bought some extra 3 mm birch plywood panels, so I could trace the original kit parts and cut new modified versions if necessary, rather than risking the original pieces.

What would be the safest method?

Would you recommend:

  1. tracing and copying the original bulkheads first;
  2. marking the intended openings on the copies;
  3. keeping only the structural portions needed to support the hull and decks;
  4. dry-fitting everything before gluing;
  5. or using another method entirely?
Any advice, drawings, examples, or photos of similar modifications would be very helpful.

Thank you.
 
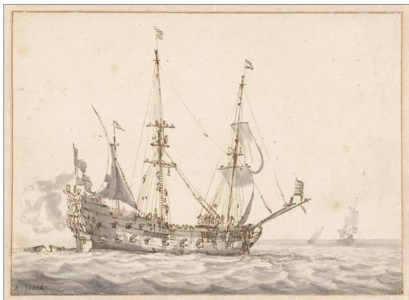
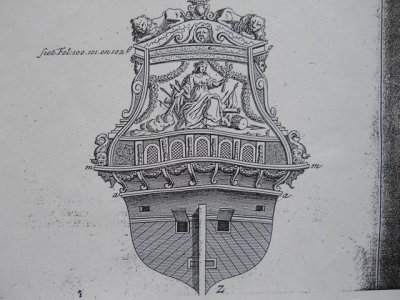
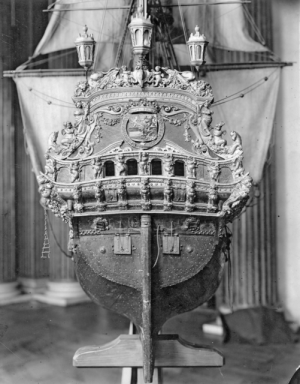
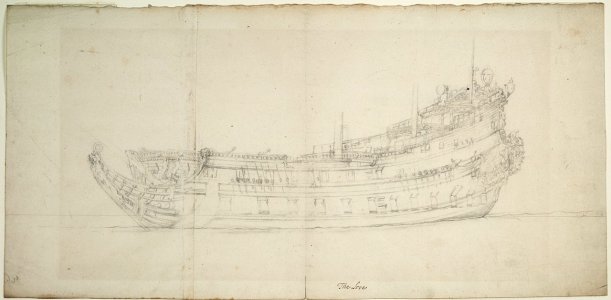
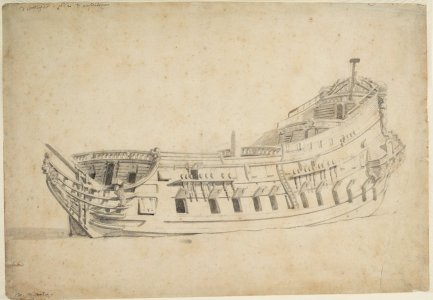
Hello , I am starting now to plan the ship , but I am also brainstorming on what I want it to be like, I do not want it to be a black swan , so I have been trying my best to find out what it could be the mest match for most of the shapes of the ship an and possibly with some easy and minor adjoustments match better, what I found is this :

Hollands oorlogsschip, by Abraham Storck 1645–1710

so may be something like 1675 could be a possible period dating for this ship ?

Source: https://www.whiterosefineart.com/abraham-storck/


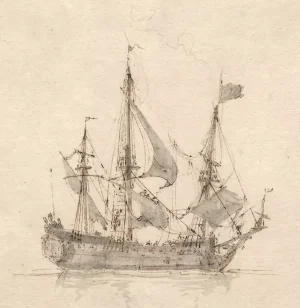
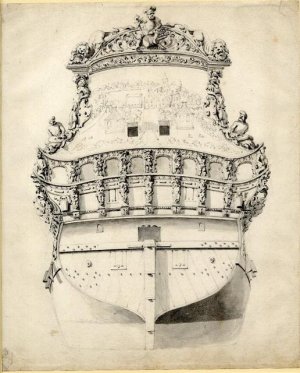
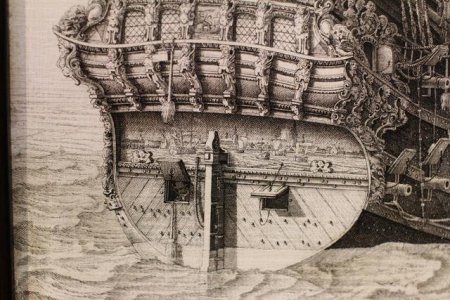
the other images are about stern possible changes and other similar but larger ships of Liefde that is slightly larger though .

sources for the other images :


1782897945356.png

I also added a possible reconstruction:

ManoWarOlandese.png


abraham-storck-1644–1709-1.webp

AN00290123-001-l.jpg

Beh-lter.jpg

DSCN0744.jpg

I-4-092-253.png

px6185.jpg

px6186.jpg
 
Last edited:
Hey Naima,

I think your research is brilliant, as is what you’re planning to do with it. However, I have to tell you that what you’re planning will completely blow the Black Swan out of the water. In other words, just like the Black Pearl, the Black Swan is a purely fictional ship, which is reflected in its deck layout and rigging. In reality, you’d never sail a ship like that, as it wouldn’t actually be seaworthy. That’s why this kit is good – just to give it a go and see if you can build it at all and enjoy the process. You’re sure to find help here. Of course, you can also jazz up this kit – for example, the cannons, which are really awful in the kit. But bear in mind that any extras always cost more money, time and effort. East Indiamen include, for example, the Batavia – you can have a look at that to see what a ship from that era looked like. It’s important to note that there were differences between the English, French and Dutch ways of rigging a ship… In any case, I’m delighted that you want to build this kit here.
Best regards, Günther
 
Thankyou
Hey Naima,

I think your research is brilliant, as is what you’re planning to do with it. However, I have to tell you that what you’re planning will completely blow the Black Swan out of the water. In other words, just like the Black Pearl, the Black Swan is a purely fictional ship, which is reflected in its deck layout and rigging. In reality, you’d never sail a ship like that, as it wouldn’t actually be seaworthy. That’s why this kit is good – just to give it a go and see if you can build it at all and enjoy the process. You’re sure to find help here. Of course, you can also jazz up this kit – for example, the cannons, which are really awful in the kit. But bear in mind that any extras always cost more money, time and effort. East Indiamen include, for example, the Batavia – you can have a look at that to see what a ship from that era looked like. It’s important to note that there were differences between the English, French and Dutch ways of rigging a ship… In any case, I’m delighted that you want to build this kit here.
Best regards, Günther
Thankyou, what you think is the seaworthyness problem with the Black swan ? Being my first ship I decided to start by the small safeboat , but since It seems primitive and not nice I started with a random kit taken on aliexpress which I think looks better , hopefully its same scale 1/75 .

20260721_072114.jpg

20260722_065344.jpg
 
Hey Naima,

The dinghy looks really great. Nice frame kit. Unfortunately, I can’t tell you whether it’s too big. Just from looking at your photo, I think it’s far too long. It should be about 8.5 cm long. Your dinghy looks bigger. But it’s lovely that you’re building it. By now you’ve surely realised that it’s not that easy after all. Of course, you’ve also got to factor in the sanding work – that’s always a huge job. Since the Black Swan is just a fantasy ship, you can really let your creativity run wild with it – yes, even mistakes are allowed. Overall, the kit is good. However, no emphasis has been placed on historical accuracy here. The rigging isn’t correct either. After all, the kit is only suitable for beginners … So, go on then, get started …

Best regards,

Günther
 
Hello everyone,
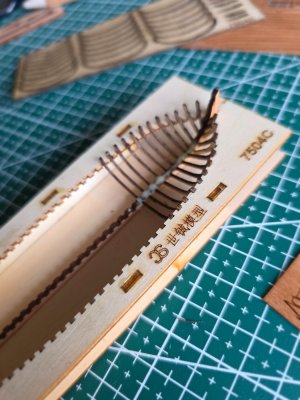
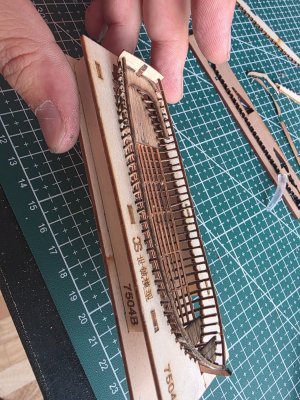
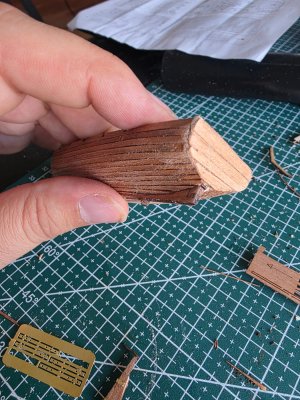
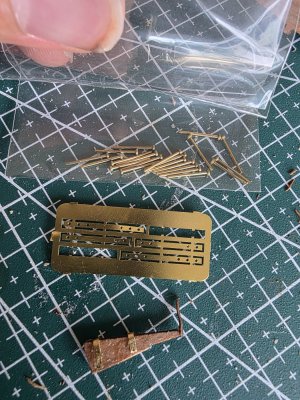
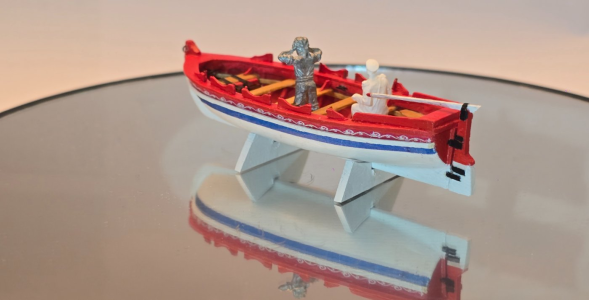
I am currently working on my very first wooden ship model, a lifeboat, before starting with the pirate ship. I know it looks a bit rough and messy, but I treated this as a learning experience and I've learned a lot along the way. I definitely messed up a few things (like spacing and inverting some planks/parts), but I tried to fix what I could.
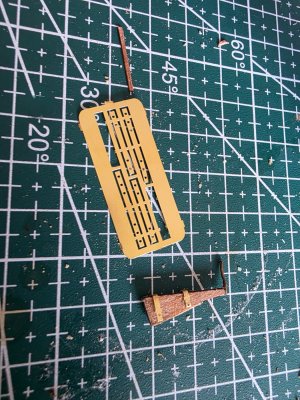
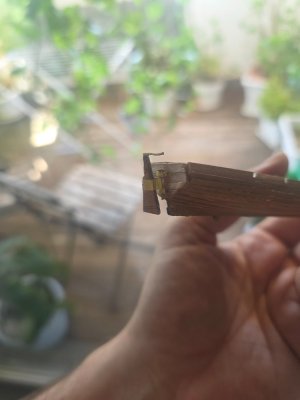
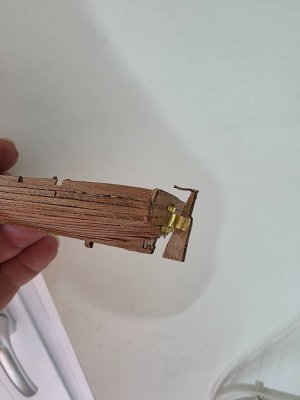
Right now, the most blatant issue I'm stuck on is the rudder on the stern. The kit's instructions are in Chinese and completely lack clear steps or images on how to assemble this part.
I have the wooden rudder piece itself, some tiny nails/pins, and some small brass/golden metal strips (which I assume are for the hinges). I suppose these are meant to attach the rudder to the stern so it can move. Before I try to invent a custom solution and potentially ruin it, could someone give me some advice on the best way to use these specific items to assemble and mount the rudder?
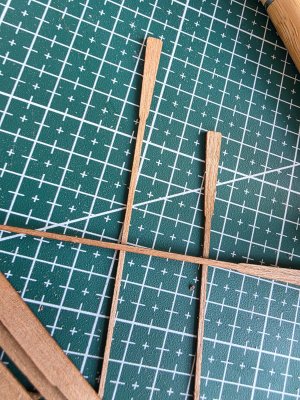
Additionally, I have a question about the oars. The kit provided some very long, flat, rectangular wooden strips for them. The shafts are completely flat and not tapered or rounded at all. Do you have any tips or techniques on how to properly shape and taper these flat blanks into realistic-looking oars?
Thank you in advance for any ideas or help you can give to a beginner!

20260729_090711.jpg

20260729_090701.jpg

1000074046.jpg

20260729_091503.jpg
 
Ok I know looks crap but its the best I could be able to do with what I have , probably I have not the right tools here, any suggestions for future micro metal joints work is welcome

20260730_110740.jpg

20260730_110746.jpg
 
Naima, that’s a good-looking result for your first build. The learning curve with wooden ship building is very steep at the beginning. Stays kind of steep…but stay encouraged!

If you don’t have the right tools for working with very small metal parts, which many people do not, you might consider removing the metal hinges and instead use heavy black paper. At that scale it will look at least as good as metal and will be much easier to work with.
 
Hey Naima,
well, as I said, it’s looking good so far. If you really want an accurate rudder, there’s a method I always use. There are technical drawings available for the dinghy. You can, for example, convert the scale for the rudder and print it out on paper. That way, you’ll get an idea of what the rudder and its mountings look like. In your photos, the rivets for the mountings look huge. That’s why I wouldn’t use them. You can imitate them, for example, by using metal strip for model-making. You can even use paper!! You can cut it to the right size. Then take a blunt needle and push it into the metal strip. That way, you’ve simulated the rivets. I did that for my little dinghy for the Athena (Black Swan). I’m converting it, you see… I wish you continued success. Thumbsup

1785571199236.png
 
Hello everyone,
I am currently working on my very first wooden ship model, a lifeboat, before starting with the pirate ship. I know it looks a bit rough and messy, but I treated this as a learning experience and I've learned a lot along the way. I definitely messed up a few things (like spacing and inverting some planks/parts), but I tried to fix what I could.
Right now, the most blatant issue I'm stuck on is the rudder on the stern. The kit's instructions are in Chinese and completely lack clear steps or images on how to assemble this part.
I have the wooden rudder piece itself, some tiny nails/pins, and some small brass/golden metal strips (which I assume are for the hinges). I suppose these are meant to attach the rudder to the stern so it can move. Before I try to invent a custom solution and potentially ruin it, could someone give me some advice on the best way to use these specific items to assemble and mount the rudder?
Additionally, I have a question about the oars. The kit provided some very long, flat, rectangular wooden strips for them. The shafts are completely flat and not tapered or rounded at all. Do you have any tips or techniques on how to properly shape and taper these flat blanks into realistic-looking oars?
Thank you in advance for any ideas or help you can give to a beginner!

View attachment 622464

View attachment 622465

View attachment 622466

View attachment 622467
Hello, great first build. As Gunther suggested the gudgeons (hinges) are way out of proportion. Nambiiru's suggestion to use heavy paper is a good one. Wire can be used instead of the heavy nails they gave you. The oars can be rounded by gentle sanding. The blades of the oars can be shaped with some carving or sanding. I will be following your build. I have started the Black Swan myself. There is a you tube video on a person who is also building one that may be of value to you.


The introduction part of this site may be very helpful for you.


There are also numerous you tube videos covering just about every stage of construction of various wooden ship models.

Rob
 
Thanks everyone for the nice answers, well the Small boat let me understand a few things so I am now moving on the Main ship :) ...
 
Hey Naima,
well, as I said, it’s looking good so far. If you really want an accurate rudder, there’s a method I always use. There are technical drawings available for the dinghy. You can, for example, convert the scale for the rudder and print it out on paper. That way, you’ll get an idea of what the rudder and its mountings look like. In your photos, the rivets for the mountings look huge. That’s why I wouldn’t use them. You can imitate them, for example, by using metal strip for model-making. You can even use paper!! You can cut it to the right size. Then take a blunt needle and push it into the metal strip. That way, you’ve simulated the rivets. I did that for my little dinghy for the Athena (Black Swan). I’m converting it, you see… I wish you continued success. Thumbsup

View attachment 623265
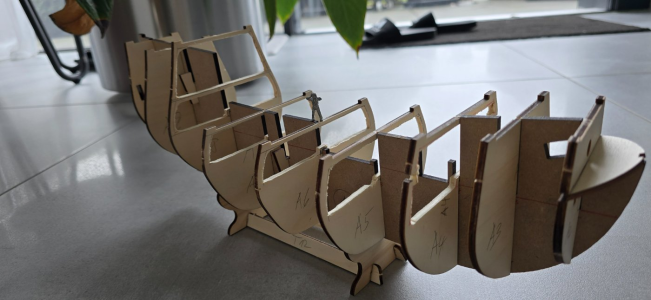
Thankyou , btw , I wanted to also do an Hollow underdeck , can you share some measures on how you planned the cuts as you did in this picture ?
1785597849019.png

I was about to cut the lower deck at the same height of the small frame that is provided with the ship but that its just decorative, I see you have cutted it at a similar height level , but for the A5 you went more down seems not sure why ...

Also I want to do this hoollow part because I wanted ot be able to see the full cannons from outside also for the lower deck
I am only interested in the second gun deck not making also the cargo area .

but another are aI would like to cut is the Area of the captain cabitn that I would like to redo if I am able .

also did you plan to cut the vertical spline walls that you would see from the side opening and that probably in a real ship wouln't be there? Becasue I fear it could make the sructure more fragile .
 
Last edited:
Thankyou , btw , I wanted to also do an Hollow underdeck , can you share some measures on how you planned the cuts as you did in this picture ?
View attachment 623373

I was about to cut the lower deck at the same height of the small frame that is provided with the ship but that its just decorative, I see you have cutted it at a similar height level , but for the A5 you went more down seems not sure why ...

Also I want to do this hoollow part because I wanted ot be able to see the full cannons from outside also for the lower deck
I am only interested in the second gun deck not making also the cargo area .

but another are aI would like to cut is the Area of the captain cabitn that I would like to redo if I am able .

also did you plan to cut the vertical spline walls that you would see from the side opening and that probably in a real ship wouln't be there? Becasue I fear it could make the sructure more fragile .
Hey Naima,

I wanted to cut the lower deck to the same height as the small frame on the model ship, which is purely decorative. I can see that you’ve cut it to a similar height, but with the A5 you’ve gone lower. I’m not sure why … I went lower because I wasn’t sure whether the height would be suitable for a 1:72 scale figure. I just wanted to put a figure in there and give it a go.

I’d also like to design this cavity so that the cannons are fully visible from the outside. As for the lower deck, I’m only interested in the second gun deck, not the hold … I don’t want to model it in detail, as that would mean I’d have to leave one side of the ship open so you can see what’s going on below deck. But as I don’t like dummy cannons, I just want to position the guns here so you can roughly make out that there are some there. The floor will be planked, nothing more! I might add some lighting, but I’m not sure…

Another area I’d like to cut out is the captain’s cabin, which I’d like to redesign if possible.

Did you also plan to remove the vertical strip walls that can be seen from the side opening – which probably wouldn’t be there on a real ship? I’m worried that this might make the structure less stable.

…… I haven’t made up my mind about that yet. I’m not sure. I’m going to fit timber in the spaces between the frames for the lower planking, so that the hull is nice and rigid and I’ll have a much better support surface for the planking!!

You’ve got a lot planned and I’m keeping my fingers crossed for you. I’m curious to see when you’ll start building, and I’m looking forward to it. :D Thumbsup
 
Hey Naima,

I wanted to cut the lower deck to the same height as the small frame on the model ship, which is purely decorative. I can see that you’ve cut it to a similar height, but with the A5 you’ve gone lower. I’m not sure why … I went lower because I wasn’t sure whether the height would be suitable for a 1:72 scale figure. I just wanted to put a figure in there and give it a go.

I’d also like to design this cavity so that the cannons are fully visible from the outside. As for the lower deck, I’m only interested in the second gun deck, not the hold … I don’t want to model it in detail, as that would mean I’d have to leave one side of the ship open so you can see what’s going on below deck. But as I don’t like dummy cannons, I just want to position the guns here so you can roughly make out that there are some there. The floor will be planked, nothing more! I might add some lighting, but I’m not sure…

Another area I’d like to cut out is the captain’s cabin, which I’d like to redesign if possible.

Did you also plan to remove the vertical strip walls that can be seen from the side opening – which probably wouldn’t be there on a real ship? I’m worried that this might make the structure less stable.

…… I haven’t made up my mind about that yet. I’m not sure. I’m going to fit timber in the spaces between the frames for the lower planking, so that the hull is nice and rigid and I’ll have a much better support surface for the planking!!

You’ve got a lot planned and I’m keeping my fingers crossed for you. I’m curious to see when you’ll start building, and I’m looking forward to it. :D Thumbsup

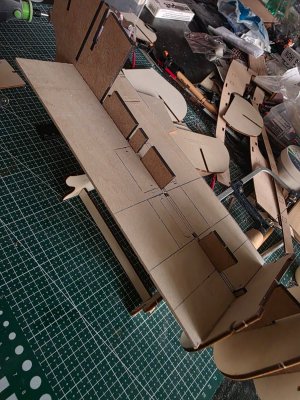
Thanks! This is pretty much exactly what I'm planning to do. I’ve been experimenting with cutting a 3mm sheet to fit in and between the frames. Once I figure out the exact sizes, I'm going to split it into pieces, carve out the holes, and reinforce it with supports underneath. I'm also thinking about adding some lighting. I definitely don't want to leave the side of the hull open; I just want the interior to catch the eye through the gun ports.


Don't mind the mess ...

20260802_201636.jpg
 
Btw anyone working on the Occre, do you have any sugestions on a kit to replace the acutal Guns ? for two reasons, first it seems to me those guns are ahistorical , they look more like Guns from the 1500 rather than 1680-1700 , which is the target year I am pointing at , and second I am not sure of the scale , and third they do not seem very realistic but mostly rough .

So I would like to know if you have any sugerstions on the scale, model kits and possibly I would like something nice and decorated yet detailed but properly in scale for this ship . I guess 1/75 .

I am also considering the lower gun deck height , I have read that usually those areas , at least on a Voc ship or similar where really low like 1.5 m , It seems to me too low is it really that low ? how could people walk and operate inside? I also saw that some cutout of other 1700 ships showing instead people standing and operating the guns , so I am confused.

If the real heights were 1.5 m then it seems the lower deck heights would be mostly in scale but otherwise I woul dhave to lowerd the lower deck floor, with consistend othe rstructural changes .
The guns might help understand the level height of the openings on the hull to match the cuns positions.

20260803_104500.jpg

20260803_121221.jpg
 
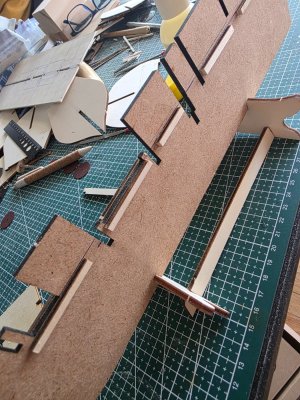
I opened all lower decks , I decided to skip the 3mm floor and I am thinking to go for a more flexible and light 1 mm floor, over wich put the wooden planks , so reaching a 2 mm ffloor rather than a 3 + 1 mm , this to allow more room space for possible items and miniatures eventually of 1/72 or 1/75 , Will post an update later.
 
Hi, for decorated gun barrels, look at Amati. And average people were quite a bit shorter than we are today, so a deck high under the beams of about 1.60m doesn't seem too unrealistic.
 
Hi, for decorated gun barrels, look at Amati. And average people were quite a bit shorter than we are today, so a deck high under the beams of about 1.60m doesn't seem too unrealistic.
HiThanks, what Mm size is better? the actual ones are I think 27 mm , but I am not sure if 30 mm would be better or too big?
 
Back
Top