-

Win a Free Custom Engraved Brass Coin!!!
As a way to introduce our brass coins to the community, we will raffle off a free coin during the month of August. Follow link ABOVE for instructions for entering.
-

PRE-ORDER SHIPS IN SCALE TODAY!
The beloved Ships in Scale Magazine is back and charting a new course for 2026!
Discover new skills, new techniques, and new inspirations in every issue.
NOTE THAT OUR FIRST ISSUE WILL BE JAN/FEB 2026
You are using an out of date browser. It may not display this or other websites correctly.
You should upgrade or use an alternative browser.
You should upgrade or use an alternative browser.
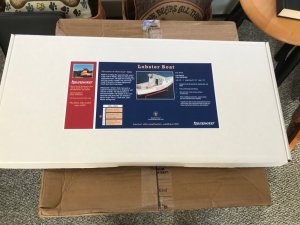
Bluejacket Shipworks Lobster Boat 5/8” = 1’
- Thread starter Pathfinder65
- Start date
- Watchers 16
Test fitting frames 2 through 8 to keel. A couple frames (4 and 5) needed the slots on the keel filed out a bit to make a better fit.
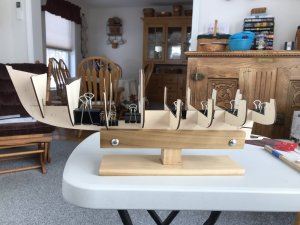
Next step is to test fit the deck:

The slots for the frames need to filed. The fit is very tight and any force used to make a “fit” will result in breakage.
Intermission:

Next step is to test fit the deck:

The slots for the frames need to filed. The fit is very tight and any force used to make a “fit” will result in breakage.
Intermission:
Following the build instructions the next step is to test fit the deck and frames 2 through 8.
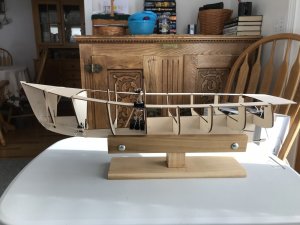
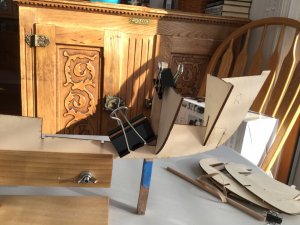
I used a small flat file to clean up the slots in the deck. That helped with fitting and aligning the deck to the frames. The dry fit looked pretty good until I noticed that frames 4 through 7 (counting left to right) weren’t quite perpendicular to the keel.

It’s very noticeable looking at the Port side (counting the frames right to left). I’ve started the “fix” by mounting frame 2 to the keel and squaring it. My plan is to do the same to all the frames, working from frame 2 to frame 8.
,
Intermission:

I used a small flat file to clean up the slots in the deck. That helped with fitting and aligning the deck to the frames. The dry fit looked pretty good until I noticed that frames 4 through 7 (counting left to right) weren’t quite perpendicular to the keel.

It’s very noticeable looking at the Port side (counting the frames right to left). I’ve started the “fix” by mounting frame 2 to the keel and squaring it. My plan is to do the same to all the frames, working from frame 2 to frame 8.
,

Intermission:
The build instructions indicate that frames 2 through 8 should be dry fitted to the keel and then the deck added to lock everything in place. I tried that in the above posts and found that some of the frames were ever so slightly warped and needed a little adjustment. Yesterday I held them in front of my steam kettle and let the steam soften the Boxwood. I then placed the frames in between two pieces of 3/4 X 8 X 16 in plywood and clamped that assembly to my workbench. This morning I repeated the build instructions and found everything fit as it should. All the frames are glued to the Keel, but the deck will not be glued until the planking is done.
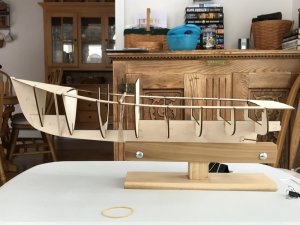
Intermission:

Intermission:
Watching this looks good so far
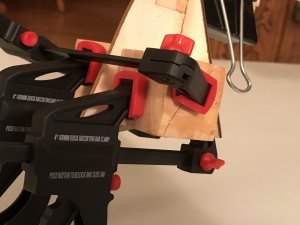
The next step in the build will be interesting. The kit contains two pieces of blocks to be carved to fit the bow (from the Stem to frame 1). The instructions state that the blocks may or not be used to aid in planking the hull. With the blocks in place the planks will butt up to blocks versus without the blocks the planks will have to beveled at the Stem.
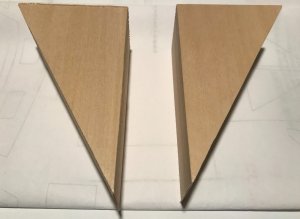
The carving pattern supplied with the kit plans.
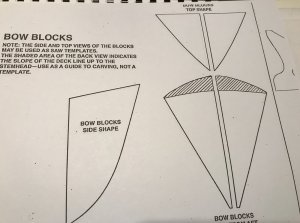
Not ever having done any carving this will take a little imagineering.
Intermission:

The carving pattern supplied with the kit plans.

Not ever having done any carving this will take a little imagineering.
Intermission:
so the first real saw dust will be produced - looking forward
I'd put them in Just my personal preference. take your time, remove small amounts of Wood at a time. You got this Brother I have faith.
For bow blocks you could try balsa as it is so much easier to shape and does the job well.
Graham, good idea. I’ll pick up some balsa blocks to “practice on”. But today is another snowplowing day. Another “Monster” snow storm has arrived. The forecast is for wet snow, rain, then freezing rain. Third such storm in the last two weeks. Going to be a long day.
Saw Dust and Wood Chips:
Port bow block roughed out.

After a couple of days of sawing, gauging, whittling and not what I would call carving I've got the block shaped into its final form.

The build instructions indicate that the final shaping of the block will be done after the planking is completed. The instructions call for a 1/16 overlap for the block at the first frame. This is to allow the planking to butt up to the block.
I think the second block will go much easier and faster. Not ever having done any carving it took several experimental tries of different X-Acto blades to find the one that worked the best.
Port bow block roughed out.

After a couple of days of sawing, gauging, whittling and not what I would call carving I've got the block shaped into its final form.

The build instructions indicate that the final shaping of the block will be done after the planking is completed. The instructions call for a 1/16 overlap for the block at the first frame. This is to allow the planking to butt up to the block.
I think the second block will go much easier and faster. Not ever having done any carving it took several experimental tries of different X-Acto blades to find the one that worked the best.
Last edited:
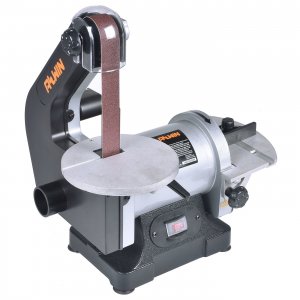
you will love having that tool Brother I have one similar and its a mainstay in my shop for small stuff. wife doesn't like me sanding in the house so its a garage tool but used very oftenGoing to be a bit of an intermission. Waiting on the arrival of a tool to help with the shaping of the bow blocks.
View attachment 65949
The new tool comes with certain conditions.
1) It goes under the Xmas tree
2) It can’t be used until after all the Holiday company goes home.
Hmmm. Test fitted the bow block I've finished.
I can not decide if I want to continue the build with the planks butted up against the bow block or if the planks should laid stem to stern. The build instructions indicate its up to the builder as to which method to use.
I found a couple of examples on line of the planks laid stem to stern.
There seems to be enough material in the kit to plank the boat either way.
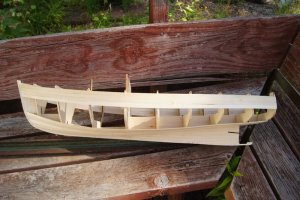
I've got a couple weeks of no shipyard activity so are there any votes as to which method to use.
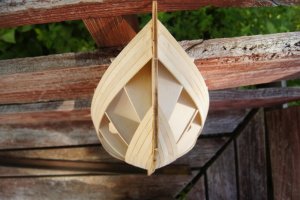
I can not decide if I want to continue the build with the planks butted up against the bow block or if the planks should laid stem to stern. The build instructions indicate its up to the builder as to which method to use.
I found a couple of examples on line of the planks laid stem to stern.
There seems to be enough material in the kit to plank the boat either way.

I've got a couple weeks of no shipyard activity so are there any votes as to which method to use.

Whoops, almost a major error.
Had a couple of minutes this morning. I was showing my build progress on the Lobster boat and noticed that I had reversed frame #4. The door opening should be on the Starboard side.
Frame door opening on wrong side.
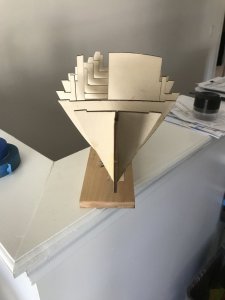
Correct placement.

I had used Gorilla Super Glue Gel to fix all the frames to the keel. I brushed some Zap Z-7 Debonder on the glue joints for frame #4 and waited a half hour. The frame came out easily.
As UWE says "check the drawings, check again and if not sure check ...."
Had a couple of minutes this morning. I was showing my build progress on the Lobster boat and noticed that I had reversed frame #4. The door opening should be on the Starboard side.
Frame door opening on wrong side.

Correct placement.

I had used Gorilla Super Glue Gel to fix all the frames to the keel. I brushed some Zap Z-7 Debonder on the glue joints for frame #4 and waited a half hour. The frame came out easily.
As UWE says "check the drawings, check again and if not sure check ...."
Whoops, almost a major error.
Had a couple of minutes this morning. I was showing my build progress on the Lobster boat and noticed that I had reversed frame #4. The door opening should be on the Starboard side.
As UWE says "check the drawings, check again and if not sure check ...."
Good that you realized it at an early stage of the building - and very good, that you use a glue which can be softened - I am using for most of the situation a standard water based wood-glue, especially for such situations! And these happens also to me (often enough)
This happens to all of us. Nice catch.
Hmm, Another interesting "Novice" error.
I had little time yesterday and thought I would assemble the "cockpit sole" or also known as the deck floor.
I glued the two halves together and filled the seams and sanded the completed piece. I had some deck planking left over from my Enterprise build and decided that might work for planking the deck floor of the Lobster boat.
But.... the thickness of the deck floor versus the moisture from glue for the deck planking resulted in an uncalculated result.
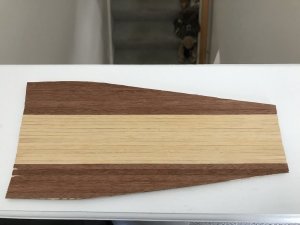
The deck curled as the glue dried. I had put quite a bit of weight on top to keep the deck nice and flat. But the result is pictured below.
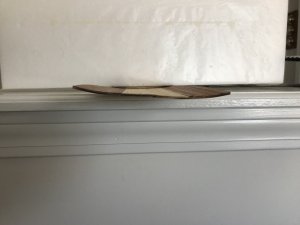
Other than looking like an airplane wing, the planking came out OK. I've ordered new deck material (pre planked) to fix my problem.
I had little time yesterday and thought I would assemble the "cockpit sole" or also known as the deck floor.
I glued the two halves together and filled the seams and sanded the completed piece. I had some deck planking left over from my Enterprise build and decided that might work for planking the deck floor of the Lobster boat.
But.... the thickness of the deck floor versus the moisture from glue for the deck planking resulted in an uncalculated result.

The deck curled as the glue dried. I had put quite a bit of weight on top to keep the deck nice and flat. But the result is pictured below.

Other than looking like an airplane wing, the planking came out OK. I've ordered new deck material (pre planked) to fix my problem.


