Bluenose #54

Joined
Jan 13, 2017
Messages
74
Points
58

Hi
Bluenose #54 has docked safe in Scotland.
The box had me a bit worried as it looked like it had been through some tough times.


20220915_200338.jpg

But opening it up, I needn't have worried as it was well packaged.

I don't normally post photos of myself, but as this was a special post !!lol

Looking forward to starting this when I retire at the end off September.

Thank you Heinrich for getting this here for me.

I am not a great modeler so will be looking for help ( PLEASE ), and really happy to be part of this community.

20220915_200914.jpg
 
Hi Jim. It is always great to see the face behind the name. I am very glad that Bluenose made it safe and sound to you (the couriers are a rough bunch, it seems). To me it is always a relief and mission accomplished, when the model arrives at her destination. As to help and assistance, you will get lots - just ask!
 
Nice you started a build-log, Jim. With the picture of your kit and yourself. Always good to see te person behind the build. I wil ad the link in the next up-date of the BN-list. And a retirement: I know all about it and can recommend it wholeheartedly. You can't start early enough.:)
Regards, Peter
 
Hi jimbo,
I am already looking forward to seeing how you get on with the build and the build log.
I have always thought Bluenose is a really nice looking ship.
Good luck with the build I will be following.
 
Hi Here we go,
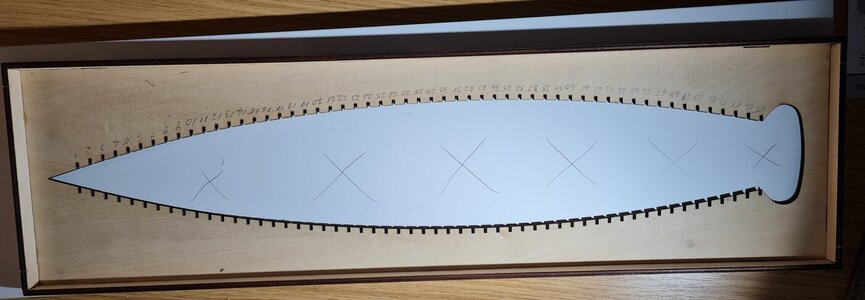
First start on this and I have an issue! How do I remove the center out of this board ?

I don't have loads of tools but imagine I might need something special to cut this out ?
Does anyone have any other thoughts on what I can use ?
View attachment 336437
Hi Jim. I used a jigsaw:
5976DA37-847E-43E9-8611-9C8667BB8B4B.jpeg
But you can drill a row of holes along both sides and then punch it out with a chisel.
Regards, Peter
 
Hi Here we go,
First start on this and I have an issue! How do I remove the center out of this board ?

I don't have loads of tools but imagine I might need something special to cut this out ?
Does anyone have any other thoughts on what I can use ?
View attachment 336437
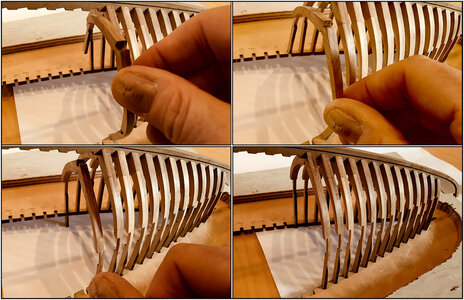
When you are later installing the frames under the keel, as in the manual page 7, you can place them by tilting them a little bit, like on the picture where I show the stages:
30DB3ED7-CC0A-415A-8692-5D08624BF049.jpeg
I had installed the extra base-plate above the jig-base. You need to have some space under the jig.
But I think there where also members who first placed all the frames and the placed the keel over them.
And others had also the extra base under the jig-base or building without the jig. They showed them mostly in the first pages of there build-logs.
Regards, Peter
 
Last edited:
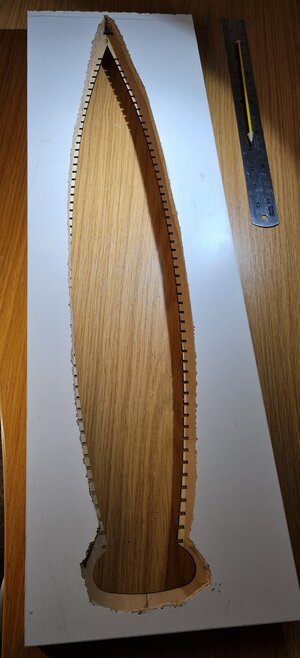
OK , i guess im the impatient type and borrowed a jig saw from my brother in law. I know this is not pretty, but im guessing i only need to clear the base so the frames can seat properly. The Slots are clear all the way around.
Cutting this it made a real mess chipping the veneer, but again will this cause me problems further down the road.

Thanks for your help.
Jim

20221025_215532.jpg
 
Hi Jimbo,
I noticed that In Peter Vooght's photos that he posted at #7 there is a lot more room around his jig and strengthening wood around.
Your look much closer I don't know if that will cause you any problems as you say.
 
OK , i guess im the impatient type and borrowed a jig saw from my brother in law. I know this is not pretty, but im guessing i only need to clear the base so the frames can seat properly. The Slots are clear all the way around.
Cutting this it made a real mess chipping the veneer, but again will this cause me problems further down the road.

Thanks for your help.
Jim

View attachment 336457
Hi Jimbo,
I noticed that In Peter Vooght's photos that he posted at #7 there is a lot more room around his jig and strengthening wood around.
Your look much closer I don't know if that will cause you any problems as you say.
If the sawn plank is under the jig, that's no problem. The frames will be placed in the slots from the other side and the top surface of the frames will be flush with the bottom of the jig.
Regards, Peter
 
Hi,
Made a start on the Frames, so i have only bade a,couple and thought i would check to see if my idea of chamfering is the same as everone else, and was i doing it right before I go any further.
Anyone know what kind of wood this is ?
Its really tough.
20221029_161113.jpg
 
It's generally accepted hereabouts that its a variety of wild pear. Tough it is altho I've learned that for preliminary frame fairing, carving or whittling works quite nicely for me. I just have to always keep in mind the grain direction tho, never try whittling _into_ a grain end.
 
It's generally accepted hereabouts that its a variety of wild pear. Tough it is altho I've learned that for preliminary frame fairing, carving or whittling works quite nicely for me. I just have to always keep in mind the grain direction tho, never try whittling _into_ a grain end.
Think I'll stick to sanding haha never thought pear could be so tough, Hard on tge old hands trying to get it down. Even resorted to a dremmel type tool, that works but it shows how hard the material is.
 
Think I'll stick to sanding haha never thought pear could be so tough, Hard on tge old hands trying to get it down. Even resorted to a dremmel type tool, that works but it shows how hard the material is.
Hey Jimbo,
For the rough shaping of the frames I used a Dremel and later on, once all frames were safely installed, I sanded the frames to final shape, prior to planking.
As far as the Dremel goes, easy does it; take your time.
Oh and pear is not only tough, but brittle as well; before you know it you're a member of the broken frame club (BFC).
I'm sure I'll be joining the BFC before this build is over ! haha thank you for your help, when you bevel the edges is it just the edge, or is it beveled back to the other edge ?
 
I'm sure I'll be joining the BFC before this build is over ! haha thank you for your help, when you bevel the edges is it just the edge, or is it beveled back to the other edge ?
The beveling is from edge to edge, or over the entire width of the frame.
Others have used different methods to achieve the required beveling; filing and sanding, scraping. Whatever you're comfortable with, as long as it gets the job done.
 
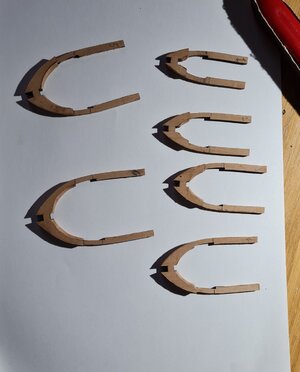
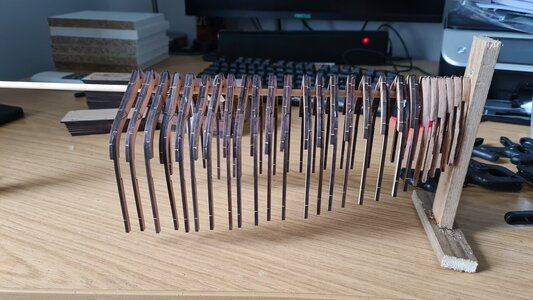
Hi, I have continued with constructing the frames No26 finished, quite a bit to go yet.
My next question is, I tried fitting a couple of the frames into the jig, but they don't fit into the slots. Do I need to sand a bit off of each to let them fit in ? and should they be a tight fit?
I think I'm about to join the BFC if I try to put force on them

I will say i am totally loving this build ( so far ) lol im sure there will be more stressful times to come though haha
20221031_121253.jpg
 
Hi, I have continued with constructing the frames No26 finished, quite a bit to go yet.
My next question is, I tried fitting a couple of the frames into the jig, but they don't fit into the slots. Do I need to sand a bit off of each to let them fit in ? and should they be a tight fit?
I think I'm about to join the BFC if I try to put force on them

I will say i am totally loving this build ( so far ) lol im sure there will be more stressful times to come though haha
View attachment 337528
It’s looking good, Jim.
And it is correct that the frames don’t fit in the slots. You have to sand them a bit. But do that in all the slots on the same side. So that the space between all the fronts / back sides are everywhere the same. The best is if the frames has a bit of resistance, but can be slide when you install them under the keel.
Regards, Peter
Thanks Peter, :) just didn't want to try and force them in :)
 
Back
Top