Build Log: Trumpeter 1:200 Scale RMS Titanic

Joined
Jun 16, 2020
Messages
39
Points
48

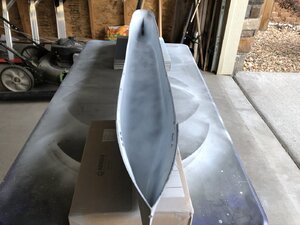
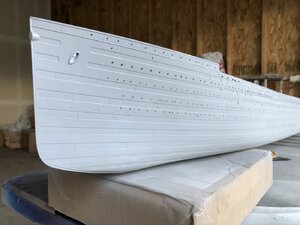
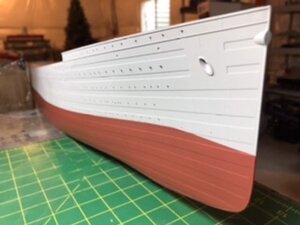
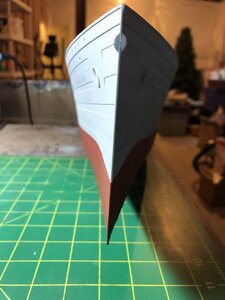
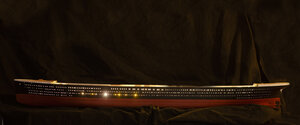
I recently purchased the 1:200 scale Trumpeter Titanic, the Detail Kit, and multiple 3D printed pieces. My first steps included drilling out portholes throughout the ship in multiple sizes with a pin vice. I then applied light blocking in the hull along with a flat white to evenly bounce the light for the portholes. Speaking of lights, although the kit comes with lights it doesn’t include hull lighting. I’ll purchase warm white LED strip lights for a majority of the lighting and accent light as appropriate.

This is my first build log post and hope it is in compliance.

A2878159-BB8E-449E-BCE4-440042648820.jpegFDE3A44B-8574-4C69-A360-EA2EFD907FE4.jpeg2A3946E0-285A-4964-8314-F133A00F9F90.jpeg
 
I recently purchased the 1:200 scale Trumpeter Titanic, the Detail Kit, and multiple 3D printed pieces. My first steps included drilling out portholes throughout the ship in multiple sizes with a pin vice. I then applied light blocking in the hull along with a flat white to evenly bounce the light for the portholes. Speaking of lights, although the kit comes with lights it doesn’t include hull lighting. I’ll purchase warm white LED strip lights for a majority of the lighting and accent light as appropriate.

This is my first build log post and hope it is in compliance.
Hallo and many thanks for starting this log - well done (the log and the preparation of the hull) - A huge work drilling all these portholes - especially if it is such a huge model - I am looking forward and will follow your log with big interest
 
Hallo and many thanks for starting this log - well done (the log and the preparation of the hull) - A huge work drilling all these portholes - especially if it is such a huge model - I am looking forward and will follow your log with big interest
Thank you Uwek. I’ll do my best to document the process.
 
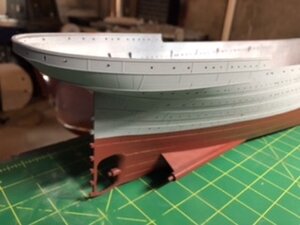
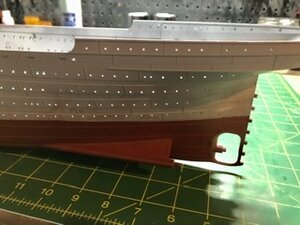
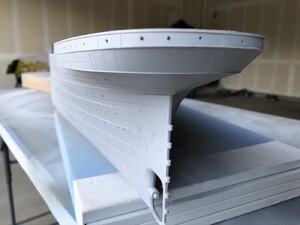
Well, the first of I’m sure several nerve racking tasks are underway. I applied the antifouling paint this afternoon. I used Tamiya Oxide Thin Primer. I may add a flat red to it but want to give this a day or so to settle in my mind’s eye. This may look good against the black I’m planning on using.

17562AA3-2FA2-4D9A-A203-81FE9D54E08E.jpeg2E35FACF-EA21-4547-B946-D26D4E6784AF.jpegC2EC13CF-7681-4B4E-BAE5-F7ABA5DFCC18.jpegB8402112-03F4-4F8D-8F87-B3CF6E6BD78D.jpeg
 
I can already tell this is going to be a well planned out build - I look forward to seeing this one come to life. May I suggest https://evandesigns.com/ for your lighting? They have a warm LED as small as pico size (I think 1mm x .5mm). You can also install a variable resistor (Potentiometer) to control brightness.

It is interesting that you chose white on the inside of the hull to reflect light. Therefore, I assume that you are going to install a few lights in the hull to "cast" a light to fully illuminate the inside?
 
Hello Donald, thank you for suggesting evandesigns for lighting. I’ll definitely take a look. You are correct, I intend to light the hull to allow the staterooms to be “occupied.” I’ll likely black some out as some passengers may be sleeping. :)
 
Nice job so far. May I kindly ask your opinion about my post on p.4 of Mahenke's build of the same kit? Thanks in advance.
 
I recently purchased the 1:200 scale Trumpeter Titanic, the Detail Kit, and multiple 3D printed pieces. My first steps included drilling out portholes throughout the ship in multiple sizes with a pin vice. I then applied light blocking in the hull along with a flat white to evenly bounce the light for the portholes. Speaking of lights, although the kit comes with lights it doesn’t include hull lighting. I’ll purchase warm white LED strip lights for a majority of the lighting and accent light as appropriate.
This is my first build log post and hope it is in compliance.
Hallo @Ccolvin
we wish you all the BEST and a HAPPY BIRTHDAY
Enjoy your day
Birthday-Cake
 
Back
Top