overview Can you get the most out of your Proxxon MF70?

Hi,
Like you I bought some end mills that are too large for the proxxon collet and am now looking at either an adaptor or the USOVO kit to replace the shaft. You mention here that using the correct sized collet reduces the run-off to acceptable levels but in a later post, after you installed the replacement shaft, you seem to say that even using the adaptor you are still getting run-offs of about 20 hundredths of a mm. Would you mind confirming the run off you get using the adaptor please.

I'm planning on using a 0.5mm end mill to make some gratings so a 0.2mm run off would not be good enough for the job and i would need the replacement shaft.

ALso did you find a way to identify the MF70 serial number, i've checked mine and can't find anything that would help me decide which of the shaft kits to buy.

Many Thanks
Brett
Hi Brett,

The serial number can be found on the front of the milling head (this is where I have my number).

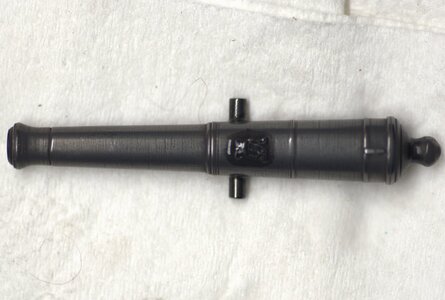
If you have a budget and can afford to buy a USOVO replacement shaft, this is the way I highly recommend it. However, the adapter Phil shows above is a decent workaround. I've seen members buy a smaller diameter adapter and threaded it to M8. This way, you just use the existing thread on the factory shaft. The deviation is very minimum and can definitely suit modeling purposes. On my USOVO shaft, I use mills 1.00mm on a 4.00mm shaft to mill a flint bore on the gun barrel.
1685664572472.jpeg

My MF70 becomes my desctop tool, I mean I don't move it in a safe place. I use it alsmost everyday and keep experementing.
 
Hello MF70 users -

Thanks again for the help on this thread. Everyone has been very helpful and friendly with my newbie questions about the MF70. Much appreciated.

FWIW I wanted to update the group on my modest increase in MF70 experience in a couple of areas:

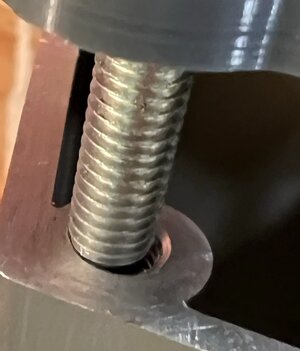
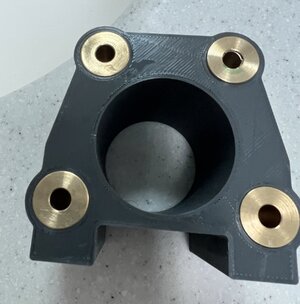
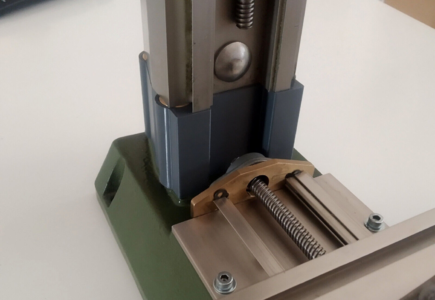
I have a new MF70 and only recently understand that the MF70 design has changed over time so not all mills are the same. I discovered a Z-axis extension plate on eBay and finally bit the bullet as I needed more Z-axis to drill precise holes in the front and rear of locomotive shells. Unfortunately, despite being a very nicely designed and executed part, the extension plate I recieved doesn't fit my mill. The distance it is off is small, but the tolerances are tight enough that it won't fit. See attached photo. The difference in MF70s over time may be common knowledge but I wasn't aware of it when I made my purchase. Fortunately, my son-in-law has the knowledge and the equipment to make me a new extension plate when he gets some time from work. I couldn't hold the purchased extension plate in my drill press and precisely open up the diameter to make the part fit so I needed another solution. Prospective buyers might want to communicate with the seller if you are considering a z-extension. He did respond to my after-the-fact questions very promptly but I'm still unclear what serial numbers / years the z-axis extension plate was designed to fit. From USOVO's excellent website I infer that "old" might be up to SN 22851 and "new" is then SN 22852 and above.

I also purchased (again from eBay) a rather expensive (for what it is) LED light. Lumen Fix F70. $$$. It works and fits well and is more professional than my kludge of using an Eveready LED headlamp strapped around the mill head. I could have messed around with LED light strips and come up with another solution but wanted to focus on modeling and not tool hacks. I considered microscope ring lights but they would have been almost as expensive as what I purchased and would need to be modified to work with the mill.

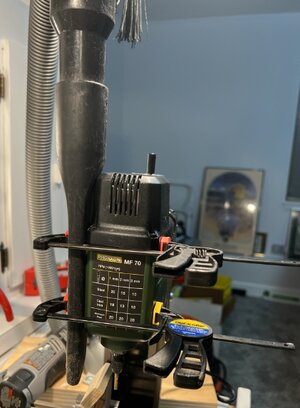
I also have a kludgey partial fix for dust collection. I have a Fein vacuum for woodworking with an autostart feature. I plug the MF70 into the vacuum switched outlet and vacuum comes on when the mill starts. Fein's are also fairly quiet. I bought a second Fein crevice tool that is dedicated to the MF70 - but given the simplicity of the attachment that really wasn't necessary. The crevice tool is attached very crudely to the mill head using 2 small Irwin QuickClamps. The clamps do the job of supporting the crevice tool and hose and allow the suction of the crevice tool to be adjusted close to the work.

I appreciate the posts here and elsewhere on the forum showing the MF70 in action. Moving from woodworking to machining (for me in wood, plastic and soft alloy) was a leap into the unknown. I appreciate seeing on this forum the blend of woodworking fences and jigs combined with metal working specific ideas. I thought I was going to need all metal holding clamps and to learn entirely new processes.

MF70 Extension Plate.jpg

MF70 Extension Plate_002.jpg
 
have a new MF70 and only recently understand that the MF70 design has changed over time so not all mills are the same. I discovered a Z-axis extension plate
Glad you have this discussion useful. Can you tell us a bit more about a Z-axis extension? What does it impove\add for the mill?
 
Glad you have this discussion useful. Can you tell us a bit more about a Z-axis extension? What does it impove\add for the mill?
Hey Jim -

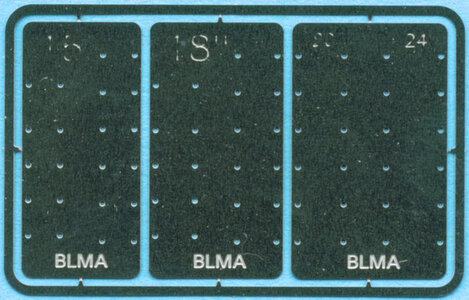
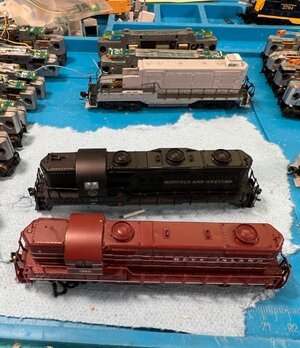
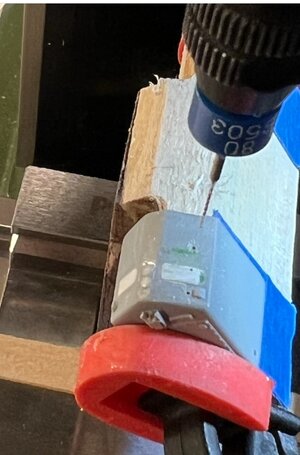
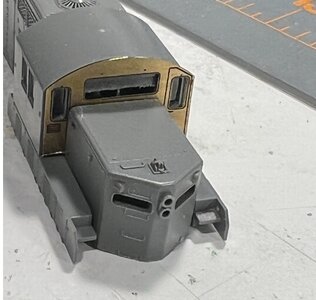
Thanks for asking. I needed the extra 50 mm of height because even though I'm in N-scale (1:160) many of the locomotives of the era I model (1979) are too long to drill on the ends (locomotive front and rear). I quickly found that I didn't have enough z-axis space with the cross table and then the vice attached to the cross table. Any jig I would use to hold the locomotive shell in a vertical direction would also eat up some height, at least above the table if not above the vice itself. I need a wooden jig to hold the plastic shell and also cant it so that the beveled front and rear ends are perpendicular to the z-axis. The extension block adds 50 MM. I had a pretty simple use case in mind; that is, I want to drill grab iron holes for 15" and 18" scale grab irons on the locomotive long hood ends (the short hoods by themselves fit fine). I have a BLMA brand PE template (see photo) which does help vs. complete freehand. I used double sided tape to hold the PE template and hand drilled with a#78 wire drill in a pin vise. The tape sorta worked, but could wiggle a bit and at 1:160 any movement is a big deal. I expect I could do a few this way, but I have several dozen models I'd like to convert to separately applied grab irons vs. molded. All the time I had my MF70 on the workbench and I was thinking - why am I not using a precision tool for this grab iron job??

My MF70 is with my son-in-law now for the z-axis modification and I'll post in a week or two when he has created the extension specific for my newer Serial Number series mill. The images you grabbed from the web look like the z-axis extension plate I purchased. Again, presumably it fits the lower, older Serial Number mills though the seller did not confirm that.

Hopefully my added explanation makes sense. Added some pictures of what I was doing on the short hood which did fit with the existing z-axis working space. (sorry about so many train photos... I do like boats! and ships! )

later

Bob

57a-Drill-Template__07708.jpg

Chop Nose Fleet.jpg

Drill Short Hood Grab Iron.jpg

Fein Attached to Mill.jpg

End Drill Short Hood GP7.jpg

Chop Nose PE Cab test fit.jpg
 
Glad you have this discussion useful. Can you tell us a bit more about a Z-axis extension? What does it impove\add for the mill?
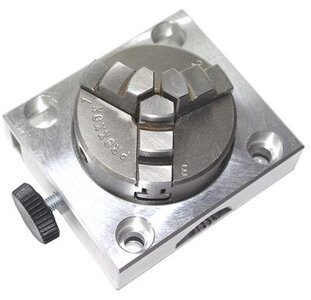
This is interesting because I haven't been able to find a inclining/rotating vice small enough to fit(eg micromart 3-5/8in). Advice and information please.
 
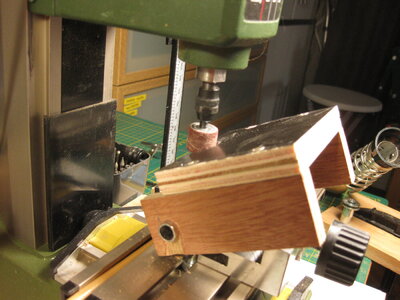
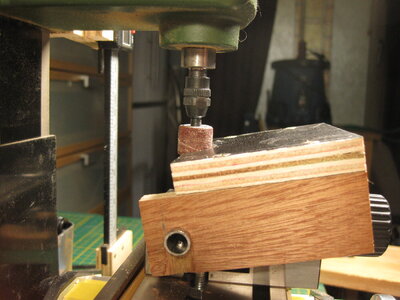
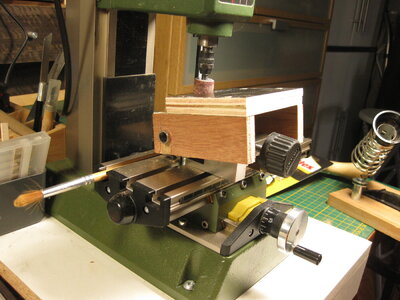
I had the problem when I use my MF70 for sanding under an angle.
Buying an angle table will cost me the drilling height and isn't cheap for a small machine.
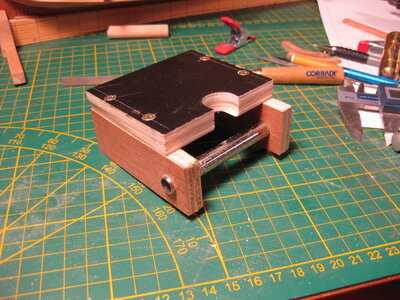
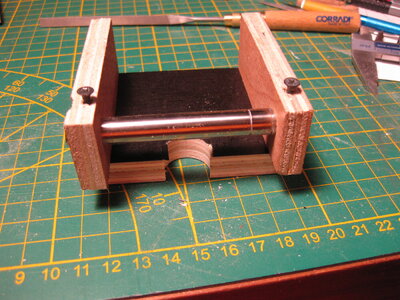
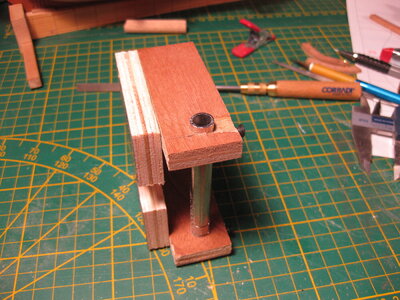
I solved this with a simple cheap (scratch) solution. I can adjust the angle with a electronic angle tool. And the steel rod gives stability and a fixed position.
A few pictures will say enough.

IMG_3638.JPGIMG_3639.JPGIMG_3640.JPGIMG_3641.JPGIMG_3642.JPGIMG_3643.JPGIMG_3644.JPG

The pieces of wood where lying around after I made my tool chest. The iron rod is of an old printer (paper feed) and a few screws. So only the cost of some energy.
 
I had the problem when I use my MF70 for sanding under an angle.
Buying an angle table will cost me the drilling height and isn't cheap for a small machine.
I solved this with a simple cheap (scratch) solution. I can adjust the angle with a electronic angle tool. And the steel rod gives stability and a fixed position.
A few pictures will say enough.

View attachment 385911View attachment 385912View attachment 385913View attachment 385914View attachment 385915View attachment 385916View attachment 385917

The pieces of wood where lying around after I made my tool chest. The iron rod is of an old printer (paper feed) and a few screws. So only the cost of some energy.
great solution, thanks that you are sharing it with us
 
I had the problem when I use my MF70 for sanding under an angle.
Buying an angle table will cost me the drilling height and isn't cheap for a small machine.
I solved this with a simple cheap (scratch) solution. I can adjust the angle with a electronic angle tool. And the steel rod gives stability and a fixed position.
A few pictures will say enough.

View attachment 385911View attachment 385912View attachment 385913View attachment 385914View attachment 385915View attachment 385916View attachment 385917

The pieces of wood where lying around after I made my tool chest. The iron rod is of an old printer (paper feed) and a few screws. So only the cost of some energy.
Great. Can you adapt it for milling and drilling?
 
If, for example, I wish to mill at 30deg from the vertical, I use something to raise one side of the piece to the approximate angle. There are vice attachments but are too high too fit under the body of the Proxxon. Adapting your invention to take clamps could work
 
If, for example, I wish to mill at 30deg from the vertical, I use something to raise one side of the piece to the approximate angle. There are vice attachments but are too high too fit under the body of the Proxxon. Adapting your invention to take clamps could work
That problem is the same. There is just a small space between the body. That is where they talk before in post #144 about.
 
Back
Top