Candelaria by Occre 1:85 - Firstbuil

I am late to the start of your build, but I'd like to say "nice start!" to where you are so far.

I noticed that the tan ropes you have shown are twisted in the wrong direction. Only the people you find on forums such as this would ever notice, but I thought it would be worthwhile to point out. I can never remember whether they are left- of right-handed twist, but you are showing "S" twist as opposed to the more normal "Z" twist rope that is used. There are a number of discussions on SOS discussing the two forms. The black ropes that you showed in your first post looks to be Z-twisted.
 
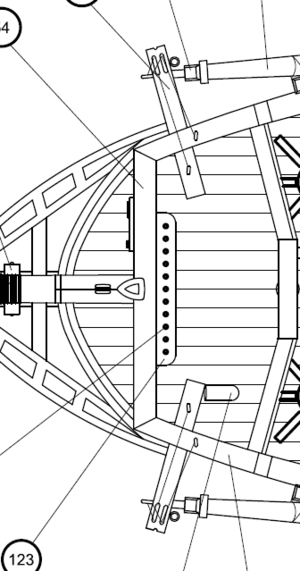
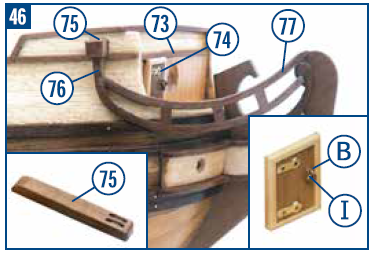
Nice catch on the anchor booms Frank. What I'm failing to see though is how the booms are made up. Step #46 states "check on plan 2 to make up the part #75". The only plan 2 I see is plan 2-B in the 1-1 schematics with no dimensions or directions on making this part. What am I missing?
 
I am late to the start of your build, but I'd like to say "nice start!" to where you are so far.

I noticed that the tan ropes you have shown are twisted in the wrong direction. Only the people you find on forums such as this would ever notice, but I thought it would be worthwhile to point out. I can never remember whether they are left- of right-handed twist, but you are showing "S" twist as opposed to the more normal "Z" twist rope that is used. There are a number of discussions on SOS discussing the two forms. The black ropes that you showed in your first post looks to be Z-twisted.

First, thank you very much!

On the rope making, doing some of my own experimentation, and following Olha Batchvarov's instruction, here's what I've found. In using Gutermann thread, it comes from the factory with a left-hand twist, so you have to do a right-hand twist on the rope when using virgin thread, or it will blow itself apart when you cut it because you've twisted it against it's natural memory, which is the tan rope you see. With the black, that is the cable-laid with 3 strands of rope, which you have to twist in the opposite direction (left-hand twist) because since the rope itself now has a right-hand twist, if you do right-hand again, you will untwist the rope. Hope that makes sense. And being a beginner in my "career", at this point I'm just after rope that looks better than the factory supplied fuzzy yarn.
 
Nice catch on the anchor booms Frank. What I'm failing to see though is how the booms are made up. Step #46 states "check on plan 2 to make up the part #75". The only plan 2 I see is plan 2-B in the 1-1 schematics with no dimensions or directions on making this part. What am I missing?

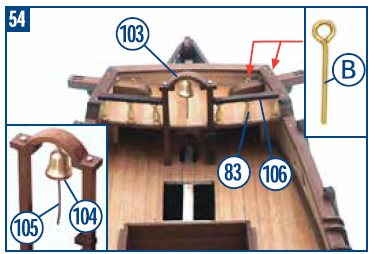
They really don't give any instruction, but if you look at 1:1 plan 2A overhead, you can measure right off the sheet for the length to cut, then look at subset photo in bottom-left of picture 46 to show what it should look like after shaping & drilling, plus the exterior support (part 76), and picture 54 shows what they look like in place.
From my model building, I have what's called "abrasive cord" which I plan on running through each pair of sheave holes to cut (saw) down into the beam to give it some depth & rounded definition for the rope to sit down in. It's fairly inexpensive on Amazon, and a small spool will last you forever.

1699819967012.png

1699820159460.png

1699820203906.png
 
Last edited:
First, thank you very much!

On the rope making, doing some of my own experimentation, and following Olha Batchvarov's instruction, here's what I've found. In using Gutermann thread, it comes from the factory with a left-hand twist, so you have to do a right-hand twist on the rope when using virgin thread, or it will blow itself apart when you cut it because you've twisted it against it's natural memory, which is the tan rope you see. With the black, that is the cable-laid with 3 strands of rope, which you have to twist in the opposite direction (left-hand twist) because since the rope itself now has a right-hand twist, if you do right-hand again, you will untwist the rope. Hope that makes sense. And being a beginner in my "career", at this point I'm just after rope that looks better than the factory supplied fuzzy yarn.

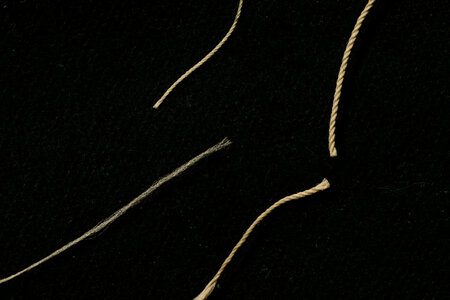
I assume since you mentioned that you got your Guttermann thread from Ben at Ropes of Scale, that it is either E121 or E151. These threads have very little direction of twist as supplied, unlike Guttermann cotton thread for instance (as well as others). Here is a picture of some rope I have made from E121. The thinnest is the E121. The next is three single stands of E121 (I call it 3x1 as opposed to measuring it and referring to it that way) which results in a total of 3 strands. The thickest shown is 3x3 which is composed of 9 total stands. I have successfully made up to 3x8 (24 stands). It is true that this polyester rope will unravel, but it can be lessened by heat treating after winding. The cut end of the 3x1 strand shown has been like this for several weeks. I cut the 3x3 strand just before taking the photo and you can see that one side of the cut has unraveled a bit while the other has held its shape. It you look at the bottom of the 3x3 rope it is evident that handling may cause unraveling. After making the rope I tie an overhand knot in each end to minimize unraveling before heat-treating.

The ropes that Ben sells using this thread are laid in the Z format. Correct me if I am wrong, but I think it is considered to be left-handed.


IMG_7752.jpg
 
I assume since you mentioned that you got your Guttermann thread from Ben at Ropes of Scale, that it is either E121 or E151. These threads have very little direction of twist as supplied, unlike Guttermann cotton thread for instance (as well as others). Here is a picture of some rope I have made from E121. The thinnest is the E121. The next is three single stands of E121 (I call it 3x1 as opposed to measuring it and referring to it that way) which results in a total of 3 strands. The thickest shown is 3x3 which is composed of 9 total stands. I have successfully made up to 3x8 (24 stands). It is true that this polyester rope will unravel, but it can be lessened by heat treating after winding. The cut end of the 3x1 strand shown has been like this for several weeks. I cut the 3x3 strand just before taking the photo and you can see that one side of the cut has unraveled a bit while the other has held its shape. It you look at the bottom of the 3x3 rope it is evident that handling may cause unraveling. After making the rope I tie an overhand knot in each end to minimize unraveling before heat-treating.

The ropes that Ben sells using this thread are laid in the Z format. Correct me if I am wrong, but I think it is considered to be left-handed.

I bought 121, 151, and 382 in black, dark brown, & tan... so 3 spools of each color in 3 different sizes. I did try to do Z twist with the threads, and it just didn't go well for me. I'm doing right around 12% to 14% reduction in thread length before performing rope twist, and finds that works very good in the rope not wanting to untwist itself when applying tension. However, as a test, when I tried Z twist instead of S twist, as soon as I cut it, almost the entire length of rope wanted to fly apart, whereas the S twist just comes apart a couple centimeters and done. What are you doing for heat treating?
Thank you for the feedback... I'm definitely still in my learning phase, so any recommendations are always welcome!!
 
Few things going on...
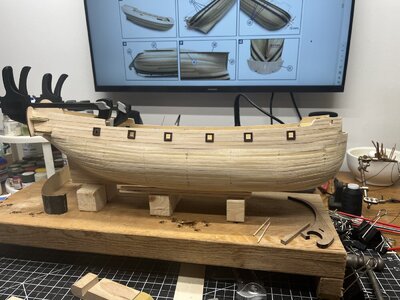
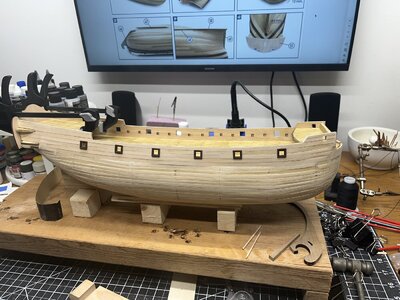
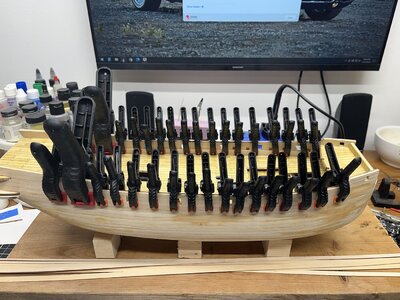
- finished 1st layer planking.
- got all the planks shaped & sanded around the bulwarks.
- got the stern shaped for the rear face of the galley... not glued, just clamped for visual.
- started main sanding to rough down some of the high spots/plank edges, and find some of my obvious low spots to start filling those & a few plank gaps.
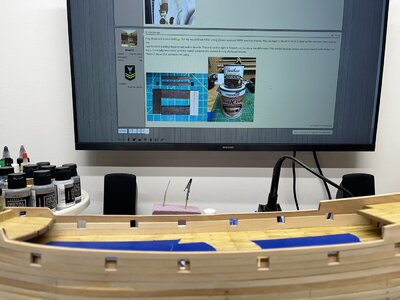
- lastly, as I discussed over in Alan's build, I decided not to cut out the scuttles/sweep ports (thank you, Uwek) right away to get a visual of how it looked without them, and determine if I wanted to leave them covered before I plank the interior of the bulwarks. Here it is test fitted with the gun port frames, and I think I like it.

IMG_1355.JPG

IMG_1356.JPG
 
Last edited:
Hi Frank. I'm about to start the finish planking layer but I'm holding off until I do further research on this critical step.
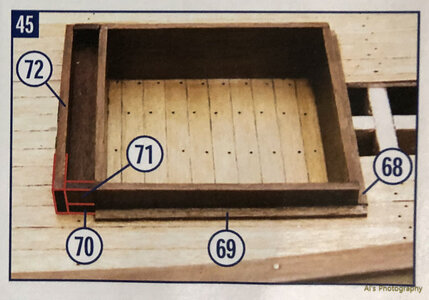
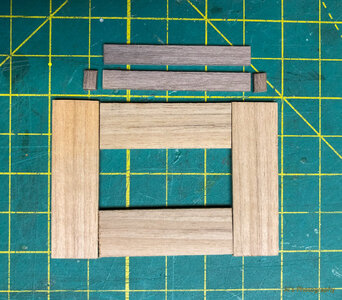
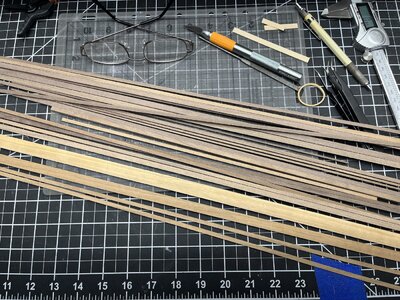
In the mean time I thought I'd frame out the mortar deck. As seen in photo #45 the frame is walnut & calls for 15mm wide boards. Looking through my stock the only board 15mm wide is this blond board that probably is walnut but was cut from the outer part of the tree. Can you check yours & see if it's as light as mine?
I'll be experimenting with walnut stain to match the other boards you see in the photo. Actually, when I look at my supply of kit walnut there is a big variance in tone. Thanks........Al.IMG_6149.jpgIMG_6148.jpg
 
Hi Frank. I'm about to start the finish planking layer but I'm holding off until I do further research on this critical step.
In the mean time I thought I'd frame out the mortar deck. As seen in photo #45 the frame is walnut & calls for 15mm wide boards. Looking through my stock the only board 15mm wide is this blond board that probably is walnut but was cut from the outer part of the tree. Can you check yours & see if it's as light as mine?
I'll be experimenting with walnut stain to match the other boards you see in the photo. Actually, when I look at my supply of kit walnut there is a big variance in tone. Thanks........Al.

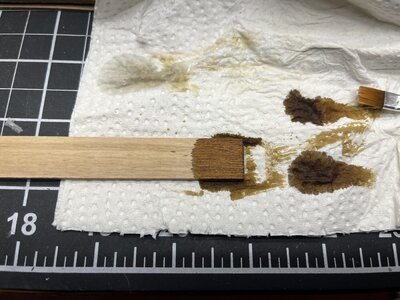
Look like mine's the same. I picked up OcCre's paint set for this model, and it has the walnut stain in it, so I will nip off a piece, test it this evening, and post a pic tomorrow after it dries.

IMG_E1367.JPG
 
I just went downstairs & slapped some dye on the end of the plank. IMO, looks pretty good... a light sanding before dye and some varnish will richen it up.

IMG_E1368.JPG
 
While I'm here, might as well update...

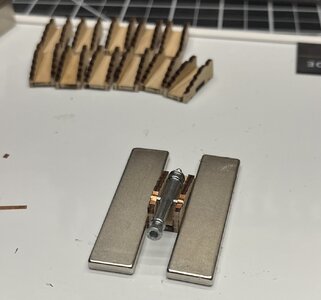
Been gluing internal bulwark planks... one at a time since it's some funky curvature. In the meantime, I started assembling gun carriages and mock-up. I took a dremel wire wheel to one of the guns, in addition to drilling out the bore for a little more depth, and it cleaned up really nice, so I'm still being wishy-washy on those.

IMG_1363.JPG


IMG_E1364.JPG
 
Last edited:
Well at least Occre is consistent with their kits although I wish they would be consistent with their wood tones. Looking at the #45 photo the walnut all looks the same or is that what the stainis for.
On another note your ship is looking very good. Also, I ordered a book, Planking Techniques for Model Ship Building by Donald Dressel. I need to alot of studying before I attempt laying down the 2nd. plank layer. At this point I'm very apprehensive about this step.

I hear ya, and thank you... I'm not afraid to say the second planking has me a bit rattled as well. I do plan on bending/fitting the top rubbing strakes (pic #36) so I can mark on the hull where bulwark stops and the walnut starts. That strake should cover the seam of the transition.

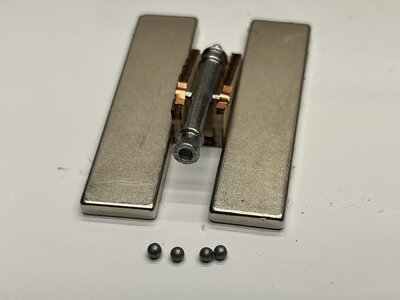
Also, measured the cannon bore, consulted a shot chart, and it just so happens that #8 shot shells match the bore almost perfectly if you're looking for some additional scale detail later.

IMG_E1369.JPG
 
So I just noticed the kit canon balls are too large & your using #8 shotgun shot? I just happen to have some here-nice tip. It looks like you bored out the canon's.
 
The balls in the kit are for the mortar rack... they're a wee bit larger. ROTF

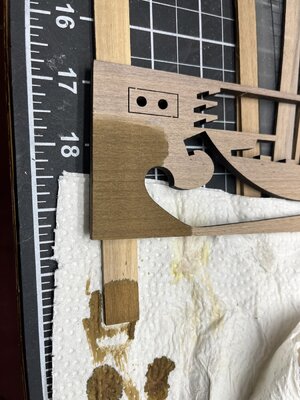
Also forgot to mention... here's a shot of the tree from the false keel. I hit that with stain about two weeks ago, but without varnish.

IMG_1370.JPG
 
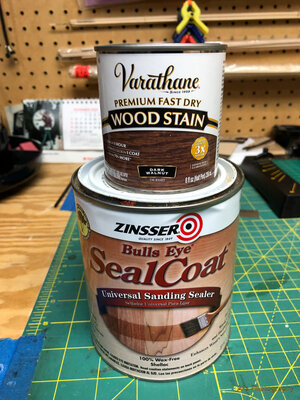
Yup, those are mortar balls:oops:. For my wood finish I'll be using Zinsser sealcoat 100% wax free shellac. You can wipe or brush it on & it dries within minutes. Very easy to use.
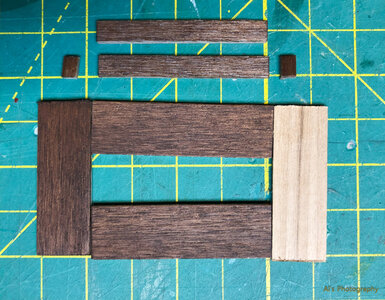
Just finished staining those blond walnut boards. The one on the right is flipped over to show the difference. The smaller boards on top are only coated with shellac-no stain. I'm totally impressed with the match between the stained & only shellaced boards.
Photo 2 shows the products I'm using.
IMG_6150.jpgIMG_6151.jpg
 
Last edited:
Yup, those are mortar balls:oops:. For my wood finish I'll be using Zinsser sealcoat 100% wax free shellac. You can wipe or brush it on & it dries within minutes. Very easy to use.
Just finished staining those blond walnut boards. The one on the right is flipped over to show the difference. The smaller boards on top are only coated with shellac-no stain. I'm totally impressed with the match between the stained & only shellaced boards.
Photo 2 shows the products I'm using.
View attachment 408343

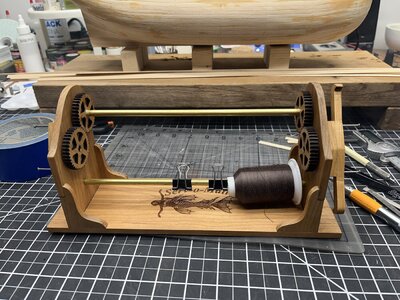
Wow… nice color difference. I used two coats of the Bulls Eye on my serving machine, and I do like the finish.

IMG_1371.jpeg

I did use the OcCre varnish on my decks, and for probably being a bulk generic, it actually came out looking really good. It’s impossible to show in pictures, but it has a very nice satin sheen to it without being glossy or reflective

At the bench, trimming out cannon ports… lol

IMG_1372.jpeg
 
Back
Top