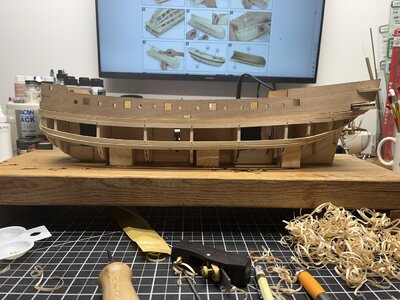
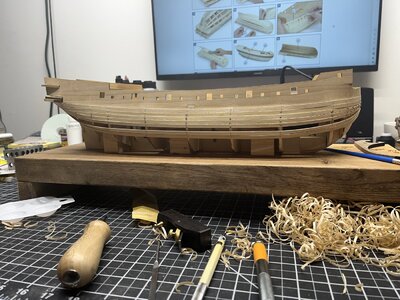
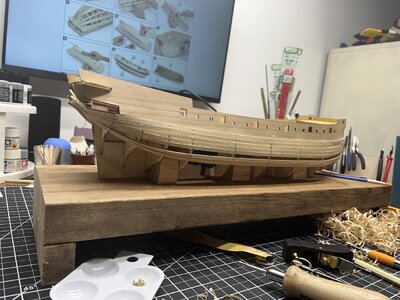
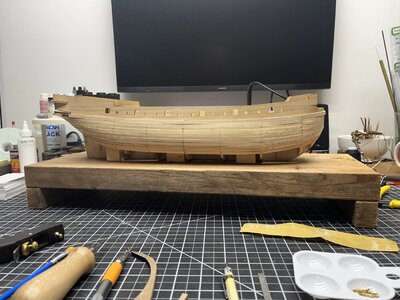
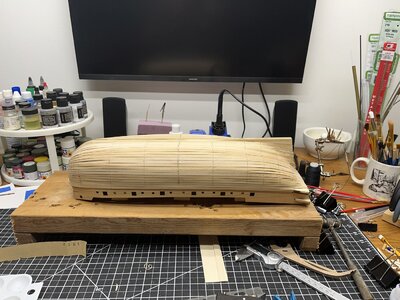
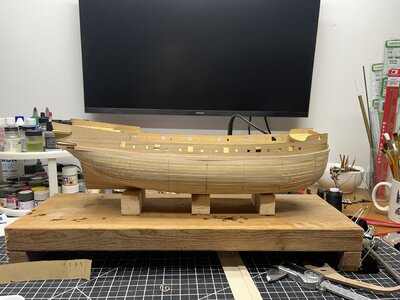
Hi Frank. Refering back to your post #73 the master plank is 3mm thick & will be flush with the 2mm planks at mid ship. At the bow & stern this will not be the case due to no notches at these points. Looks to me like the 3mm planks will need to be sanded down to be flush with their neighbors? Or is there something I'm missing .
.
-

Win a Free Custom Engraved Brass Coin!!!
As a way to introduce our brass coins to the community, we will raffle off a free coin during the month of August. Follow link ABOVE for instructions for entering.
-

PRE-ORDER SHIPS IN SCALE TODAY!
The beloved Ships in Scale Magazine is back and charting a new course for 2026!
Discover new skills, new techniques, and new inspirations in every issue.
NOTE THAT OUR FIRST ISSUE WILL BE JAN/FEB 2026
You are using an out of date browser. It may not display this or other websites correctly.
You should upgrade or use an alternative browser.
You should upgrade or use an alternative browser.
Candelaria by Occre 1:85 - Firstbuil
- Thread starter FrankW
- Start date
- Watchers 18
-
- Tags
- 1:85 la candelaria occre
Hi Frank. Refering back to your post #73 the master plank is 3mm thick & will be flush with the 2mm planks at mid ship. At the bow & stern this will not be the case due to no notches at these points. Looks to me like the 3mm planks will need to be sanded down to be flush with their neighbors? Or is there something I'm missing.
You are correct… they will be proud at the bow & stern where there are no notches, and will need to be sanded to match the 2mm planks later.
Looking real good Frank. I just got my 3mm planks attached-finally. Did you happen to notice on step 27 it says " from the bulwark pin three strakes in place". Looking at photo 29 I see at the stern it shows that the top strake abuts up to the fin or part #30. I was confused by that but I believe that top strake gets attached to the bottom of the bulwark. Maybe you decided to leave it off for now but just an observation on my part.
Looking real good Frank. I just got my 3mm planks attached-finally. Did you happen to notice on step 27 it says " from the bulwark pin three strakes in place". Looking at photo 29 I see at the stern it shows that the top strake abuts up to the fin or part #30. I was confused by that but I believe that top strake gets attached to the bottom of the bulwark. Maybe you decided to leave it off for now but just an observation on my part.
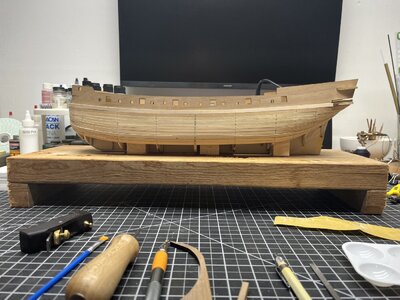
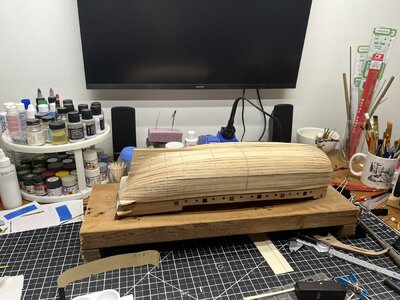
I just decided to start from the skeleton down, then do the bulwarks up. I'm pretty much hybridizing between the instructions & John A's build. I figure for the first planking, as long as the skeleton is covered, I'm good. As you can see from all of the shavings on the bench, I'm working on tapering the tips of the planks at the ends for a "radius" application, and so far I don't think it's going too bad for my first time. A couple mistakes here-and-there, but I'm learning.
Uwek posted this link that may help you out. I have a ways to go to get to your point.Decent progress, but I've hit a pause point. Both looking at how I want to close it up, and upon test fitting the rudder mount part of the false keel, I need to do a little fine tuning on the shaping of the skeleton to get the planks to lay the way I want.
View attachment 403726
View attachment 403727
https://shipsofscale.com/sosforums/attachments/planking-project-pdf.395905/
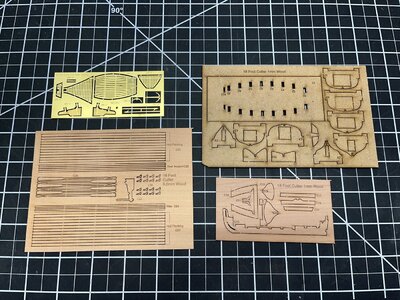
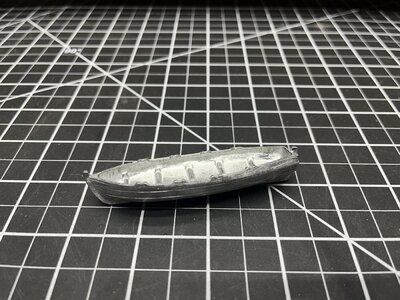
Looks like a great boat kit & I see they included the ours.And I also got a little present in the mail today... picked up Vanguard's 86mm Cutter to replace the 85mm kit beauty. Thank you to @KeithW and his Royal William build for turning me on to this little gem.
View attachment 403736
View attachment 403737
Uwek posted this link that may help you out. I have a ways to go to get to your point.
https://shipsofscale.com/sosforums/attachments/planking-project-pdf.395905/
THAT is some great information… thank you. OcCre isn’t very clear on how to finish around the keel, and John A’s method of “slap it on there it will be fine” kinda gives me an OCD tic.
Looks like a great boat kit & I see they included the ours.
Yup, it came with them. The way they worded the description made it sound like you needed to order the “optional” oars, but it was only a few $ for the extras in case I snap any.
I'm replying to this post again because I'm confused as to weather a bearding line is needed. No where in the directions or photo's does it talk about or show bearding the false keel although I understand why it's done.....I think. By bearding the false keel the 1st. planking layer will then lay flush up against the rudder mount? It makes sense to bevel/beard at the stern but why not explain that procedure in the plans. I think I'll start a post titled "bearding line" & ask the experienced ship builders.....stay tuned.Decent progress, but I've hit a pause point. Both looking at how I want to close it up, and upon test fitting the rudder mount part of the false keel, I need to do a little fine tuning on the shaping of the skeleton to get the planks to lay the way I want.
View attachment 403726
View attachment 403727
I'm replying to this post again because I'm confused as to weather a bearding line is needed. No where in the directions or photo's does it talk about or show bearding the false keel although I understand why it's done.....I think. By bearding the false keel the 1st. planking layer will then lay flush up against the rudder mount? It makes sense to bevel/beard at the stern but why not explain that procedure in the plans. I think I'll start a post titled "bearding line" & ask the experienced ship builders.....stay tuned.
And that is precisely one of the things I was thinking. If you don’t do that, in order to get the second planking to meet flush with the false keel, you have to sand completely through the first planks, possibly going through the glue and detaching them.
Obviously the planks that lay flat on the plywood aren’t a problem, but anything that curves off of a bulkhead is going to require a little additional depth and surface area.
Last edited:
I'm in the same boat as you Frank. I've been dry fitting planks for the last 3 days & was going to post photos & decided to wait until the planks are glued down. Slow but making progress with a dose of contemplation here & there. Looking forward to seeing your completed hull.Still planking, I'm just not posting pictures of every third plank I put on. I figure it's like seeing your first pair of boobs... you're proud of it, until you realize everyone's seen it before.
Very nice Frank, I'm a couple steps behind you.
A MAJOR accomplishment Frank! And then when you get to sand her...what a joy!
Good afternoon Frank. Lovely job… and now you sand, sand and more sand..Wee bit of a milestone... got her closed up! I know that's not much for most around here, but for a first-timer, it sure feels pretty good seeing it take shape. I do still have to lay a few planks up the outside of the bulwarks & trim out ports, but I think that will be a breeze now.
View attachment 406164
View attachment 406165
View attachment 406166
Very nice Frank, I'm a couple steps behind you.
A MAJOR accomplishment Frank! And then when you get to sand her...what a joy!
Thank you, gentlemen
Good afternoon Frank. Lovely job… and now you sand, sand and more sand... Cheers Grant
I had an uncle who was a professional carpenter... did custom interior work. I loved working summers in his shop when I was younger, except the sanding... Gawd, I hated the sanding.

Started planking up the bulwarks last night & trimming out the gun ports. Not really an important post, but did find a small issue that needed corrected.
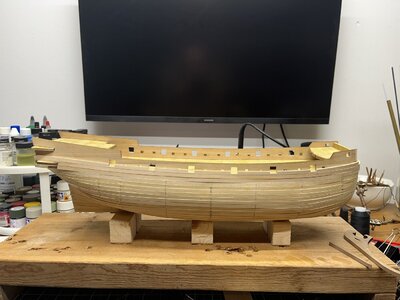
Pardon me for not knowing the official terminology, but for some reason at this point I happened to notice that the holes in the bulwark above the forecastle for what I'll call the anchor lifting beams/booms do not line up where they're supposed to. They are about 1.5mm too high, leaving a gap beneath those beams... I had to trim them down so they line up flush with the deck, and then will adjust the filing of the planking around them so you don't see the gap above. Again, something minor, but Alan, since you're at the same point I thought I'd mention it.
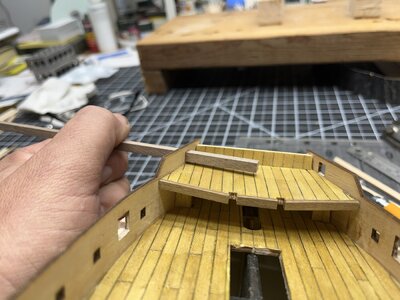
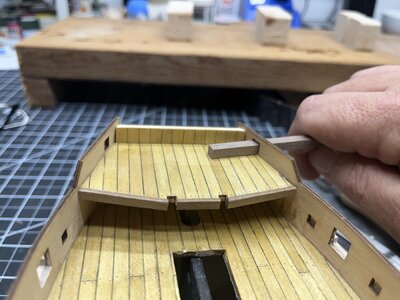

Pardon me for not knowing the official terminology, but for some reason at this point I happened to notice that the holes in the bulwark above the forecastle for what I'll call the anchor lifting beams/booms do not line up where they're supposed to. They are about 1.5mm too high, leaving a gap beneath those beams... I had to trim them down so they line up flush with the deck, and then will adjust the filing of the planking around them so you don't see the gap above. Again, something minor, but Alan, since you're at the same point I thought I'd mention it.


