
-

SUBSCRIBE TO SHIPS IN SCALE TODAY!
The beloved Ships in Scale Magazine is back and charting a new course for 2026!
Discover new skills, new techniques, and new inspirations in every issue.
NOTE THAT OUR NEXT ISSUE WILL BE July/August 2026 -

Win a Free Custom Engraved Brass Coin!!!
As a way to introduce our brass coins to the community, we will raffle off a free coin during the month of August. Follow link ABOVE for instructions for entering.
You are using an out of date browser. It may not display this or other websites correctly.
You should upgrade or use an alternative browser.
You should upgrade or use an alternative browser.
Cazador Xebec 1750 - OcCre - scale 1:60 [COMPLETED BUILD]
I agree, very clean and precise…and already embellishments on wood, etc. This promises to be a very nice ship!Great work Peter. I love your clean way of building and the walnut adds a lot of value.
")
- Joined
- Oct 11, 2021
- Messages
- 740
- Points
- 403

Hi Dean,It seems you either already finished the ship or are just posting pictures of past work? I ask because you have shown at least a months work in 2 days!
I’m just a fast worker Dean…

No, just kidding I‘m working on the second hull planking this very moment. The steps before were actually a bit more than a months work.
")
you see, with a young family and a business to run, my spare time is very limited but it helps me getting things off my mind and so I plan my building hours carefully.
- Joined
- Oct 11, 2021
- Messages
- 740
- Points
- 403
Thanks Heinrich,Great work Peter. I love your clean way of building and the walnut adds a lot of value.
really appreciate it. I do love the walnut, hopefully it will show something extra on the model.
there are actualy two types of walnut. European and American. Both are from the same family tree, but different. European walnut seems to get more and more rare and therefore you see kitmakers change their models and update older versions to “new and improved” verslons. Al walnut is replaced by cheaper types of wood. plywood, Sapelli etc. A really sad story if you ask me, but what can you do..
Pter

A simple tool is a single edge razor blade which will been to be replaced with new ones every so often. If you to to YouTube preparation and sharpening of scrapers it can be a challenge. I bought a set and have not been particularly successful in keeping the proper burr on them. Hopefully you can do better than I . . . so I keep to by stock of 100 blades, always scraping in the same direction. Rich (PT-2)I'll give it a try over the weekend. I like the idea of using a blade. Should be able to get an Xacto chisle blade to the lower deck of my current build when I progress that far.
Glenn
- Joined
- Oct 11, 2021
- Messages
- 740
- Points
- 403
Second Hull planking starts
Hello my fellow shipbuilders, today I'll show you the start of the second layer of the hull planking. It's always a "thing" for me to do and achieve. As mentioned before, I'm always a bit anxious with this process. I know what to do, but the end result is not always the wanted outcome if you're not careful. To me it makes or brakes a model ship. So, let's go.
First of all, I'll cut all the strips in fixed lengths. It's not needed, but it's to my liking. It keeps my workplace clean and organized and that's the way I like it. Preparations and measure twice before any glue gets near a strip of wood.

It's time to start. I lay the first few strakes until I hit the first "green" line on the hull. The space between the green lines consist out of 5 strakes. All should be equal to each other, but in reality it doesn't. This has to do with faults I made, or and extra a drop of glue which is blocking something etc etc. Theory vs Practicum... you'll know what I mean. In the end, it doesn't have to be perfect, it has to be good enough for me.


These lines are there to keep me on track. So, the next few strakes takes me to the next green line.


Last part....


The macro lens is killing me....almost there....

And port side is finished....next is starboard... But I have to scrape the hull smooth. There a some bumps and lumps here and there. Also some minor gaps are shown due to the splintering of the veneer. It's minor and can easily fixed with some glue / sawdust mix.


So, what do you think. Should I continue or find another hobby, you tell me?
Until next time,
Pter
Hello my fellow shipbuilders, today I'll show you the start of the second layer of the hull planking. It's always a "thing" for me to do and achieve. As mentioned before, I'm always a bit anxious with this process. I know what to do, but the end result is not always the wanted outcome if you're not careful. To me it makes or brakes a model ship. So, let's go.
First of all, I'll cut all the strips in fixed lengths. It's not needed, but it's to my liking. It keeps my workplace clean and organized and that's the way I like it. Preparations and measure twice before any glue gets near a strip of wood.
It's time to start. I lay the first few strakes until I hit the first "green" line on the hull. The space between the green lines consist out of 5 strakes. All should be equal to each other, but in reality it doesn't. This has to do with faults I made, or and extra a drop of glue which is blocking something etc etc. Theory vs Practicum... you'll know what I mean. In the end, it doesn't have to be perfect, it has to be good enough for me.
These lines are there to keep me on track. So, the next few strakes takes me to the next green line.
Last part....
The macro lens is killing me....almost there....
And port side is finished....next is starboard... But I have to scrape the hull smooth. There a some bumps and lumps here and there. Also some minor gaps are shown due to the splintering of the veneer. It's minor and can easily fixed with some glue / sawdust mix.
So, what do you think. Should I continue or find another hobby, you tell me?
Until next time,
Pter
Last edited:
You have completed a large step forward with your careful and well done planking. It looks like it will finish out very well. Rich (PT-2)Second Hull planking starts
Hello my fellow shipbuilders, today I'll show you the start of the second layer of the hull planking. It's always a "thing" for me to do and achieve. As mentioned before, I'm always a bit anxious with this process. I know what to do, but the end result is not always the wanted outcome if you're not careful. To me it makes or brakes a model ship. So, let's go.
First of all, I'll cut all the strips in fixed lengths. It's not needed, but it's to my liking. It keeps my workplace clean and organized and that's the way I like it. Preparations and measure twice before any glue gets near a strip of wood.
View attachment 268251
It's time to start. I lay the first few strakes until I hit the first "green" line on the hull. The space between the green lines consist out of 5 strakes. All should be equal to each other, but in reality it doesn't. This has to do with faults I made, or and extra a drop of glue which is blocking something etc etc. Theory vs Practicum... you'll know what I mean. In the end, it doesn't have to be perfect, it has to be good enough for me.
View attachment 268252View attachment 268253
These lines are there to keep me on track. So, the next few strakes takes me to the next green line.
View attachment 268254View attachment 268255View attachment 268256View attachment 268257View attachment 268258
Last part....
View attachment 268259View attachment 268260View attachment 268261
The macro lens is killing me....almost there....
View attachment 268262
And port side is finished....next is starboard... But I have to scrape the hull smooth. There a some bumps and lumps here and there. Also some minor gaps are shown due to the splintering of the veneer. It's minor and can easily fixed with some glue / sawdust mix.
View attachment 268263View attachment 268264View attachment 268265
So, what do you think. Should I continue or find another hobby, you tell me?
Until next time,
Pter
- Joined
- Sep 3, 2021
- Messages
- 5,209
- Points
- 738

If you want another hobby, that's for you to decide, but, as far as I'm concerned, just go ahead with the second layer planking on the starboard side!So, what do you think. Should I continue or find another hobby, you tell me?

Try www.woodcraft.com. remember, if you use a scraper, they need prepping and you'll need a burnisher as well as a good flat file.I bought them at a carpenters shop in the Netherlands. You can find them in the US as well.
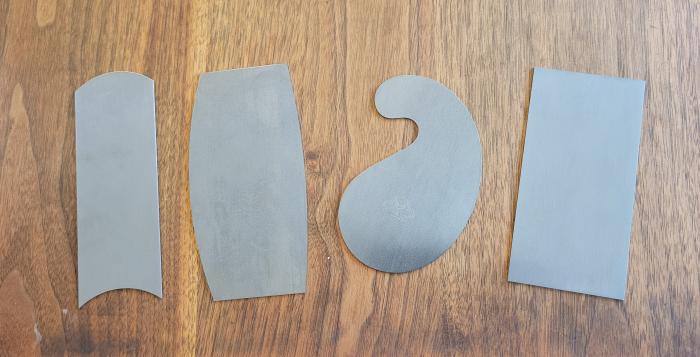
Pax Shaped Cabinet Scraper Set
Cabinet scrapers are very satisfying to use - a simple tool, generally inexpensive, that gives you an even finish when used properly. This set of 4 Paxtoolsforworkingwood.com
She looks great! It will look perfect after scraping!Second Hull planking starts
Hello my fellow shipbuilders, today I'll show you the start of the second layer of the hull planking. It's always a "thing" for me to do and achieve. As mentioned before, I'm always a bit anxious with this process. I know what to do, but the end result is not always the wanted outcome if you're not careful. To me it makes or brakes a model ship. So, let's go.
First of all, I'll cut all the strips in fixed lengths. It's not needed, but it's to my liking. It keeps my workplace clean and organized and that's the way I like it. Preparations and measure twice before any glue gets near a strip of wood.
View attachment 268251
It's time to start. I lay the first few strakes until I hit the first "green" line on the hull. The space between the green lines consist out of 5 strakes. All should be equal to each other, but in reality it doesn't. This has to do with faults I made, or and extra a drop of glue which is blocking something etc etc. Theory vs Practicum... you'll know what I mean. In the end, it doesn't have to be perfect, it has to be good enough for me.
View attachment 268252View attachment 268253
These lines are there to keep me on track. So, the next few strakes takes me to the next green line.
View attachment 268254View attachment 268255View attachment 268256View attachment 268257View attachment 268258
Last part....
View attachment 268259View attachment 268260View attachment 268261
The macro lens is killing me....almost there....
View attachment 268262
And port side is finished....next is starboard... But I have to scrape the hull smooth. There a some bumps and lumps here and there. Also some minor gaps are shown due to the splintering of the veneer. It's minor and can easily fixed with some glue / sawdust mix.
View attachment 268263View attachment 268264View attachment 268265
So, what do you think. Should I continue or find another hobby, you tell me?
Until next time,
Pter

Hello Ptèr, not "what can we do" but what do we have to do. European Walnut is not just a question of price but more of availability. It has become rare, the climate change is changing the growing conditions. Which is not only the case for walnut. I think that we model builders must finally understand that the old days of unlimited access to wood of all kinds are over. I hear more and more that more and more model makers have to limit or give up their hobby solely for cost reasons. Of course, I will continue to watch your log with great interest.Thanks Heinrich,
really appreciate it. I do love the walnut, hopefully it will show something extra on the model.
there are actualy two types of walnut. European and American. Both are from the same family tree, but different. European walnut seems to get more and more rare and therefore you see kitmakers change their models and update older versions to “new and improved” verslons. Al walnut is replaced by cheaper types of wood. plywood, Sapelli etc. A really sad story if you ask me, but what can you do..
Pter
- Joined
- Oct 11, 2021
- Messages
- 740
- Points
- 403
Hello Mash,Hello Ptèr, not "what can we do" but what do we have to do. European Walnut is not just a question of price but more of availability. It has become rare, the climate change is changing the growing conditions. Which is not only the case for walnut. I think that we model builders must finally understand that the old days of unlimited access to wood of all kinds are over. I hear more and more that more and more model makers have to limit or give up their hobby solely for cost reasons. Of course, I will continue to watch your log with great interest.
you make a fair point! Thanks for your reply and the will to read my log! Hope to see you around from time to time!
- Joined
- Oct 11, 2021
- Messages
- 740
- Points
- 403
Well “perfect” it’s not but very acceptable. I must have something to improve on for my next model you know. It keeps me busy and my wife out of my hairShe looks great! It will look perfect after scraping!


Of course, good contact is half the battleHello Ptèr, not "what can we do" but what do we have to do. European Walnut is not just a question of price but more of availability. It has become rare, the climate change is changing the growing conditions. Which is not only the case for walnut. I think that we model builders must finally understand that the old days of unlimited access to wood of all kinds are over. I hear more and more that more and more model makers have to limit or give up their hobby solely for cost reasons. Of course, I will continue to watch your log with great interest.
I also ave have the Ocre Chebeke in the works. Unfortunately, I haven't been able to do anything for a few weeks; an injury to my hand is very protracted. Research for the next model goes...Very good adjustments on the keel - this is already "scratch building" - many Thabnkjs for starting this building log and showing the details and methods of your work in photos - very interesting
- Joined
- Aug 30, 2020
- Messages
- 684
- Points
- 353
The cut straight edge of a piece of glass can do the same job, I have a piece from a broken coffee table top so it's reasonably thick.Thank you for answering my question. I need to acquire a scraper and gain some experience preparing and using it. I'm familiar with the concept of how but not experienced.
Glenn