Cazador Xebec 1750 - OcCre - scale 1:60 [COMPLETED BUILD]

Hello everybody!

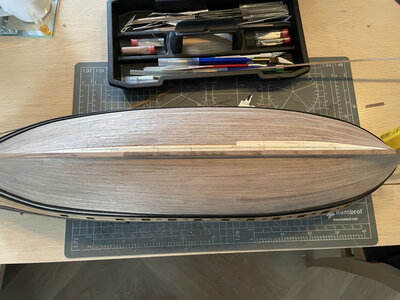
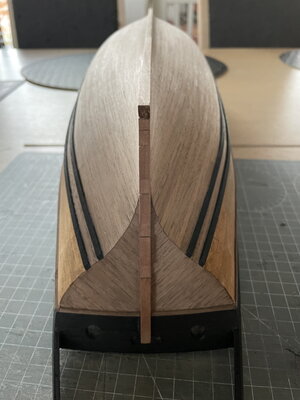
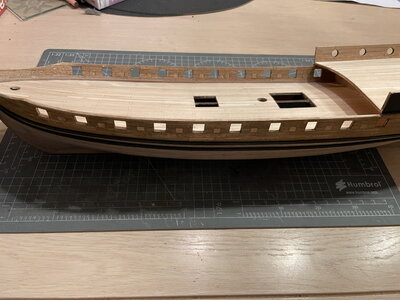
This weekend was a nice productive weekend for modeling. I had some spare hours to work on Cazador and particularly the 2nd planking on port side and I can say that the hull is finished. Planking is done. A milestone in every build I must say. :)
Let me show you the process...

I start off with the same way of working I did on SB. Because this is a veneer, I can do it this way, say SB first and later Port. Do not try this way on a single planked hull because it will warp the keel / hull.

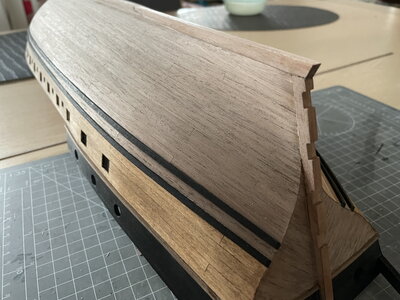
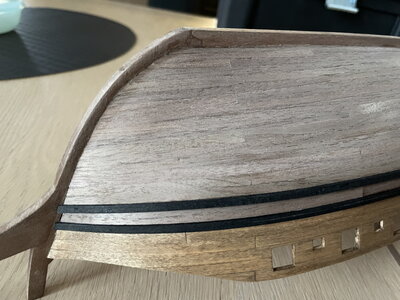
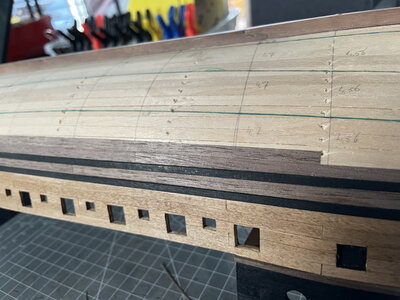
I cover the first section with veneer strips. Each and every strip has been tapered to reduce the width along the length of every strip. It's a droughting task and you need to approach it with perseverance and endure the "long" run. It's not easy so to say, and the bigger the ship, the longer this process will take.
Cazador_101.jpg

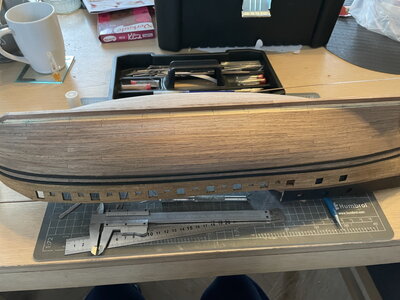
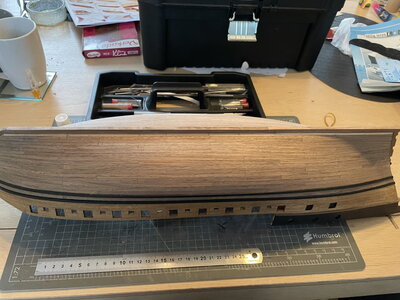
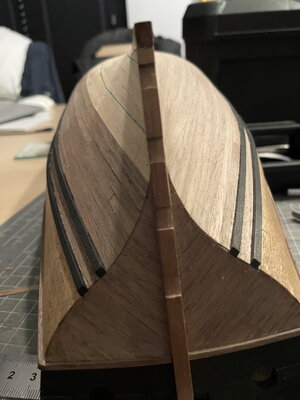
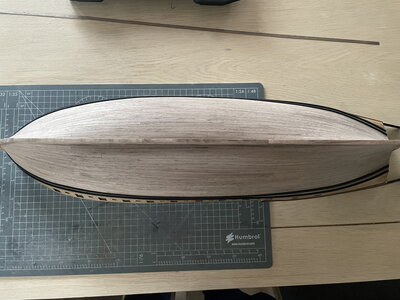
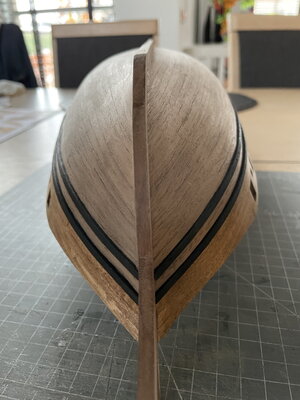
I always, and I mean always check the running of a strake after every strip of veneer. It must have a nice curved line and to do that, I look from port to stern and vise versa. See the pictures below that gives a nice view on the strakes. No lumps or bumps, just a clean line that should be parallel to the green line. Just to give you a bit of an insight of my way of work. ;)
Cazador_102.jpgCazador_103.jpg

Continue with the planking job and filling up the other sections the same way.

Cazador_104.jpg

Cazador_105.jpgCazador_106.jpgCazador_107.jpg

So the last board is the garboard plank. Again I recommend normally to place the garboard plank as the first plank due to the rabbet line. However I'm using veneer strips and these can be placed easily. So I decided to use the garboard plank as my "whisky / whiskey plank" during this process and place it at the end.

Cazador_108.jpgCazador_109.jpgCazador_110.jpgCazador_111.jpg
Cazador_112.jpg

I'm pretty pleased how it turned out. I'll just quote Forrest "It's like a box of chocolates, you never know what you're gonna get" :)
So, hull closed, in some time later I will seal and finish it with Danish Oil. One of my favorites.
I also stained the outer and inner bulwarks with an medium oak color. It give the wood a more "authentic" look. It was a first time try and I like it so far.

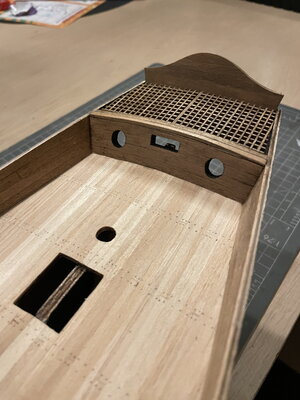
Next I did find some time to work on the stern and replace the plywood stern and made a new one from some strips of wood.

Cazador_113.jpgCazador_114.jpg

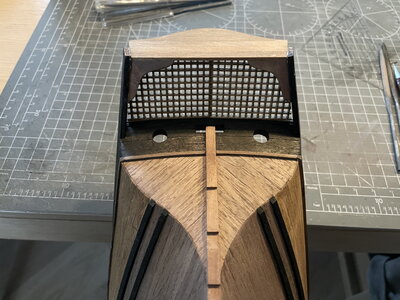
Placed it on the ship including the gratings at the stern. Bit of a thing, I wanted the gratings to curve a bit. It's not "normal" wood very dense and hard and tough to work with. However I did find a way to sand a bt of a curve into it. The top railings have to be placed later on and will cover the small gap on the side of the gratings. So no worries.

Cazador_115.jpg

If you have any questions, likes or comments, please leave a reply and I'll get back on it as soon as possible.

And that's it. Until next time,
Peter
 
You have done a superb planking job Peter! That is one of the nicest-planked hulls I have seen in a long time! I also agree with your decision to replace the stern with one made up from individual planks - it just looks so much more authentic. Lastly, you did a superb job on the gratings too - at best a "klus", but yours turned out super!
 
Hello everybody!

This weekend was a nice productive weekend for modeling. I had some spare hours to work on Cazador and particularly the 2nd planking on port side and I can say that the hull is finished. Planking is done. A milestone in every build I must say. :)
Let me show you the process...

I start off with the same way of working I did on SB. Because this is a veneer, I can do it this way, say SB first and later Port. Do not try this way on a single planked hull because it will warp the keel / hull.

I cover the first section with veneer strips. Each and every strip has been tapered to reduce the width along the length of every strip. It's a droughting task and you need to approach it with perseverance and endure the "long" run. It's not easy so to say, and the bigger the ship, the longer this process will take.

View attachment 269584

I always, and I mean always check the running of a strake after every strip of veneer. It must have a nice curved line and to do that, I look from port to stern and vise versa. See the pictures below that gives a nice view on the strakes. No lumps or bumps, just a clean line that should be parallel to the green line. Just to give you a bit of an insight of my way of work. ;)
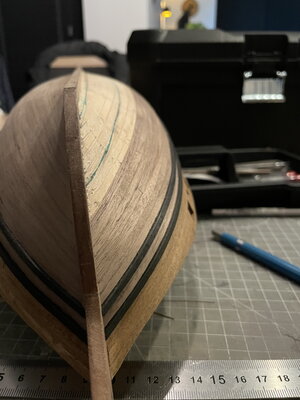
View attachment 269585View attachment 269586

Continue with the planking job and filling up the other sections the same way.
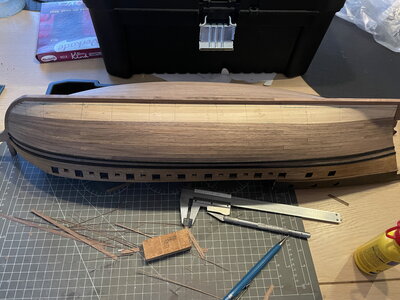
View attachment 269587

View attachment 269588View attachment 269589View attachment 269590

So the last board is the garboard plank. Again I recommend normally to place the garboard plank as the first plank due to the rabbet line. However I'm using veneer strips and these can be placed easily. So I decided to use the garboard plank as my "whisky / whiskey plank" during this process and place it at the end.
View attachment 269591View attachment 269592View attachment 269593View attachment 269594
View attachment 269595

I'm pretty pleased how it turned out. I'll just quote Forrest "It's like a box of chocolates, you never know what you're gonna get" :)
So, hull closed, in some time later I will seal and finish it with Danish Oil. One of my favorites.
I also stained the outer and inner bulwarks with an medium oak color. It give the wood a more "authentic" look. It was a first time try and I like it so far.

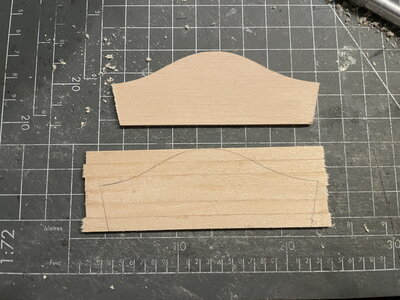
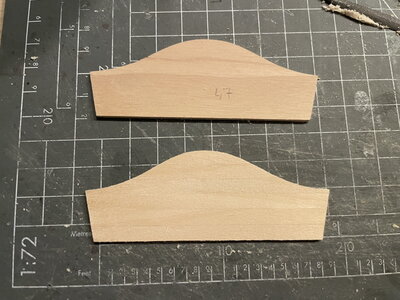
Next I did find some time to work on the stern and replace the plywood stern and made a new one from some strips of wood.
View attachment 269596View attachment 269597

Placed it on the ship including the gratings at the stern. Bit of a thing, I wanted the gratings to curve a bit. It's not "normal" wood very dense and hard and tough to work with. However I did find a way to sand a bt of a curve into it. The top railings have to be placed later on and will cover the small gap on the side of the gratings. So no worries.
View attachment 269598

If you have any questions, likes or comments, please leave a reply and I'll get back on it as soon as possible.

And that's it. Until next time,
Peter
Very nice hull planking well finished out as well as your decks. Rich (PT-2)
 
Great job on planking and the guidance on why and how you did this was good to see.

Now we can follow your example and get our ships to look as nice.

Can't wait to see final look after oiled up.
 
Great job on planking and the guidance on why and how you did this was good to see.

Now we can follow your example and get our ships to look as nice.

Can't wait to see final look after oiled up.
Thanks for the support Kurt. I do need to attach the hinges for the rudder, so I tend to oil the hull after placement of the rudder, or the glue might not hold on the oiled hull…
 
Hello my fellow shipmates,

Today a small but important update. As mentioned before I discarded the Sapele wood and also the plywood parts (laser cut).
I did some shopping at a lumberyard for some Walnut and Castello. Unfortunately original boxwood was not available, so I choose a second best and that's Castello.
To me, I like to work with boxwood for carving. But that's for later, now let us focus on the walnut.

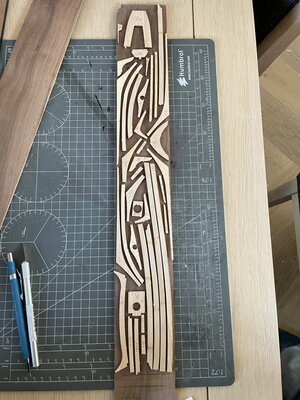
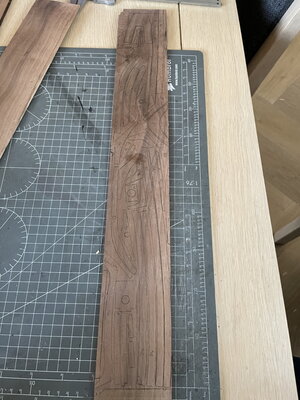
I choose a lay-out for all the plywood parts,

Cazador_067.jpg

Tracing all the parts with a pencil.

Cazador_068.jpg

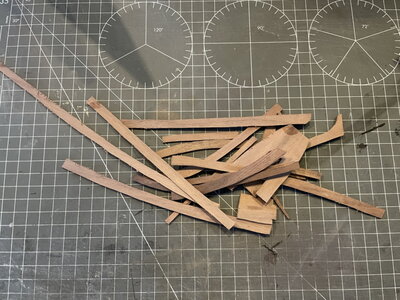
Then use a handsaw / scrollsaw which turns into a pile of wooden pieces..
Some of the parts are already cleaned up and sanded into shape. The rest you see below, are worked on later when they needed to be installed on the ship.
Working with handtools only, it takes some time...

Cazador_126.jpg

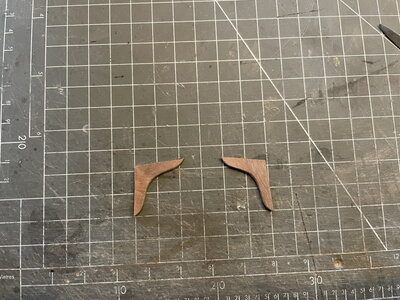
The next parts are a pair of knees that's need to be installed at the transom.

Cazador_116.jpg

Cazador_117.jpg

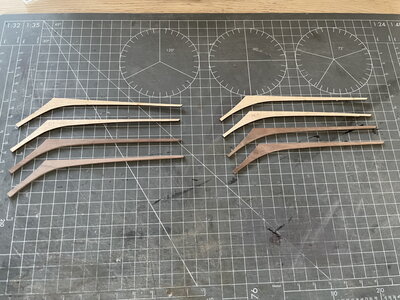
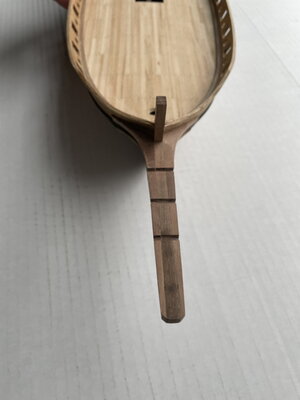
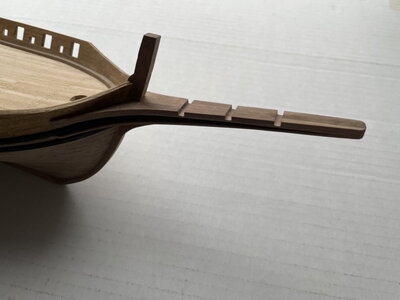
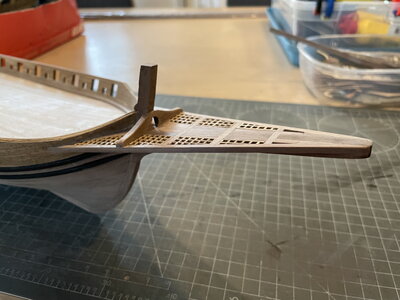
Then I moved to the prow of the ship. Plywood vs walnut parts....

Cazador_118.jpg

Installed....together it consists out of 12 individual parts. 6 per side....

Cazador_119.jpg

Cazador_120.jpg

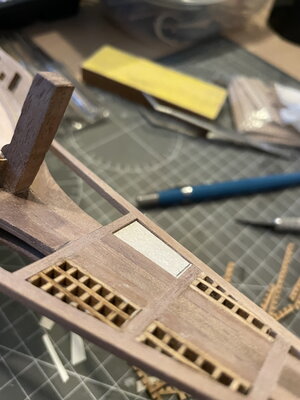
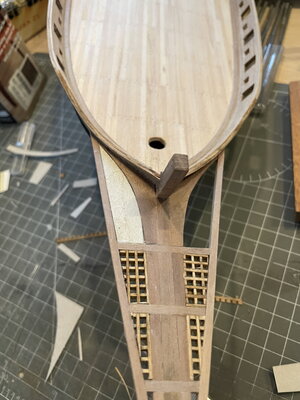
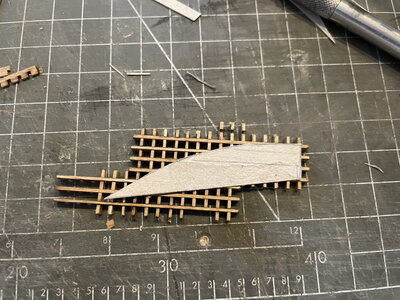
Next are the gratings. I use a simple cardboard template to trace on the gratings.

Cazador_122.jpgCazador_123.jpgCazador_124.jpg

When everything is installed....it looks something like this....

Cazador_125.jpg

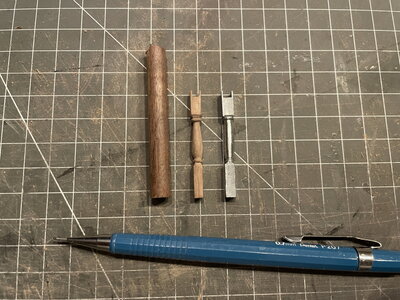
And in between I did some "mini side project" and carved a pillar out of a spare part of a walnut dowel I had left from another project. It will replace the metal part and get a nice place on the main deck. It's something for later when it needs to be installed. I'll store it for now.

Cazador_121.jpg

So, until next update, thank you for following, so long!

regards,
Peter
 
Hello my fellow shipmates,

Today a small but important update. As mentioned before I discarded the Sapele wood and also the plywood parts (laser cut).
I did some shopping at a lumberyard for some Walnut and Castello. Unfortunately original boxwood was not available, so I choose a second best and that's Castello.
To me, I like to work with boxwood for carving. But that's for later, now let us focus on the walnut.

I choose a lay-out for all the plywood parts,

View attachment 272075

Tracing all the parts with a pencil.

View attachment 272076

Then use a handsaw / scrollsaw which turns into a pile of wooden pieces..
Some of the parts are already cleaned up and sanded into shape. The rest you see below, are worked on later when they needed to be installed on the ship.
Working with handtools only, it takes some time...

View attachment 272087

The next parts are a pair of knees that's need to be installed at the transom.

View attachment 272077

View attachment 272078

Then I moved to the prow of the ship. Plywood vs walnut parts....

View attachment 272079

Installed....together it consists out of 12 individual parts. 6 per side....

View attachment 272080

View attachment 272081

Next are the gratings. I use a simple cardboard template to trace on the gratings.

View attachment 272083View attachment 272084View attachment 272085

When everything is installed....it looks something like this....

View attachment 272086

And in between I did some "mini side project" and carved a pillar out of a spare part of a walnut dowel I had left from another project. It will replace the metal part and get a nice place on the main deck. It's something for later when it needs to be installed. I'll store it for now.

View attachment 272082

So, until next update, thank you for following, so long!

regards,
Peter
Your woodworking skills are a real treat to see and appreciate the precision which which you are working. RIch (PT-2)
 
Oh wow! This is something else all together. Once again we are looking at at what seems to be the norm these days - kit bashing! :) Looking at the superb final results, the decision to replace the plywood parts was a great one - time consuming and a lot of extra work - but a great decision nonetheless!
 
Hello my fellow shipmates,

Today a small but important update. As mentioned before I discarded the Sapele wood and also the plywood parts (laser cut).
I did some shopping at a lumberyard for some Walnut and Castello. Unfortunately original boxwood was not available, so I choose a second best and that's Castello.
To me, I like to work with boxwood for carving. But that's for later, now let us focus on the walnut.

I choose a lay-out for all the plywood parts,

View attachment 272075

Tracing all the parts with a pencil.

View attachment 272076

Then use a handsaw / scrollsaw which turns into a pile of wooden pieces..
Some of the parts are already cleaned up and sanded into shape. The rest you see below, are worked on later when they needed to be installed on the ship.
Working with handtools only, it takes some time...

View attachment 272087

The next parts are a pair of knees that's need to be installed at the transom.

View attachment 272077

View attachment 272078

Then I moved to the prow of the ship. Plywood vs walnut parts....

View attachment 272079

Installed....together it consists out of 12 individual parts. 6 per side....

View attachment 272080

View attachment 272081

Next are the gratings. I use a simple cardboard template to trace on the gratings.

View attachment 272083View attachment 272084View attachment 272085

When everything is installed....it looks something like this....

View attachment 272086

And in between I did some "mini side project" and carved a pillar out of a spare part of a walnut dowel I had left from another project. It will replace the metal part and get a nice place on the main deck. It's something for later when it needs to be installed. I'll store it for now.

View attachment 272082

So, until next update, thank you for following, so long!

regards,
Peter
This brings back memories! I remember making cardboard templates to cut the gratings at the bow. I also remember how frustrating it was to then cut the gratings without breaking them!
Anyway, great job you are doing! To remake all the plywood pieces is dedication, and a good choice. I ended up painting all the ugly plywood black. Otherwise the logical choice is use a different wood! ;)
About the cardboard templates, I think I nicked that idea from you, thanks!.:p
It took me some time to make and remake all the parts on the bow. The same for all the plywood parts but I’m sure it will pay off in the end.
 
About the cardboard templates, I think I nicked that idea from you, thanks!.:p
It took me some time to make and remake all the parts on the bow. The same for all the plywood parts but I’m sure it will pay off in the end.
Awesome, glad I had something of value to offer in my build log! :p
Your extra work will definitely pay off! I’m looking forward to the end result. My only fear is it might make my ship look bad…ha ha! But I’m cheering you on because I want you to do your best, even if it’s better than what I did! ;)
Keep cheering, it works! :cool:
your Cazador is a beauty, she will never look bad, but I’ll try to make her a bit jealous. ;)
 
Hi guys,

It's time for a small update. Luckily this ship doesn't have a figurehead with an overgrown ego which has to be contained into a secure location known by man as "a cage". like with @Dean62 's ship.
Second, I've promoted the captain to admiral.......still can't use the sander in the livingroom...... :rolleyes:
It's a tough life....

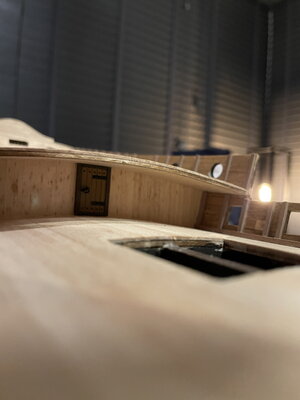
Working on the ship I placed a door which doesn't open....it's there just for show.

Cazador_143.jpg

I've closed all oar holes. I just wanted to make them smaller and relocate them, but decided not to do in this stadium. So I just closed them.
The oar holes were a bit bigger than the pre-fab lids, so I used some veneer to size them up.

Step 1: Cutting out the lids and clean them up. remove the char left by the laser and cut the veneer into small strips.

Cazador_127.jpg

Step 2: Glued the veneer on the topsides of the lids

Cazador_128.jpg

Step 3: Glued the veneer on the left and right side of the lids

Cazador_129.jpg

Step 4: Glued the veneer on the front and back of the lids

Cazador_130.jpg

Used a sanding block to shape the lids and placed them on the ship into the oar holes. It was a snug fit, not much glue was needed.

Cazador_131.jpg

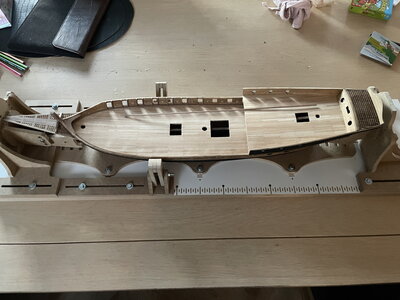
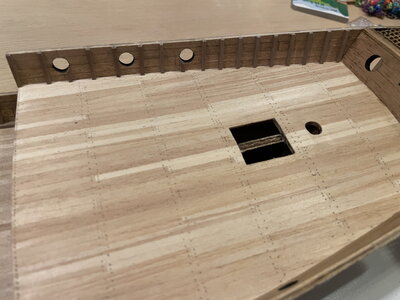
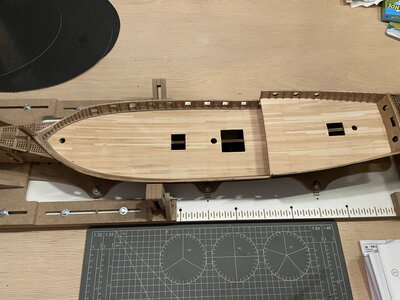
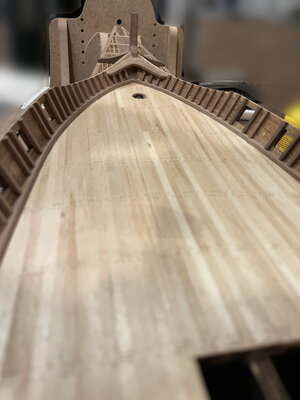
At this point in time, the ship wasn't secured in any way and just was on and off my lap, pillow, blanket or on the cutting mat. For some serious deck work that lies in front of me, the ship must be secured into a building slip.

Cazador_136.jpg

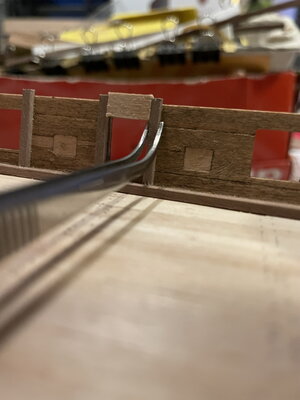
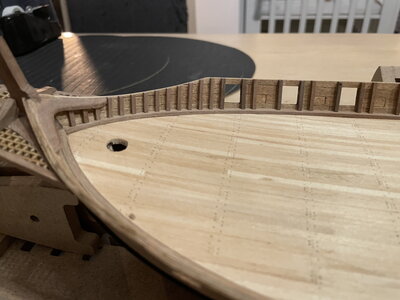
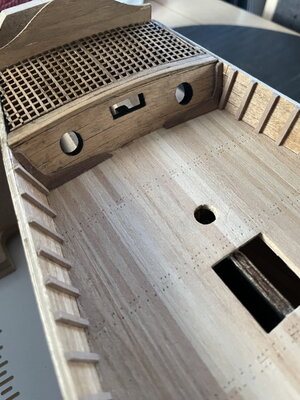
Time to reinforce the bulwarks. I used 2x2mm walnut and a piece of wood for even spacing between the portholes.

Cazador_141.jpg

Cazador_137.jpg

Cazador_138.jpg

Cazador_139.jpg

don't forget the knees....

Cazador_144.jpg

Cazador_142.jpg

until next time,
Pter
 
Last edited:
Once again, like I said on Modelbouwforum, Peter - you are doing superb work. The devil is in the details and yours pass closest scrutiny!
 
Hi guys,

It's time for a small update. Luckily this ship doesn't have a figurehead with an overgrown ego which has to be contained into a secure location known by man as "a cage". like with @Dean62 's ship.
Second, I've promoted the captain to admiral.......still can't use the sander in the livingroom...... :rolleyes:
It's a tough life....

Working on the ship I placed a door which doesn't open....it's there just for show.

View attachment 274021

I've closed all oar holes. I just wanted to make them smaller and relocate them, but decided not to do in this stadium. So I just closed them.
The oar holes were a bit bigger than the pre-fab lids, so I used some veneer to size them up.

Step 1: Cutting out the lids and clean them up. remove the char left by the laser and cut the veneer into small strips.

View attachment 274022

Step 2: Glued the veneer on the topsides of the lids

View attachment 274023

Step 3: Glued the veneer on the left and right side of the lids

View attachment 274024

Step 4: Glued the veneer on the front and back of the lids

View attachment 274025

Used a sanding block to shape the lids and placed them on the ship into the oar holes. It was a snug fit, not much glue was needed.

View attachment 274026

At this point in time, the ship wasn't secured in any way and just was on and off my lap, pillow, blanket or on the cutting mat. For some serious deck work that lies in front of me, the ship must be secured into a building slip.

View attachment 274027

Time to reinforce the bulwarks. I used 2x2mm walnut and a piece of wood for even spacing between the portholes.

View attachment 274031

View attachment 274028

View attachment 274029

View attachment 274030

don't forget the knees....

View attachment 274033

View attachment 274032

until next time,
Pter
Your precisely cut and placed work is excellently done. Rich (PT-2)
 
Back
Top