Impressive work! Was all the details from reference photos or did you freelance some?
-

Win a Free Custom Engraved Brass Coin!!!
As a way to introduce our brass coins to the community, we will raffle off a free coin during the month of August. Follow link ABOVE for instructions for entering.
-

PRE-ORDER SHIPS IN SCALE TODAY!
The beloved Ships in Scale Magazine is back and charting a new course for 2026!
Discover new skills, new techniques, and new inspirations in every issue.
NOTE THAT OUR FIRST ISSUE WILL BE JAN/FEB 2026
You are using an out of date browser. It may not display this or other websites correctly.
You should upgrade or use an alternative browser.
You should upgrade or use an alternative browser.
Construction U-552 Type VIIc Trumpeter 1:48 [ COMPLETED BUILD ]
- Thread starter Henk Liebre
- Start date
- Watchers 31
- Joined
- Oct 28, 2018
- Messages
- 760
- Points
- 403

Thank you Hans
Nice for taking the time, even more appreciation that this is your first post on the forum
I stood at your table in Duizel for a long time to admire your high-quality models
Regards
Henk Liebre
Nice for taking the time, even more appreciation that this is your first post on the forum
I stood at your table in Duizel for a long time to admire your high-quality models
Regards
Henk Liebre
- Joined
- Oct 28, 2018
- Messages
- 760
- Points
- 403

Sorry for the very late responseImpressive work! Was all the details from reference photos or did you freelance some?
Your response was forgotten for various reasons
I looked at old photos (were only black and white)
Also watched the movie Das Boot again and took pictures of it to get the right colors again to be set
Regards
Henk
Awesome job! What light kit did you use?
- Joined
- Oct 28, 2018
- Messages
- 760
- Points
- 403

thank youAwesome job! What light kit did you use?
The photo shows how small they are
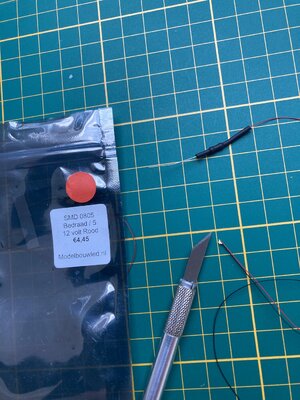
The translation on the packaging;
Led wired 12 v Red
I found while searching that there is a shop in 6 miles from my house where they sell these
I thought this was a nice solution, because I had never worked with this before
Regards
Henk
- Joined
- Oct 28, 2018
- Messages
- 760
- Points
- 403

How many light did you use and are they the nano version? Prebuilt kits for this model are expensive.thank you
The photo shows how small they are
View attachment 344432
The translation on the packaging;
Led wired 12 v Red
I found while searching that there is a shop in 6 miles from my house where they sell these
I thought this was a nice solution, because I had never worked with this before
Regards
Henk
- Joined
- Oct 28, 2018
- Messages
- 760
- Points
- 403

I used a total of 29 LEDs nano
5 x 5 lamps in the open spaces
1 x tower white in the room
1 x tower red
1 x tower green
1 red deck behind
Lamps are already attached with a resistor in the packaging
The euro price on the packaging is for the content of 5 lamps
Lamps 2 x treated with Vallejo transparent yellow
5 x 5 lamps in the open spaces
1 x tower white in the room
1 x tower red
1 x tower green
1 red deck behind
Lamps are already attached with a resistor in the packaging
The euro price on the packaging is for the content of 5 lamps
Lamps 2 x treated with Vallejo transparent yellow
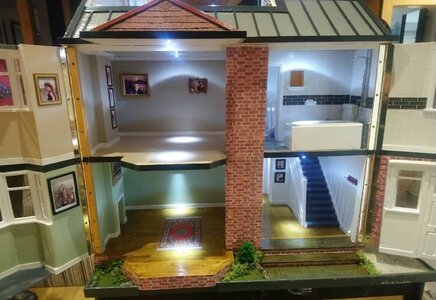
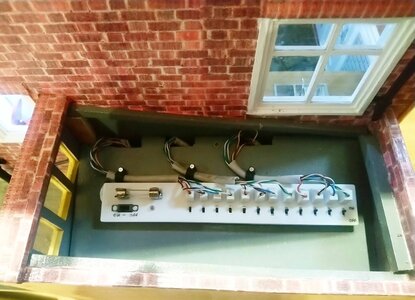
I was quite amazed at the skill of the build and use of LEDs in the engine and torpedo rooms of the sub. I finished making a Dolls House, about a month ago, for my grand daughter, which is a replica of the house they live in, in London. For this I used prewired 3mm and 5mm LEDs, size depending where they were used. Each room was wired, individually, back to a central switched and fused board, the wiring concealed under floors/ceilings, up flue stacks or channeled into the 6mm or 9mm plywood walls. Each room having its own switch and the distribution board connected to an external 9v DC transformer via a standard m/f computer type jack. Complicated, but using colour coded wire, quite straight forward. As seen in my photo, the distribution board and fuse are hidden under the garage roof. The brightness of the LEDs are in keeping with the typical modern day lighting but not controllable and not really suitable for model boats, especially historical or small scale.
Having started on a Spanish Mediterranean fishing boat and being inspired by Henk's model's lighting, I trawled (pun intended) the internet and found a UK company (also in Australia, DCCconcepts.com) who have a range of lamps and nano LEDs, and although the company does specialise in model train layout, I'm sure many of their products can be utilised for model boat building. Their detailed website describes how, through the use of resistors, in conjunction with the right lamps or LEDs, the lighting can be very well controlled to the correct atmosphere and intensity that is required. I have been able today to purchase a pack of 5, tower 2mm LEDs with resistors, from my local model shop (who unfortunately does not seem to know anything about the product).
So you can guess how my Holidays are going to pan out.
All the best for the New Year and Happy Holidays to all.
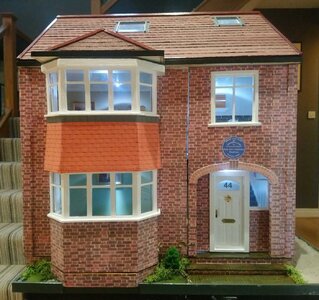
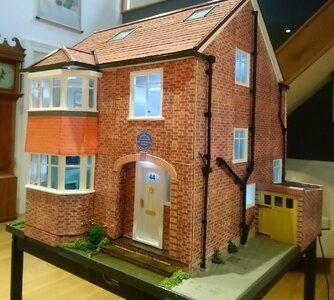
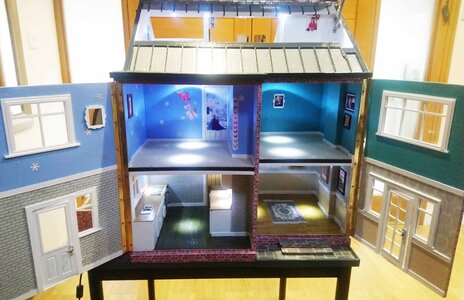


That is a beautiful doll house. Love the plaque above the door.
- Joined
- Oct 28, 2018
- Messages
- 760
- Points
- 403

Hello John,
The dollhouse looks great.
The details are very, very nicely worked out and I have looked with surprise and admiration at the interior carpet, walls and other details of the dollhouse, very special that this has become a mini replica of your own house
A special project that I am sure your granddaughter will be very happy with.
Bravo
Regards Henk
Hi Henk,
Thanks for your complimentary comments about the dolls house. I have since found out that there are "chip" LEDs, which are extremely small, ideal for the lighting on the decks and masts of ships and boats, but how to incorporated the wires into the masts I'm not sure. Unfortunately, I think I am too far advanced with the Spanish fishing boat I am building to start wiring, fitting lights and battery boxes into the model, it will have to wait my next model. For good results I think you have to plan from the start how to incorporate the looms and lights and not decide at the last minute to illuminate your model.
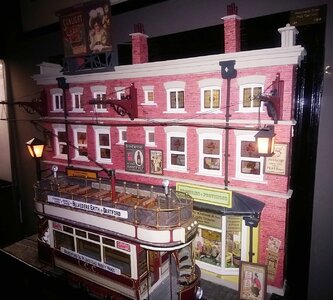
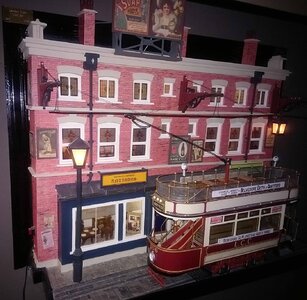
Just before CV19, I did complete a scratch built diorama for a 1902 London tram. A street scene from the East End of London "Petticoat Lane", where the shops, billboards, street light and windows are lit using 3mm and 5mm LEDs. Last summer, my wife and I then went to the National Transport museum in Crich, Derbyshire, (central England) were we had a ride on an original "LCC 106" tram which was still in working order. Amazing where our modeling hobby takes us!!??
Best wish for the New Year,
JK


Hallo @ThaioliHello Henk..
Thanks for Infos and was check out the link.
we wish you all the BEST and a HAPPY BIRTHDAY

- Joined
- Mar 25, 2023
- Messages
- 1
- Points
- 0
I am hI will post here my construction report of the Trompeter kit that I started in October 2020, and am still working on
View attachment 231611
Hallo @AIT471Have you had the Photo Etched parts from RCSUBS.CZ for awhile?
I tried but was unable to find a source.
we wish you all the BEST and a HAPPY BIRTHDAY

- Joined
- Jun 5, 2023
- Messages
- 3
- Points
- 0
Hello Henk, I’m building the same model. By reading your report on constructing the U-552, I get a lot of ideas, and it’s a great example. However, I wonder how you managed to cut the transparent part so neatly. Do I need specific tools for that?Nerves of steel for sure...Not a whole lot left of the deck...Yikes.
- Joined
- Jun 5, 2023
- Messages
- 3
- Points
- 0
Hello Henk, I’m building the same model. By reading your report on constructing the U-552, I get a lot of ideas, and it’s a great example. However, I wonder how you managed to cut the transparent part so neatly. Do I need specific tools for that?


