Cutty Sark by Sergal

You are correct as I have learned since running my mouth to Dr. Lou and you. The rings are for the pins but I thought they were for the deck seal. I also didn't count the shrouds right and so you are correct with that too. I even overlooked the pin rings on my plans. They aren't shown on every plan but they do appear on the rigging drawings with one drawing showing the fore and main mast with the rings and the other dawing showing all three masts with them. Looks to me like I have to decide how I want them and the heck with the drawings. I'll use the rings I've made on the fore and main mast an see about the mizzen mast when I get to it. Right now I'm working on the shrouds for each mast (ten on each side) and then I'll get to rigging the fore mast first. Thanks for your comment Cuttyjimr.
By the way what are you doing for the anchor chains hawser pipe? Looks like I have to drill another hole in the hull for that but I have no hawser pipe for the chain. I'm thinking maybe another piece of brass tubing for that. Pete (Norgale)
 
Last edited:
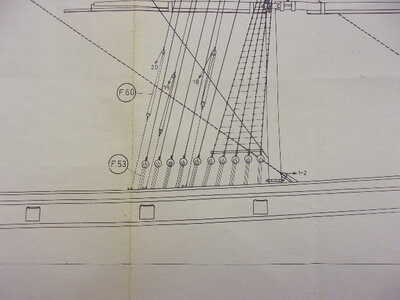
Here is a picture of my plans showing the rat lines and the shrouds for the fore mast. It doesn't seem to jibe with what you are saying. The only thing I can think of is that the CS drawings on different models are from different times during the sailing days of the ship and some changes were made as they went along. Pete

100_0032 (4).JPG
 
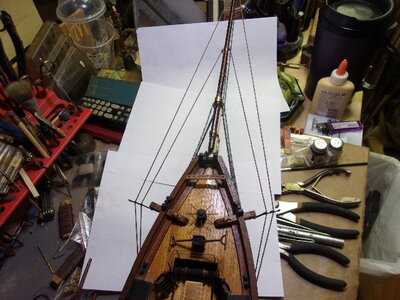
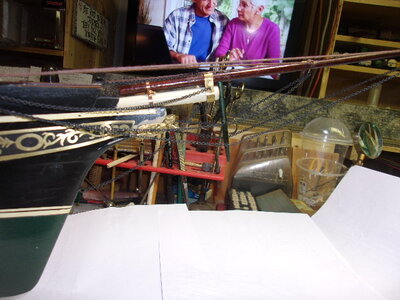
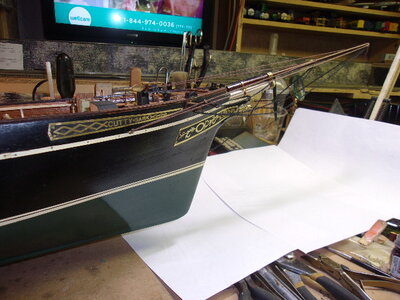
Got the chains and a couple of thick lines installed on the bow sprit. Looks good from where I sit. Also made up the twenty dead eyes for the fore and main mast and installed them in the positions provided on the insides of the ship rails.That was a lot of work. Repainted the bottom section of the fore mast and will now proceed with attaching pulleys wherever they go on the foremast. Got to start building the spars too with the foot ropes, pulleys, and stuns'ls?. Making th sails for this thing is going to be a bear. never made a sail before so this should be interesting. Need to get something to put behind the model to show the lines.Pete

100_0033 (4).JPG

100_0034 (4).JPG

100_0035 (4).JPG
 
You are correct as I have learned since running my mouth to Dr. Lou and you. The rings are for the pins but I thought they were for the deck seal. I also didn't count the shrouds right and so you are correct with that too. I even overlooked the pin rings on my plans. They aren't shown on every plan but they do appear on the rigging drawings with one drawing showing the fore and main mast with the rings and the other dawing showing all three masts with them. Looks to me like I have to decide how I want them and the heck with the drawings. I'll use the rings I've made on the fore and main mast an see about the mizzen mast when I get to it. Right now I'm working on the shrouds for each mast (ten on each side) and then I'll get to rigging the fore mast first. Thanks for your comment Cuttyjimr.
By the way what are you doing for the anchor chains hawser pipe? Looks like I have to drill another hole in the hull for that but I have no hawser pipe for the chain. I'm thinking maybe another piece of brass tubing for that. Pete (Norgale)
 
To do the anchor chain into the hawse hole I used an eye bolt fittng. I made the eye smaller with a pair of needle nose pliers and attached to end of chain. Then i drilled a small hole in the center of the hawse hole and glued the eye in there. Looks like it disappeared into the hull. Eyes I am using are Artesina Latina #8605 and Amati #8603.
Jim
 
Got the chains and a couple of thick lines installed on the bow sprit. Looks good from where I sit. Also made up the twenty dead eyes for the fore and main mast and installed them in the positions provided on the insides of the ship rails.That was a lot of work. Repainted the bottom section of the fore mast and will now proceed with attaching pulleys wherever they go on the foremast. Got to start building the spars too with the foot ropes, pulleys, and stuns'ls?. Making th sails for this thing is going to be a bear. never made a sail before so this should be interesting. Need to get something to put behind the model to show the lines.Pete

View attachment 362100

View attachment 362101

View attachment 362102
 
I ran the lanyards through the dead eyes first. There is very little room between the dead eyes and the railing, which forced me to take that route. I got deadeyes from Syren and they are grooved. Since the lower dead eye is supposed to have a metal strop, I used annealed black wire ( from hardware store ) and looped it around the lower dead eye and doubled up in a length longer than the distance from the rail to the deck. Put a spot of CA on the doubled up section, drilled hole in railng and deck, keeping the angle in mind. Inserted the doubled up wire through the railing, put on a spot of thick CA and inserted through deck. You can really only see these pieces from across the ship so my illusion seems to work. It goes without saying that you should test fit before gluing. I had to redo some dead eyes and the CA is a bummer to get loose, even with solvent remover.
 
I did a similar procedure on those dead eyes but used brass wire. Pulled two ends around the dead eye and squeezed them together where they met. I gave the wire a twist or two which tightened the wire around the eye very tight. I made the mistake of drilling the holes for the extensions directly into the deck, pushed the eye and the extension down to the deck and through the drilled hole and then bent the ext. up to the deck underneath. I also put a drop of glue on the railing where the eye sits and that should hold it. Waiting for the dark brown threads (ropes) from Zolly now so I can start the shrouds. I'm not going to try and change to the angled extension because I'll have all those tiny holes in the deck. The shrouds are all different lengths so I'll figure that out when I get to them. I can see that the lanyards will be a troublesome problem and lots of them to do too. I'll have to figure them out when I start them.
By the way I have read on here about people who have been able to buy a sail kit for this model and made by Mamoli I think. Anybody see these sails for sale anywhere? I'd sure like to find a set before I start trying to make the darned things. (Cutty Sark 1:78)
 
Last edited:
Shrouds should be black. They are wire rope in actuality. To rig start on Starboard side and loop first pair around mast. Repeat on port. Next pair starboard, then port. Last pair just looped around mast. Five per side.

Jim
 
Cuttyjimr that's exactly how I planned to rig the mast shrouds. Been studying that while waiting for the shroud material. Meantime I read in a nautical book about the size and number of strands that the shrouds are mad from and they require four strands instead of three but there is no mention of the central core for that sized rope. I'm looking into a rope walk so I can make the size ropes I want depending on the application. As for sails I've built several ships with no sails and with sails and I prefer the sails best. By angling the sails to port or starboard one side will show the expanse of sail which I really like and the other side will show most of the rigging which I also like. Kinda the best of both worlds. And yes the sails do require a lot more rigging which I am learning but by angling them to one side the ship takes up less space on a shelf. Did you know that with a Port angle the Port lines are tighter and the Stbd lines are more slack? Stbd lines must act as a shock absorber for when the wind hits the sail. Won't snap against itself or other rigging but will billow out smartly under good control. The book I'm referring to was written in 1808 by Darcy Lever and revised in 1858 by Blunt for American ships. "A Young Sea Officers Sheet Anchor" is published by Algrove Publishing if you want to look it up. Really a great book with tons of illustrations fr rigging, knots, tying things off and even ship handeling.
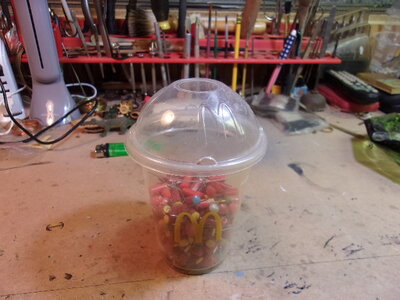
 
Mean time here's a little tip. If your tired of sticking your fingers with the pins we all use to hold stuff together while the glue dries this is something I liked and it keeps from sticking yourself when getting the pins out of a container. First you go to McDonald's and buy a small milkshake. It comes in a container that has a large hole at the top where the cute little girl squirts the whipped cream onto the milk shake. They used to put a cherry on top of all that but they don't do that anymore for some reason. Anyway you drink the milk shake which is good, rinse out the cap and the cup and dry and then put all your pins in the cup and snap the lid on over that. Now when you want a pin you just shake a few out through the hole in the top and there you are. No stuck fingers anywhere. I really like that.

100_0064.JPG
 
And now something nice to look at. My Amaryllis came in very well this year. Yes it does have to do with ships. Back in the sixties a ship ran aground in a strong storm on Riviera Beach in Florida. It got stuck so bad they had to cut it up into small pieces and haul it away in big dump trucks. Took years before it was all gone. The name of the ship was the "Amaryllis".:cool:

100_0063.JPG
 
Last edited:
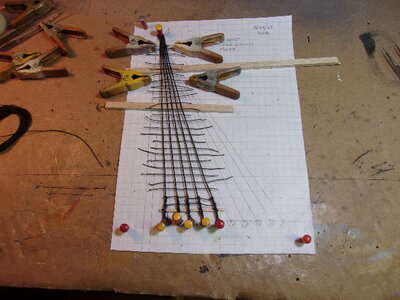
I finally have done some actual shroud work on the CS by laying out a plan for it on graph paper. I'm speaking of the lower foremast shrouds and the rat lines. Did the foremast port side first for no particular reason and measured off the length of the shrouds allowing some material at the top for the loop around the mast. I then pinched the shrouds around the dead eyes using a bit of glue to hold them in place and a small clamp. The end of the shroud was clipped to an appropriate length and also glued to itself going back up towards the top of the mast. I then tied the board across the shrouds to keep them from turning and tangling the lanyard and then started the rat lines. Tying those little tiny ratfink lines to each shroud and keeping them level and properly spaced wore me out so after two rat lines were tied for several hours work I decided to speed it up a bit and save what sight I have left as well as my remaining sanity. So using the same plan I started gluing the rest of the rat lines in place. I used a couple thick lengths of wood under the shrouds to keep the glue off the paper plan and the rest was completed a lot faster. I think the first two rat lines that I tied look ok and better than the glued lines but gluing is the best way to go for me. I was very careful to not leave any big blobs of glue on the lines and for the very few people who will ever see this model I think it will look just fine. I usually use TightBond lll glue but it's pretty thick so I used Elmers white glue instead. It's a bit thinner and penetrates the line better and holds very well. Now I'll snip off the rat lines even with the shrouds and install this first set of shrouds on the ship model to see how it turns out. Then it's on to the other five lower shrouds and then the six mid shrouds and finally the tops. Incidentally I did get some black dye and dyed the tan shroud lines black and that worked very well.

100_0068.JPG
 
Last edited:
I had to take a break from the CS because of the different instructions and the varying designs that this ship seems to be made. Went and worked on my trains for awhile for a change of pace and actually got 18 cars and an engine with all the same couplers to run all at one time. Amazing. That's the longest train I've ever run on any of my layouts over the years. It pays to get all the same couplers. Now I'm back to the Cutty and finding more qustions than answers for the rigging. I'll post a couple pictures in a bit.
 
I would like to ask if anyone has used the Mantua sails for the Cutty Sark in 1:78scale? Did you get all the sails needed for this ship and were they the right size for this scale? I'd like to order them so they'll be here when I'm ready to start using them but not if they won't fit right. Pete
 
I would like to ask if anyone has used the Mantua sails for the Cutty Sark in 1:78scale? Did you get all the sails needed for this ship and were they the right size for this scale? I'd like to order them so they'll be here when I'm ready to start using them but not if they won't fit right. Pete
Maybe check out before the possibilities for a sail set via HIS model - @BRadek is a member of our forum

 
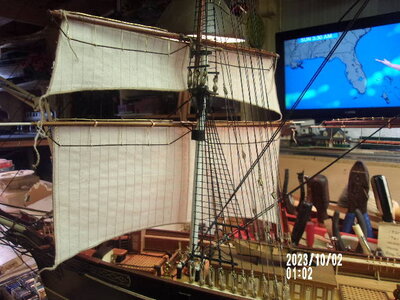
I went ahead and bought my sails from Mantua ($120 including shipping) since they also produced the kit I'm building and they arrived a couple days ago. Today I had time to work on the CS and to study the sails and instructions and decided that I WOULD proceed with installing them on the model. The sails are very well made and the complete set is there but not the stud sails. The addition of the stud sails makes the model very wide so it's just as well I didn't get them although they would enhance the model a lot. You could check with Mantua to see if they do make them and order them if you like. I have to say that the sails are really good looking and appear to be accurate in all details. The instructions are very well done and easy to follow and there is a list of the extra line and pullies etc. that you'll need to hang and rig them. Personally I see a beautiful ship with full, set sails in my future. The process of applying the sails and rigging will be simple enough but rather repetitious to say the least. It will be a lot of extra work on the ship but worth it to me. As to the sails hiding the rigging and not showing the intricacies of all our rigging work I tend to disagree. After all the rigging is there to hang the sails on so why not the sails? In my case I have built other plastic models of the Cutty Sark and the Thermopylae and found that by slanting the sails like the ship was on a tack, you can see the sails very well on one side of the model and all the rigging quit clearly on the other side. Slanting the sails will make the model narrower so it needs a smaller space to display it. This is my intention with the Cutty. If you are trying to decide on sails or not, DO IT. You won't be disappointed.
Several months ago I offered the advice of working on the rigging from the inside out. That worked ok for me on the plastic models at a smaller scale but it's not working on the wood models. With all the extra lines on a large scale wood model it seems to be going better to start at the front and do one mast at a time, doing the standing rigging first. That way you will not have lines behind (stern) to snag and maybe break something as you work from the bow toward the stern. The sail instructions also have a diagram of where all the lines attach to the deck that coincide with the plans of the model. This way anything you do that's extra with the sails will jibe with the lines from the model instructions. That's an important point to consider and very thoughtful of Mantua. Now I have to figure out how to make the sails look like they are full of wind. Hope I live long enough.

100_0097.JPG
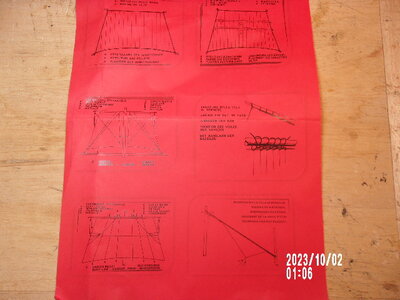
Sail instruction show what lines are used with the sails separately. There are several lines on each sail.
100_0096.JPG
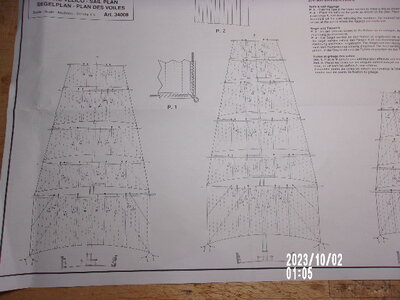
This shows the sails for each mast as they go on the model.
100_0095.JPG
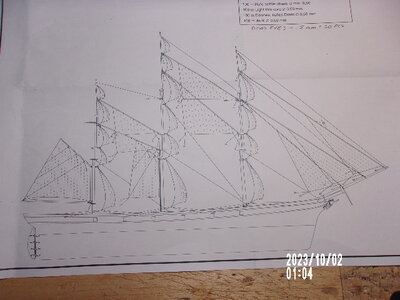
Side view of jib sails and the other fore and aft sails.

100_0091.JPG
With the sails slanted the model is thinner across the beam and shows off the rigging too. Seems better to do the runnig rigging on this mast and then the succeeding masts so you won't have a lot of lines in your way while you build.
 
Last edited:
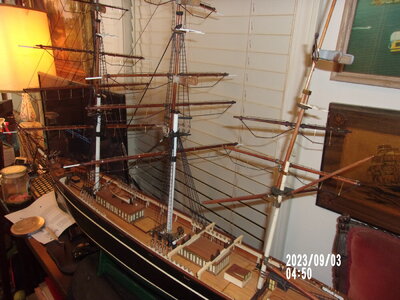
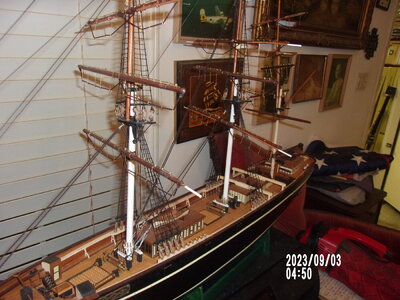
Here are a couple more pics of the masts and spars. Lots of tedious work here but it's coming along well for now. However the ships captain determines how the rigging should be hung so if there are any unusual assemblies here remember the two golden rules; Rule one- The Captain is always right. Rule two- when the Captain is wrong, rule one applies. I don't know who said that but I like it. Ha!

100_0086.JPG

100_0087.JPG
 
The scale of this ship model is 1:78. Now, if a standing rigging stay for the main mast is 3 inches in diameter what size rope do I use on the model? Can you show me how you figure it? Trying to see if my rigging is anywhere near the right size for the scale. I got a rope walk to make the right sized ropes instead of guessing at the size. I will add that I can't find anywhere where the sizes are stated as every ship was different. Seems like they used whatever they had that was good enough. It's all very confusing.
 
Back
Top