Photo etching, also known as photo chemical machining or chemical etching, is a manufacturing process that uses corrosive chemicals and photoresist masking to create thin metal parts. The history of photo etching can be traced back to the early 20th century when it was used to create intricate designs on jewelry and decorative items. It became a game-changing manufacturing technique in the middle of the century, and modern chemical etching began with the invention of photoresists in the 1950s.
Photoetched parts are tiny metal parts that are used to add detail to models. Using a chemical process, they are made by etching a metal sheet, such as brass, stainless steel, or titanium. The process involves covering a light-sensitive emulsion with a photographic negative and then washing away the unexposed areas. The remaining areas are then eaten away by acid, resulting in the desired design. Photoetched parts are commonly used in model making and miniature engineering and are particularly useful for adding fine details that are difficult to produce with plastic. Some examples of their use include:
- Military modeling: Adding details like grilles, hinges, latches, and handrails
- Building Gundams: Adding surface details and covering locating holes
- Model ships: Photoetched parts are often used for model ships due to their extremely small scale
- Cockpit detailing: Photoetched parts are ideal for cockpit detailing and other fine details that are too small for injection or resin molding
- Light blocks: Photoetched parts can be used as light blocks in small or tight areas of a model that will be lit
Greetings, folks, you guessed it right. Today's review of the Photoetched parts. I have just some of the PE parts from DryDoc in my possession, which I will review in the following posts. But... if for some reason, you didn't read my previous reviews on mini-kits, please follow the links below. I would be curious to know your opinion, hence, you may already bought and used them in the past.
Today's topic for the review is the Gunport hinges. The gunports were sealed by the gunport lids. In the 15th Century, these were simple timber boards, which were placed over the ports on the inside, and secured with a locking bar. The invention of the gunport lid suspended on hinges and closed with lanyard dates from the early 16th Century and is scribed to a French master shipwright. As said earlier the gunport lids are suspended on hinges.
The hinges' designs and shapes have varied over centuries from the origin they were made. While some of them were fancy, others were just simple designs technologically they built the same and suited only one purpose - to suspend the port lid.
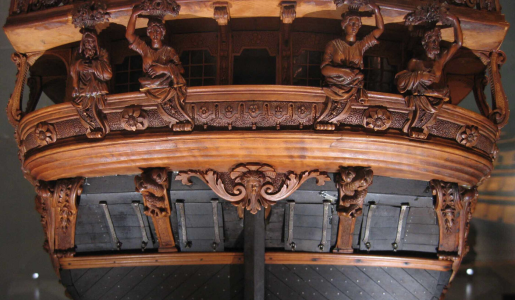

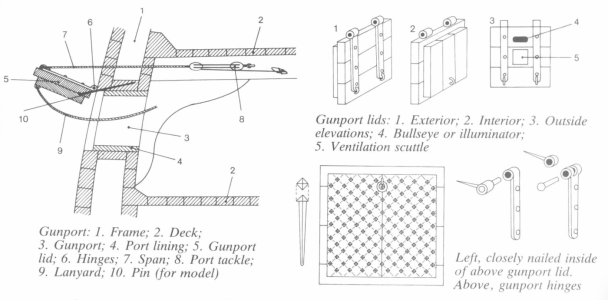
Gun port in detail with parts and layout

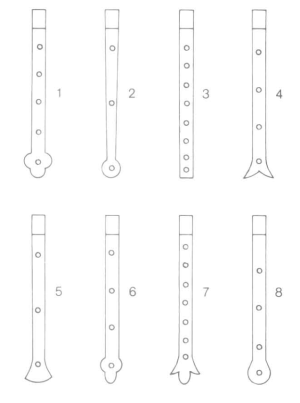

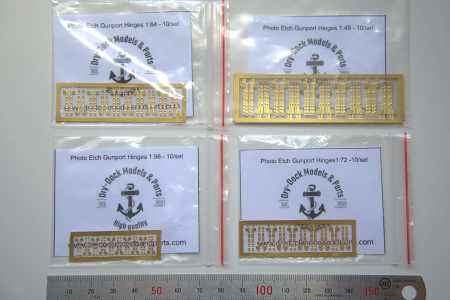
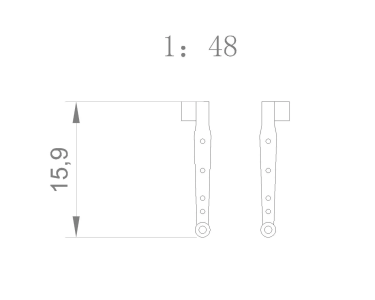
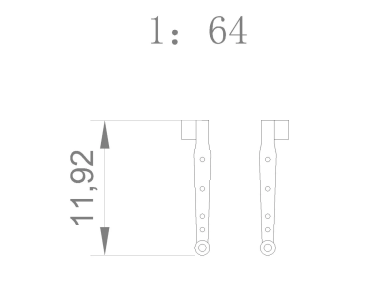
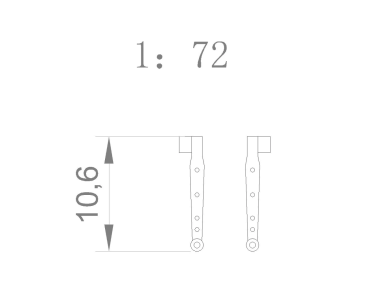
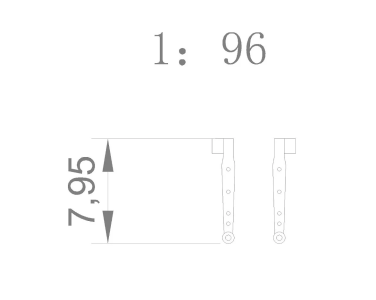
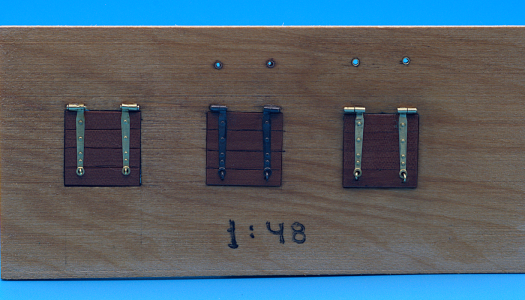
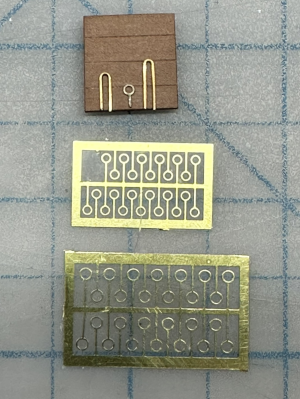
DryDoc's hinges were suitable based on British design from the 18th century. They come on the fret by 5 pairs (total 10) and will make hinges for 5 gunport lids (2 for each port). As with most PE parts, from DryDoc, the hinges are designed for 4 common scales: 1:48, 1:64, 1:72, and 1:96
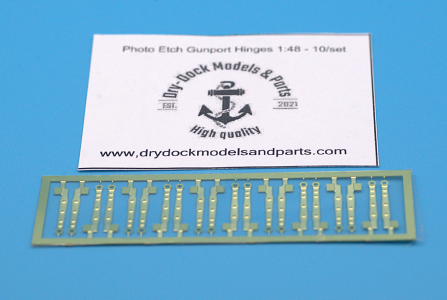
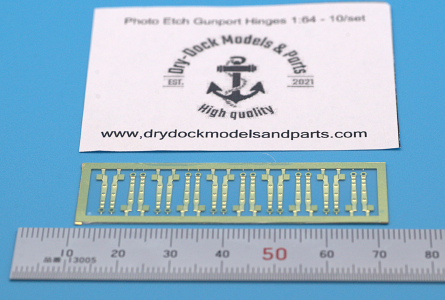
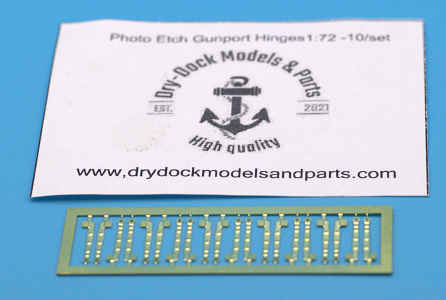
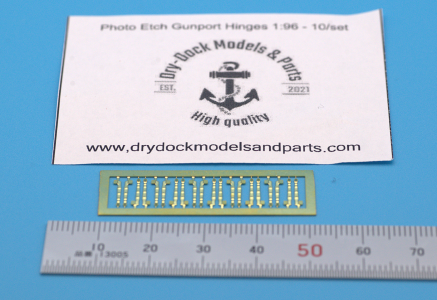
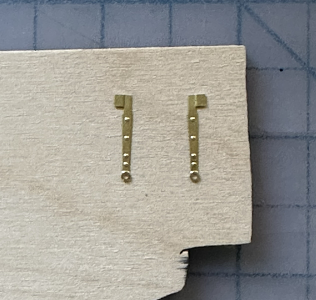
Macro images to get an impression of quality. I like the embossed bolt imitation: no need to drill holes for the bolts.

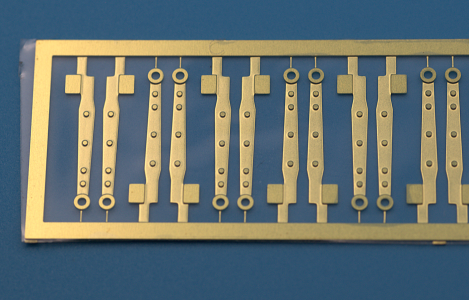
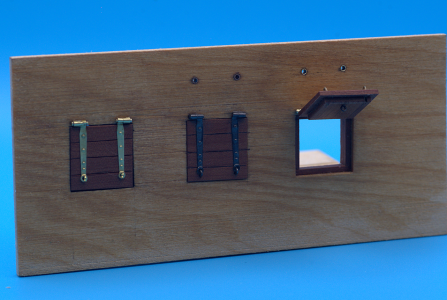
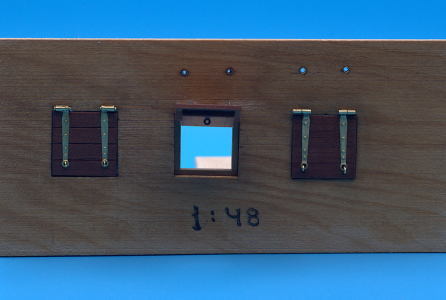
The hinges are designed for 'static' mode, other words, not function for opening/closing. You will have to decide how you will show your gun port: closed, opened. Now, let's see what you can do with those hinges. Please note, that all the hinges are designed the same, so no need to show all the scales. However, I will be using different scales interchangeably in my tutorial.
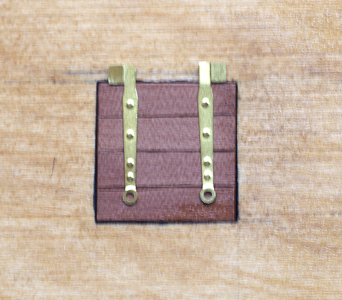
The first step is to remove the pair from the fret, and clean flushing. As you can see, even with embossed bolts, the hinge itself looks 'flat'.
With just a simple trick, I will make it look much better, IMHO. First, I anneal, do not anneal the entire part as it will get soft, only the top portion. Once the part cooled, place it on your cutting mat (doesn't have to be Green ), the next task is to find the suitable diameter drillbit and place it on top of the hinge. Make sure the drillbit is parallel to the cutting mat surface and 90 degrees to the entire hinge. (see images below). Lightly tap on the drillbit, the part should bent a bit, keep an eye on the drillbit position. make sure it is parallel to the matt and tap again. Continue until satisfied with the shape.


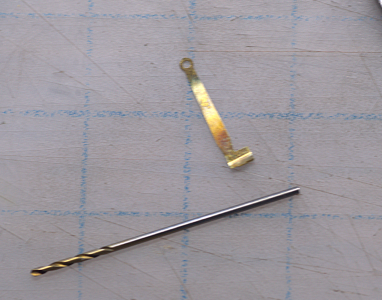
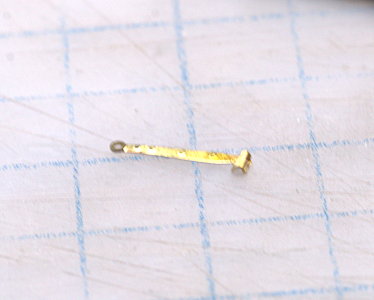
This is the simplest method to bend, IMHO, and doesn't require special tooling, but... if you plan to make hinges for 100+ ports, I suggest making a simple jig similar to the one on the next image. The results will be uniform for all of your hinges.
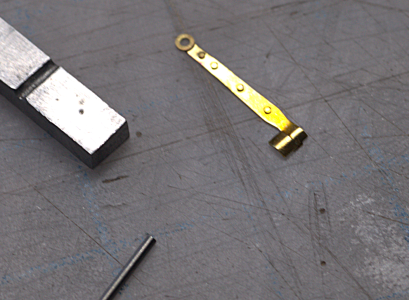
At this point, they look much better than flat, but ...something else can be done, and I will let you find from the following images. I am sure you guessed it right, I added a bolt. I use tiny nails from DryDoc and solder them. As you can see, now they look like real hinges even though they are fake.

both images for comparison
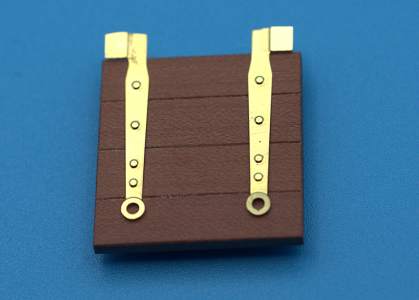

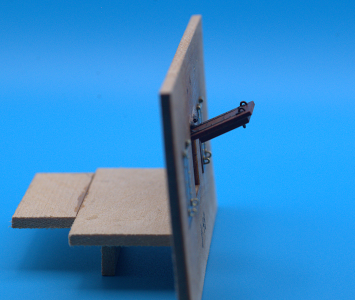
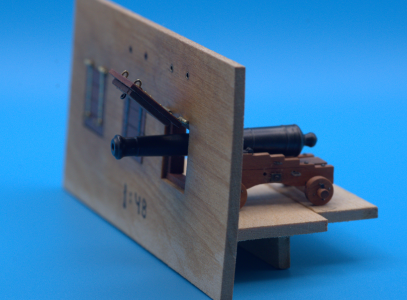
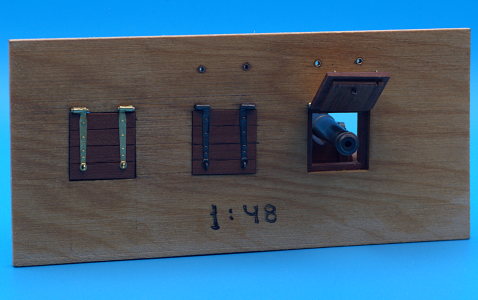
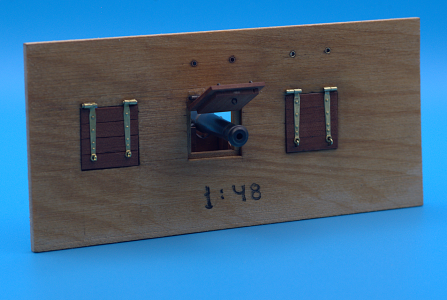
I mean this is it! With a small effort and minimum tooling, you can make cool-looking hinges. But... if this is not yet convincing you, check this out... I made my working hinge using the main parts from a PE. Making 100 + working hinges would require a different process ... or maybe not, but... I found some brass tubing and wire, said 'Trimbly, Sumbly, Boom, and here is the result.
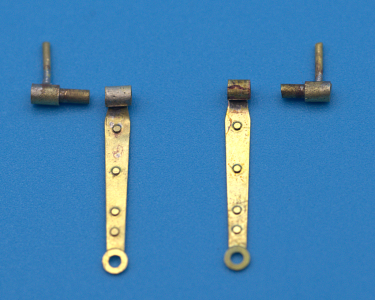
The parts are made from tubing and wire
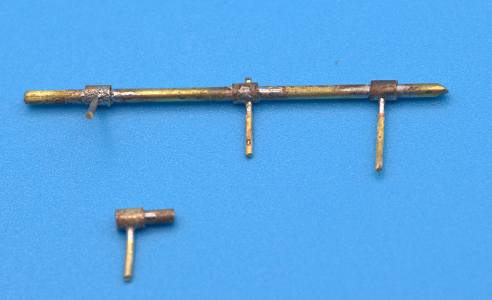
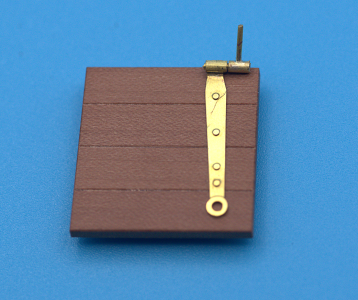
here is the proof
...and the final images on the next post due to a limit of 25 per single post
Photoetched parts are tiny metal parts that are used to add detail to models. Using a chemical process, they are made by etching a metal sheet, such as brass, stainless steel, or titanium. The process involves covering a light-sensitive emulsion with a photographic negative and then washing away the unexposed areas. The remaining areas are then eaten away by acid, resulting in the desired design. Photoetched parts are commonly used in model making and miniature engineering and are particularly useful for adding fine details that are difficult to produce with plastic. Some examples of their use include:
- Military modeling: Adding details like grilles, hinges, latches, and handrails
- Building Gundams: Adding surface details and covering locating holes
- Model ships: Photoetched parts are often used for model ships due to their extremely small scale
- Cockpit detailing: Photoetched parts are ideal for cockpit detailing and other fine details that are too small for injection or resin molding
- Light blocks: Photoetched parts can be used as light blocks in small or tight areas of a model that will be lit
Greetings, folks, you guessed it right. Today's review of the Photoetched parts. I have just some of the PE parts from DryDoc in my possession, which I will review in the following posts. But... if for some reason, you didn't read my previous reviews on mini-kits, please follow the links below. I would be curious to know your opinion, hence, you may already bought and used them in the past.
Parts review - Drydock Models and Parts - Windlass
Greetings all. Today, we are continuing to review Mini-kits from DryDock. The first review was about Capstan and can be found on the link below. https://shipsofscale.com/sosforums/threads/drydock-models-and-parts-capstan.15248/ Today, we will review the Windlass mini-kit. The windlass...
shipsofscale.com
Parts review - Drydock Models and Parts - Anchor
Happy Monday, folks!! Last week, I had reviews of the mini-kits from DryDock, the Windlass, and Capstan. If, for any reason, you missed those reviews, you simply click the links below and make your own decision. Today, we are continuing to review Mini-kits from DryDock, and the subject for...
shipsofscale.com
Parts review - Drydock Models and Parts - Capstan
If you have landed here, you most likely visited the post about reviewing some aftermarket products sold by DryDoc Models and parts. No matter how you find this page, today, our topic for review is the Capstan. The word capstan comes from the Old French capestan or cabestan(t), which may have...
shipsofscale.com
Parts review - Aftermarket naval guns parts to upscale, Part 1/3
* there is no copyright on any images in this review Let's face it...How many of us have been disappointed with the cannons supplied in the kits? Personally, I found that manufacturers don't pay enough attention to cannon details. Often, the carriages are out of scale and made from cast metal...
shipsofscale.com
Parts review - Aftermarket naval guns parts to upscale, Part 2/3
Greetings all. This is way long past-due log of Part 2 of 3 series: Accesories\Uspscale mini kits of naval guns. To those of you who came directly to this post, please follow the below link to get familiar with our discussion about aftermarket naval gun mini kits...
shipsofscale.com
Today's topic for the review is the Gunport hinges. The gunports were sealed by the gunport lids. In the 15th Century, these were simple timber boards, which were placed over the ports on the inside, and secured with a locking bar. The invention of the gunport lid suspended on hinges and closed with lanyard dates from the early 16th Century and is scribed to a French master shipwright. As said earlier the gunport lids are suspended on hinges.
The hinges' designs and shapes have varied over centuries from the origin they were made. While some of them were fancy, others were just simple designs technologically they built the same and suited only one purpose - to suspend the port lid.


Gun port in detail with parts and layout


DryDoc's hinges were suitable based on British design from the 18th century. They come on the fret by 5 pairs (total 10) and will make hinges for 5 gunport lids (2 for each port). As with most PE parts, from DryDoc, the hinges are designed for 4 common scales: 1:48, 1:64, 1:72, and 1:96


Macro images to get an impression of quality. I like the embossed bolt imitation: no need to drill holes for the bolts.


The hinges are designed for 'static' mode, other words, not function for opening/closing. You will have to decide how you will show your gun port: closed, opened. Now, let's see what you can do with those hinges. Please note, that all the hinges are designed the same, so no need to show all the scales. However, I will be using different scales interchangeably in my tutorial.
The first step is to remove the pair from the fret, and clean flushing. As you can see, even with embossed bolts, the hinge itself looks 'flat'.


With just a simple trick, I will make it look much better, IMHO. First, I anneal, do not anneal the entire part as it will get soft, only the top portion. Once the part cooled, place it on your cutting mat (doesn't have to be Green


This is the simplest method to bend, IMHO, and doesn't require special tooling, but... if you plan to make hinges for 100+ ports, I suggest making a simple jig similar to the one on the next image. The results will be uniform for all of your hinges.

At this point, they look much better than flat, but ...something else can be done, and I will let you find from the following images. I am sure you guessed it right, I added a bolt. I use tiny nails from DryDoc and solder them. As you can see, now they look like real hinges even though they are fake.

both images for comparison


I mean this is it! With a small effort and minimum tooling, you can make cool-looking hinges. But... if this is not yet convincing you, check this out... I made my working hinge using the main parts from a PE. Making 100 + working hinges would require a different process ... or maybe not, but... I found some brass tubing and wire, said 'Trimbly, Sumbly, Boom, and here is the result.

The parts are made from tubing and wire


here is the proof
...and the final images on the next post due to a limit of 25 per single post








 .
.