'Emma' - A Diorama making use of the sloop-rigged smack kit, Emma C Berry (1866), from Model Shipways, 1/32 Scale.

There may appear to be nothing happening here but that's not actually the case. There's a lot of planning happening. I can find very few (one) photograph of a wooden scale model of an abandoned wooden fishing boat so I'm into new territory here. There are lots of photos of the real thing though which is good news.

THIS is one of the most useful but it's a stock photo so I will only post the link here. It appears to be in the process of being broken up by some big machinery for firewood which is a great idea, though I'm not about to introduce a JCB (back-hoe) into the plan. The firewood scavengers can be using axes on my Emma - same sized hole but smaller pieces in the woodpile. Thumbsup

I'm going to be doing a lot of painting experiments aren't I? Most of my experience of weathering models is only applicable to metal substrates. Wood and the paint on it decays in ways that are quite new to me and I'll have to find chemical and mechanical ways to do that to my basswood. Ammonia springs to mind as a possibility. Some people who soak their planks use ammonia to soften wood for extreme bending. Super soft wood might be very useful...

One common factor in this kind of extreme weathering is the difficulty in organising a scene to convincingly replicates chaos. Humans are natural organisers and it's very hard not to make a scene look like it was deliberately staged - which of course it will be. I think the only way I can do it is to rely for every detail on photographic evidence; somewhat paradoxical eh? It's the way I used to do the aircraft and tanks etc.

I've tried sketching some layouts but until I have Emma in my hot sweaty hands, I won't really know how best to lay her down and rip off her planking, so that's a problem for later.
 
Hi Smithy
I've just ordered this kit from Cornwall Model Boats and thought to check SOS for any existing builds and found your thread - it's very, very entertaining. Thumbsup
I don't think I will do a build log (mostly because I'm rubbish at them) but will follow yours avidly.
Keep up the excellent commentary!
Cheers
Tom

You are very welcome Tom. Anyone who signs up and enjoys this blog and tells me so from time to time puts wind in my sails. You could call it a following wind. “Oh ha, ha, ha, ha!”

It’s good to have fellow Brits on board too, not for any nationalistic reason but because you are more likely to know what chemicals are available here for the molecular destruction of basswood. :)
 
Oops! Duplicated post.

It’s a shame to waste a stamp so I thought I would mention a curious thing. I have two projects in progress at the moment and I’m working hard on both of them. The curious thing is that in neither case am I going anywhere near the workbench.

Proper planning prevents poor performance, they say, and for once in my life I am doing the planning properly instead of jumping in and then spending hours repairing my mistakes. Do you think I’m finally growing up?
 
Last edited:
It is Alive! Keel and Building Slip Construction Begins


I'm a bit out of sorts today and have left Alert's rigging severely alone while I recover from CA poisoning but I don't need to be firing on all cylinders to glue up a keel.

PB180136.JPG


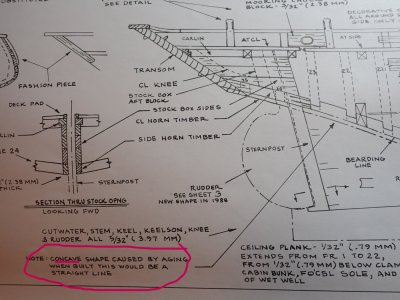
I like these hand lettered (?) plans with the little notes but don't we generally get more conVEX with ageing? Lol. By the time I've finished with this boat there won't be a straight line left anywhere.

PB180137.JPG

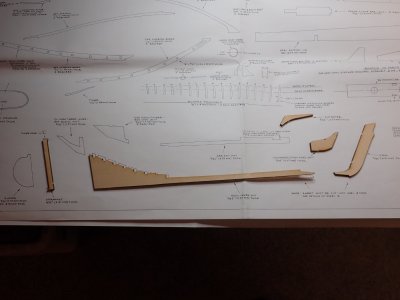
These are the parts of the keel. There's a keelson too but I'm told not to attach it yet. I was told to attach the cutwater on the right but I know how clumsy I am so I'm leaving that until I absolutely have to attach it.

PB180142.JPG

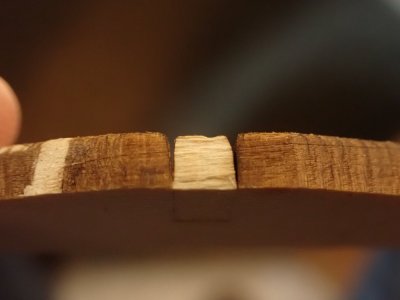
There's quite a lot of laser bevel in this wood so getting the edges of these thick pieces properly square is quite important. Note too that the laser did not cut all the way through. Not a problem as this wood has the texture of day old toasted white bread on a foggy morning and cuts very easily. I used my Stanley knife/boxcutter as usual but just for fun severed one tab with only a scalpel.

PB180138.JPG

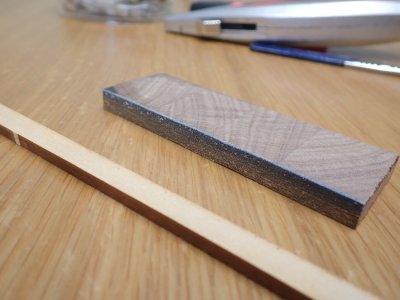
Sanding square was done with this home made tool. It's 120 grit wet and dry. I think anything finer would clog immediately.

I use good quality German silicon carbide wet and dry paper which cuts fast and clean and lasts for ages.

PB180139.JPG

Because basswood is so absorbent, I applied a 'primer' coat of Titebond Original to ensure that the fibres didn't starve the joint of glue. Once that was touch dry, on with the next coat and...

PB180140.JPG

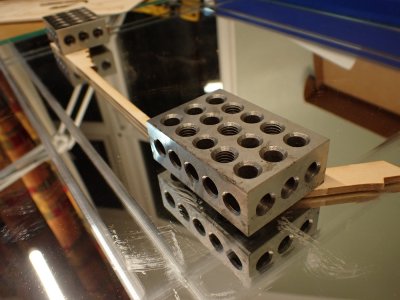
...the joints were assembled flat on a mirror, and held down until tomorrow morning with a pair of gravity clamps.

PB180145.JPG

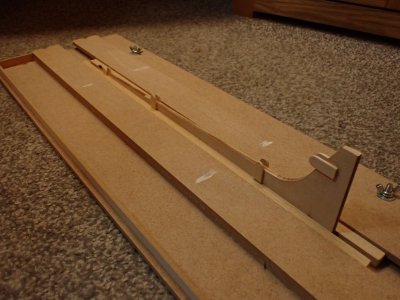
I also assembled the kit provided building slip. I've built it into my HobbyZone Small Building Slip for my convenience. That little tray is very handy and helps me sweep the whole model and the pieces I'm working on, onto the top of the bookcase when I'm working on the other project.

As that man was heard to say as he passed the second floor windows after falling from the Empire State Building, "So far, so good."
 
I know I have become much more Convex in recent years. Hand lettered for sure. I learned printing in drafting class in high school. The teacher was very particular about accuracy and speed. I stopped using cursive after school and switched to block lettering. Now they don’t even teach cursive in schools today.

I like the clamping fixture for the keel.

I always meant to get some 123 blocks. They are certainly worth the cost.
 
I stopped using cursive after school and switched to block lettering. Now they don’t even teach cursive in schools today.

It’s surprises me that schools don’t teach touch typing.

I like the clamping fixture for the keel.

I have been thinking about that. I may have to give it a bit of a twist.

I always meant to get some 123 blocks. They are certainly worth the cost.

Yes, they are very handy. I have some specially made nuts and bolts for fastening them together in different combinations. Something that I have never actually used LLOL.
 
I was up early this morning and feeling creative. I checked the keel and it was stuck fast to the mirror! Titebond is amazing. Fortunately I was able to wedge it off with the point of a scalpel.

PB190001.JPG

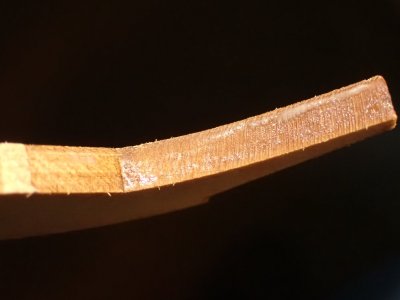
While my porridge was soaking, I wrapped a dishcloth around the keel and poured boiling water over it.

PB190002.JPG

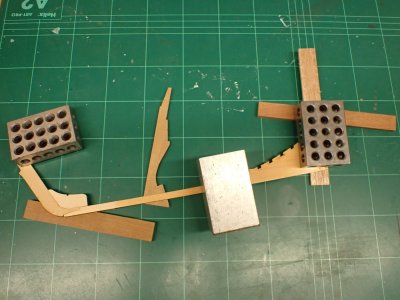
After only ten minutes or so I found the basswood had softened enough to bend. I wedged it with scrap and weighted and waited...

PB190003.JPG

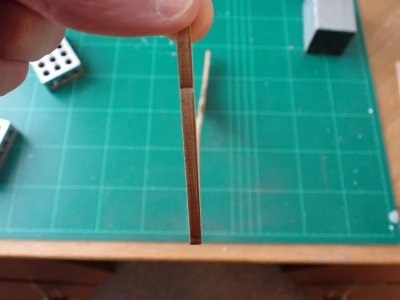
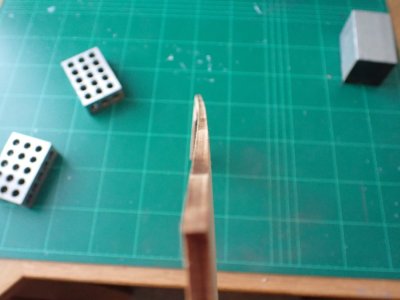
Excellent. There's my twist.

PB190004.JPG

And there's my bend.

Emma's backbone is now a portrait of my own, not broken but bent and twisted by age and a rough life. ;)

Modelling the inevitable workings of entropy is a fascinating challenge and gives great scope for creative fun. I've done it with plastic kits but not yet on a wooden boat. You can't build a model and then age it to this extent, you have to work towards the final product right from the beginning

And that's what I'm doing here. You may be wondering why I glued the keel together straight in the first place? That was to make sure that the joints between the pieces would make sense. This is to be a boat gently rotting away from the keel upwards, not a violent shipwreck or battle casualty. Also, I have to assemble it somehow and I would like the woodwork at the two ends to be more or less coherent. This is also a self portrait in a way, though the 'woodwork' at one end of me becomes less coherent month by month. ROTF
 
Last edited:
I said I wasn't very clever at the mo.
On a serious note, how are you fairing up mate ? Feeling any better ?
I come across a funny phenomenon yesterday.
Suddenly, I could hear my voice inside my head and when I talk and it sounds like Donald Duck, and when the wife talks to me it's a monotone drone without definition (no quips please, she's a gorgeous soul ;)) and I keep getting sounds in my ears like an engaged telephone line.
100% truth
Yet I can hear all other sounds pretty much OK for a 68 year old middle aged bloke.

I hear voices inside my head too. Apparently that’s ok. It’s when things like light switches and cats start talking to you that you have a problem.

I’m getting better slowly. It’s not as bad as when I was coppering Alert, so I expect to be ok in a week or so. Serves me right for being so thick as to use CA again.

I’m still modelling in a sleepy way. I tidied up my spares box one day. Ordered some new kit on another. I saw a box of ten reels of Gutterman thread in useful colours on Amazon. They came today. Not reels but kilometer long spools. So I now own an extra 10km (6.2 miles) of rigging thread, just in case. My mind is as sharp as a billiard ball right now. Sleep
Instead of CA glue, you may want to try UV setting glue. I use it a lot instead of CA. The real advantage of it is that it will not set until it is exposed to UV (I use a UV flashlight which is inexpensive) You can find a lot of different types on Amazon


You can get a small kit like above to experiment with.


Rob
Interesting choice because only the amount that can be exposed to light will cure, which means that if you are bonding non-transparent surfaces you can only get the squeeze-out to cure. You're actually left with non-cured resin underneath, and I have to wonder what it's tendency over time would be to get absorbed by the wood and cuase other issues.
 
Interesting choice because only the amount that can be exposed to light will cure, which means that if you are bonding non-transparent surfaces you can only get the squeeze-out to cure. You're actually left with non-cured resin underneath, and I have to wonder what it's tendency over time would be to get absorbed by the wood and cuase other issues.
I do use it mostly for rigging, securing lines and when I want to fix thing in place for example, keeping a coil of rope from unraveling. I have not used it for securing planks in place or where a high strength bond is required. However I think I use it about 90% of the time when I would have used CA.
 
Back
Top