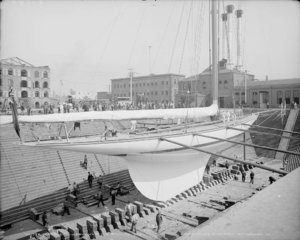
Endeavour 1934 - yacht J-class - 1:80 Amati

  • Thread starter Thread starter Ekis
  • Start date Start date
  • Watchers Watchers 14
Oops, I knew last night that I had forgotten to write something ...
However, I had said to myself before posting: "do not forget to specify that you did not stuff yourself on the pole, it is perfectly voluntary for aesthetic reasons of the final model (after try in the good sense) !!"
But I totally forgot to say it ... Excuse me!

And yes, I wanted to put the spinnaker on this side to see the front.
The hanging rope is actually a brass wire filled with white wire that rigidly separates the spinnaker from the hull ... :p
 
hello healthy happy days
j class endeavour I'm looking for the plans of this beautiful yacht
maybe you can help me on this subject.

Thank you
Murat
 
Hi Murat,
unfortunately I can't help you : the Endeavour plans have been damaged (rather destroyed...) while I had lent them to another modeler.
 
sad incident because;
I've been looking for those plans for about 7 months, but unfortunately I couldn't find them.
Thank you very much for your interest.

Murat
 
I built this about 6 years ago, was almost done, but the site crashed and lost the build logs. I think after seeing yours, I may find the model and blow it up. LOL

Yours is excellent. How did you do the turnbuckles?
 
Hi.. I'd like to ask you what you mean by "light protection" mentioned in previous page. I expect you basically built the boat, coated the body in color and then used some UV protective finish on top of it?
I have the same kit and now I'm thinking about some workflow for how to paint it to make it las as long as possible.. I can imagine what the light and dust can make to such a finish on a wooden ship.

btw.. beautiful build.. :)
 
Hi.. I'd like to ask you what you mean by "light protection" mentioned in previous page. I expect you basically built the boat, coated the body in color and then used some UV protective finish on top of it?
Hi Maxtor,
can you tell me where I wrote that I had put a protection against light?
I reread the whole thread without finding those words...
On this boat, I mainly applied several coats of paint, sanding between each one to get a very smooth finish (but deliberately not too plastic looking).
 
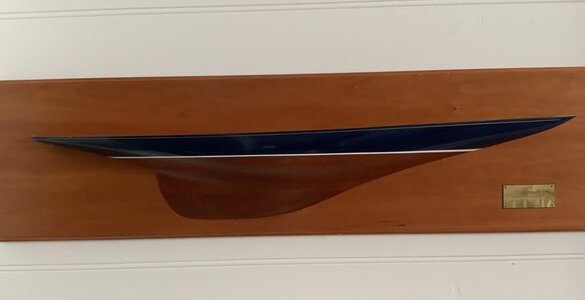
Ekis, absolutely stunning model you built , I like the stand , it will give me some inspiration to build the same , enclosed some photographs of a half hull I bought years ago and the name of the builder Scott Chambers in WA
 

Attachments

  • FA6FD9B0-6E99-4F0B-851F-0689150743EE.jpeg
    FA6FD9B0-6E99-4F0B-851F-0689150743EE.jpeg
    228.4 KB · Views: 10
  • 3B7AB697-3A7B-455C-BA51-9D2A9FBB3FDA.jpeg
    3B7AB697-3A7B-455C-BA51-9D2A9FBB3FDA.jpeg
    65.3 KB · Views: 10
I arrived at the end of the deck !
This is the raw version before light protection and retouching paint on the edges.
48740364126_926ff41061_b.jpg
Oh sorry.. I was reading that in the night almost sleeping understanding it in a wrong way.. so my fault. It was this one above.. that was why I was asking.. being surprised that someone have some special way how to preserve the model or so.. :p

Anyway.. thx for explanation. I have the same model here.. being a bit scared of planking that will come in next few days or weeks.. it looks like you was planking it with dry wood if I'm right. I was thinking about soaking these planks before I will start with it.
 
Back
Top