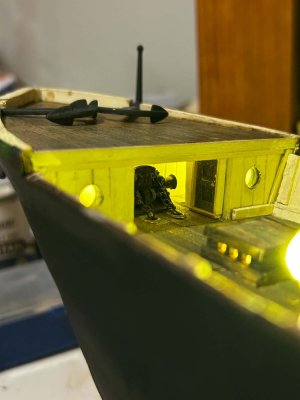
Hi all,
In case it's helpful for others or of interest (and just as a way to document), I thought I'd share my first build log here as I enter this new hobby. I am completing this in my dorm room at University, so excuse the tight space and messy work area (hard enough to fit a folding table in here, let alone all the tools). I do have some experience with modeling and woodworking, but this is the first model ship I've ever tackled.
At first, I wanted to reference other exceptional threads here on SoS and the many photos available online to fix all the inaccuracies in the kit, but, as a student, time is too limited (and I want to finish the kit before I have to move out of the dorm). I am implementing easy changes (such as not including penciled dots on the deck, to reflect Endurance's lack of visual deck nails), but otherwise following the instructions. This is going to be a gift for my father, and he seems to prefer more of a stylized model as opposed to pure accuracy anyway (we actually traveled to Grytviken together years ago as kind of the ultimate father-son adventure, and I hope to include with the model a photo album from our journey (thus why this kit was chosen)).
Anyway, I've learned a lot already, and I hope to keep progressing.
Some lessons I've learned so far:
I am aiming to get this all completed in time for the holidays to give as a gift, but I may have to push it off to be a birthday present, depending on how busy my academic schedule is and how long this takes.
Any tips, support, thoughts, or ideas are appreciated.
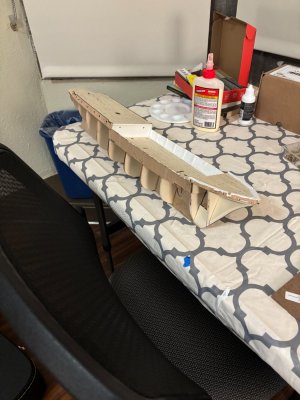
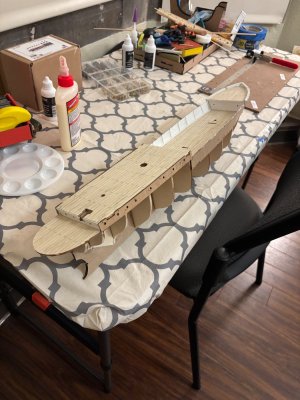
In case it's helpful for others or of interest (and just as a way to document), I thought I'd share my first build log here as I enter this new hobby. I am completing this in my dorm room at University, so excuse the tight space and messy work area (hard enough to fit a folding table in here, let alone all the tools). I do have some experience with modeling and woodworking, but this is the first model ship I've ever tackled.
At first, I wanted to reference other exceptional threads here on SoS and the many photos available online to fix all the inaccuracies in the kit, but, as a student, time is too limited (and I want to finish the kit before I have to move out of the dorm). I am implementing easy changes (such as not including penciled dots on the deck, to reflect Endurance's lack of visual deck nails), but otherwise following the instructions. This is going to be a gift for my father, and he seems to prefer more of a stylized model as opposed to pure accuracy anyway (we actually traveled to Grytviken together years ago as kind of the ultimate father-son adventure, and I hope to include with the model a photo album from our journey (thus why this kit was chosen)).
Anyway, I've learned a lot already, and I hope to keep progressing.
Some lessons I've learned so far:
- Bending small particle-board and lime wood strips can be difficult without a mold. I'm used to using a traditional wood bending iron for larger pieces, and the smaller pieces are more delicate.
- Pin angle is, at times, important. One pin accidentally pierced the ship's stern wall because I hammered it in at a slightly incorrect angle. It should be easily fixable, but it was avoidable.
- Conjecture, but it may be better to plank the deck after securing the underlying template to the frame (as opposed to planking the deck prior to fitting it to the frame, as in the instructions). I notice that the planks, being thin, take more effort and care to work to fit the frame after they've been glued (to avoid damaging the decking). My gut is that fitting them individually to the deck once the deck is secured to the model's frame will produce slightly cleaner results.
- Make templates when scratch building smaller pieces (e.g. the small piece at the front of Endurance's bow). It was hard to get everything just right without this.
I am aiming to get this all completed in time for the holidays to give as a gift, but I may have to push it off to be a birthday present, depending on how busy my academic schedule is and how long this takes.
Any tips, support, thoughts, or ideas are appreciated.