Figurehead. Carved.

Doing carving is something that you have it or not
I do not have it, and always amaze to see talent like yours
I do figurine painting at the amatory level not great but not bad
I put you on the same level as Olga Kropotova for figurine painting a level that I just dream to attain. https://www.youtube.com/channel/UC3eCZzOktQT7RUG93VVvjkg
When you look at what you do it is something that you just dream of. The level of excellence is just well it is amazing.
 
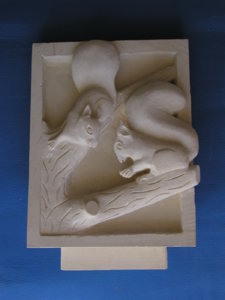
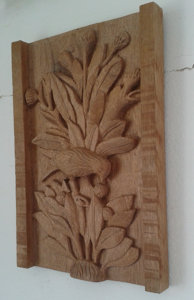
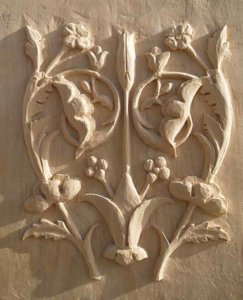
Thank you Alex for the link of the hand tools. I had a few of those years ago and I am still using them today. I joined the stone and woodcarving school 7 years ago and work on larger scale (photos of my work). What are the sizes of the figureheads ( length, width and depth of the ornament)? I would like to experiment on small ornaments.

june11.JPGThe bird 2016.jpgP5076310a.jpg
 
Doing carving is something that you have it or not
I do not have it, and always amaze to see talent like yours
I do figurine painting at the amatory level not great but not bad
I put you on the same level as Olga Kropotova for figurine painting a level that I just dream to attain. https://www.youtube.com/channel/UC3eCZzOktQT7RUG93VVvjkg
When you look at what you do it is something that you just dream of. The level of excellence is just well it is amazing.
Charles, thanks for the link, I enjoyed watching Olga’s work. Great painting!
 
Thank you Alex for the link of the hand tools. I had a few of those years ago and I am still using them today. I joined the stone and woodcarving school 7 years ago and work on larger scale (photos of my work). What are the sizes of the figureheads ( length, width and depth of the ornament)? I would like to experiment on small ornaments.
Hi JoeF. You have a good job, on a small scale it should work well. Renomme decor width 62mm. Thickness 2.5mm. Typically, modelers order reliefs with a thickness of one to three mm.
 
Thank you Alex. How is the process and stages of the carving for a small ornament?
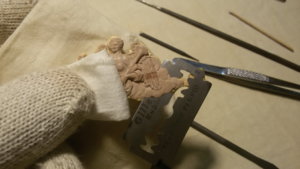
First make the contours of the relief. Then glue this contour to a hard wooden substrate. Optionally, the substrate can also give the contour of the relief. In some cases, you can make a contour of the relief directly on the substrate. At the end of the work with a dangerous razor blade, remove the relief from the substrate. You can also glue the relief to the substrate through a layer of paper. It will be easier to remove from the substrate, but there is a risk that when working due to layers of paper, the relief may come off when you press the tool. I also don’t like to remove the paper later. When working, attention must be paid to the subtle details of the relief going perpendicular to the wood fibers. When the tool is pressed firmly, the wood will crack and break.20190819_104227.jpg
 
I could look at your work for hours Alex. I find so many things I admire about your work. Your eye for correct anatomical proportions and detail is a gift. I truly don't think this aspect of your work can be taught.

The expressions on your subjects' face is quite mesmerizing. I also appreciate the way you capture the flow of the subjects' garment material. It truly looks soft and falls quite naturally. The depth of your undercuts is flawless.

I do have a couple of questions;
1. Would you tell me what you make your tools from? I have made my own carving tools from dentist probes.
2. I think you did mention you also used a rotary or power tool. If you do, what is it? I do use an old dentist drill with the foot actuator.
3. Lastly, and most challenging for me. Would you recommend the magnifying eye wear you use.

Thank you.
 
Thanks to everyone for the good ratings.
1. Would you tell me what you make your tools from? I have made my own carving tools from dentist probes.
2. I think you did mention you also used a rotary or power tool. If you do, what is it? I do use an old dentist drill with the foot actuator.
3. Lastly, and most challenging for me. Would you recommend the magnifying eye wear you use.
С сожалению гугл переводчик не совсем корректен и я не все понял из ваших вопросов.
1. Если делаю инструмент сам, то использую старый инструмент для обработки металла, близкий по форме к тому, что я хочу сделать и медицинские боры.
2. В основном пользуюсь бор машиной с узким корпусом, что бы удобнее было держать ее как ручку или карандаш. В планах тоже приобрести с ножным управлением.
3. Если работать с миниатюрой, то без увеличительной оптики не обойтись.Что бы не загружать глаза, я стараюсь работать в бинокулярах с минимальным увеличением.1,25. Но иногда приходится работать и с большим увеличением.

Google Translate. Unfortunately, the Google translator is not entirely correct and I did not understand everything from your questions.
1. If I do the tool myself, then I use the old metal processing tool, close in form to what I want to do and medical burs.
2. Mostly I use a bor machine with a narrow body, so that it would be more convenient to hold it like a pen or pencil. The plans also purchase a foot control.
3. If you work with a miniature, you can’t do without magnifying optics. In order not to load my eyes, I try to work in binoculars with a minimum magnification. 1,25. But sometimes you have to work with a large increase.
 
Last edited:
It's very difficult to carve by hand. I have engraved it myself. It's more difficult than clay sculpture.
This technology needs not only hard training, but also a deep understanding of 3D objects, as well as a talent for the understanding of human body structure. I bought books on human medicine to understand this, but what I lacked was talent
 
Back
Top