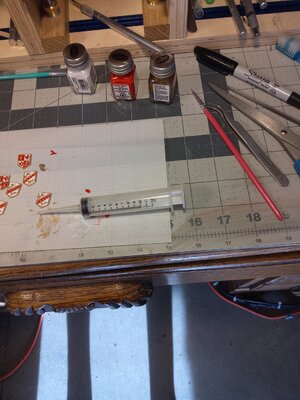
Go to your pharmacy store and ask for 3 ml syringe with a 1 1/2" x 1.2 mm needle. Those cost me a buck apiece so I bought 5. Using a water solubabale glue makes hot water cleaning periodicall of both the needle cover and the needle fairly simple to be used over and over. I did grind the point off for a flat end for general use but the sharp needle end works for filling narrow planking cracks for the over-sanding procedure. A thin wire can clean it out when the glue sets up in longer periods of not being used. The best solution to that was a set of fine reamers from Germany, a Broach Set of six, BRO-174.00, which are a square shape and

-

SUBSCRIBE TO SHIPS IN SCALE TODAY!
The beloved Ships in Scale Magazine is back and charting a new course for 2026!
Discover new skills, new techniques, and new inspirations in every issue.
NOTE THAT OUR NEXT ISSUE WILL BE MARCH/APRIL 2026 -

Win a Free Custom Engraved Brass Coin!!!
As a way to introduce our brass coins to the community, we will raffle off a free coin during the month of August. Follow link ABOVE for instructions for entering.
You are using an out of date browser. It may not display this or other websites correctly.
You should upgrade or use an alternative browser.
You should upgrade or use an alternative browser.


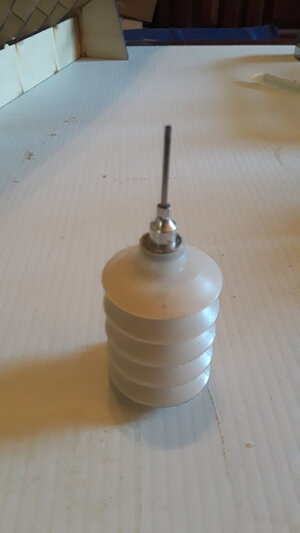
That makes more sense...... thank you.... greatly.....I use irrigation syringes. No needle but still has a fairly fine tip.
- Joined
- Jun 2, 2020
- Messages
- 97
- Points
- 88

I have used it on several projects using Bondo glazing and spot putty and the results are great. The putty drys fast and sands easily. The car Bondo could be used but it is hard to sand.On metal but not on wood. I use Dap-Pink
- Joined
- Feb 12, 2021
- Messages
- 7
- Points
- 3

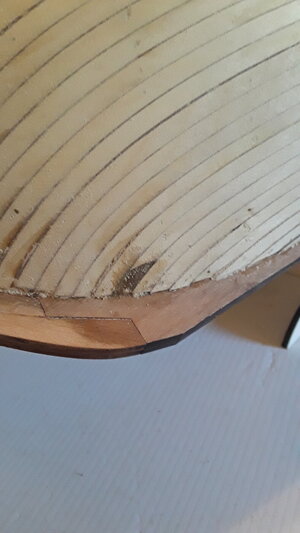
I'm pretty much new to wooden ship models so I can not say much about what to use as a filler. But I can say that I broke one planking. I left the part alone as it was pushed inside the hull but was hanging on by a little bit. So I filled it with glue first as to prime the wood. Then I mixed glue and sawdust and added it to the broken plank.
Attachments
I use a fine wood filler called Timbermate, especially as a fine filler including wood grain, great stuff. Water based, no shrinkage etc. There’s different custom colours available. I think it’s an Australian product but available in N. America.
 www.timbermategroup.com
Regards,
Roger
Timbermate | timbermategroup
www.timbermategroup.com
Regards,
Roger

Actually for small jobs like filling in gaps in the second planking or around gun port linings a dab a glue and some sawdust rubbed in with a finger and then sanded works perfectly--you don't need a syringe or anything fancy. The trick is timing the sanding right so the glue isn't too wet or dry and of course you want to rub or sand off any glue residue before varnishing.Sounds more like it would make one big mess
An old trick from woodworking. To match the existing wood, you use a belt sander to grind a nice pile of sawdust. Then add wood glue to the dust. The trick is to use glue that dries clear, such as Elmers White glue, to minimize the darkening of the filler as you would experience with yellow glues.Actually for small jobs like filling in gaps in the second planking or around gun port linings a dab a glue and some sawdust rubbed in with a finger and then sanded works perfectly--you don't need a syringe or anything fancy. The trick is timing the sanding right so the glue isn't too wet or dry and of course you want to rub or sand off any glue residue before varnishing.

Ha?? A friendly doctor? ...do they really exist? Except for the @dockattner, but he is no longer a doc, he is a ship modeler.Why not ask your friendly doctor (they exist) and get some for free.

- Joined
- Oct 1, 2023
- Messages
- 2,233
- Points
- 488

Thank you ThomasActually for small jobs like filling in gaps in the second planking or around gun port linings a dab a glue and some sawdust rubbed in with a finger and then sanded works perfectly--you don't need a syringe or anything fancy. The trick is timing the sanding right so the glue isn't too wet or dry and of course you want to rub or sand off any glue residue before varnishing.
- Joined
- Jun 29, 2024
- Messages
- 1,835
- Points
- 488

I keep three fillers “in stock.” Bondo Original Formula, Bondo Spot Putty, and Durham’s “Rock Hard” Water Putty. Three work great. I am a scratch builder and prefer solid carved hulls that will be painted.
Roger
Roger
- Joined
- Oct 1, 2023
- Messages
- 2,233
- Points
- 488
I'm a little afraid of the Bondo as it's harder than the planking material.I keep three fillers “in stock.” Bondo Original Formula, Bondo Spot Putty, and Durham’s “Rock Hard” Water Putty. Three work great. I am a scratch builder and prefer solid carved hulls that will be painted.
Roger
- Joined
- Oct 1, 2023
- Messages
- 2,233
- Points
- 488
I'm looking ahead to my next model and am considering the San Felipe by ZHL.
First those who have followed me a little. Is this going to be over my head?
First those who have followed me a little. Is this going to be over my head?
- Joined
- Jun 29, 2024
- Messages
- 1,835
- Points
- 488
As I said above I do not build kits or POB planked hulls. These filler materials serve my needs well.
Roger
Roger
- Joined
- Oct 1, 2023
- Messages
- 2,233
- Points
- 488
I'm not sure if the planking fan method is working having never used it before. I appears that the stern is falling behind so I have incrementally increased the plank width at the stern. This should bring the flat part of the stern complete when I reach the natural line of the plank upon reaching the deadfall area. Fingers crossed. Either way I'm happy so far.
Thank you for your input
Happy modeling
Ted
I understand, I have mentally filed away you choice of materials should I get in a position to use them.As I said above I do not build kits or POB planked hulls. These filler materials serve my needs well.
Roger
Thank you for your input
Happy modeling
Ted
- Joined
- Oct 1, 2023
- Messages
- 2,233
- Points
- 488
Arrrgh, the variance in plank thickness is really irritating. I only have one spare plank in the kit since I used two to estimate the real number of planks vs count shown on the plans.
A friendly physician here! I use Elmers wood filler and feel it does a good Job. I also use some white glue mixed with sawdust on occasion.
The use of fillers becomes a far less frequent necessity when one builds a solid hull model as I'm sure Roger can attest. Kits used to provide a solid hull blank, roughly shaped, which could be painted or, if one wanted to "show the planking" veneered with thin planking wood. However, the machinery automatically to carve hulls from solid wood is expensive and it's a lot less expensive and saves a lot of shipping and warehousing space if a kit can be packaged in a flat box with the "hull" reduced to some bulkheads and a bunch of wood strips. I suppose it was marketing hype, but some kit manufacturers promote their models as somehow "better" because the hull shape is defined by bending the planks on frames or bulkheads instead of by shaping a solid block of wood. They also suggest that POB or POF construction is "easier" than "carving a hull," which however counterintuitive it may seem to the uninitiated, is quite simply untrue if standard "tricks of the trade," such as the "bread and butter" or "lift method" are followed. In this respect, I find the old machine-carved solid model hull kits were far easier to build than the present-day POB and POF kits.
If a hull is to be painted, what is used to fair the surface doesn't much matter. There's lots of options on the market. I use standard fairing putty primarily due to its extremely fine grain, rapid hardening, and ease of sanding. My go-to is Interlux Surfacing Putty. It's solvent is acetone, so care is required to keep a good air-tight seal on the can, but it is easily reconstituted in the can by adding a small amount of acetone and letting it sit overnight and reach "equilibrium." It's a marine product and can be found at chandleries or online. It dries white.
This product is a bit pricy compared to drywall spackle which appears much the same, but it isn't. The chalk it's made of is very finely ground and so permits sanding with fine grit abrasives, e.g., 600 grit. A good finish on a miniature has to be a "miniature" finish. A thick coating build-up destroys the sharp scale definition that good models require. Therefore, the surface has to be perfectly smooth before the finish coating is applied in order to achieve a perfectly fair finish with a minimum of built-up coating material, be it opaque or clear. One shouldn't rely of multiple coats of thick finish coating sanded repeatedly to fair the surface. It also bears mentioning that sanding wood that has been sealed with thin, clear shellac down to 300 grit and finer is a lot easier if what is being sanded is the lightly shellacked wood and a proper fairing compound that is designed to be easily sanded.

For filling cracks and minor imperfections in wood that is to be finished bright, I use furniture finisher's wax filling crayons which are made by several manufacturers and widely available. I use Mohawk brand, for no reason other than their availability to me. They are wax crayons which are made in a variety of wood finish colors. These crayons can be purchased one at a time and in sets for a wider range of colors. The wax softens easily from the warmth of the user's fingers or, if preferred, another heat source can be used. Application is accomplished either by simply rubbing the softened wax into the crack and buffing off the excess or by actually melting the wax from the crayon with a flame (really messy, but good for larger cracks) or other heat source. Generally, I shave off a bit and roll it in a ball between my fingers until it is soft enough to suit the application. Any clear finish can be applied over this product.
I found a YouTube video that addressing filling cracks in furniture and covers the use of finisher's wax sticks in detail. A picture is worth a thousand words and a video twice that:
I have also used the well-known "sawdust in something sticky" method to good effect, although it can get messy and the last thing I need in my shop is more sawdust! I've mixed sawdust in clear shellac to good effect. When the shellac dries (quickly because it's solvent is denatured alcohol) it sands easily. Also, besides its quick evaporation time, using shellac as a binder for the sawdust avoids the risk of sanding before the inner core of the putty applied has completely cured. The temptation to feel the surface and decide it's cured enough to start sanding is always there, for myself at least. I've found sanding adhesives such as Titebond PVA to be problematic because they tend to get gummy when the friction from sanding warms them up. They then gum up the sandpaper, rendering it useless. This can be a real pain when using expensive abrasives on detail sanders and drums! When shellac is used as a binder, it's easily dissolved with denatured alcohol and wiped off if one wants to have another go at it for whatever reason.
As always, "your mileage may vary." This is what works for me. If something else works for you, by all means, go for it!")
If a hull is to be painted, what is used to fair the surface doesn't much matter. There's lots of options on the market. I use standard fairing putty primarily due to its extremely fine grain, rapid hardening, and ease of sanding. My go-to is Interlux Surfacing Putty. It's solvent is acetone, so care is required to keep a good air-tight seal on the can, but it is easily reconstituted in the can by adding a small amount of acetone and letting it sit overnight and reach "equilibrium." It's a marine product and can be found at chandleries or online. It dries white.
This product is a bit pricy compared to drywall spackle which appears much the same, but it isn't. The chalk it's made of is very finely ground and so permits sanding with fine grit abrasives, e.g., 600 grit. A good finish on a miniature has to be a "miniature" finish. A thick coating build-up destroys the sharp scale definition that good models require. Therefore, the surface has to be perfectly smooth before the finish coating is applied in order to achieve a perfectly fair finish with a minimum of built-up coating material, be it opaque or clear. One shouldn't rely of multiple coats of thick finish coating sanded repeatedly to fair the surface. It also bears mentioning that sanding wood that has been sealed with thin, clear shellac down to 300 grit and finer is a lot easier if what is being sanded is the lightly shellacked wood and a proper fairing compound that is designed to be easily sanded.
For filling cracks and minor imperfections in wood that is to be finished bright, I use furniture finisher's wax filling crayons which are made by several manufacturers and widely available. I use Mohawk brand, for no reason other than their availability to me. They are wax crayons which are made in a variety of wood finish colors. These crayons can be purchased one at a time and in sets for a wider range of colors. The wax softens easily from the warmth of the user's fingers or, if preferred, another heat source can be used. Application is accomplished either by simply rubbing the softened wax into the crack and buffing off the excess or by actually melting the wax from the crayon with a flame (really messy, but good for larger cracks) or other heat source. Generally, I shave off a bit and roll it in a ball between my fingers until it is soft enough to suit the application. Any clear finish can be applied over this product.
I found a YouTube video that addressing filling cracks in furniture and covers the use of finisher's wax sticks in detail. A picture is worth a thousand words and a video twice that:
I have also used the well-known "sawdust in something sticky" method to good effect, although it can get messy and the last thing I need in my shop is more sawdust! I've mixed sawdust in clear shellac to good effect. When the shellac dries (quickly because it's solvent is denatured alcohol) it sands easily. Also, besides its quick evaporation time, using shellac as a binder for the sawdust avoids the risk of sanding before the inner core of the putty applied has completely cured. The temptation to feel the surface and decide it's cured enough to start sanding is always there, for myself at least. I've found sanding adhesives such as Titebond PVA to be problematic because they tend to get gummy when the friction from sanding warms them up. They then gum up the sandpaper, rendering it useless. This can be a real pain when using expensive abrasives on detail sanders and drums! When shellac is used as a binder, it's easily dissolved with denatured alcohol and wiped off if one wants to have another go at it for whatever reason.
As always, "your mileage may vary." This is what works for me. If something else works for you, by all means, go for it!
Last edited:
i am using bondo now. i'm satisfied but it is harder than spackle. and so sanding is harderAnyone ever use "bondo" for filler? Thanks