French Liner France Hachette publication 1/250

Nice weather I am starting to paint the hull outside long process
So between coating and waiting to the paint to dry I will build the davits and the winches
The davits are compose of 4 pieces and the winches 13
24 life boats = 2 supports per boat 1 winches for 4 supports place between each assembly
All the parts came in 10 instalments 23-1
23-2, 23-3 all the parts for the davits
1.JPG
To put the 3 parts necessary to build 1 support the part mist align themselves with 2 hole 0.4mm that will be use later to let pass a wire 23-4
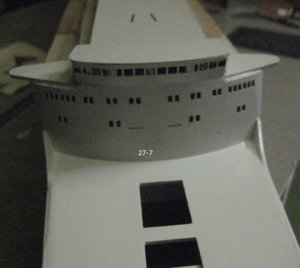
So I build myself a gig 23-5 using my vice a double side tape and 2 small bits 0.35mm at the proper space 23-5 using a drop of CA glue I build the support 23-6, 23-7
2.JPG
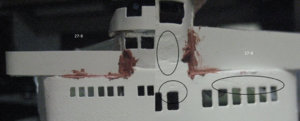
48 assembly 23-8, 28-9 to that I add the rail platform port side and starboard 23-10
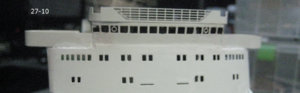
The complete assembly 23-11
3.JPG
The part for the winches 23-12
1 winches complete 23-13 all 12 of them build 23-14
4.JPG
An idea of the size 23-15
48 support and 12 winches 23-16
5.JPG
 
As I start to do the paint of the hull I build what will be the support
24-1, 24-2, 24-3 simple block of 1” square block paint black screw to the hull
1a.JPG
Red hull after 3 coat of paint 2.5h interval between each coat 24-4
Was windy and the paint did not applied properly 24-5 to 24-7 have to sand the defect
1b.JPG
Now have to wait 48h to the paint to cure properly before finish the sanding and apply the final coat
End the time is running short to complete the ship as bad weather is at my door

After sanding the excess of run out paint 2 more coat ready to take of the masking tape
I use Tamiya tape as usually I have no problem 23-8
Of course not this time because of my mistake of the run out was a bit to thick and a part of the red pain rip of 23-9
A trick that was teach to me by a fellow modeller because there a small edge where the paint rip of I apply a tin coat of putty and sand it carefully 23-10 the easy way to correct the paint because it is spray paint I spray a bit of paint in a small container and dab the place that as to be repair 23-11
1c.JPG
23-12 job done the finishing will be the black and the white band
1d.JPG
 
Was waiting for nice weather, barely no wind and got one
So protect the part that must be protected did that early morning 25-1
1a.JPG

Did 1 coat of undercoat flat grey paint 25-2.
Wait 2h then applied the first coat of black follow 2h by the second coat.
1b.JPG
Hull paint finish
The white line the kit came with a tape for that level line that I did not use
I measure the 2mm white line and place the masking tape accordingly and it is done 25-3, 25-4
1c.JPG
1d.JPG
Now will go ahead to finish the super structure still have a few correction with putty here and there to correct default and touch up of paint when that done and before doing any wire I will spray the complete ship with a hard clear matte protective topcoat I use Rust-Oleum Chalked product. That is also useable on wood by the way.

Notes
Word of caution do not let the masking tape too long on a paint surface as we have to press the tape to prevent paint to go under if you wait to long the glue of the tape might have the time to penetrated the paint. So when you remove it, the paint might rip of
2 unforgettable (because I know better but went to fast) mistakes I did with the red portion of the hull.
First I went to fast and put the masking tape in advance waiting for the weather to be nice 3d was too long for the tape. The tape removal as to be done rapidly ideally the same day
Second did not do a proper under coat and it was too windy so result was run of and rip of paint.
 
Installing the hand rail 26-1, 26-2
1a.JPG
Very thin piece of metal each hand rail got pin red circle but the hole for the pin black circle do not fit properly. It is so thin that it is impossible to sand and make correction to fit so I was in the obligation to drill new hole to fit them. Also they are so thin and small that it is a challenge to not break or bent them 26-3, 26-4

26-5, 26-6 all the hand rail are install
1b.JPG
1c.JPG


At this time I am at instalment 115/140 and page 891/1112
And 220h on that model and doing the last paint touch up or putty correction
 
Finishing the bridge
Another curve etch part to install
27-1 the part to be install 27-2
1a.JPG

Of course again do not fit properly on one side 27-3, 27-4
1b.JPG


So more putty and more sanding I will corrected in the same time the wood edge at the bow 27-5, 27-6
1c.JPG
Almost done 27-7
1d.JPG
Installing the bridge wing and guest what more putty and saw defect 27-8, 27-9
1f.JPG
Done 27-10 if I am lucky putty is finish
1g.JPG
 

Attachments

  • 1e.JPG
    1e.JPG
    176.9 KB · Views: 4
  • 1f.JPG
    1f.JPG
    77.3 KB · Views: 5
  • 1g.JPG
    1g.JPG
    54.3 KB · Views: 3
1a.JPG
1b.JPG
1c.JPG1d.JPG
1e.JPG
1f.JPG

That it the French Liner France is finish

Start the build Mai 23 2018
Finish October 17 2018
Time 284h

Was in 140 installments took 3 years from 2011 to 2014 to received everything and put it aside 4 years

It was a nice kit to build the instruction was very clear and easy to follow in the end I have a nice ship to show.
Only thing that I did not like is the way instruction make you build it.
You start something put it aside take it back 20 installment later put it aside and finish it 15 step further.
Second thing that bug me is the fact that it will have be easy to cut the number of installment by at least 20

But it was fun to build it
now on the wall with the Bismarck
IMG_1839.JPG
 
Tanks Jim:cool:
was fun to build
that was the last one of my past build
now to the current build the Greek Bireme (post already start)
And the Royal Louis at the mast step some 20 something post to bring it to date
 
Many Many thanks for showing us this built in a time lapse log - Very good result - You did a very good job with solving the details, correcting the small problems of the kit.
And we can realize:
If you have to make thousand of treenails in a sailing ship or windows in a cruising ship
or rigging of 100 guns or installing the same number of David-cranes
-> you need a lot of patience and power of endurance
Thumbs-Up
 
I have learn a lots about putty on the build but it was fun
Will take probably another 10 y before to see that ship release by Amati as a stand alone ship.
It was expensive to buy but as I said over a 3-4y period it was the price of 1 coffee per day
Got my eye on this one to go with my other 2 but not the budget to get it :confused:
https://www.model-space.com/us/ijn-akagi-full-kit.html
 
Charles,
another of your superb models - beautiful. Always loved this ship. Great job!! Here is a link to her complete history - as with many of her kind (Normandie, SS United States) she also had a sad end of life.


PS: In 1961 (as a child) I spent an early summer in Normandie. I saw her leave Le Havre from the beach in Trouville France - Always remembered that memory
 
Back
Top