Fully functional realistic mini canons

After completing a slightly longer carriage, proportioned to the barrel I have made some bore depth measurements and marked them on the ram rod illustrating the various working depths that were machined and taken up by the charge load and ball shot for the remaining functional firing barrel length of shot for that charge load.
First the two carriages. The shorter would have been better for a carronade than a long gun.
View attachment 185808
Next is the ram rod to full machined depth of bore and charge, marked off. The diameter of the charge portion is smaller than that of the working bore. Depending upon the charge grain load that load extends past the charge depth into the full bore diameter, shortening up the barrel length for the ball shot travel.
View attachment 185809
I have skipped past the shot bore depth and charged depth, as well as face of ball shot to show all of those as marked on the rod which was being "extracted" with the shorter depths.View attachment 185810View attachment 185811
Here you see all of the depth marks and have to mentally "pull" the rod to your right, out of the muzzle to visualize the working depths in the bore.
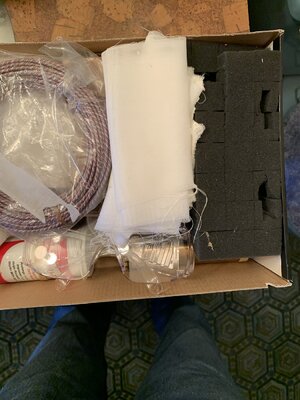
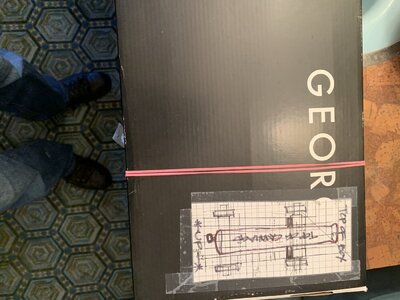
Here are some photos of the "Gun Box" and first carriage firing setup followed by a video of one of the shots.Cannon firing box.jpgBox with identification to not turn it over and know where the muzzle is pointed. Next removing the cover and padded contents.Cannon Fireing Box Opened.jpg
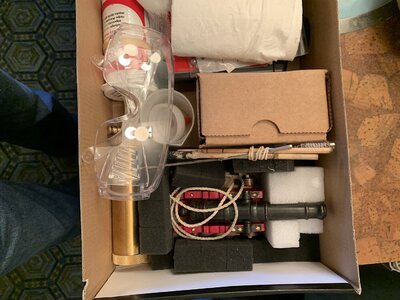
Cannon under the black foamCannon Firing Box cannon padding.jpg
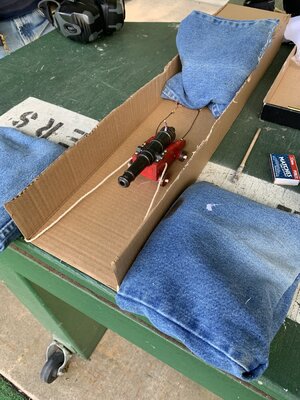
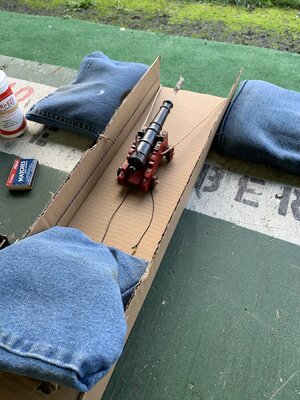
Setting up at the firing range with the breach end view. Note the ram rod in the bore to assist in elevation aiming. Cardboard box to be sure that the first firing recoil is contained in addition to the carriage restraint hawser round the box ends and under sand bags. An additional sand bag for recoil stop if it travels farther than anticipated.First Fireing Setup Muzzle view.jpgFirst Firing Setup at club range Breech view.jpg
 
Here are some photos of the "Gun Box" and first carriage firing setup followed by a video of one of the shots.View attachment 186161Box with identification to not turn it over and know where the muzzle is pointed. Next removing the cover and padded contents.View attachment 186162
Cannon under the black foamView attachment 186163
Setting up at the firing range with the breach end view. Note the ram rod in the bore to assist in elevation aiming. Cardboard box to be sure that the first firing recoil is contained in addition to the carriage restraint hawser round the box ends and under sand bags. An additional sand bag for recoil stop if it travels farther than anticipated.View attachment 186165View attachment 186164
I will try to insert a video of one firing sent to me by a club member. If it plays or not this is not a toy and has potentially lethal outcome so all safety precautions and proper firing conditions are recommended as the .27 inch 30 grain ball shot penetrated about 2/3 of a 1/2 inch chipboard backstop to the paper target. I take no responsibility for any use of this or other postings that any person may engage with.
 
I will try to insert a video of one firing sent to me by a club member. If it plays or not this is not a toy and has potentially lethal outcome so all safety precautions and proper firing conditions are recommended as the .27 inch 30 grain ball shot penetrated about 2/3 of a 1/2 inch chipboard backstop to the paper target. I take no responsibility for any use of this or other postings that any person may engage with.
It seems that MP-4 files cannot be decoded by my insertion attempt. Something that perhaps the Administrators can assist with. I'll go to the forum to see what instructions are there. PT-2
 
It seems that MP-4 files cannot be decoded by my insertion attempt. Something that perhaps the Administrators can assist with. I'll go to the forum to see what instructions are there. PT-2
I will try the MP-4 insert one more time same decoding problem. Oh well. If you want to see it send me your email address and I will forward this short clip. PT-2 still denying any use of these ideas or information and any adverse results or outcome of their use by others.
 
After completing a slightly longer carriage, proportioned to the barrel I have made some bore depth measurements and marked them on the ram rod illustrating the various working depths that were machined and taken up by the charge load and ball shot for the remaining functional firing barrel length of shot for that charge load.
First the two carriages. The shorter would have been better for a carronade than a long gun.
View attachment 185808
Next is the ram rod to full machined depth of bore and charge, marked off. The diameter of the charge portion is smaller than that of the working bore. Depending upon the charge grain load that load extends past the charge depth into the full bore diameter, shortening up the barrel length for the ball shot travel.
View attachment 185809
I have skipped past the shot bore depth and charged depth, as well as face of ball shot to show all of those as marked on the rod which was being "extracted" with the shorter depths.View attachment 185810View attachment 185811
Here you see all of the depth marks and have to mentally "pull" the rod to your right, out of the muzzle to visualize the working depths in the bore.
View attachment Boom 2020-10-17.mp4
 
Here is the firing after loading. Note that the carriage restraining lines are slack allowing recoil and a rear wheel jump. You can see this if you go to full screen and use the slider button at the bottom to slowly advance, view by view the powder expulsion and rear wheels coming up about 1/4 to 1/2 inch. When later shooting I kept the restraining lines taught giving better accuracy but still recoil jump. I have been able to get on 24x48 inch paper starting at 12 yards, then 16 and out to 20 but losing elevation accuracy. I couldn't tell where the shots went at 25 yards. All were able to penetrate at least 2/3 of a 5/8 inch chip board stop. This is a potentially lethal mini-cannon for which mis-use can have adverse results.

Using various combinations of three breech bolsters for elevation at distance I will continue to refine my understanding of the accuracy of my load, shot weight, and estimated elevation aiming. Windage has not been a problem left and right as sighting along the tapered barrel is fairly easy; the problem arises in elevation where the visual downward slope over the breech and muzzle cross downwards the axis of the bore itself sending shots higher than visually estimated.

I take no responsibility for any use of what I have posted or shown by others. Use hearing protection, safety glasses, know your target and what is behind it. Stay safe. Have fun. PT-2
 
After completing a slightly longer carriage, proportioned to the barrel I have made some bore depth measurements and marked them on the ram rod illustrating the various working depths that were machined and taken up by the charge load and ball shot for the remaining functional firing barrel length of shot for that charge load.
First the two carriages. The shorter would have been better for a carronade than a long gun.
View attachment 185808
Next is the ram rod to full machined depth of bore and charge, marked off. The diameter of the charge portion is smaller than that of the working bore. Depending upon the charge grain load that load extends past the charge depth into the full bore diameter, shortening up the barrel length for the ball shot travel.
View attachment 185809
I have skipped past the shot bore depth and charged depth, as well as face of ball shot to show all of those as marked on the rod which was being "extracted" with the shorter depths.View attachment 185810View attachment 185811
Here you see all of the depth marks and have to mentally "pull" the rod to your right, out of the muzzle to visualize the working depths in the bore.
Here is the firing after loading. Note that the carriage restraining lines are slack allowing recoil and a rear wheel jump. You can see this if you go to full screen and use the slider button at the bottom to slowly advance, view by view the powder expulsion and rear wheels coming up about 1/4 to 1/2 inch. When later shooting I kept the restraining lines taught giving better accuracy but still recoil jump. I have been able to get on 24x48 inch paper starting at 12 yards, then 16 and out to 20 but losing elevation accuracy. I couldn't tell where the shots went at 25 yards. All were able to penetrate at least 2/3 of a 5/8 inch chip board stop. This is a potentially lethal mini-cannon for which mis-use can have adverse results.

Using various combinations of three breech bolsters for elevation at distance I will continue to refine my understanding of the accuracy of my load, shot weight, and estimated elevation aiming. Windage has not been a problem left and right as sighting along the tapered barrel is fairly easy; the problem arises in elevation where the visual downward slope over the breech and muzzle cross downwards the axis of the bore itself sending shots higher than visually estimated.

I take no responsibility for any use of what I have posted or shown by others. Use hearing protection, safety glasses, know your target and what is behind it. Stay safe. Have fun. PT-2
When again firing to build a data base for range and elevation impacts at the range today I used a more documented procedure. Leveled the firing surface with a 24 inch level and sighting along the top to a tall paper target 10 yards out found the level line point. The target is 7 ft. high x 30 inches wide with a vertical center line and horizontal line crossing at the mid point; there are side marks for foot and half-foot upwards and down. I didn't think to take a photo but will next time out.
I use combinations of the three breach bolsters: one double height, one half of that, and one tapered.
The following results were found with varying combinations of bolsters (more lead to depression of the bore. . . fewer or smaller lead to elevation of the bore) Starting low working upwards:

Dbl+Sngl+Taper struck into the ground below the target.
Dbl +Singl struck 24 inches below the crossing line
Dbl + Taper struck 30 inches below the crossing line which is puzzling as it should have risen
Dbl alone struck 6 inches below the crossing line
Sngl + Taper struck 30 inches above the crossing line
Single alone struck 39 inches above the crossing line
I still had the Taper bolster alone and then None but it was too cold to continue.

I should have refired the Dbl + Taper which should have risen but dropped for unknown reasons so I'll probably reshoot that again for a check.

Next time out will be firing the same series at 15 yards, then progressively 20, 25, 30, 35, 40, 45, 50 or if unable to hit paper to suspend the sighting-in tests. I can only elevate the bore to about +37 degrees and not a full 45 degrees due to the carriage components under the breach.

It is a lot of fun but needs full respect in loading, handling, firing, and then cleaning out before the next shot. Variations are to be expected from a number of variables but the shot and charge grain weights are consistent with a few tents of a grain. Cold temps constricted the bore a small amount that I could detect when ramming down the wadded ball shot which took more pressure. Cleaning was also more difficult to insert and then withdraw that padded rod.

Firing only on an approved firing range and complying with "Hot Range and Cold Range" procedures insure communication between shooters present and not going in front of the firing line when it is Hot which also includes not handling or loading firearms/my cannon when Cold and people move forward to their targets and back.
I take no responsibility for any use of the information that I put up by others, in any manner, as there is potential danger, even lethal, with these small scale cannons or other simulations of cannons. PT-2
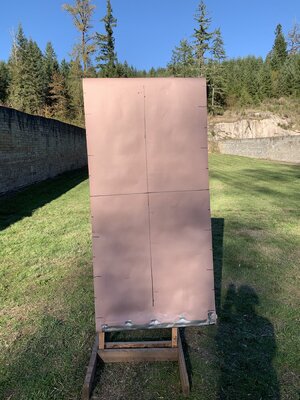
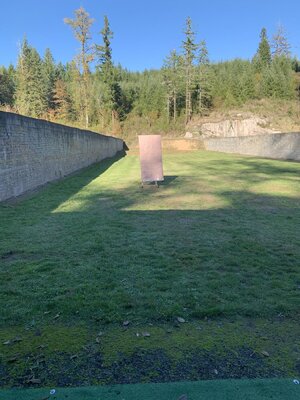
Second firing data base control shooting Tuesday at the range. Two photos of the 84"x30" target and with it at 15 yards.Cannon Target.jpg
Side ticks are at 6 inch intervals for rough estimation of elevation impact. Vertical is for windage which is only limited by my visual aiming while elevation at this point is by recorded trial shots in a sequence of the three bolsters as explained above. Next is the target at 15 yards today.Cannon Target at 15 Yards.jpg
Here are the elevation impacts' results
All prior setup data was the same or within 1 inch.
15 Yards
All bolsters not shot which would have been the lowest trajectory and into the ground.
Dbl/Sngl at -33 inches with a level trajectory diff. of -42 inches
Dbl/Taper at -11 impact at -26
Dbl at 18 for 9 inches above level
Sgl/Taper shot over the top (84 inches AGL) at unknown crossing height

20 Yards
First three combinations of bolsters not shot as assumed would be into ground
Dbl at 30 inches for 39 above level
Other combinations of bolsters lowering breach not shot due to time and cold temps.

I have been using an assumed middle of the tapered bolster but will have to use it more carefully for elevation control of impacts. I mark after each shot when I find the hole with the bolsters' combination, distance, and date before measuring the distance above or below the horizontal line but have not been recording windage as it is a sighting alignment variable and not one of firing. It shoots very straight from what I am seeing.

Once I have a good elevation data base I should be more able to hit paper closer to the crossing of the lines at known distances. Careful setting of the tapered bolster will be the key to better elevation impacts.
I again take no responsibility for any use of what I present, by others in any manner as there is potential hazard involved. PT-2
 
When again firing to build a data base for range and elevation impacts at the range today I used a more documented procedure. Leveled the firing surface with a 24 inch level and sighting along the top to a tall paper target 10 yards out found the level line point. The target is 7 ft. high x 30 inches wide with a vertical center line and horizontal line crossing at the mid point; there are side marks for foot and half-foot upwards and down. I didn't think to take a photo but will next time out.
I use combinations of the three breach bolsters: one double height, one half of that, and one tapered.
The following results were found with varying combinations of bolsters (more lead to depression of the bore. . . fewer or smaller lead to elevation of the bore) Starting low working upwards:

Dbl+Sngl+Taper struck into the ground below the target.
Dbl +Singl struck 24 inches below the crossing line
Dbl + Taper struck 30 inches below the crossing line which is puzzling as it should have risen
Dbl alone struck 6 inches below the crossing line
Sngl + Taper struck 30 inches above the crossing line
Single alone struck 39 inches above the crossing line
I still had the Taper bolster alone and then None but it was too cold to continue.

I should have refired the Dbl + Taper which should have risen but dropped for unknown reasons so I'll probably reshoot that again for a check.

Next time out will be firing the same series at 15 yards, then progressively 20, 25, 30, 35, 40, 45, 50 or if unable to hit paper to suspend the sighting-in tests. I can only elevate the bore to about +37 degrees and not a full 45 degrees due to the carriage components under the breach.

It is a lot of fun but needs full respect in loading, handling, firing, and then cleaning out before the next shot. Variations are to be expected from a number of variables but the shot and charge grain weights are consistent with a few tents of a grain. Cold temps constricted the bore a small amount that I could detect when ramming down the wadded ball shot which took more pressure. Cleaning was also more difficult to insert and then withdraw that padded rod.

Firing only on an approved firing range and complying with "Hot Range and Cold Range" procedures insure communication between shooters present and not going in front of the firing line when it is Hot which also includes not handling or loading firearms/my cannon when Cold and people move forward to their targets and back.
I take no responsibility for any use of the information that I put up by others, in any manner, as there is potential danger, even lethal, with these small scale cannons or other simulations of cannons. PT-2
What the F*ck are you talking about? What is a bolster let alone a double bolster with a taper?
 
What the F*ck are you talking about? What is a bolster let alone a double bolster with a taper?
Those are the wooden blocks set underneath the breach end to elevate the barrel. The have different thicknesses (vertically) and a tapered one is just that for more fine elevation adjustments. The double is twice the thickness of a single one. At my scaled cannon Single = about 4 mm, Double = about 9 mm, Tapered from about 5 mm down to 1 mm but that one only can be inserted about half way on the supporting piece on top on the rear axle. I have have also seen "quoin" but from some of my resources that applies to the handle and not the bolster, possibly meaning both block/taper and the handle.
Just terminology as ships/models have their own terminology for various parts and places. All of these show up in the photos contained in the two forum threads (buttons).
To better answer the bolster question:
Building 18th Century Naval Artillery, Damian Siekonic, Privateer Media, LLC, Center Valley, Pennsylvania, 2008. Glossary, pp. 82 - 83
Bolster - A wooden component of a cannon carriage that sits between the quoin and stool bed and allows for a greater depression of the muzzle when aiming.
Quoin - A wedge-shaped wooden component of a cannon carriage used to adjust the elevation of a cannon barrel for aiming.
Stool Bed - A wooden component of a cannon carriage that rests over the hind axle tree and serves as a base for the quoin.
All are visible in the carriage photos in the last (6) thread along with the firing video. . . it may take some scrolling down to see these.
PT-2 (Rich)
 
Back
Top