






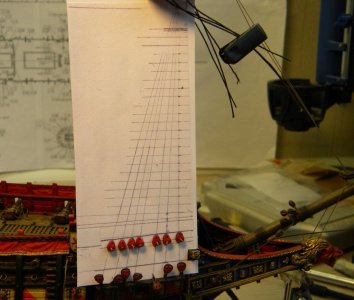
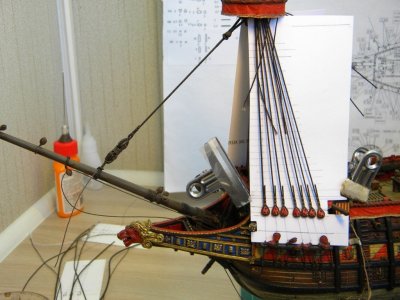
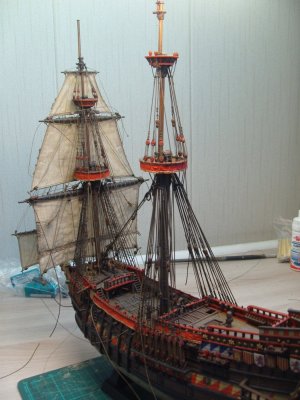
When will be ready to fitt shrouds, You could try to use this carton patern which makes installation easy... it need to be cutted in such way to be fitted precisly between top and channel.
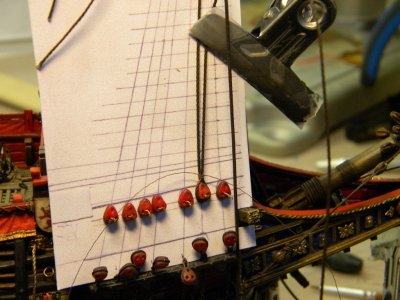
You can draw shrouds position on it and position of upper deadeyes as well.
Lower deadeyes links need to be secured in the chanel and on the hull in the proper pozitions and angles according to patern drawn on carton plate.
Upper deadeyes in row need to be secured temporary by soft thin wire to the carton patern in proper pozition as well, from opposite You can drop a CA gel on this screwed wire which holds upper deadeye in position...
Than to fitt prepared in such way carton patern with temporarly secured upper deadeyes between top and chainplate firmly.
Than pass free end of each shroud's ( consider that all shrouds already fitted on the mast top in advance in proper secuence in pair and seized together)
around relevant upper deadeye ( port>sbs or how it must be done correctly sequence , first to fit pair of port shrouds than sbs than port site again or vise versa here I do not remember already it need to be checked in Anderson book))
# You pass free end shroud around upper deadeye hold it by pincet in position, drop a small CA gel on the upper part of the shroud which passed around deadeye slightly above upper part of deadeye and squeese standing and running part of the shroud above deadeye for a couple of seconds to allow CA gel to work.
# Than make a few simple repeated knots one abive other in this area by Scala 240 and fix it by CA gel against unwiding and to start another pair of shrouds on other side...and repeat process till the moment all shrouds will be secured on the carton paterns on both sides.
#There is important do not apply force when You are busy with passing shroud around upper deadeye, to control forces You apply need ti check that carton plates remain straight not starting bending...
# As soon as all shrouds in place and connected with relevant upper deadeyes You can slowly remove carton paterns , turn them upside down and accurately remove wire that keeps deadeyes on the partern...
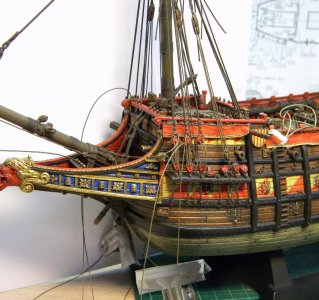
# and to start to install shrouds lanyards and to adjust shrouds tension...of couse there must be no real tension but imitation only that shroud are tight... weight of paper steel clips will be sufficient to make shrouds /lanyards looks tight...
# when all lanyards are tight You can secure remainings running ends of the shrouds above upper dedeyes as it is described in RC Anderson book and to trimm them in proper way.
For imitation lashing You can use very thin Scala 240 making a simple knots in sequence tightly one above anoter a few times...
All threads You are going to use better need to be painted in advance - artistic oil paints mixed with tick oil and ket it dry after..
.You can use burnt umbra or umbra for standing rigging anf golden ochre for running, or adjust colors by your own taste...
Wnen this mix of artistic oil paint and tick oil polimerisied , threads became as very soft thin wire , it keeps shape and straight and angles and very handy to work with!...
Oil paints need to be deluted in this teack oil in resonable proportion by your own taste , well mixed and than thread need to be pulled trough piece of cotton rags or glove soaked in this mix a few times to be good painted through, and than hanging some where to dry for approx 24 hrs...
Some pictures illustrating this process of making shrouds You could see in that link to German forum I posted early
All the Best!
You can draw shrouds position on it and position of upper deadeyes as well.
Lower deadeyes links need to be secured in the chanel and on the hull in the proper pozitions and angles according to patern drawn on carton plate.
Upper deadeyes in row need to be secured temporary by soft thin wire to the carton patern in proper pozition as well, from opposite You can drop a CA gel on this screwed wire which holds upper deadeye in position...
Than to fitt prepared in such way carton patern with temporarly secured upper deadeyes between top and chainplate firmly.
Than pass free end of each shroud's ( consider that all shrouds already fitted on the mast top in advance in proper secuence in pair and seized together)
around relevant upper deadeye ( port>sbs or how it must be done correctly sequence , first to fit pair of port shrouds than sbs than port site again or vise versa here I do not remember already it need to be checked in Anderson book))
# You pass free end shroud around upper deadeye hold it by pincet in position, drop a small CA gel on the upper part of the shroud which passed around deadeye slightly above upper part of deadeye and squeese standing and running part of the shroud above deadeye for a couple of seconds to allow CA gel to work.
# Than make a few simple repeated knots one abive other in this area by Scala 240 and fix it by CA gel against unwiding and to start another pair of shrouds on other side...and repeat process till the moment all shrouds will be secured on the carton paterns on both sides.
#There is important do not apply force when You are busy with passing shroud around upper deadeye, to control forces You apply need ti check that carton plates remain straight not starting bending...
# As soon as all shrouds in place and connected with relevant upper deadeyes You can slowly remove carton paterns , turn them upside down and accurately remove wire that keeps deadeyes on the partern...
# and to start to install shrouds lanyards and to adjust shrouds tension...of couse there must be no real tension but imitation only that shroud are tight... weight of paper steel clips will be sufficient to make shrouds /lanyards looks tight...
# when all lanyards are tight You can secure remainings running ends of the shrouds above upper dedeyes as it is described in RC Anderson book and to trimm them in proper way.
For imitation lashing You can use very thin Scala 240 making a simple knots in sequence tightly one above anoter a few times...
All threads You are going to use better need to be painted in advance - artistic oil paints mixed with tick oil and ket it dry after..
.You can use burnt umbra or umbra for standing rigging anf golden ochre for running, or adjust colors by your own taste...
Wnen this mix of artistic oil paint and tick oil polimerisied , threads became as very soft thin wire , it keeps shape and straight and angles and very handy to work with!...
Oil paints need to be deluted in this teack oil in resonable proportion by your own taste , well mixed and than thread need to be pulled trough piece of cotton rags or glove soaked in this mix a few times to be good painted through, and than hanging some where to dry for approx 24 hrs...
Some pictures illustrating this process of making shrouds You could see in that link to German forum I posted early
All the Best!
Last edited:


