Kurt Konrath
Kurt Konrath
A cutaway version with full tubing, wiring and cables would be fantastic to see!
Dean or Doc K would be the folks who could pull this off.
Dean or Doc K would be the folks who could pull this off.
 |
As a way to introduce our brass coins to the community, we will raffle off a free coin during the month of August. Follow link ABOVE for instructions for entering. |
 |
 |
The beloved Ships in Scale Magazine is back and charting a new course for 2026! Discover new skills, new techniques, and new inspirations in every issue. NOTE THAT OUR FIRST ISSUE WILL BE JAN/FEB 2026 |
 |

That's what I call "issuing a challenge"!A cutaway version with full tubing, wiring and cables would be fantastic to see!
Dean or Doc K would be the folks who could pull this off.
Thanks Grant, glad you found my build.Good morning Dean. Firstly my condolences for the passing of your Mom. I’m so sorry Dean. Your P - 38 “Kathy” will keep her close. I apologize for the ton of likes and loves however I don’t often venture into the airplane forum, so had to play catch up. A classic Dean build so far- beautiful craftsman with wonderful detail. After the spitfire my favorite WW2 plane. I will have to check myself and remember to have a look at this forum from now on as I have 3 buddies building here. Cheers Grant


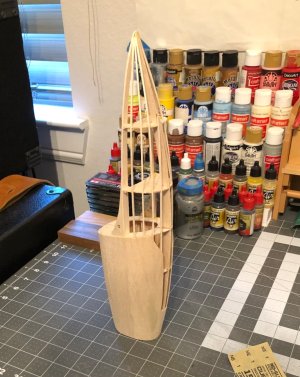
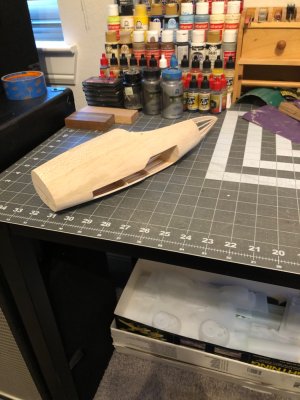
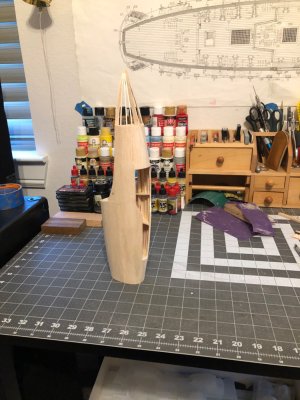
So that's why I couldn't make sense of it; skin edges as expected but stringers being continous.As I add the wood to the fuselage, I realize the stringers and bulkheads will have to be cut out for the landing gear opening. Odd they didn’t have you do that at initial assembly of the frame? Anyway, that will be next after skinning the entire fuselage. For now I stopped the wood at the edge of the opening. I will continue this until it’s all done, then the edges will be sanded flush after removing the required stringers and bulkhead areas. Fun stuff!
I assume they are giving you the option to build it with the landing gear up and doors closed. I have considered that option, as it’s too big to put on a shelf! But I think I still want the landing gear down. Could be talked out of it, as I am going to hang it from the ceiling.So that's why I couldn't make sense of it; skin edges as expected but stringers being continous.


Won't do such a thing, my only suggestion would be to make the landing gear functionalCould be talked out of it, as I am going to hang it from the ceiling.
dittoWon't do such a thing, my only suggestion would be to make the landing gear functional
A slow progress is still a progress, Dean. And this is a time consuming proces to add this thin sheet with such a tight result as you show.As I add the wood to the fuselage, I realize the stringers and bulkheads will have to be cut out for the landing gear opening. Odd they didn’t have you do that at initial assembly of the frame? Anyway, that will be next after skinning the entire fuselage. For now I stopped the wood at the edge of the opening. I will continue this until it’s all done, then the edges will be sanded flush after removing the required stringers and bulkhead areas. Fun stuff!
View attachment 474733


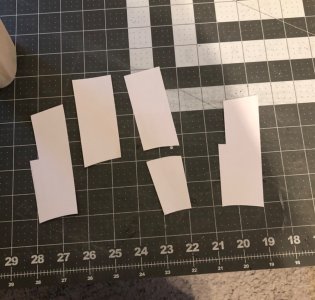
 …but I like wood working…and thin wood soaked in water is very pliable. I think making the patterns is time consuming but a necessity. And my friend @Peter Voogt showed me a long time ago how well those work.
Thanks Paul!Looks great, Dean!
Looks very, very good, Dean.Update…a few more panels on.
I will wait until I attach it to the main wing before I add the panels that attach to the wing…it will be more clear when the time comes. This way I can assure they will line up exactly without any gaps.
Also I have to review the plans to make the opening for the nose landing gear in the bottom prior to adding panels.
Onward and upward!
View attachment 473183
View attachment 473184
Thanks Adi!Looks very, very good, Dean.
To do properly you will need to add new stringer at all door edges, and then make doors with edges as well to hang, as they weren't just curved panels, they had structural support stringers at edges as well.I assume they are giving you the option to build it with the landing gear up and doors closed. I have considered that option, as it’s too big to put on a shelf! But I think I still want the landing gear down. Could be talked out of it, as I am going to hang it from the ceiling.
Thanks Kurt, the stringers are already in the appropriate locations to outline the gear door opening. I just had to cut the stringers and bulkheads, and then trim the wood to the edges.To do properly you will need to add new stringer at all door edges, and then make doors with edges as well to hang, as they weren't just curved panels, they had structural support stringers at edges as well.
Best you determined it at this point when easier to work then when whole piece had been fully skinned with wood.
