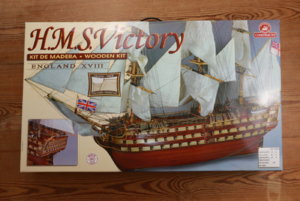
H.M.S. Victory Constructo - by Wooden Ship Crafts

Joined
Dec 8, 2019
Messages
131
Points
103

Location
Dublin, Ireland
Hello, Ship of Scale friends,

After reading around the Ships of Scale forum, I decided to start my own Build Log. I have no experience building such models, so it will be great if you could support me here. My model is H.M.S. Victory wooden ship from Constructo.

Size
It is a 1 to 94 scale model.
Length: 111cm
Width: 40cm
Height: 80cm

Why did I decide to build Victory?
First of all, I like how it looks. It is big enough to dig into the details. Also, I wanted to work less with colors, and focus on wood and oil when building. When I was searching on the internet, I checked different models, but after seeing HMS Victory, my eye didn't stop with the other model.

8 years ago, I did try to start with the Deagostini HMS Victory, however, I made a mistake. I decided to wait for all 120-140 (don't remember for sure) magazines before I start. So I've lost motivation. While waiting, I bought a small version of HMS Victory with a solid body, so I can work on something while waiting for Deagostini complete set of magazines. I've built it, but, it is nothing compared to kits when you have to build a ship body yourself.

Pricing
The price for this wooden ship model from Constructo is £309 on Amazon UK. I've seen on other websites plus-minus £30.

Quality
Pictures on the Amazon UK website for this model were better than other ones I've checked, that was one of the reasons I stopped with Constructo. The box, as well as its content, is just great. I have no previous model ships to compare with, but from what I saw on the other videos, mine is pretty good quality.

Motivation
In order to keep myself motivated and receive some feedback, I created a YouTube channel called Wooden Ship Crafts. The plan is to upload my progress on a weekly basis.
Also, this particular model is a birthday present from my wife, so I just don't have any excuse, why shouldn't I build it :).

I could never imagine, I would find a forum like this where like-minded people build and share their progress. So I am happy to find Ships of Scale forum as well as the Build Logs.

What's inside the box?
In the video, I've created a few days ago, I show the content of the H.M.S. Victory wooden ship model. Have a look, and let me know your thought or if you have any questions related to the content or any item inside. I will be happy to answer.


HMS Victory History
HMS Victory is a 104-gun first-rate ship of the line of the Royal Navy, ordered in 1758, laid down in 1759 and launched in 1765. She is best known for her role as Lord Nelson's flagship at the Battle of Trafalgar on 21 October 1805.

She additionally served as Keppel's flagship at Ushant, Howe's flagship at Cape Spartel and Jervis's flagship at Cape St Vincent. After 1824, she was relegated to the role of harbour ship.

In 1922, she was moved to a dry dock at Portsmouth, England, and preserved as a museum ship. She has been the flagship of the First Sea Lord since October 2012 and is the world's oldest naval ship still in commission, with 241 years' service as of 2019.
 
Last edited by a moderator:
IMG_5620.JPG
A small update.
Today, I went to a few local art shops to see available glue options as a model knife. There are two probably the only two tools I need in order to start the first two steps.

I've asked a question in the Modeler Builder Tool Craft Set Kit recommendations thread about the kit and found out that there is no sense to buy one. It is obviously better to go with the individual tools to start the wooden ship model. At least half of the tools from any Tool Craft Set Kit won't be used. So it is worth looking into the local options.

From my experience with Diagostini HMS Victory, I remember that the false keel and frames should be cleaned with sandpaper. It seems like it is not the case with the current HMS Victory model. At least I don't see such instructions in the book for steps 1-4. But, I am sure that once I will cut frames from the frame which holds these frames, I would have to use sandpaper to clean places on all frames and false keel in the place of the cut.

Screenshot 2019-12-11 at 22.09.16.png

For glue, if to be honest with you, it wasn't super straight forward to me, what glue should I use. But with the help of folks from this forum, I confirmed that a PVA glue should work for wood. It is a white glue, which can be used for wood and other surfaces. So if you will be looking for glue, start with PVA, usually, it is not an expensive option.

Screenshot 2019-12-11 at 22.09.04.png

As for the model itself, I checked the first steps, it seems straight forward. Also, I've noticed, that not all elements can be found from the image instructions. I hope it shouldn't be a problem going forward.

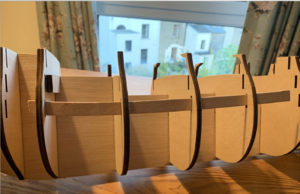
On the picture is my mini work in progress, before I cut the frames.
Screenshot 2019-12-11 at 22.20 1.png

Tomorrow I should start and see some progress.

I am planning to buy for the work:
1. PVA Glue
2. Model knife
3. Ruler with 45 degrees.

See ya!
 
Good morning, wonderful people.

I went to local the Eason store and bought a few tools to start: knife, PVA glue and a ruler. Total price is €11.38 (includes 23% tax).

Price breakdown:
Ruler - €1.50
Art Knife - €7.99
PVA Glue - €1.99

IMG-3512.jpg
As suggested in the thread where I asked about the tools kit, I bought only required tools for the start.

I wasn't sure about the sandpaper, but now I understand that I need it :) in a few days after I start.
 
Last edited:
And don't forget the sand paper.
Good to see the log started.
Watching with keen interest. :)
Tony

Thanks @Galley Slave , this is something I was thinking about yesterday.
Any suggestions for the grit size for the sandpaper?
I've read that 80-120 grit is for smoothing surfaces and removing small imperfections and 360-600 grit for the finish.

Probably I have to go with 80-120 for the start.
 
You know, I have no idea.
I was given a bag full of ladies emery boards and just use whichever one I feel is doing the best job.
This was after I had bought a few sanding boards myself, but have no idea what grit they have on them.
I tend to avoid very grainy ones as they leave lines on the wood.
I have a feeling that the ones I use the most are in the 120-200 range.
With probably a 400-800 to finish off.
'Borrow' a couple of the Admiral's emery boards and see which work best.
Make sure you get permission.
Admirals rarely tolerate insubordination in the ranks. :)
 
The work has been officially started.
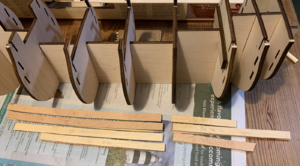
Early in the morning, I decided to unplug all frames and false keel from the frame and write down all numbers from photo instructions book to materials. It really helps. Of course, I've faced with the issue, that it was hard to identify no 19 fore and the sides no 20 and a few more. But a few hours with the try and check approach, I figured out all parts and its numbers for the start.

Screenshot 2019-12-13 at 22.29.10.png
It appeared that I don't really have a proper pencil, so I used a black one from the collection of 6 colors. Very important to sign parts with numbers.
Screenshot 2019-12-13 at 22.30.26.png

I did go with the sandpaper to make sure the surface of all parts is clear. So, in order to start, we have to have sandpaper, as I was thinking that it will be needed somewhere in step 14. I used 120 grit sandpaper. It was fine. It could be even 100 for this Constructo parts.

I have some issue with the frame 9 and the no 19 fore for some reason, it doesn't seem to be enough to perfectly sit inside the 9 frame hole. However, when I hold with the fore, it is fine. So, maybe when putting a glue, I would have to hold to have the fore in the right position.

Screenshot 2019-12-13 at 22.36.50.png
Maybe, when I put glue and align all frames, it will be fine.
The instruction shows that the fore should be right in the hole of the 9th frame.

Screenshot 2019-12-13 at 22.37.18.png

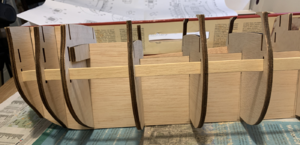
Overall, I like today's results with my Victory. It took some time to cut all parts with my art knife. But it was fine.

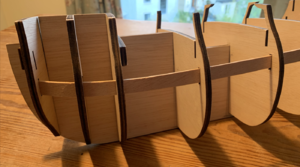
This is the current state as of now. No glue used.
Screenshot 2019-12-13 at 22.40.23.png
Screenshot 2019-12-13 at 22.40.41.png

That's it for today. See you tomorrow!
 
You are of a very good start, Max! Good idea to install frames without glue - 'dry fit'. * Tip (if you don't mind) when you will glue frames to the keel make sure:
1. Remove the char from frame's gluing surfaces. But watch out not to remove excess material, otherwise, the frames will be loose. It has to 'snag' for better gluing.
2. Frames must be exactly 90 degrees against the keel frame. You may find a square or simply a couple of 'lego' blocs. Yes, LEGO is very popular in our community ;)
3. Glue the next frame only when the first (the previous frame is set). Constantly check frames against the keel for 90 degrees (It is damn IMPORTANT!!!)
I am sure it will be OK! Good luck...
 
Thanks @Rowboat for stopping by. This HMS Victory model I would say intermediate to advanced level. As it has lots of details you have to build for this model. I haven't compared to other smaller models, but this one is definitely not easy to build.

Hi, @Jimsky I am really happy and open to receive any feedback. I wasn't sure if I have to remove all char from the frames, so thank you for the recommendation. I am still thinking about how I am going to make sure 90 degrees against the keel. I watched a few videos to try to understand what to actually measure and how to do this.

Hi, @Galley Slave I can't agree with you more. I really like it when there is some valuable and practical feedback, though. So I don't rush with applying glue, better to think and measure, then move forward.
 
Great start! Just remember...all questions are welcome! There are no stupid questions. A note on edge char on laser cut parts...I know the conventional wisdom is to sand away edge char...my experience is you only need to sand the edges of parts that will be visible and left in natural wood (not painted). I rarely sand edges that will be hidden. Besides, sanding is my least favorite aspect of modeling! :) You will also use a lot of CA glue as you progress. Ship modeler's creed...one part at a time (and its only wood...if you make a mistake remake the part!)
 
Bad news. I broke the left fore while trying to fit nicely both fores no 19 inside the hole of frame 9.
Screenshot 2019-12-14 at 16.19.16.png
Good news, I found a fix.

A little bit of a story.

Actually, I was preparing my thought about this fore and how this should fit into the HMS Victory Constructo model, as there is no word in the instructions book about it.

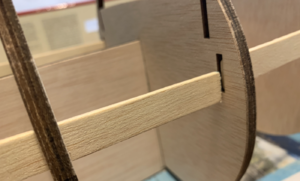
The 2 strips (known as no. 19 fore in the instructions photo book) have to start with the frame 1 and end in the middle of the frame 9. I tried to see if this is a case, but can't properly match that 9th frame middle. So the fore (strap) goes inside the whole halfway 9th frame on both sides.

The other thing I've noticed is that these straps have some angle at the left. It is probably because you have to put it into frame 1 starting from frame 9.

Screenshot 2019-12-14 at 16.18.23.png
Again, no instructions if the left side should go up or down when you install it on the model. Both sides look ok when installed. But I looked closely and tried to install the fore without moving frames, remember, my frames haven't glued just yet.

This is an example when no 19 fore line goes down, see the left side. That's what I did yesterday, but as I've noticed, frames weren't on its slots.
Screenshot 2019-12-13 at 22.40.23.png
Here you can see, when I tried to put the fore from frame 9 without moving any frames, it doesn't go further. So my conclusion is that the fore or stripe and its angle should go up, not down, as in the photo below.
Screenshot 2019-12-14 at 16.19.01.png

Now, it goes through the second hole on the left side.
Screenshot 2019-12-14 at 16.19.08.png

Now, this is the right place for the fore no 19. But, with this version, it doesn't go inside frame 9.
Screenshot 2019-12-14 at 16.18.54.png

I checked the instructions I found out, that it doesn't really matter how the fore is going to be installed to frame 3, as it won't be visible. Most importantly, is that the no 19 fore will go into the 9 frame hole.

The length is not enough to go both ways for the 19 fore, frame 3 and frame 9, so while trying something I broke it.

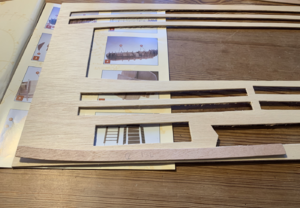
Luckily, I still have the big frame and I decided to cut the new fore, a slightly longer one.Screenshot 2019-12-14 at 16.19.22.png
Screenshot 2019-12-14 at 16.19.49.png

Before I will install the new one, I will keep the old broken one, just in case. Also, I think it is a good idea to put the stripes into hot water for a few minutes, so it won't break again. If all goes well with this new fore, I will make a similar length for the other side.
 
Great start! Just remember...all questions are welcome! There are no stupid questions. A note on edge char on laser cut parts...I know the conventional wisdom is to sand away edge char...my experience is you only need to sand the edges of parts that will be visible and left in natural wood (not painted). I rarely sand edges that will be hidden. Besides, sanding is my least favorite aspect of modeling! :) You will also use a lot of CA glue as you progress. Ship modeler's creed...one part at a time (and its only wood...if you make a mistake remake the part!)

Hi, @danielsje thank you for the suggestions. I think I will go tomorrow to the local hobby shop for the CA glue.

As for sanding, I will have to find a sand tool for sanding inside the frames where they are installed to the keel. As I can't believe I can do a proper job with the sandpaper.
 
Hi Max, a word of warning about CA glue. Cyano Acrylate (CA) made the instant bond (for the most part) between the gluing parts. They made with different viscosity and different set times. Also, most brands have a tendency to clog (mate) gluing spot and...most important, penetrate into the wood so you will not be able to stain\oil. I have not checked all the brands, but I am a long-time fan, and absolutely love Mercury Adhesives. The super-thin formula like water will go anywhere. The price is moderate and I saw them on e-bay. Check it out... And always have handy CA debonder, in case you glue your skin...(scarry).

 
Small update.
As part of the HMS Victory build, I record my work for the YouTube channel Wooden Ship Crafts.
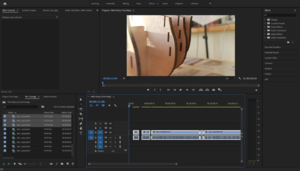
Here is a behind the scenes editing process. I have 2 hours or so footage, and I would like to make something like 10 minutes or so, maybe even less.
Screenshot 2019-12-15 at 13.47.12.png

Let me know what would you like to see or hear in the upcoming videos.
 
My friends,

I have two news.
1. I bought a cutting mat A3, so no more newspaper usage :).

2. I found a few plastic things and planning to use it for 90 degrees when I will apply glue for the 3rd frame to the keel. Any suggestions if I am missing something are more than welcome.
Screenshot 2019-12-15 at 18.50.20.png

It scares me to put glue and ensure 90 degrees at the same time as this is a very first and important part.
 
Back
Top