
-
SUBSCRIBE TO SHIPS IN SCALE TODAY!
The beloved Ships in Scale Magazine is back and charting a new course for 2026!
Discover new skills, new techniques, and new inspirations in every issue.
NOTE THAT OUR NEXT ISSUE WILL BE July/August 2026 -

Win a Free Custom Engraved Brass Coin!!!
As a way to introduce our brass coins to the community, we will raffle off a free coin during the month of August. Follow link ABOVE for instructions for entering.
You are using an out of date browser. It may not display this or other websites correctly.
You should upgrade or use an alternative browser.
You should upgrade or use an alternative browser.
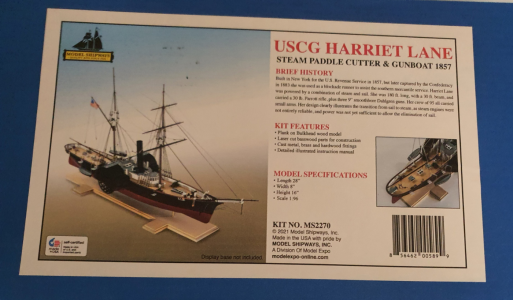
I won't go through the inspection of the kit contents as this has been done most effectively by others. But I did discover that the paddle wheels are only half wheels (Very false). I don't really like this so my first job will be to see if I can make some paddle wheels for the ship and actually install. I don't want to use any of the kit pieces because at this stage I want a fall back position
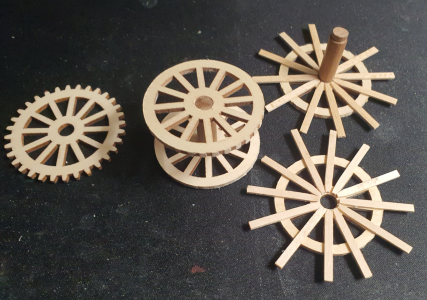
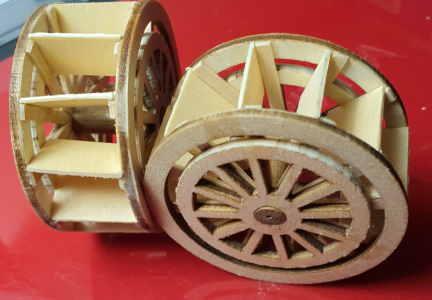
I am doing things the wrong way round but I have to see if my Ideas on operating paddle wheels will work. This means a substantial modification to the kit parts that surround the Paddle Wheels ( Cutting substantial square holes to allow the wheels to fit). So far so good. The parts loose some of their strength through this work but when assembled together the should recover it
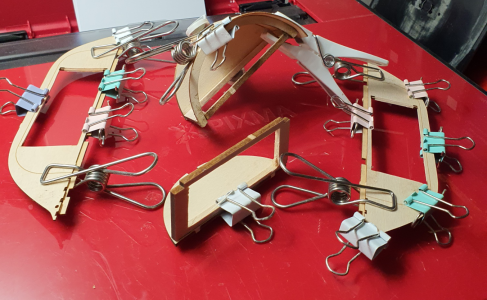
I have probably made my first mistake - I made the paddle wheels the same width as the fake ones and I now believe that I will have great difficulty fitting these in the paddle wheel cover, but more importantly I found that the paddle wheels woobled ( the axel was not quite perpendicular to the rotation) and this was unacceptable because of the tightness the wheel in the cover, it would probably jam. Now I am building the cover with the best opening I can provide and I will build the paddle wheels with more care to match this opening
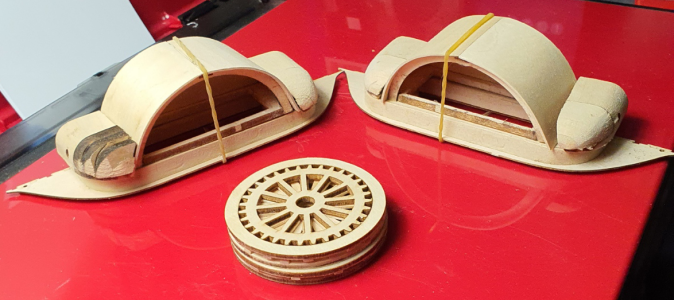

Stuff always happens, nice recovery…I have probably made my first mistake - I made the paddle wheels the same width as the fake ones and I now believe that I will have great difficulty fitting these in the paddle wheel cover, but more importantly I found that the paddle wheels woobled ( the axel was not quite perpendicular to the rotation) and this was unacceptable because of the tightness the wheel in the cover, it would probably jam. Now I am building the cover with the best opening I can provide and I will build the paddle wheels with more care to match this opening
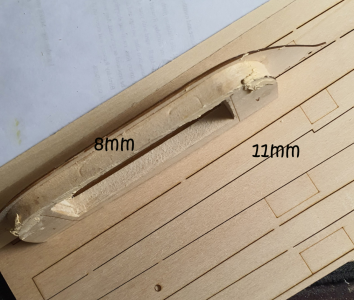
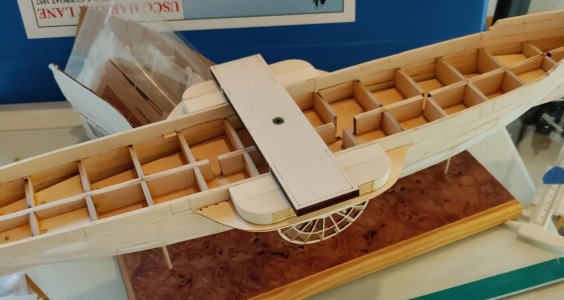
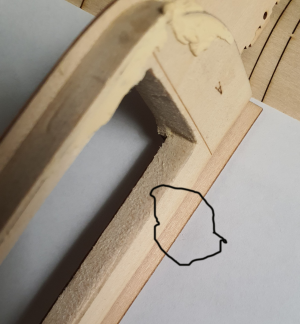
Whilst building this kit I pay particular attention to the other builders to follow their lead, I thus beleive I may have a problem. In the attached photo ( taken by another top builder) you will see he levels the pontoons. thus the pontooms must be the same thickness as the Rail piece of the boat. I have found this not to be the case but for the life of me I cannot see what I have done wrong. My solution is to insert a spacer in the pontoon. - any suggestions as to where I have done things differently????

- Joined
- May 25, 2020
- Messages
- 1,418
- Points
- 443

Omega! I thought I was "watching" you. I am now. You are doing some very cool stuff! I love your audacity, tenacity and curiosity. I'm glad you solved the spacing problem. I hope to see more pics soon. Perhpas you've already motorized the wheels? In any event, happy modeling!
Blessings. Peace. Gratitude.
Chuck
Blessings. Peace. Gratitude.
Chuck


Super build so far and I love the unique tasks required of the sidewinders. Nicely done!
- Joined
- Sep 8, 2024
- Messages
- 226
- Points
- 113

Preamble - I have zero knowledge of this kit.
But I'm fascinated by your endeavour - I had / still have a hankering for a paddler.
My only comment is
It's a kit, and all kits are only a pack of suggested parts. trust nothing in the kit or plans, and not necessarily what others have done. Kits are reduced to 'simple' to get costs down - like a half a wheel! and other folk may have made changes to make things work.
For your current impasse, if you have checked the thickness's of parts and alignments (maybe the material you have was faulty, then either re-make the spacer to fit the rail, cut down the rail to fit the spacer (!) or add shims to bring it up to correct size.
And, of course, SoS is here to provide masses of advice, though bear in mind that free advice is worth exactly what you pay for it, so make your own judgements..
Jim
(looking forward to seeing more of this)
But I'm fascinated by your endeavour - I had / still have a hankering for a paddler.
My only comment is
It's a kit, and all kits are only a pack of suggested parts. trust nothing in the kit or plans, and not necessarily what others have done. Kits are reduced to 'simple' to get costs down - like a half a wheel! and other folk may have made changes to make things work.
For your current impasse, if you have checked the thickness's of parts and alignments (maybe the material you have was faulty, then either re-make the spacer to fit the rail, cut down the rail to fit the spacer (!) or add shims to bring it up to correct size.
And, of course, SoS is here to provide masses of advice, though bear in mind that free advice is worth exactly what you pay for it, so make your own judgements..
Jim
(looking forward to seeing more of this)
- Joined
- May 25, 2020
- Messages
- 1,418
- Points
- 443
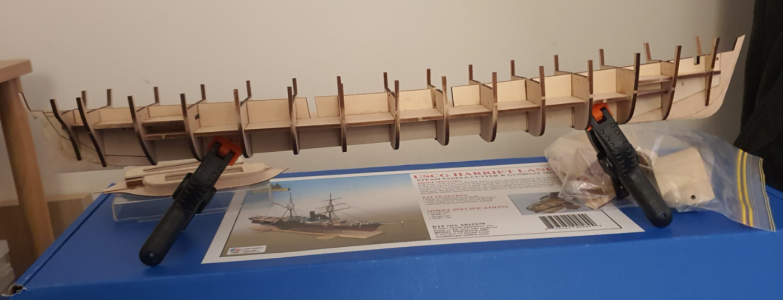
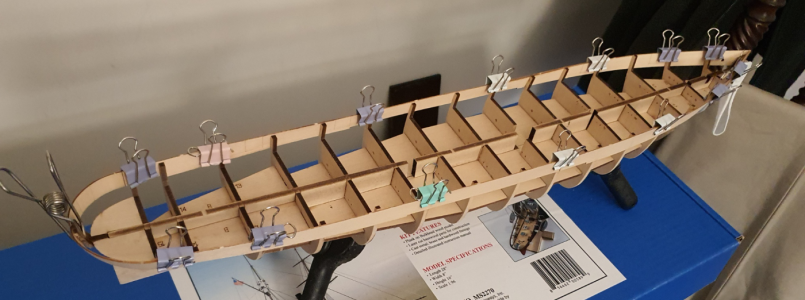
Omega! Looking good, shipmate! Seems you had no problem with the stern planking coming apart on you - well done! Here's 2 cents in case the issue is on your mind - final bulwark height. @DocTom and I have been talking about this issue as it impacts how the guns sit in their ports when the time comes. More important for you because of your motorized working wheels.
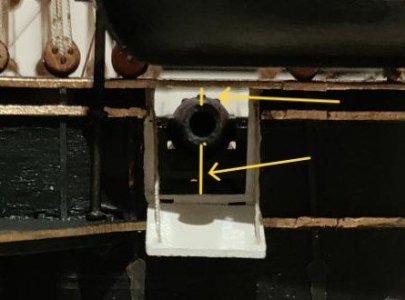
As you may have remarked by visitng other logs - there is a persistent problem of the caprail pressing on the top of the gun barrels and having to sand the bottoms of the carriages practically flat to ameliorate the problem enough so that the best outcome is the cap rail presses on the top of the barrel. The measurment in the pic below show why this happens. True story - I thought it was just because I did it wrong. Happens to me all of the time.
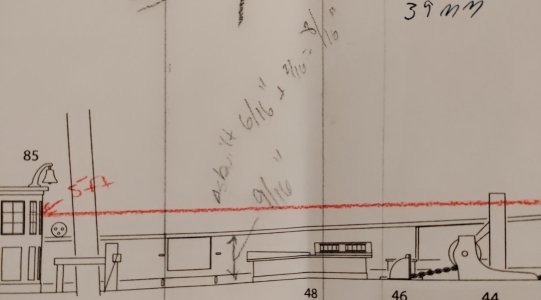
As you know I discovered the problem very late in my build. There were three parts to the problem in my case. 1) I planked the deck with 1/16" thick planks instead of using the precut, pre-marked, unscribed 1/32" deck from the kit. My decision took away 1/32" from the as built distance between the deck and the top of the finished bulwark. 2) As built, my bulwark was 3/8" high. At this point I put my guns on deck and noticed the massive shortness of the bulwarks . 3) Then I went to the plans and measured the designed height of the bulwarks 9/16". That missing 3/16" was the problem! in my case add 1/32" to the problem because I used 1/16" thick stock to plank the deck.
I say all of this as a reminder to beware

You're doing a lot of cool modifications and increasing the level of detail on your Harriet Lane and you may want to make sure you have the bulwark height necessary to accommodate her guns properly. Given the work you've already done on the sponsons, you'll need to keep the height problem constantly in mind as you plank the hull. In my case, I didn't need to do anything drastic to the sponsons when I heightend the bulwarks. In your case you're looking at making sure the axel placement is correct for your motorized wheels.
Even though it worked out for me, it was still wrong - I only added 1/8 to the bulwarks and the caprail is still a little to close to the tops of my guns by about 1/32" - 1/16" The yellow line above the muzzel should be longer
Blessings. Peace. Gratitude.
Chuck
As you may have remarked by visitng other logs - there is a persistent problem of the caprail pressing on the top of the gun barrels and having to sand the bottoms of the carriages practically flat to ameliorate the problem enough so that the best outcome is the cap rail presses on the top of the barrel. The measurment in the pic below show why this happens. True story - I thought it was just because I did it wrong. Happens to me all of the time.
As you know I discovered the problem very late in my build. There were three parts to the problem in my case. 1) I planked the deck with 1/16" thick planks instead of using the precut, pre-marked, unscribed 1/32" deck from the kit. My decision took away 1/32" from the as built distance between the deck and the top of the finished bulwark. 2) As built, my bulwark was 3/8" high. At this point I put my guns on deck and noticed the massive shortness of the bulwarks
. 3) Then I went to the plans and measured the designed height of the bulwarks 9/16". That missing 3/16" was the problem! in my case add 1/32" to the problem because I used 1/16" thick stock to plank the deck. I say all of this as a reminder to beware
You're doing a lot of cool modifications and increasing the level of detail on your Harriet Lane and you may want to make sure you have the bulwark height necessary to accommodate her guns properly. Given the work you've already done on the sponsons, you'll need to keep the height problem constantly in mind as you plank the hull. In my case, I didn't need to do anything drastic to the sponsons when I heightend the bulwarks. In your case you're looking at making sure the axel placement is correct for your motorized wheels.
Even though it worked out for me, it was still wrong - I only added 1/8 to the bulwarks and the caprail is still a little to close to the tops of my guns by about 1/32" - 1/16" The yellow line above the muzzel should be longer
Blessings. Peace. Gratitude.
Chuck