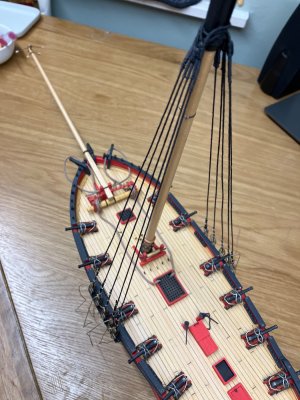
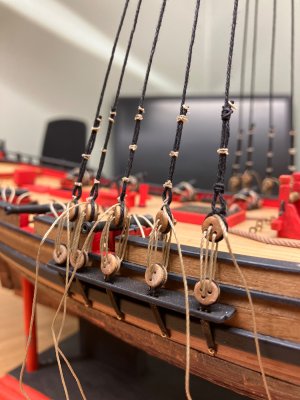
HM Armed Cutter Alert (1777) - Vanguard Models - 1/64

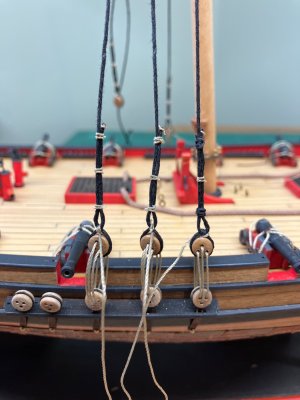
Nice. A proper throat splice above the deadeye! Not so easy...

That’s neither splice nor seizing but simply a knot with several turns, and that makes it all dead easy. Deadeye easy in fact. ;)

And now bad guy Dirk comments ... har har har ... the anchor cable is unfortunately a) too thick and b) not a cable, it should be left-handed ... if you need one better fitting I could do one next year ;-)

sorrrryyyyy ....

Sorry? No you’re not. If you were sorry you wouldn’t have pressed “post reply” You are a very bad guy, my friend (and inspiration). ROTF

The s or z twist detail reminds me of the 4 or 5 spoke Spitfire wheel trap much used in the plastic aircraft genre, or the Sherman Tank drive sprocket variations for the armour guys. These things are all really difficult to see (for my eyes at least) unless I’m deliberately looking for something to criticise. By a curious coincidence are of them all things that I take no notice of at all on my own models. ;)

I’m so inconsistent, I’m terrible. The things I dislike about my anchor strings aren’t the direction of twists or even the large diameter that barely clears the hawsholes) but the sheen, cleanliness and general ‘newness’ of the things. I’d actually have to use a magnifier to discern the direction of twist, or blow up the photo I guess.

Another inconsistency of mine is bothering to wrap the shroud string around the deadeyes in a particular way yet using the ‘wrong’ coloured thread to make the fake seizings (that no one seems to care about). Sometimes I forget what matters to me and what doesn’t!

I’ll take refuge in the words of Emerson, “A foolish consistency is the hobgoblin of little minds.” I believe creative freedom to be the higher ideal. ROTFROTFROTF

~~~~~~~~~~

Finally, please dear readers, don’t refrain from pointing these things out. I’m not bothered but there may be people out there using this build log as a reference, rather than the intended entertainment, who should be warned about me from time to time. :eek:
 
Last edited:
I am finding that rigging is the mental equivalent of lifting heavy weights - you can't do it at the first attempt.

Naa .. it's not that hard .. just take you time :-)

Maybe my Sherbourne build (same rig) can give some inspirations and idea, just check it out if you like.


Dirk
 
Last edited:
I have just seen a post on a thread about displaying our models. That thread is concerned with building cases and display stands and keeping the models for as long as possible. It has some beautiful examples of bases and I was enjoying my browsing. Then I saw a post made by @Y.T. He linked to this very short YouTube video, saying that he was afraid that his model will have the fate of a Sand Mandala.


I made this reply:

“I have built thousands of models [mostly plastic kits] over a sixty year career (so far) and have kept none of them. I’d like to think that I have been creating a decades long ‘model’ of the temporary and repetitive nature of the universe, but unfortunately that would be a rationalisation after the fact. The truth is that I was tidying up, clearing away the toys that I’d finished playing with.

However, I have usually retained the best of them for some time, maybe even a year or two and I’m very intrigued by the monks' practice of destroying their mandalas at the instant of completion. That’s something I have never done with a good build, although I remember several that met that fate because they didn’t come up to an acceptable standard.

I wonder what it would feel like to spend a year building my Alert and destroy it a minute after it was finished?”

What an exciting idea!
 
Last edited:
I feel like I’m under house arrest at the moment. My dog was castrated last Thursday and isn’t allowed more than brief toilet walks on a short lead. The lack of exercise is driving us both a little crazy but I am getting some modelling done so that’s good. I wish I was spending as much time at the bench as I am spending on visits to the fridge.

image.jpg

I’m getting the hang of this stuff, refining my technique with each repetition, which is what I meant Dubz, when I said it can’t be done first attempt. It’s not difficult to do but doing it consistently takes practice. It’s a mind game against boredom and distractions.
 
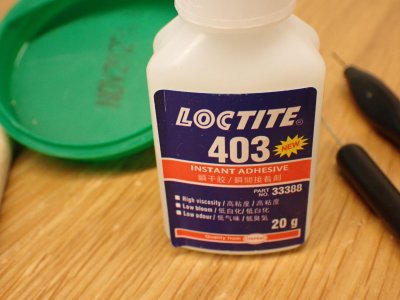
@dockattner , before I forget entirely, thanks for the odorless CA recommendation.

View attachment 488879

I've been using this for a week with no ill effects at all, and that without bothering to ventilate, wear gloves etc.
I am happy it worked for you. I have recommended it to others but folks tend to balk at the price. To me the cost is negligible if it allows me to continue in the hobby. And a bottle lasts for a long time...
 
I've taken a few photos of the work today and I think I have enough to treat you to a step by intermittently faltering step guide to the Smithy Method of hanging out the shrouds. It's not the correctly perfect way of achieving authentic replication of something that no-one's laid eyes on for 250 years anyway - it's my way of making my model. You are welcome to copy what I'm doing but after a caveat like that, don't you dare come back and say that I led you astray. ROTF

PC080004.JPG

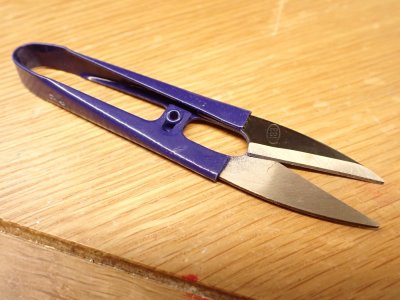
These are the shears I'm using today. They are larger than the silver ones I showed you a few pages back because the cord I'm using for the shrouds is so much thicker. The idea is to make a single clean cut rather than hacking the line into a bushy end so it's handy to be able to apply a bit of power. I use shears not scissors because I can use these with either hand, at any angle, and the cutting edges always stay firmly on contact with each other, unlike scilly scissors.
PC080005.JPG

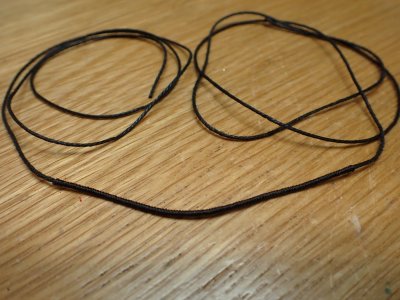
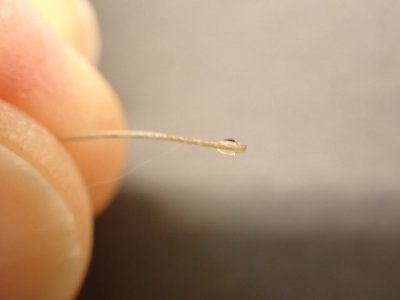
Every line I use gets the CA aiguillette treatment both ends even if it's just a knot with little threading to be done. I dip the end in superglue and then wipe it in and off between two fingers, moving fast so I don't (often) glue my fingers together. Sometimes it's unneccessary but I like to keep things simple and if I do every one I don't have to answer the question, "Will this need a threading point?" each time. It does no harm and takes only seconds (unless you are slow to wipe :D)

PC080021.JPG

These photos are from several shrouds so don't be surprised that I flash from side to side and front to back. The sequence of operations is the thing that matters, not the particular story of a single piece of thread.

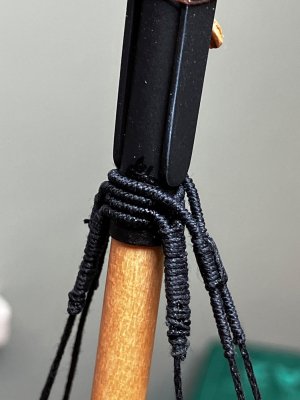
This is the middle of a double shroud. It goes up from a deadeye on say, the port side, loops around the mast where it's seized on securely and then returns to the adjacent deadeye on the port side. A single shroud goes from deadeye to mast and ends there. Doubles save space at the top of the mast.
PC080022.JPG

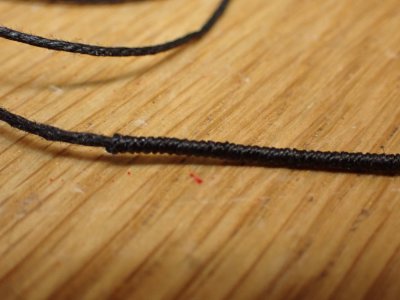
I'm lucky to have a son who wanted to make me a serving machine which made it easier to wrap the centre section of the line, as shown above. However, before I had the machine I did this by hand. It takes longer. Tie the serving thread to the shroud with a half hitch, dab on a tiny drop of CA to lock the knot, trim one end off and wrap the other around the shroud (which is stretched between two clamps) ten times, apply a dot of Ca, another ten, another dot... At the end, a half hitch and a final dot, trim the end with shears and it's ready.
PC080023.JPG

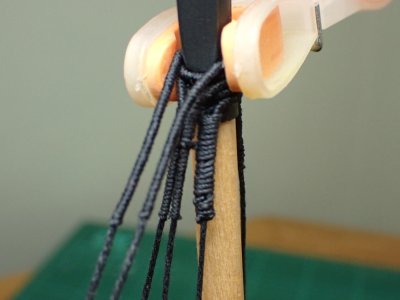
I wrap the centre around the mast and hold it in place with a lightweight rubber-faced clothes peg/pin. (Actually, it's neither a peg nor a pin, is it?)
PC080024.JPG

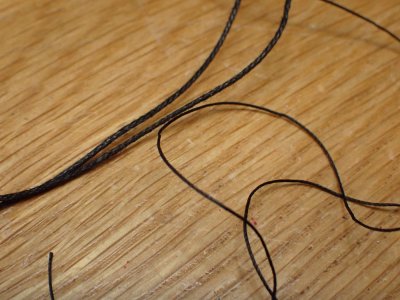
Personally, I don't care whether my lines are the right diameter. I'd bet a week's pension that they varied greatly in service. This was 1777, and although industrialisation and mass production was getting underway, standardisation was still some way off. Interchangeable parts were still a hundred years off and the idea that ropes were made to anything better than "yeah, that's close enough for Admiralty work." is absurd in my opinion. Other opinions are available and surely welcome on other threads. ;)

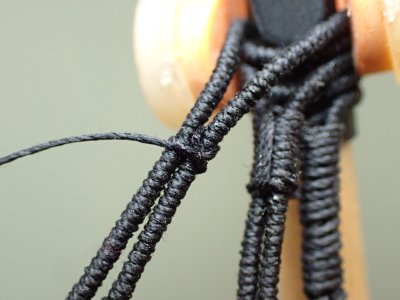
All I care about is that the serving is a bit thinner than the shroud. I did one with the same size lines and it looks absurd in my opinion. See below.
PC080026.JPG

The seizing closest to the mast is the absurd one, far too clumsy as well as far too long. Too late to change it now though.

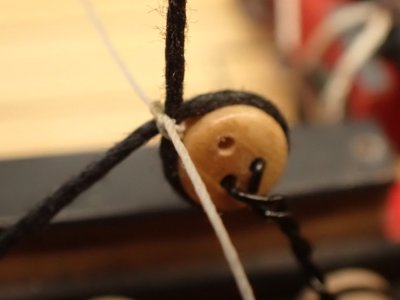
The shroud pair closest to the camera shows the beginning of the seizing. It's a half hitch with the short end tucked up out of sight in between the legs, a trick I learned from a drag artiste one wild weekend in Singapore.

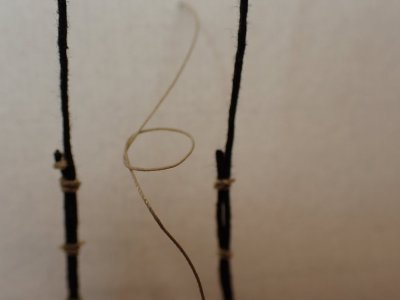
The shroud pair in the middle shows a completed seizing. Ten times horizontally around the outside and then two turns of vertical frapping to tighten it all up. Is the frapping authentic? I've no idea. I think I've seen it on one of the How-To books but I was first taught it by a soldier one wild night on Salisbury Plain when we were doing interesting things with pine poles and blank ammunition. I may be remembering it from there. Either way, I think it looks fabulous.

I've been tying on a starboard side shroud and then its mirror image and then arranging them smartly against the mast before allowing some CA to seep into the fibres and lock everything into place. Don't do that. It would be better, I now think, to get them all tied on loosely and then arrange them all before locking them in place. It's only a little thing but it looks better when it's all hanging straight (as the drag queen said...)
PC080007.JPG

Now then, let's go downstairs.

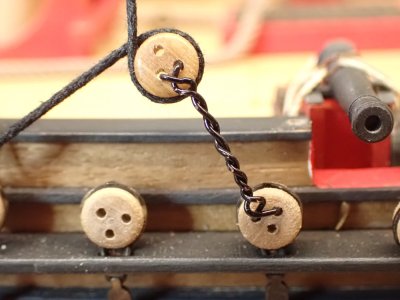
I want the deadeyes to be in a roughly straight line. I don't want them perfectly straight because they are a mechanism for adjusting and equalising the tension of each shroud, rather like tuning a guitar, and deadeyes, turnbuckles and tuning pegs do not line up exactly in real life. That said, I don't want one to be overhauled (the two 'blocks' touching) and the next set ten feet apart. When the shroud ropes stretched or shrunk to that extent the seizing which attached them to the deadeye would be removed and the shroud refastened back in a neutral position. That's why they are seized instead of spliced onto the deadeye.

To get the roughly straight like I use the simple twisted wire jig you see here. It's a few second's work to make one in a suitable length and though it's capable of being improved in a zillion high tech ways (3D print, lathe turned, laser aligned, digital readout, beam me up Scotty...) why bother?
PC080006.JPG

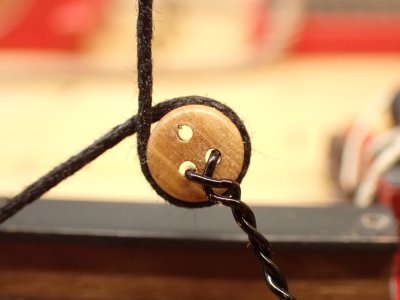
The first seizing is a vertical one where the shroud crosses over itself above the deadeye. Why? Because a horizontal one would require the heavy rope to be bent too tightly, which would snap fibres and weaken it.. The vertical seizing also leave a handy triangular hole which we will make use of later.
PC080008.JPG

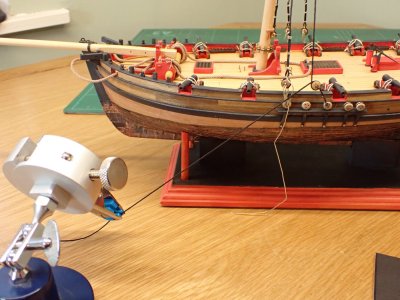
Tying a thin line around that crossing is either impossible or very easy depending on how many hands you have. I used all five of mine. Robot Duck held the loose end of the shroud whose upper end is of course held up by the mast. Wire jig held the deadeye in place, roughly. It's pulled out of plumb by the vigorous duck who thinks he has been given a worm, but as long as I do the same thing with all of the shrouds, it won't matter much. Probably.

That left one flesh type hand for the seizing line and...
PC080010.JPG

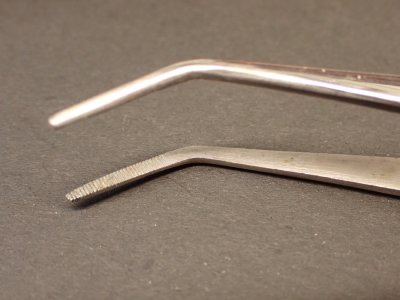
... the other for these beautiful tweezers stolen from a biology lab many years ago. They have been inside countless rats and frogs and now are perfect for knot tying at a distance. It's the bent end that does the trick, improving access by the simple rotation of the tool. The milled edges grip the cord well and the accumulated bio-hazards make the ends slightly sticky and smooth over the sharp edges of the milling. When not in use for rigging they are excellent for removing stray fragments of eggshell from my breakfast and pulling those strange wandering rib bones out of fish.
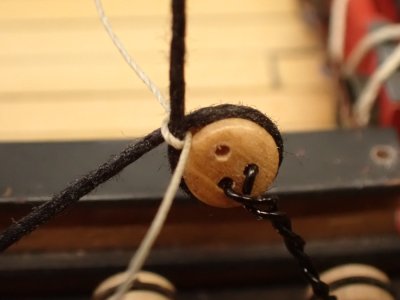
PC080011.JPG

Step one.

PC080012.JPG

Step two is another simple 'half hitch and glue', being careful neither to stick the shroud to the deadeye (yet) nor to block that little triangular hole.
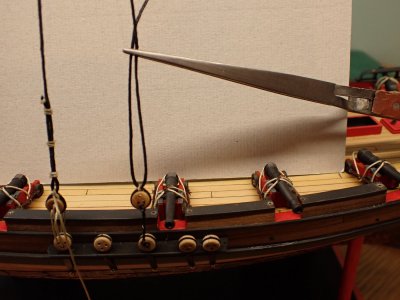
PC080013.JPG

Does this picture need words? I start at the bottom and tie three seizings with a little whipping at the rope's end. (Another wild Saturday night comes to mind...)

Note the self-locking pliers holding up the droopy end. I like these things and have about twenty pairs. I use them lots when rigging, mostly for pulling lines taut by the weight of the metal. They are also very handy for holding pieces for airbrushing.
PC080014.JPG

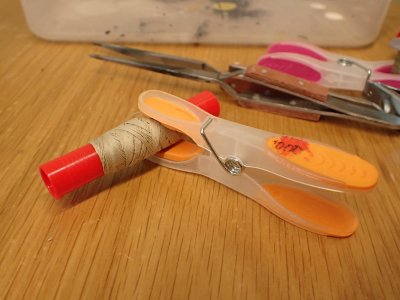
[Aside] Stop your spool rolling off the desk or otherwise tangling with a clothes (not a) pin or peg.
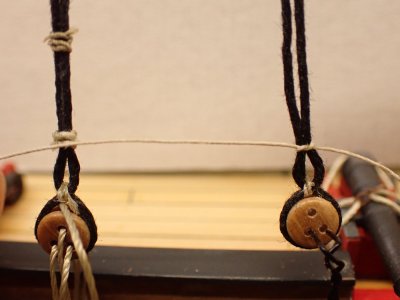
PC080015.JPG

I line up the seizings by placing the end of the line against the first shroud. I see that the cheeky little jig was just about to fall out of the deadeye as the shutter clicked :).

PC080018.JPG

That's the whipping about to go on.

All of this work looks like a riot in a macrame class when macro-photo-zoomed-in-on-your-giant-monitors but in the world of Smithy's flat and seen through his worn out old Mk1a eyeballs, it is beautiful. Mi amore. Je suis mucho pleased.

~~~~~~~~~~
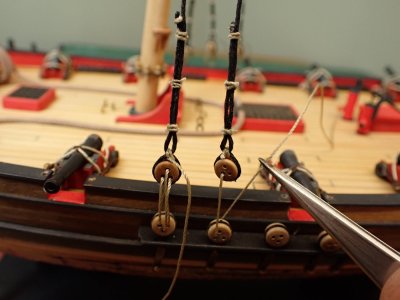
PC080019.JPG

I'll do another update about lanyards later but I must include this last picture. It was to be captioned "I stop after threading the lanyard through both deadeyes once to confirm that I'm working in the correct direction from the bow to stern, and the the loose end of the shroud is always towards the bow." I then carried on and made an entirely new mistake. Can you guess what I did?

Hubris in action. ROTFROTFROTF

~~~~~~~~~~

p.s. Is this kind of step by step update of value to you, the reader? I’d appreciate some feedback please. Thanks. :)
 
Last edited:
Is this kind of step by step update of value to you, the reader?
To me yes. Reading words is helpful but many pictures help me visualize and more easily see the nuances.
The challenge in positing like this is the balance between too much and too little. It takes time to write and post in such detail. These posts are of value to me and you clearly enjoy creating them but are you always able to find that balance which both pleases and prevents burnout from too much?

Wonderful build. I quite enjoy following along and I am learning much in the process. Ancora Imparo.


cheers, Graham
 
To me yes.
Thank you, Colonel. Those are the words of encouragement that I needed to keep this gibberish going for the next three pages at least. Thumbs-Up

... pictures ... see the nuances.

You've seen my nuances? Forgive me! I must remember to get properly dressed before taking photographs.

are you always able to find that balance which both pleases and prevents burnout from too much?

Always? Believe me my old friend, I would be delighted with ever. Unfortunately, as a general rule I am slightly less balanced than a giraffe on a unicycle.

Ancora Imparo.

cheers, Graham

And so am I. I learned a bit of Italian tonight as well as some Art History. Nice one Graham, you always provoke thought.
 
All ten shrouds are now tied loosely in place. It was the longest six days of the build so far. The last four were attached today and are not as well done as the earlier ones. I was bored with them and inattentive.

image.jpg

I’ll take a breath and then fit the standing and running back stays and the fore and preventer stays. They are all a tad more complicated and I’ll need to work out some new ways of doing things, which I expect will be a bit more stimulating.

image.jpg

After all sixteen mast supporters are in place I’ll be able to bring them up to the correct tension, lock them off and have a little party to celebrate the conclusion of the first two thirds of the standing rigging.

And then the bowsprit…
 
Ship modelling is an activity that requires a lot of my mental processing power. Let’s say 90% - I’m not really a robot but it’s a handy way to imagine it. I shut down almost everything else when I’m working well. I always have a cup of cold tea by me, untouched. I forget the time completely until Buddy taps me on the leg to tell me it’s time to eat or go for a walk. I’ll hear a message arrive on my phone but instantly forget to look at it until later. In this condition I produce acceptable results with few errors.

But sometimes there’s something more important than walkies happening in the real world that demands some brain space. This might even be out of my awareness at the time - an unconscious sub-routine working on a complicated problem. We all do that, of course, often while sleeping. Do you ever have what feels like a sudden understanding, a flash of inspiration that solves a problem? That’s because the matter has been under consideration without bothering your consciousness, maybe for days, months even. It might occupy say, 5% of brain space.

I have more than one of these sub-routines running right now and they are collectively allocated 20% of me. That’s a constant, even though I’m not aware of it constantly, it’s constantly happening.

So that means that the absolute maximum concentration I can apply to modelling for a two hour session is less than 80%. Hence a detectable shoddiness becomes visible. You probably won’t notice because I’m only an average modeller and make errors all the time. I notice because I know what I can do and can observe the shortfall.

I don’t think there’s anything to be done about this. I don’t think there’s anything that needs doing - the hobby is only a time filler and the results aren’t important, certainly not compared with the real world stuff. No, I mention it purely as a point to ponder and perhaps chat about.
 
Good morning Smithy. I had to play some catch up here. I enjoy reading your logs and you make me smile and laugh. Always a good thing. Way to go with your rigging you are owing it.
Cheers Grant

Thanks Grant. I like to include a quip or two.

Nothing done yesterday unfortunately. I visited a market yesterday and bought a huge pile of CDs - music from way back in the seventies and eighties to replace my long lost collection. I spent an marvellous evening travelling back in time to my single days. I even dreamed of the youth club disco.

It’s been a terrible shock seeing myself in the mirror this morning. I seem to be old?

:eek:
 
Hi Smithy
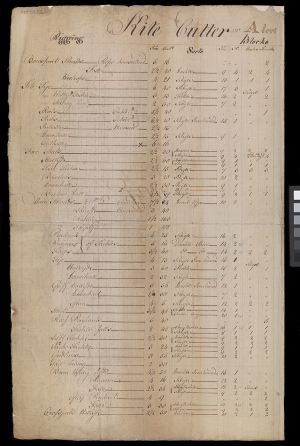
Probably too late at this point but I just now found the following rigging warrant for the Alert 1777 at RMG. There are two pages of detailed information.
The dimensions for the ropes includes circumference in inches and lengths in fathoms.
Allan

Rigging Warrant for Kite (1764) and Alert (1777)
A sheet folded in two recording handwritten details of the rope thicknesses and lengths for the various rigging parts, as well as the type and size of the blocks for rigging Kite (1764), a 4-gun Cutter, and later used for Alert (1777), a 10-gun Cutter (later classed as a sloop but still cutter-rigged).


The first page is below
1734005965378.png
 
Back
Top