HM Brig Sloop Speedy Vanguard Models kit [Completed Build]

Joined
Aug 14, 2018
Messages
471
Points
323

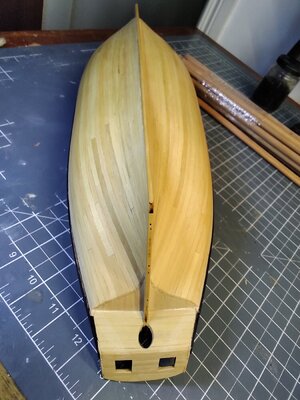
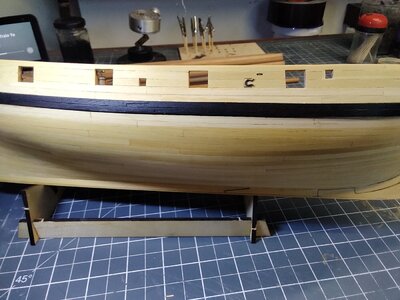
I'm coming a bit late to this log as I have already built the hull. This is my first try at logging my work and I am feeling a bit inadequate and don't really know what I should write, but I fancied giving it a go. Hopefully other folks can learn from my mistakes.
As I have said I have already just about finished the second planking of the hull and have started to coat it using a clear matt varnish. I have been pleasantly surprise how well the construction went, down no doubt to Chris Watton's excellent design and manufacturing. The wood used for the second planking is Box, This is my first experience of working with it and found it easy to both cut and bend, particularly using hot air. My only complaint would be due to the woods hardness it blunts scalpel blades in no time!
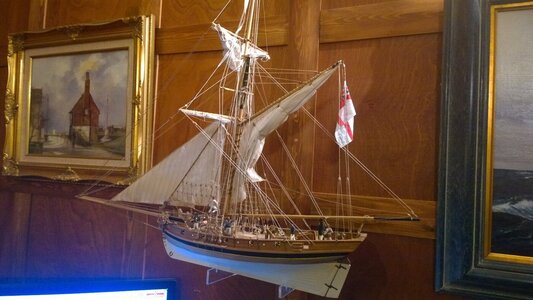
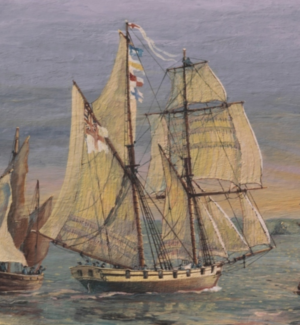
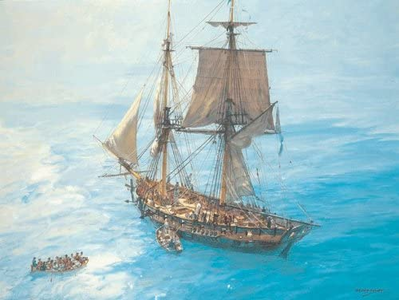
My, probably over ambitious, plan is to finish the brig as in the painting by Jeff Hunt1641545886467.pngIMG_20220104_143212.jpgIMG_20220104_133956.jpg
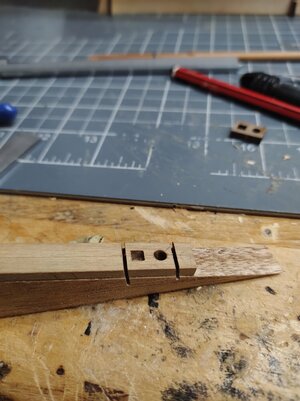
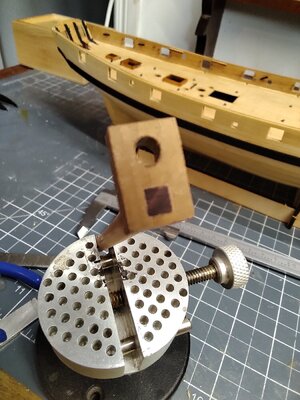
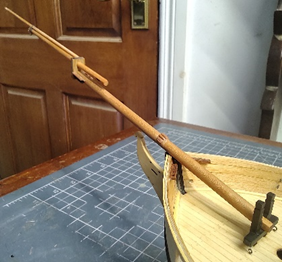
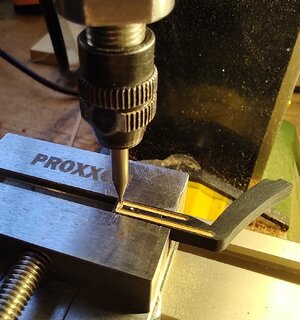
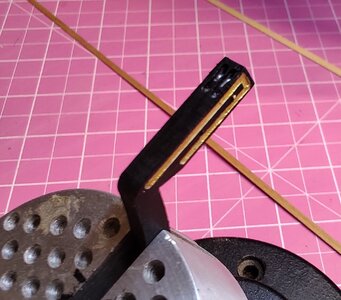
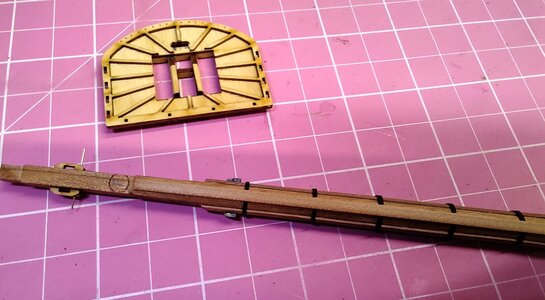
Today while waiting for the varnish on the hull to dry I have started working on the bowsprit, jibboom and flying jibboom, and this is where I first deviate from the plans as I intend to rig this model using the knowledge gained from the books such as 'Rigging Period Ship Models by Lennarth Petersson', The Anatomy of Nelson's Ships by CN Longridge plus many others. The first difference will be to remake the bowsprit cap to take a square tenon instead of the kit's round one, this I will do with all the other mast caps as well but this one is a bit more difficult being cut at an angle.
IMG_20220106_102218.jpgIMG_20220106_103827.jpgIMG_20220106_110138.jpgIMG_20220106_113723.jpg
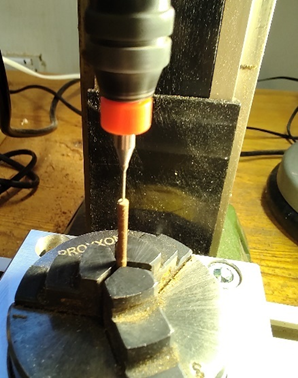
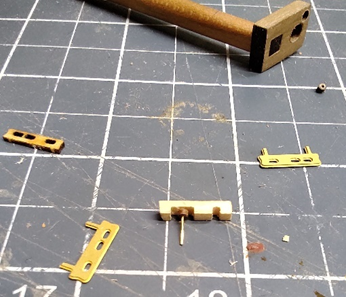
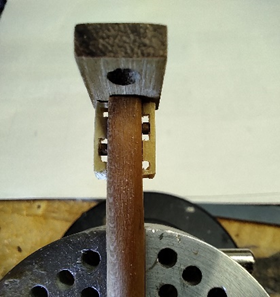
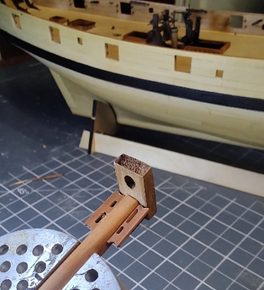
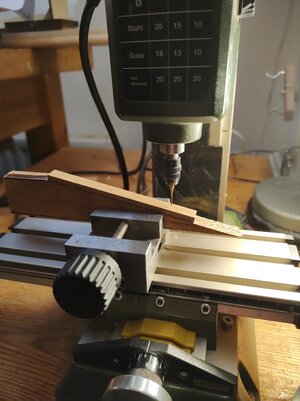
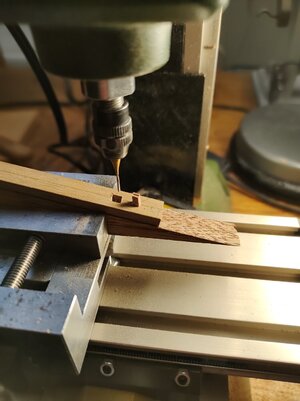
To make it I attached a bit of 10 x 4 mm walnut using double sided tape to a piece of scrap cut at 12 degrees, the angle I took of the original t.d. of Speedy and Flirt found on the Greenwich Royal Museum web site, then using my smallest 0.8mm cutter and my little milling machine I cut out a 4mm square and drilled a 4mm hole for the jibboom as you see it turned out a goof fit. Tomorrow I will turn the three bowsprit components and finish the bowsprit. I am going to use cherry rather than the walnut dowels that came with the kit as I don't intend to paint them and I like the colour.
 
Bothersome Bees

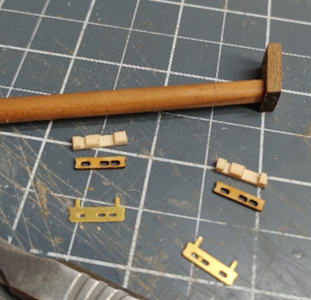
I have made the three spars that make up the bowsprit etc. and everything went well until I came to adding the Bee blocks. The kit supplied two alternatives for the covers one pair in laser cut box wood the other, slightly larger, in P.E. brass1641640219410.png

However, to my mind neither where right, the cutaways for the sheaves being too far out from the bowsprit, as well the box wood ones looked a bit fragile to be rigged. The kit had no suggestion to make the actual sheave blocks, so I cut them out of a bit of box scrap and went on to make the sheaves themselves.
1641640308179.png

I reduced a walnut dowel down to 1.75mm using a drill and drawbar, then down through the centre I drilled a 0.4mm hole. With a piece of brass wire inserted I carefully cut off two small sheaves. I then fitted them in the blocks and attached the blocks to the bowsprit and will paint them black.
1641640376175.png1641640388383.png

1641640409324.png


Now for the covers, with the sheaves now tight to the bowsprit, unfortunately neither of the supplied covers fitted so I made a pair out of 4x1 cherry and attached with a small dot of CA glue.

The other spars where test fitted after blackening the P.E. fittings. As I haven’t finalised how I will rig them yet I will leave the fitting of in haulers eye bolts etc. until later. In the meantime I have continued to make and fit the deck furniture.
1641640449290.png1641640464735.png

1641640481792.png

It looks like it will be a bit tight working around the base of the main mast most pieces will not be glued in until later so that might help.
 
Hello Jack. It is great to see that you are building the Speedy - I have heard only good things about these kits. On the original, space was at a premium as well. I love that story of how Cochrane's head was supposedly sticking out of the skylight/hatch above his cabin, while shaving in the mornings. Are you not going to copper-plate the hull?
 
Is this the same as HMS Pickle?

Looking really good BTW
No, Pickle was a schooner, Speedy is a brig (not to be confused with the RN cutter Speedy) Master and Commander by Patrick O'Brian used the exploits of this under Thomas Cochrane's command for his book. Jack Aubrey is essentially Cochrane. Reading O'Brian's books is the most entertaining way of learning about the RN of the time, the men,the ships and the details of handling them. Chris Watton's kits (Vanguard) are excellent quality.
I'm coming a bit late to this log as I have already built the hull. This is my first try at logging my work and I am feeling a bit inadequate and don't really know what I should write, but I fancied giving it a go. Hopefully other folks can learn from my mistakes.
As I have said I have already just about finished the second planking of the hull and have started to coat it using a clear matt varnish. I have been pleasantly surprise how well the construction went, down no doubt to Chris Watton's excellent design and manufacturing. The wood used for the second planking is Box, This is my first experience of working with it and found it easy to both cut and bend, particularly using hot air. My only complaint would be due to the woods hardness it blunts scalpel blades in no time!
My, probably over ambitious, plan is to finish the brig as in the painting by Jeff HuntView attachment 281086View attachment 281087View attachment 281088
Today while waiting for the varnish on the hull to dry I have started working on the bowsprit, jibboom and flying jibboom, and this is where I first deviate from the plans as I intend to rig this model using the knowledge gained from the books such as 'Rigging Period Ship Models by Lennarth Petersson', The Anatomy of Nelson's Ships by CN Longridge plus many others. The first difference will be to remake the bowsprit cap to take a square tenon instead of the kit's round one, this I will do with all the other mast caps as well but this one is a bit more difficult being cut at an angle.
View attachment 281089View attachment 281090View attachment 281091View attachment 281092
To make it I attached a bit of 10 x 4 mm walnut using double sided tape to a piece of scrap cut at 12 degrees, the angle I took of the original t.d. of Speedy and Flirt found on the Greenwich Royal Museum web site, then using my smallest 0.8mm cutter and my little milling machine I cut out a 4mm square and drilled a 4mm hole for the jibboom as you see it turned out a goof fit. Tomorrow I will turn the three bowsprit components and finish the bowsprit. I am going to use cherry rather than the walnut dowels that came with the kit as I don't intend to paint them and I like the colour.

I used George Bandurek's sail making method for 'Nimble'. He has produced a book, 'Super Detailing the Cutter Sherborne' with all the techniques he has devised. You may find that useful. The methods are outlined on MSW. The sails don't involve any sewing working under the premise that, no matter how small and fine the stitching it will not scale!

WP_20180318_007.jpg
 
Last edited by a moderator:
Thanks for clearing that up, when I 'up' my skills I would love to build a model of HMS Pickle as a leaving gift for the mess when I finally retire from it.

I have read all of the O'Brian books, never a dull read at all. Thumbsup
 
Hello Jack. It is great to see that you are building the Speedy - I have heard only good things about these kits. On the original, space was at a premium as well. I love that story of how Cochrane's head was supposedly sticking out of the skylight/hatch above his cabin, while shaving in the mornings. Are you not going to copper-plate the hull?
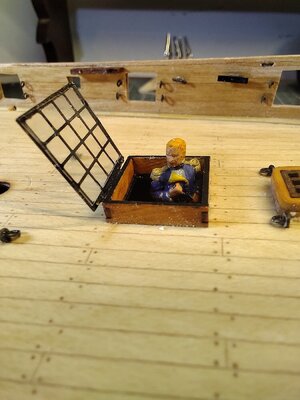
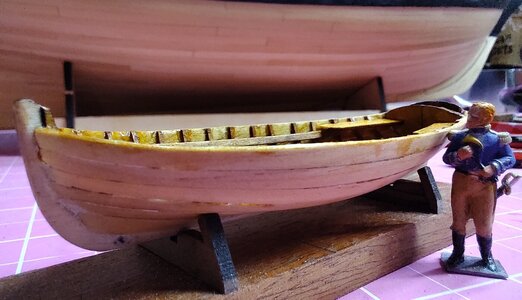
Hello Heinrich , yes I read that also in a book called 'Cochrane Britannia's Sea Wolf'. The book's a great read and he was quite the man. The kit comes with a to scale figure of him and I took this picture, bit of sawdust on it sorry about that.IMG_20220108_152641.jpg
 
Thanks for clearing that up, when I 'up' my skills I would love to build a model of HMS Pickle as a leaving gift for the mess when I finally retire from it.

I have read all of the O'Brian books, never a dull read at all. Thumbsup
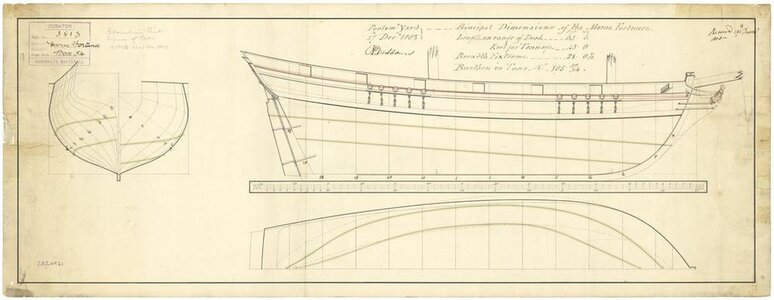
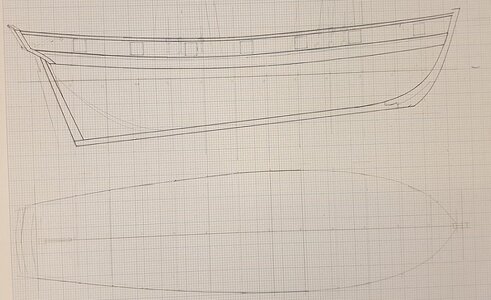
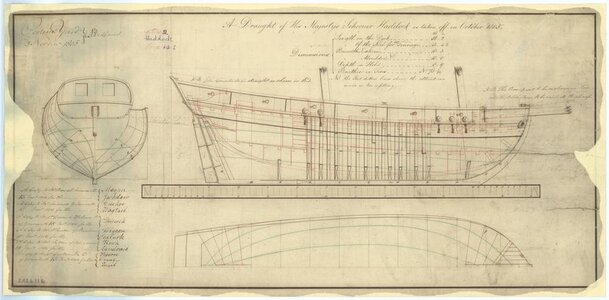
I really dislike the Pickle available by Jotika. It doesn't fit the historic description and for a randomly chosen Bermuda built schooner it's about as plain as they come. I've read their research but there were better hull options available from the National Maritime Museum records. Likewise the sailing replica based in Grimsby, which is categorically NOT anything like the original, it being a similar sized Russian build. So I am currently designing one that fits the proportions and the detail as outlined in the reference by Peter Hore and the painting by Robert Dodd (with the anecdotal guidance of Lt Lapenotiere!? officer commanding) It was much more elegant than Jotika's chosen pedestrian hull. Although Hore likens it to the French La Recouvrance there are other viable options amongst Bermudan schooners with RN connections. Vice Admiral Lord Seymour bought it against admiralty orders because it was a fast manouverable ship he was chartering in Bermuda, it stands to reason it would have good sleek lines. One such is the Morne Fortunee, other nice hulls built in Bermuda are the Haddock class adopted by the navy. My hull is an amalgamation of these which seem to best fit the Pickle's sailing qualities. Attached are the Morne Fortunee , originally Glory, and my (3rd) draft which is accurate to the contemporary specifications, and the Haddock class built for the admiralty which are shorter wider beamed variations. Since there are no existing plans of the 'Sting' (the original 1799 build) we will never be certain, however I think my conclusions are a good 'best guess'.

Morne fortunee (Bermuda built Glory).jpgDraft BE 2.jpgHaddock Jackdaw Cuckoo etc 06.jpg
 
Hello Heinrich , yes I read that also in a book called 'Cochrane Britannia's Sea Wolf'. The book's a great read and he was quite the man. The kit comes with a to scale figure of him and I took this picture, bit of sawdust on it sorry about that.View attachment 281375
Dear Jack
you are doing great job, well done :)Thumbsup
 
I really dislike the Pickle available by Jotika. It doesn't fit the historic description and for a randomly chosen Bermuda built schooner it's about as plain as they come. I've read their research but there were better hull options available from the National Maritime Museum records. Likewise the sailing replica based in Grimsby, which is categorically NOT anything like the original, it being a similar sized Russian build. So I am currently designing one that fits the proportions and the detail as outlined in the reference by Peter Hore and the painting by Robert Dodd (with the anecdotal guidance of Lt Lapenotiere!? officer commanding) It was much more elegant than Jotika's chosen pedestrian hull. Although Hore likens it to the French La Recouvrance there are other viable options amongst Bermudan schooners with RN connections. Vice Admiral Lord Seymour bought it against admiralty orders because it was a fast manouverable ship he was chartering in Bermuda, it stands to reason it would have good sleek lines. One such is the Morne Fortunee, other nice hulls built in Bermuda are the Haddock class adopted by the navy. My hull is an amalgamation of these which seem to best fit the Pickle's sailing qualities. Attached are the Morne Fortunee , originally Glory, and my (3rd) draft which is accurate to the contemporary specifications, and the Haddock class built for the admiralty which are shorter wider beamed variations. Since there are no existing plans of the 'Sting' (the original 1799 build) we will never be certain, however I think my conclusions are a good 'best guess'.
I utterly admire the research you are conducting into this but in reality, in every mess I have visited that has a paining of the Pickle, each one depicts a slightly different vessel, it's a real shame that the actual records were never fully maintained, however, I will ask a friend of mine (who is the ex-CO HMS Victory - yes she is still in commission) and see if he can give any pointers, it may take a while he has been posted to Belgium.

If I hear anything of use, I'll get back to you.
Many thanks. Yes I have dismissed the bulk of the artwork depicting Pickle which is why I've decided to concentrate on Robert Dodd's contemporary painting of Pickle at Trafalgar with, apparently, the commander of Pickle advising. This is the only contemporary image that exists.
 
Good heavens no, this one!
Hi Bob
To my knowledge Pickle is not the same class of brig as Speedy or Flirt as these two where the only ones built to the same plans. The Jeff Hunt painting illustrated is of the brig Speedy not Pickle. Your draft of Pickles' profile looks great, are you intending to scratch build it?
 
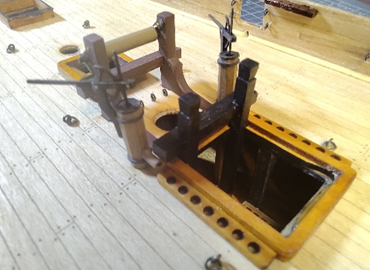
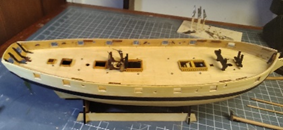
While I have been waiting for the transom and bulwark cap's glue to dry I have added a little detail to the cathead bits before installing them. Apart from the 4 pound cannon and ships boat, (I'll work on these as I wait for glue or paint to dry on hull parts),IMG_20220111_114535.jpgIMG_20220111_123021.jpg the deck is complete now. There is some decorative work to be done on the sides of the hull then the channels to be added and then to think about the masts
 
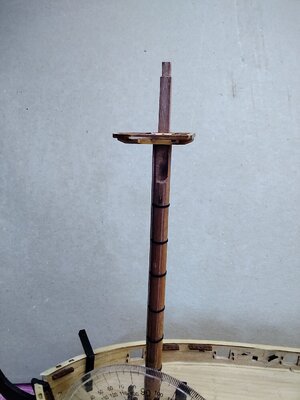
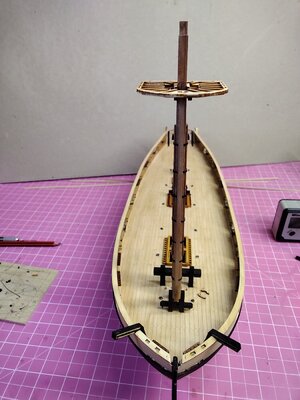
Spent a while today making the fore mast, then adding the cheeks, iron rings, fish and cleats. The most fiddly part was drilling 0.4mm holes in the little box wood jeer block strop cleats. their 'feet' do not leave a lot of room for gluing so hopefully pinning them will keep them in place. A slight note of caution, generally I would use three types of adhesive; Evo stick exterior pva, Gorilla Cyanoacrylate 'super' glue and Super Phatic aliphatic glue, however I have noticed that the aliphatic glue doesn't do so well when bonding box wood as it does with other woods. Perhaps it is the density of box of maybe it's hardness does not let it penetrate the surface so well I don't know, maybe just me.

IMG_20220112_123937.jpg

Before I fix the top I will need to attach 8 blocks to the cross trees I am not sure how I will attach them to their respective eye bolts, but I am considering using heat shrink wire sheathing similar to that I use to make the 'iron' mast rings. I will have to test the strength first but if it works it might look neater.
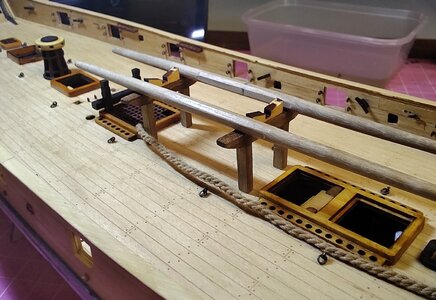
The fore mast is tilted slightly sternwards and therefore the front of the top will need to tilt downwardIMG_20220112_133942.jpgIMG_20220112_125323.jpgIMG_20220112_125240.jpg
I have also now added the bulwark cap along with the boom rests and the cat bitts, so far so good
 
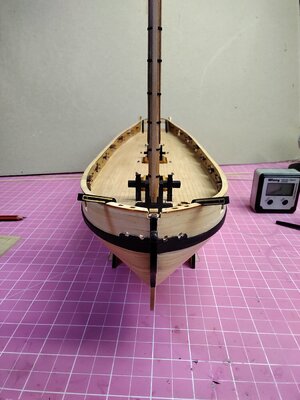
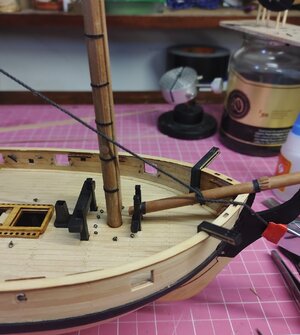
Although I feel that things have not moved on much this last few days I am content that I have got the fore mast top pretty much finished as it proved to be quite challenging. After setting up a temporary main stay I was able to determine where to attach the heart blocks to the fore mast and bowsprit.IMG_20220113_091710.jpg
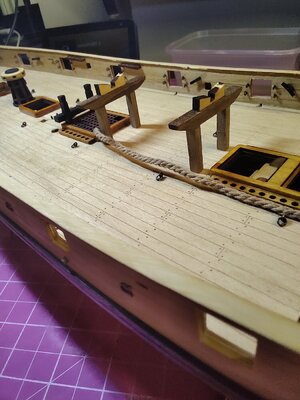
The kit comes with dead eyes here but to my eye closed hearts look better.
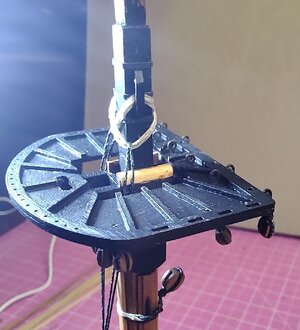
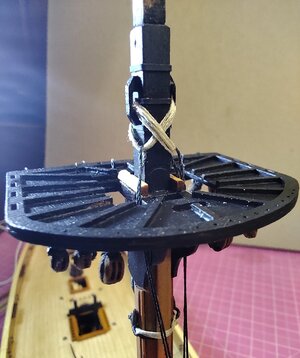
Then it was on to the top itself, the laser cut parts to build this are quite delicate and needed care not to damage. Hanging below the top platform are 16 blocks, 14 a fiddley 3mm. I experimented with connecting them with heat shrink black banding and while this looked very good I was not sure the blocks wouldn't pull out when a bit of tension was added to the rigging, so I abandoned the idea and tied them on with 0.25 black 'rope'. For the four most visible that are attached to the back, although it doesn't show up too well in my pic's.,( only have phone camera ) I used a very fine served length of rope.
IMG_20220116_081054.jpg
I finished the top for now by adding a pair of jeer block slings although I might not keep them as they may look too obtrusive.
IMG_20220116_081019.jpg
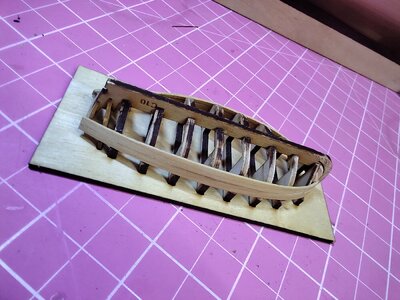
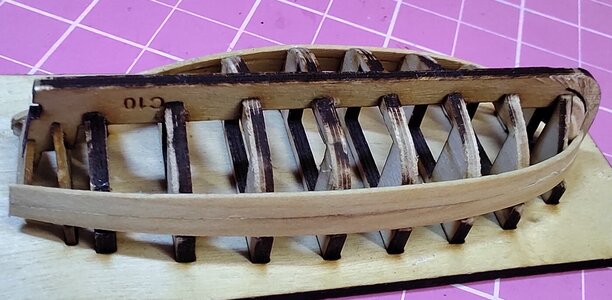
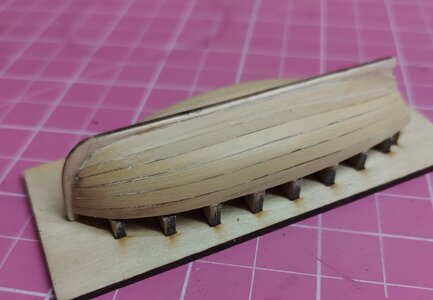
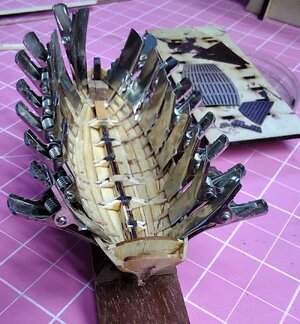
For a bit of light relief I have started to plank the ships boat,
IMG_20220116_081139.jpg
IMG_20220116_091519.jpg
I have already built one of Vanguards little boats, in pear wood, and found it good fun so fingers crossed this one in box will turn out ok..
 
No, it's a schooner! As stated above. The thread is in answer to Buster's question. I see we have a 'lost in translation' problem!! (Geoff has painted Pickle also btw) Yes I will scratch build. I'll start a separate thread to avoid kidnapping this one!
 
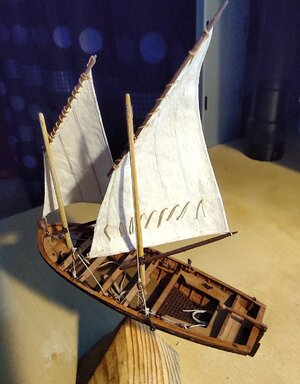
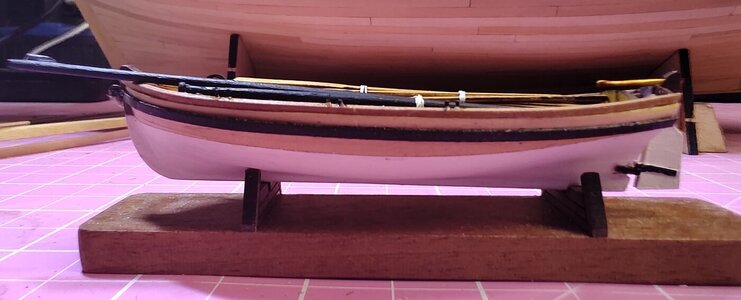
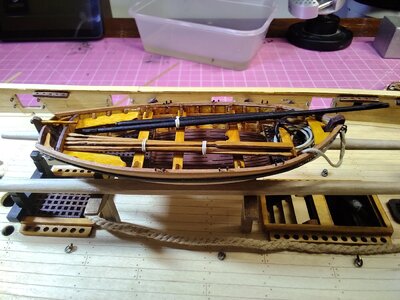
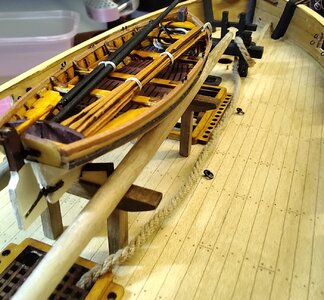
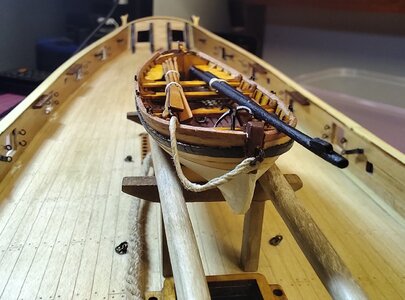
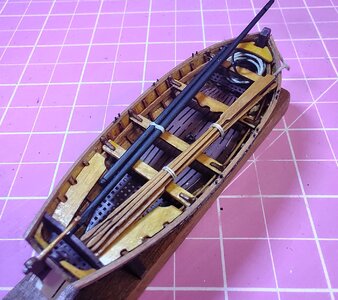
Due to a spot of illness I didn't get much completed this week, however I did manage to pretty much finish Speedy's 18' cutter.IMG_20220122_163826.jpg
Here are some picks. I decided that since I wanted to add some sweeps and needed somewhere to store them I would change the boats chocks for what I believe are called 'gallows bitts'. the ones shown are, I think, too tall so I will shorten them before finalising things. The sweeps are a scale length of around 160mm so they take up a lot of space, but there should be enough room for them each side of the boat, maybe a spar or two as well.
IMG_20220116_081139.jpgIMG_20220118_173800.jpgIMG_20220119_114530.jpgIMG_20220122_162419.jpgIMG_20220122_162440.jpgIMG_20220122_162943.jpgIMG_20220122_163411.jpgIMG_20220122_163428.jpgIMG_20220122_163920.jpg

IMG_20220119_234920.jpgI'm not too sure the 10th Earl is impressed with my building!
 
Back
Top