Hms Alert 1777- Trident Model 1:48 by Submarinerblue

Joined
Dec 31, 2017
Messages
224
Points
133

I’ve started a build log for Alert, although I must admit that my progress will depend on seeing the logs from more proficient modelers to help me out since the instructions are not if very much help so far. I have built Japanese models with no English at all but with detailed colored illustrations and measurements. Some illustrations here are hard to understand and the English is often incomprehensible.

Building Jig:

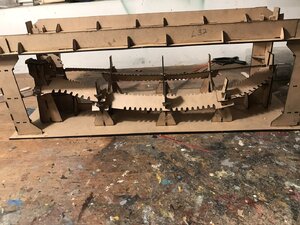
The building jig is very well designed and will likely be of tremendous help in fitting the frames. The parts are made of thick cardboard. I would have preferred plywood which is sturdier and less likely to break, but this workable.
The jig uses a tab and slot design. Many of the tabs and slots fit together quite well. In other cases you have to either sand down the tab or enlarge the slot, or both for it to fit. The jig came together well, but without photos from Uwe’s log I would have had some trouble.

Keel Assembly:

I have a major issue here.

The CNC parts have been done well and they can be cut from the boards with little effort. Very well done and no sanding of burn marks like laser cutting. A big plus for Trident. I hope all the parts are this well done.

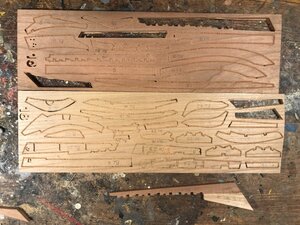
However, the parts for the keel assembly, on my kit anyway, are from boards with strikingly different colors. Now I don’t mind if different woods or different shades of wood are used for different parts of the model. Deck planks can be different from frames and gratings can be different woods from spars. But, using two different colored woods for the same assembly is a no-no. Even staining can’t correct this. I have asked Trident to replace the two boards. We’ll see what they do.

in the meantime I’ll start on the frames.

I hope that Uwe and others proceed with their logs soon.

117D7C0A-9832-461E-9A29-2D1F068DC384.jpeg1CF991AA-D7DB-400A-A0C5-05E2EE839E68.jpeg
 
I’ve started a build log for Alert, although I must admit that my progress will depend on seeing the logs from more proficient modelers to help me out since the instructions are not if very much help so far. I have built Japanese models with no English at all but with detailed colored illustrations and measurements. Some illustrations here are hard to understand and the English is often incomprehensible.

Building Jig:

The building jig is very well designed and will likely be of tremendous help in fitting the frames. The parts are made of thick cardboard. I would have preferred plywood which is sturdier and less likely to break, but this workable.
The jig uses a tab and slot design. Many of the tabs and slots fit together quite well. In other cases you have to either sand down the tab or enlarge the slot, or both for it to fit. The jig came together well, but without photos from Uwe’s log I would have had some trouble.

Keel Assembly:

I have a major issue here.

The CNC parts have been done well and they can be cut from the boards with little effort. Very well done and no sanding of burn marks like laser cutting. A big plus for Trident. I hope all the parts are this well done.

However, the parts for the keel assembly, on my kit anyway, are from boards with strikingly different colors. Now I don’t mind if different woods or different shades of wood are used for different parts of the model. Deck planks can be different from frames and gratings can be different woods from spars. But, using two different colored woods for the same assembly is a no-no. Even staining can’t correct this. I have asked Trident to replace the two boards. We’ll see what they do.

in the meantime I’ll start on the frames.

I hope that Uwe and others proceed with their logs soon.
Looking forward to your build. About the two different colors I can imagine you would like to have them all the same. But keep in mind that even in original builds not only the wood color differentiates but even the type of wood as well as oak or elm was used for these parts. Just a thought.
 
This is two batches of raw materials, both cherry wood, our principle is 16 light color + 18 light color or 16 dark color + dark color combination. This is our mistake and we will send the light color No.16 to submarinerblue as soon as possible
 
While I am waiting for the replacement parts for the keel I have begun frame construction, I started arbitrarily with frame 15.
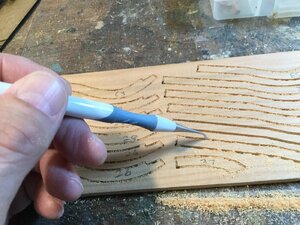
I used a dental pick to scrape out the sawdust in the grooves and also to puncture the thinner wood in the grooves to make removal easier with an X-acto blade or a keyhole saw.

Once the frame piece has been removed I had to do cleanup to remove rough edges and splinters. The pieces would have been easier to remove if the CNC cutting had gone a millimeter or two deeper into the wood, although maybe there would have been the risk of pieces falling out of the board with a deeper cut.

in any event cleanup of each piece only took a few seconds. I’ll do further fine sanding when all the frames have been completed and installed and I Eventually remove the ship from the jig.

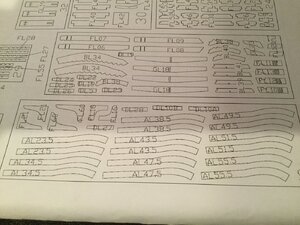
When I completed frame #23 I noticed that there are a number of frame pieces (futtocks?) labeled 23.5, 34.5, etc. I sent a PM to Trident to ask about them. I think I’ve figured out where those go, but I’m not going to do anything with them until I get his response.

D47E33B7-16A8-4CEB-A96E-C00D7492E56B.jpegimage.jpg
 
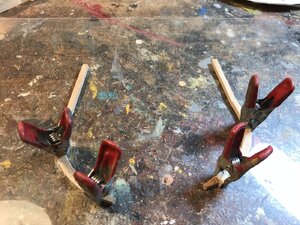
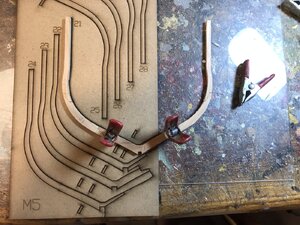
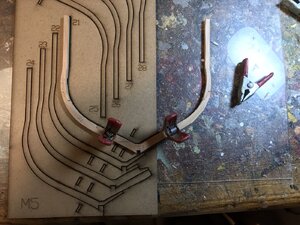
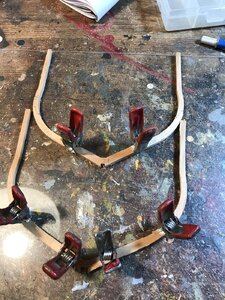
I have not really used the frame jigs as designed when assembling the frames. They seem to go together quite well when I lay them on a flat acrylic or glass surface and clamp each piece. I do use the jigs to verify that the frames are very close to the correct shape. Even if one or two are off by a few millimeters they will have enough flex to fit into the jig and keel without any problem.

ECB3A4D7-E9C2-4D7C-B1D9-5BB327AB1983.jpeg84282281-0482-4D3B-A10C-59C017A079CF.jpeg58EDC9A0-A066-4A03-9B6E-B829D77FA1AB.jpegD588C399-A7FD-44E6-9C42-F4E543D05B09.jpeg
 
Wow, great progress, submarineblue! I didn't get to the point of building the frames. May I ask why do you building the frame outside the jig (template). I think the MDF template made by mean to use with frame assembly. Also, if you asked Trident for questions, like the one you mentioned above, please ask here in the log. Remember it is a group build and we are building from the same kit. Sooner or later we all hit the same issue.
 
Jim, maybe it's probably hard to get the frame down in the mounting jig with the clamps on.
I wonder if there is a big difference between a finished frame glued with clamps or in a mounting jig.
Greeting-
 
Jim, maybe it's probably hard to get the frame down in the mounting jig with the clamps on.
I wonder if there is a big difference between a finished frame glued with clamps or in a mounting jig.
Thanks, Knut, as far as I understand, the mounting jig should eliminate the needs of clamps. The jig made the size of the frame. Once you glue the parts you put the jig on the flat surface (glass for example) and press the parts into the jig. Trident suggested putting things plastic wrap to avoid glue contact with the jig.

2.jpg
 
I’m just used to the Harold Hahn method where he supplied the plan for each frame. I placed the plan under glass and assembled each frame on top of the Corresponding plan so the shape would match. My concern with the Trident method is that the frames already fit tightly in the jigs. If you put Saran Wrap between the frame and the jig they will fit even more tightly. That could be a problem in removing the frame without cracking it. I admit I haven’t tried it. I just feel more comfortable with a method I’m used to. The Trident jigs are still useful to verify that my finished frames are correct.
 
I've tried the glad wrap..Seems quite O.K....Though I will concede that some of the joints are very tight..I have noticed that there are differing qualities and thicknesses of the cling wrap..
 
Well, then we can see what it will look like when someone else in the group makes frames according to the Trident method, greetings-
 
Back
Top