HMS Alert by Olympic1911

Joined
Sep 23, 2018
Messages
97
Points
253

Hi all,

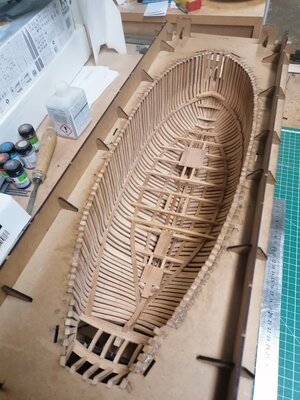
My ship came in on August 26th. I immedately started work on it, and so far, here is what it looks like:

IMG_20210828_095957.jpgIMG_20210828_100014.jpgIMG_20210828_141557.jpgIMG_20210828_141616.jpgIMG_20210828_154459.jpgIMG_20210829_084955.jpgIMG_20210829_194415.jpgIMG_20210831_172829.jpgIMG_20211023_092227.jpgIMG_20211024_090838.jpgIMG_20211024_091309.jpgIMG_20211024_101331.jpg
I wish to express that the kit is exceptionally well engineered, I'm actually thinking about buying a second one. Thanks to all at Trident Model for doing an excellent job!

Peter
 
Hallo Peter,

I am very happy, that you started the HMS Alert and much more, that you also start the building log.
This will be a lot of fun - for you building this interesting kit and for us to see your good work in your log...... I am looking forward
 
Im waiting to be contacted about this kit, do you mind sharing how much you paid for it?
 
Thanks for your kind comments and likes everybody. Much appreciated. Now that all the frames are in and have been faired it was time to complete the stringer-clamps to the jig. Therefore the hull was removed from the jig. It literally jumped out of it!

IMG_20211124_165453.jpg

IMG_20211124_165445.jpg

IMG_20211124_165424.jpg

And in the next image the clamps have been added to the jig:

IMG_20211125_065526.jpg

And here the hull is placed into the jig again:

IMG_20211125_070019.jpg

In the following is the process of adding the stringers:

IMG_20211125_142133.jpg

IMG_20211125_180419.jpg

IMG_20211126_173518.jpg

I'm quite pleased with this:

IMG_20211127_110315.jpg

IMG_20211127_110133.jpg

Thanks for checking in!

Peter
 
I have had a very enjoyable weekend working on the Alert and this is how far I got:

IMG_20211128_172937.jpg

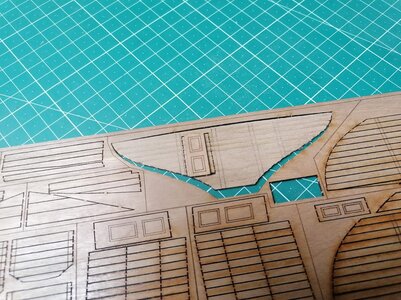
So the next logical step would have been to start work on the interior. But I'm not sure how this is supposed to work. Is the idea that we are to cut out all the wooden strips of each bulkhead and then glue them together thus eliminating the gaps between each plank?

IMG_20211128_172603.jpg

You can see: the door doesn't fit. Now I have no problems with that as I can easily scratch build a new one, but the question is: Are we supposed to leave the bulkheads as they are and simply attach the square wooden timbers to these? This would leave us with bulkheads that have gaps between each planks which I don't like at all. Besides it would be near impossible to remove the charred edges between each plank.
IMG_20211128_172617.jpg

Here you can see, the door fits.

Any input is appreciated.

Thanks
Peter
 
You can see: the door doesn't fit. Now I have no problems with that as I can easily scratch build a new one, but the question is: Are we supposed to leave the bulkheads as they are and simply attach the square wooden timbers to these? This would leave us with bulkheads that have gaps between each planks which I don't like at all. Besides it would be near impossible to remove the charred edges between each plank.
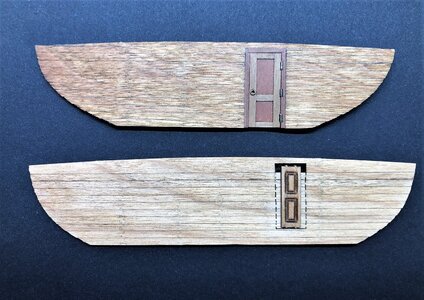
Good question, Peter. Your observations are correct, the doors are a bit smaller for this scale and don't presentable, IMHO. Also, you would need to make the door frame first, so it will look correct. As for the walls, they should, IMHO, be cut as individual planks and glue together. In this case, the charred edges are not a problem and will help represent individual planks better. Take a look at some tests I made sometime back.

The first image is the front of the timber (as suggested). In the below image, the door is provided in the kit, the upper image is the door made from scratch.

IMG_2220.JPEG

this image shows the timber from the opposite side (from the back). I like it much better than the front. As you can see, the charr is not a problem and actually helps.

IMG_2221.JPEG

But...the last word always will be yours, and it will be the best one because it will be the one you like most!
 
Back
Top