-

Win a Free Custom Engraved Brass Coin!!!
As a way to introduce our brass coins to the community, we will raffle off a free coin during the month of August. Follow link ABOVE for instructions for entering.
-

PRE-ORDER SHIPS IN SCALE TODAY!
The beloved Ships in Scale Magazine is back and charting a new course for 2026!
Discover new skills, new techniques, and new inspirations in every issue.
NOTE THAT OUR FIRST ISSUE WILL BE JAN/FEB 2026
You are using an out of date browser. It may not display this or other websites correctly.
You should upgrade or use an alternative browser.
You should upgrade or use an alternative browser.
HMS- As yet unamed, maybe The Wraith, or Harbinger not sure yet.
- Joined
- Jan 25, 2023
- Messages
- 31
- Points
- 48

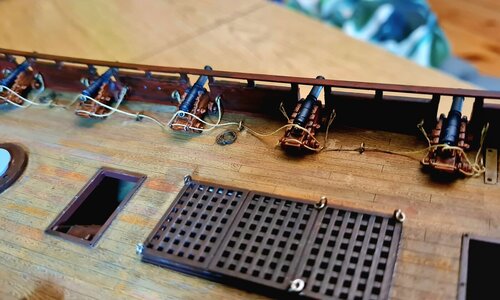
Err... I could say, sorry I made a mistake, but apparantly on this ship the wood grates were painted dark wood, the brown bits is actually paint that one of the crew spilt on them. lolYour rusted grates look cool. I was wondering, though, aren't most grates made of wood?
Thank's for pointing it out.
- Joined
- Jan 25, 2023
- Messages
- 31
- Points
- 48

I am actually waiting for a delivery of sea salt wash, its on order from spain. Wish i'd known when i ordered it.Some people dry brush white onto raised surfaces to bring out glints and highlights.
- Joined
- Jan 25, 2023
- Messages
- 31
- Points
- 48

I can't obtain any bronze colour till next week. Will try again then.Yes, but I think the figurehead should be of a darker hue than the regular gold for a more homogeneous overall look; the gold would be for the highlights since it blends well with bronze...
- Joined
- Jul 17, 2021
- Messages
- 45
- Points
- 58

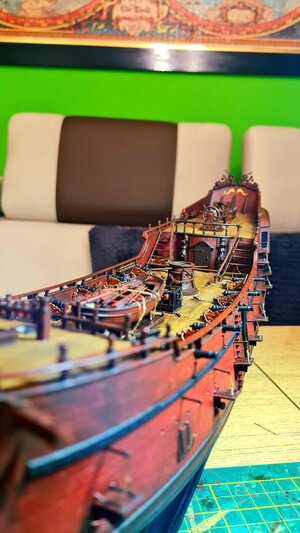
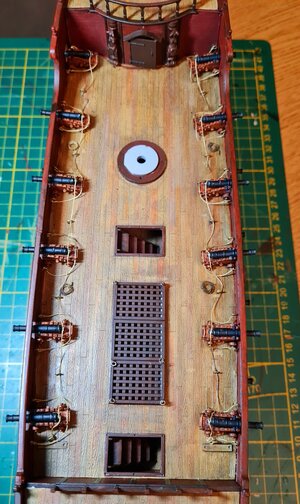
Hi Spaced, my lovely wife make now this ship. And she(we) also do not like swan. So thinking change this figurehead for more interesting. Here i wanna show you deck how my wife painting. She use Vallejo color with wash and some pencile aquarel. Of course cannons here in photos is wrong tie.. so at this moment my wife change it and is like should be. Model have huge potential so do not make hurry. And do with smile..cheersHi,
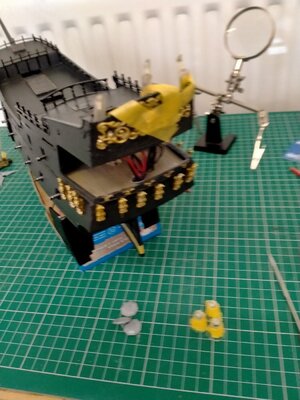
Painted the top deck grills in gun metal, tried to get a rust effect, I think it looks ok, just gave the lower decks a layer of deck tan with a dark wash. Not really necessary as they are hidden somewhat, but...hey ho.
Had a go at painting the figurehead in a light grey, but the paint wasn't taking to well, so will go over it again tomorrow.
Thank's for looking.
View attachment 353865
View attachment 353866
- Joined
- Jan 25, 2023
- Messages
- 31
- Points
- 48

She's a beauty all right, very nice, The ships ok too!... lol..sorry, couldn't resist... Well your ship is putting mine to shame, love the deck colour, the different shades, yes.. quite impressed I must say. Looks like a lot of detailed hard work gone in to that. Well done to you both.
Last edited:
- Joined
- Jul 17, 2021
- Messages
- 45
- Points
- 58

Thank you..im sure you can also make lovely ship and have to just be patience. Good luck and keep us posting pleaseShe's a beauty all right, very nice, The ships ok too!... lol..sorry, couldn't resist... Well your ship is putting mine to shame, love the deck colour, the different shades, yes.. quite impressed I must say. Looks like a lot of detailed hard work gone in to that. Well done to you both.
- Joined
- Jan 25, 2023
- Messages
- 31
- Points
- 48

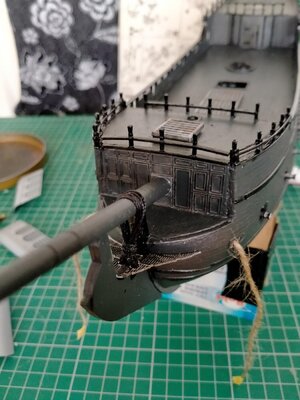
After several deck paint jobs, I decided on Anthracite for the decks and sides. had some issues with the bow not lining up together, had to do some filler work, not turned out too bad. Tying the rope around the mast on the bow,... now... that was a laugh, took a few attempts, got there in the end. Just needs touching up here and there. The rest of the bow needs constructing yet.

- Joined
- Jan 25, 2023
- Messages
- 31
- Points
- 48

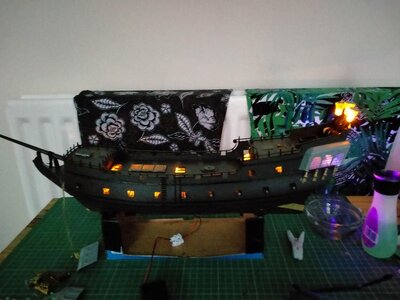
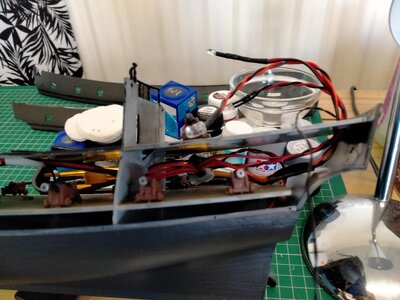
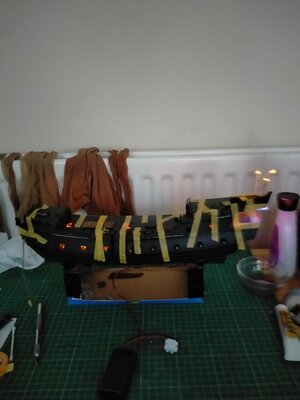
Not the best picture, too much background clutter, sorry. I wasn't going to add lights, as they came with no instructions, so i continued without. After glueing the hull ect, i thought yes it needs lights. managed to drill a hole in the hull behind the rudder, fed the wires through. Drilled a hole in the lower deck and upperdeck for the lanterns, manged to feed them through. Had problems getting a hole through the rear wall for the wires to go through towards the bow. Managed it with a hot screwdriver burned the sucker through! Couldn't get the wires all the way to the bow, but end result not to bad.

- Joined
- Jan 25, 2023
- Messages
- 31
- Points
- 48

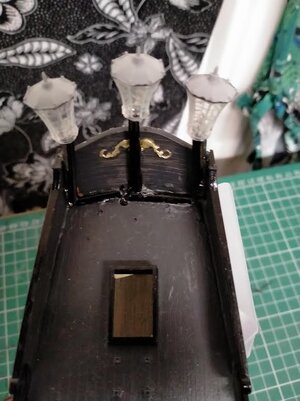
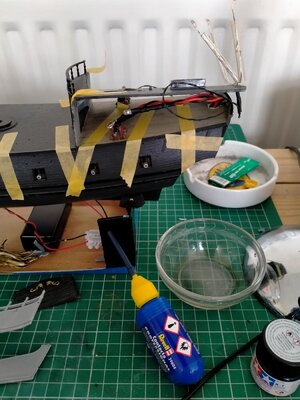
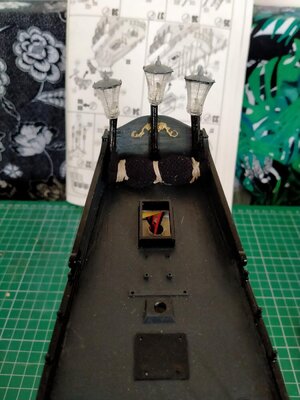
For the lanterns at the stern, i fed the wires through the upper deck, arranged the wires in to an E shape and laid them flush with the stern wall. I covered the wires with those protective sleeves for paintbrushes and secured them to the wall, painted them black. I borrowed the wifes fishnets and created a roll of net and used it to hide the wires laying along the stern wall. I drilled a hole in the lanterns and glued the wires in place and sat them on top of the brush tubes. Pleased with the outcome. (if my wife asks where her fishnets are, you know nothing!) he he he.


I’m enjoying your build. It takes me back to my BP construction.
Oooups...not genersted but generatedI hpe you won't have any issues with the heat genersted by the bulbs))) It looks quite nice; It will look even better when finished

They’re LED bulbs, aren’t they?
- Joined
- Jan 25, 2023
- Messages
- 31
- Points
- 48

- Joined
- Jan 25, 2023
- Messages
- 31
- Points
- 48

Thankyou Vfordyce, appreciate that.I’m enjoying your build. It takes me back to my BP construction.
Great Work! Are you using 'flicker' LED's or steady light? I have this kit and would like to change the swan as well
- Joined
- Jan 25, 2023
- Messages
- 31
- Points
- 48

Thankyou SigEp Ziggy, I used steady lights in the middle deck just underneath the life raft position, with a flicker in the middle of same deck, used flickers in the 3 lamps and steady and flickers near the windows and door.
The lamps, I got some clear plastic sleeves off some brushes, fed the wires through and sat the lanterns on top of cut to size sleeves. Painted black,..job done.
My project is on hold at the moment, my mother is sewing some sails together for me as replacements, so, that is taking a while. The prototype sail looks very good, 11 more to go. lol. With regards to the figurehead, the one i used fits perfect.


