• Ships of Scale has incorportated an extra level of security when you log In. Please follow on-screen prompts to acknowledge that you are not a robot via a "Check Box" or a "Pictorial Check Box Puzzle". This is needed due to higher level of AI Activity Security.
  • SUBSCRIBE TO SHIPS IN SCALE TODAY!

    The beloved Ships in Scale Magazine is back and charting a new course for 2026!
    Discover new skills, new techniques, and new inspirations in every issue.

    NOTE THAT OUR NEXT ISSUE WILL BE July/August 2026
  • Win a Free Custom Engraved Brass Coin!!!
    As a way to introduce our brass coins to the community, we will raffle off a free coin during the month of August. Follow link ABOVE for instructions for entering.

HMS ENTERPRISE by Keith 1:48 scale. New Kit from M.D.

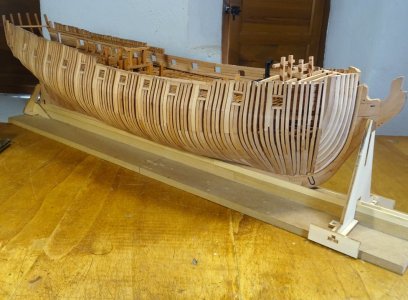
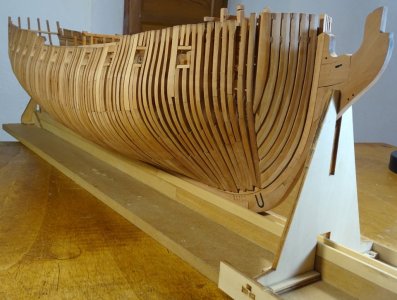
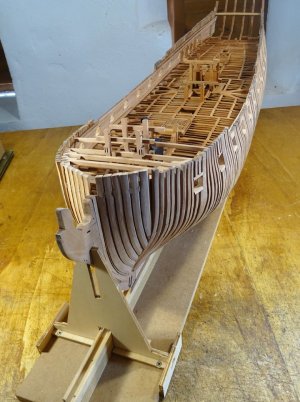
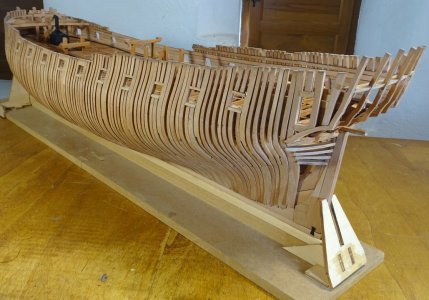
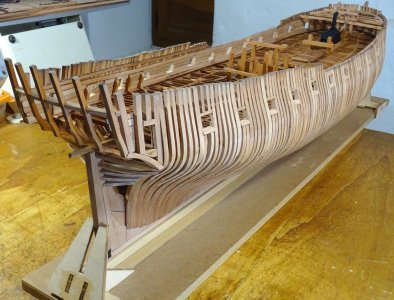
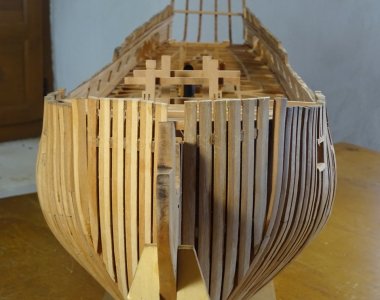
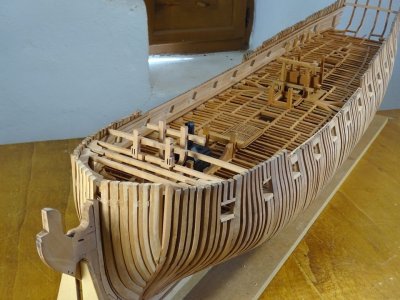
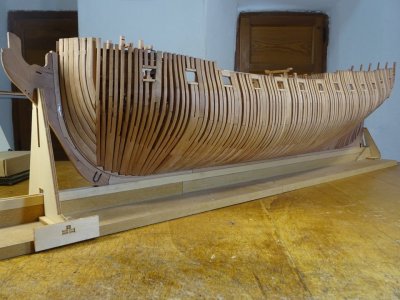
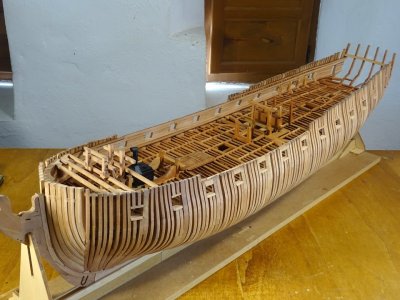
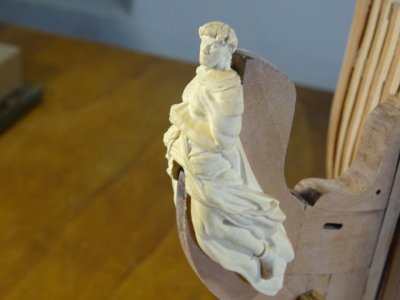
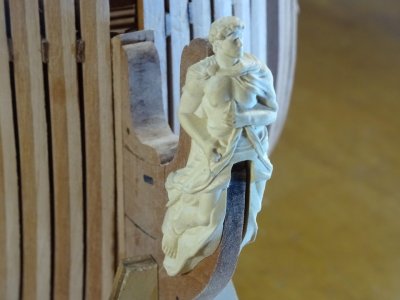
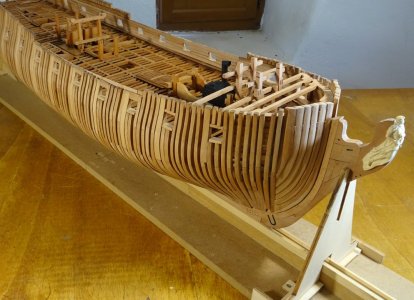
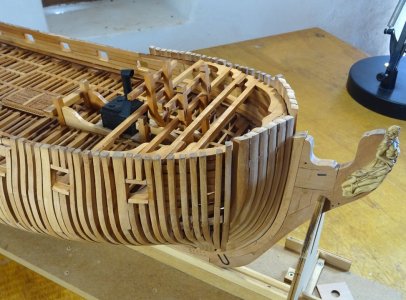
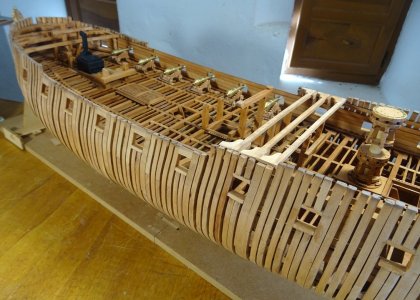
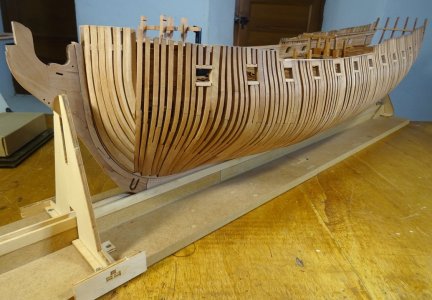
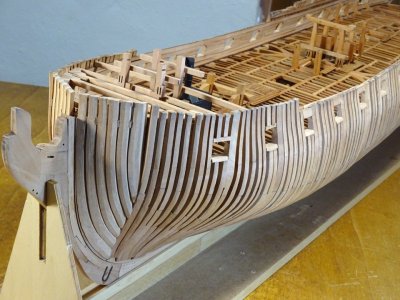
Another milestone reached. She's out of the cradle. Quite easy really. And as a testament to the accuracy of this kit, this is it with absolutely no work to the outer hull as yet., just care when fairing the ribs. Also there is now room to do what was discussed in my last post. The tapering of the head. The excellently detailed CNC boxwood figurehead is roughly fitted. I'm going to some work with staining and a dark wash to bring out the detailing. The stern gallery artwork is even more spectacular. Can't wait to get round to that. But that is some time away yet. Really pleased with the result
DSC01606.JPG

DSC01609.JPG

DSC01611.JPG

DSC01612.JPG

DSC01614.JPG

DSC01617.JPG

DSC01621.JPG

DSC01622.JPG

DSC01628.JPG

DSC01640.JPG

DSC01642.JPG

DSC01644.JPG

DSC01646.JPG

DSC01647.JPG

DSC01649.JPG

DSC01652.JPG
 
Another milestone reached. She's out of the cradle. Quite easy really. And as a testament to the accuracy of this kit, this is it with absolutely no work to the outer hull as yet., just care when fairing the ribs. Also there is now room to do what was discussed in my last post. The tapering of the head. The excellently detailed CNC boxwood figurehead is roughly fitted. I'm going to some work with staining and a dark wash to bring out the detailing. The stern gallery artwork is even more spectacular. Can't wait to get round to that. But that is some time away yet. Really pleased with the result
View attachment 642086

View attachment 642087

View attachment 642088

View attachment 642089

View attachment 642091

View attachment 642092

View attachment 642094

View attachment 642095

View attachment 642096

View attachment 642097

View attachment 642098

View attachment 642099

View attachment 642100

View attachment 642101

View attachment 642102

View attachment 642103
Looking great Keith! Nice work!! Magic Mike
 
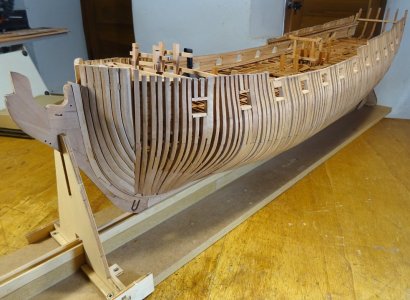
Another milestone reached. She's out of the cradle. Quite easy really. And as a testament to the accuracy of this kit, this is it with absolutely no work to the outer hull as yet., just care when fairing the ribs. Also there is now room to do what was discussed in my last post. The tapering of the head. The excellently detailed CNC boxwood figurehead is roughly fitted. I'm going to some work with staining and a dark wash to bring out the detailing. The stern gallery artwork is even more spectacular. Can't wait to get round to that. But that is some time away yet. Really pleased with the result
View attachment 642086

View attachment 642087

View attachment 642088

View attachment 642089

View attachment 642091

View attachment 642092

View attachment 642094

View attachment 642095

View attachment 642096

View attachment 642097

View attachment 642098

View attachment 642099

View attachment 642100

View attachment 642101

View attachment 642102

View attachment 642103
What a milestone and great view to she her standing free and showing her nice lines, Keith.
Regards, Peter
 
Keith,

Wow! You have done this kit justice! What an impressive hull, standing without the cradle, it looks simply superb!!

Your pictures show what a wonderful job you've done and also the quality of the kit.

A great kit in the wrong hands can be a disaster but, in your hands, this has become a thing of beauty.

Thanks for sharing!
Thank you for your very kind comments Brad. But it is really as you say, it's the quality of this kit that makes a good result
 
I would like to thank those of you who make your kind comments. It really is encouraging and truly appreciated. Thank you.
 
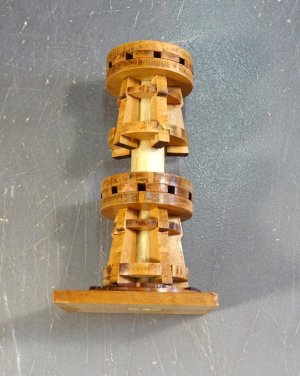
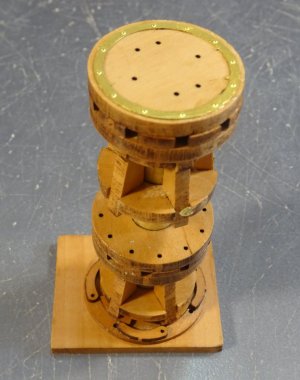
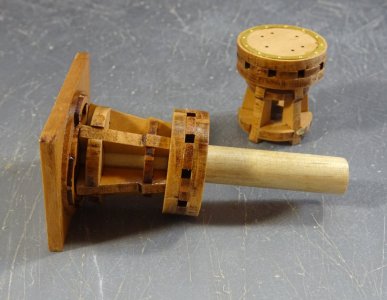
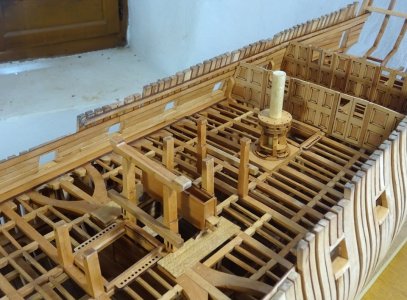
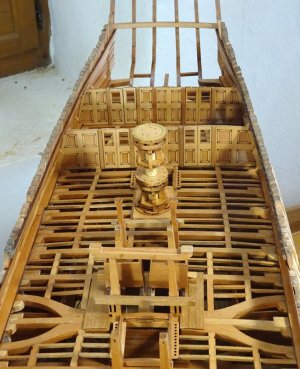
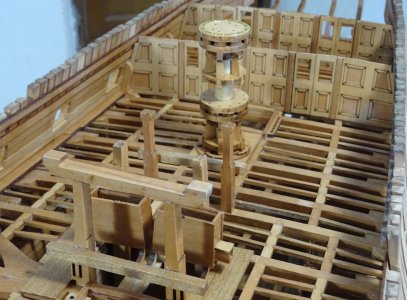
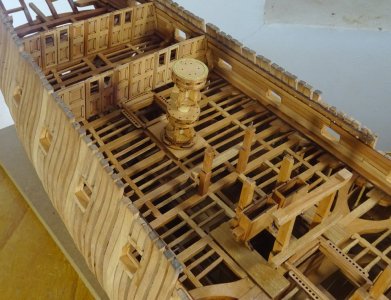
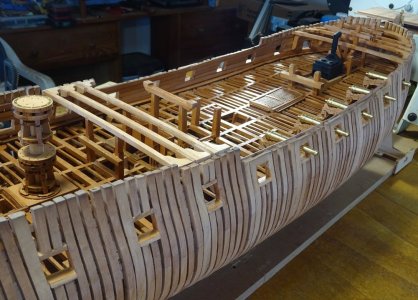
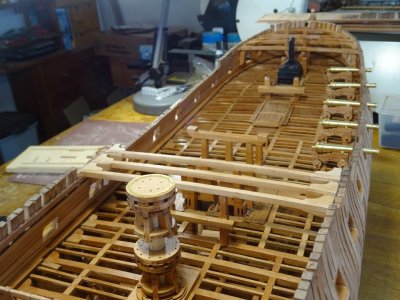
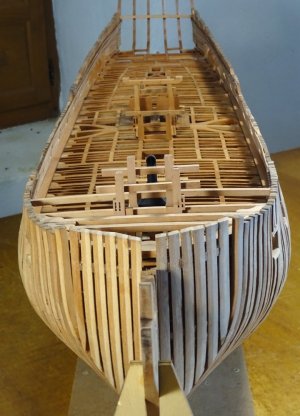
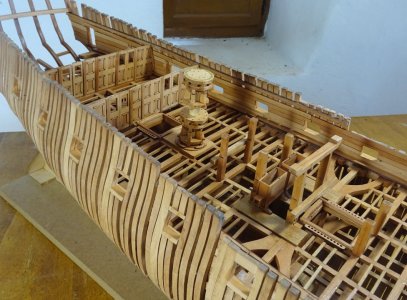
Good afternoon and thanks to all. The next stage of this build is the make up and fitting of the cabin bulkheads below the quarter deck. These are made of sections of 3 x .5 m laminate pearwood with the awkward tendency to curl up as soon as the glue is applied, so had to have glass panels ready to trap each section until dry. A bit tricky but looks OK in the end. Also the double capstan is assembled and fitted. The 1:1 drawing is necessary to get the correct height of the centre spindle.

DSC01653.JPG

DSC01654.JPG

DSC01656.JPG

DSC01658.JPG

DSC01664.JPG

DSC01666.JPG

DSC01669.JPG

DSC01670.JPG

DSC01671.JPG
 
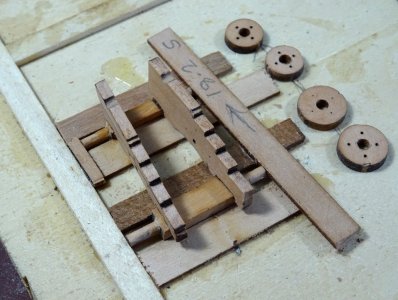
I have not seen anywhere written details of the building process for the hawse pieces for this kit, so l will give my interpretation of how l think it should be done over the next few days, going by the 3D drawings in the pdf manual. I hope it will work out OK, but only time will tell. I have started by making the 2 jigs supplied with the kit which support and accurately place the parts during the building process. The parts making up the jig are a really tight fit so a little cleaning of the char is necessary in all the joints. The next step is dentifying the components, and making up the last of the bow cant frames, x8A and B. The hawse pieces adjoin to x8A. The hawse pieces themselves consist of 28 seperate parts (F1 to F7) that join together making 7 port and 7 starboard frames as shown in the photos . The weather here, over the last week or so has been extremely hot, 37 deg C outside and 31 in my workshop, so am calling it a day for now. I shall continue over the next few days detailing the process as l understand it, so until the next time . . .

View attachment 533360

View attachment 533361

View attachment 533362

View attachment 533363

View attachment 533364

View attachment 533366

View attachment 533367

View attachment 533368

View attachment 533370

View attachment 533371
Sorry to ask about a post so much later than it was posted, but I could use some help. How did you get the angles of the cant frames and hawse pieces correct? I've struggled with this in the past with POF. I have some complicated ideas using trigonometry and jigs for the cants with sanding lines parallel to the end of the frame, but this one looks like it is not only canted, but tipped inward. Did you just do these with some finesse based on experience or did you have a system? I ask because whatever you did looks great. Thanks!
 
Sorry to ask about a post so much later than it was posted, but I could use some help. How did you get the angles of the cant frames and hawse pieces correct? I've struggled with this in the past with POF. I have some complicated ideas using trigonometry and jigs for the cants with sanding lines parallel to the end of the frame, but this one looks like it is not only canted, but tipped inward. Did you just do these with some finesse based on experience or did you have a system? I ask because whatever you did looks great. Thanks!
Hi Glen. Thanks for your comments. I do not have a system or use any complicated formula. I have built a few of these kits now. With this kit there are rough lines etched into the parts to help guide the shapes and with careful sanding and lots of fitting as you go, it all seems to come together. It is a bit tense at the time though, thinking how easy it is to mess up
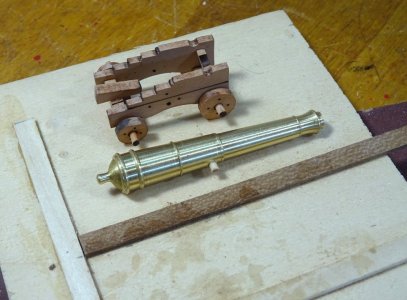
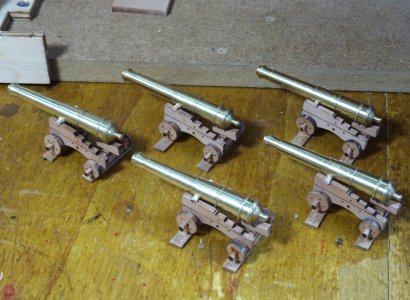
 
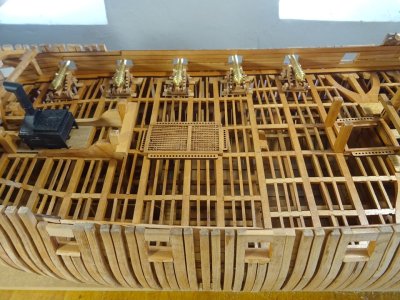
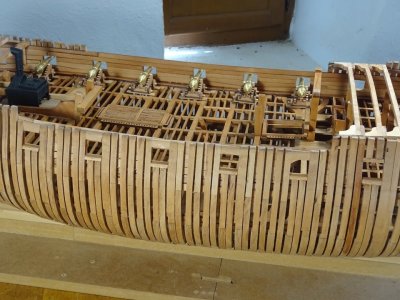
Good afternoon . Thought I would move on to new ground. The guns. 28 main guns are supplied, beautifully turned brass barrels, and detailed carriages for them all. I made up a jig to hold the axles square and secure after rounding them off ready to fit sides and trucks that make up the finished gun carriage. 6 are made so far while I wait for an order of matte black paint and primer to finish off the barrels. I had to roughly place them on the deck to see what they would look like

DSC01674.JPG

DSC01675.JPG

DSC01677.JPG

DSC01679.JPG

DSC01686.JPG

DSC01687.JPG

DSC01693.JPG

DSC01694.JPG
 
I noted you are opting for paint, probably with a brush. Any reason you prefer that over Birchwood Casey Brass Black? With the right surface prep, I typically get soft lead pencil-like black, but I am sure the choice comes from experience and taste. Just interested in what points you in the direction of paint with such nice brass.
 
I noted you are opting for paint, probably with a brush. Any reason you prefer that over Birchwood Casey Brass Black? With the right surface prep, I typically get soft lead pencil-like black, but I am sure the choice comes from experience and taste. Just interested in what points you in the direction of paint with such nice brass.
You are actually very right about the Birchwood brass black. I have used it before and got good results. It is just that I've run out of both paint and the blackening agent so have to order replacements. I went with the paint option as it is the easier to use a well used and trusted supplier n the UK. Maybe the wrong choice as Royal Mail (the carrier used by the supplier) sent me a message to say the package had arrived in Spain and was out for delivery. That was 11 days ago and has since disappeared into the ether. I emailed the supplier yesterday to ask for information on the whereabouts of the package, as there is no contact address for Royal Mail on this delivery, and am still waiting a reply. I may well resort to ordering from Birchwood Casey in the end. Just a bit worried, due to the toxic nature of this product, that it may be stopped at Spanish customs
 
You are actually very right about the Birchwood brass black. I have used it before and got good results. It is just that I've run out of both paint and the blackening agent so have to order replacements. I went with the paint option as it is the easier to use a well used and trusted supplier n the UK. Maybe the wrong choice as Royal Mail (the carrier used by the supplier) sent me a message to say the package had arrived in Spain and was out for delivery. That was 11 days ago and has since disappeared into the ether. I emailed the supplier yesterday to ask for information on the whereabouts of the package, as there is no contact address for Royal Mail on this delivery, and am still waiting a reply. I may well resort to ordering from Birchwood Casey in the end. Just a bit worried, due to the toxic nature of this product, that it may be stopped at Spanish customs
Bummer on the lost package. I got something through Royal Mail once. Eventually. I thought maybe they sent it across the continent by stage coach to Southern California after it arrived on the East Coast shipped on a full scale version of one of the sailing ships we like to build.

I know what you mean about the Brass Black being a little tough for some things. I have found managing larger items like those gun barrels you need to blacken requires a little finesse in terms of the bath concentration, container shape to cover the piece but minimize bath volume, and handling the bath waste.The process isn't for everyone. You do great work, so I'll wait to see what you cook up with painting. The nice thing about painting a gun barrel is that you can get away with black primer buffed out a little. One stop shopping.

I'm excited to check out your progress!
 
Back
Top