
-

SUBSCRIBE TO SHIPS IN SCALE TODAY!
The beloved Ships in Scale Magazine is back and charting a new course for 2026!
Discover new skills, new techniques, and new inspirations in every issue.
NOTE THAT OUR NEXT ISSUE WILL BE July/August 2026 -

Win a Free Custom Engraved Brass Coin!!!
As a way to introduce our brass coins to the community, we will raffle off a free coin during the month of August. Follow link ABOVE for instructions for entering.
You are using an out of date browser. It may not display this or other websites correctly.
You should upgrade or use an alternative browser.
You should upgrade or use an alternative browser.


Hola, era un doble forrado de la cubierta para darle mayor rigidez, ya de por si eran barcos casi gemelos, que aparejaron igual para la expedición fatídica.de John Franklin . Fuerón los primeros en incorporar motor a vapor, de dos sendas locomotoras adaptadas, su historia es muy interesante, Mattew Betts realizo el primer modelo a escala de este barco, y luego Ocre lo copio, teniendo que darle créditos al autor, hay un blog y un buen paso a paso de su modelo. En el pecio descubierto recientemente, siete ven sus tablas en diagonal.Es la primera vez que veo tablones diagonales en una cubierta principal.
¿Tus aviones realmente muestran esto?
Winova

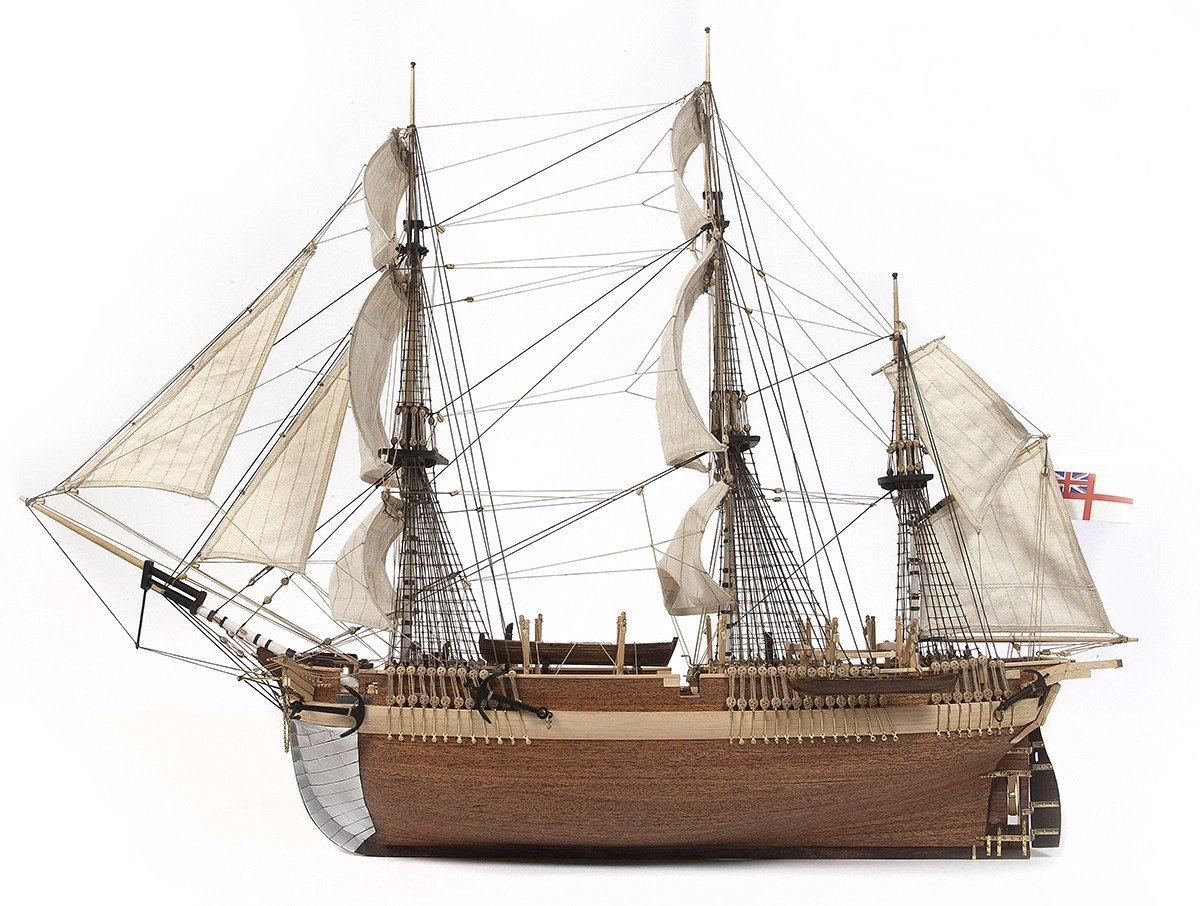
HMS Terror by Erebus and Terror - FINISHED - Scale 1:48 - POB - as fitted for polar service in 1845
On this day, two hundred years ago, HMS Terror was launched in Topsham, Devon. The Terror was originally built as a bomb vessel and saw noteworthy action during the War of 1812. However, her destiny lay in exploring the ice pack at both ends of the earth, and she was arguably the most successful ...
 modelshipworld.com

.webp")

Sigo el esquema para ambos del libro de Mattew, y de los planos reales de los barcos, le voy cogiendo el punto al soldador, si le das acido una gota en donde vas a soldar, se unen casi solas las piezas, los cuerpos de las bombas los he hecho como siempre de boj tratamiento con tinta china, no llevan caño, pues imagino que las aberturas que lleva hacia bandas, que son ovaladas, son la salida de aguas. Unas fotos....
PD. @Llaut Mallorquin ya esta tratado el molinete. El enjaretado lo voy a cambiar, aunque no es el del kit, es demasiado grande, Un saludo y virutas.
.jpeg")
.jpeg")
.jpeg")
.jpeg")
.jpeg")

.jpeg")

.jpeg")
.jpeg")
.jpeg")
.jpeg")
.jpeg")


PD. @Llaut Mallorquin ya esta tratado el molinete. El enjaretado lo voy a cambiar, aunque no es el del kit, es demasiado grande, Un saludo y virutas.
Hay veces que parece que se adelanta mucho y otras que para tres tablas cuesta más, solo es cuestión de si tienes partes hechas anteriormente o no, en este caso, no había nada hecho, estamos hablando de los habitáculos de popa, que parece ser eran retretes, sigo los planos de Mathew Betts, como siempre saco las plantillas en cartulina, y luego ya lo paso a la chapa de madera, que en este caso forro de laminas de 0´5. tiño y en su caso doy color y betún de Judea. En depende que lugares, las puertas se abren hacia proa, él prefiere seguir las que abren bandas.
Pintada la numeración de nivel de carga (creo que es para eso, ¿no?) los números romanos son pequeños, para hacer con pincel, me salía como un churro, al final, con una aguja como pincel, paciencia y untar muy poco conseguí pintarlos medio decente. Luego pensando, podía haber hecho un tiralíneas casero con dos agujas, quizás no hubiera funcionado mal, para la próxima vez...
Puse los imbornales de cubierta, son de cápsula del vino, cortados con el sacabocados, pegados con ciano, y con un conificado hecho el agujero con la forma hacia banda. Luego van pintados de negro.
Unas fotos...un saludo y virutas.
.jpeg")
.jpeg")


.jpeg")


.jpeg")
.jpeg")

.jpeg")
Pintada la numeración de nivel de carga (creo que es para eso, ¿no?) los números romanos son pequeños, para hacer con pincel, me salía como un churro, al final, con una aguja como pincel, paciencia y untar muy poco conseguí pintarlos medio decente. Luego pensando, podía haber hecho un tiralíneas casero con dos agujas, quizás no hubiera funcionado mal, para la próxima vez...
Puse los imbornales de cubierta, son de cápsula del vino, cortados con el sacabocados, pegados con ciano, y con un conificado hecho el agujero con la forma hacia banda. Luego van pintados de negro.
Unas fotos...un saludo y virutas.
Y seguimos con buena marcha, preparamos los machos, pintamos, y les ponemos los refuerzos de "hierro", envejecemos, hacemos las jimelgas, las colocamos y sus sujeciones con cabos enrollados. Ya hemos hecho el bauprés, con sus maniobras ya colocadas, lo colocamos y siguiendo a los sabios, no lo encolo, que yuyu...me ponga hacer la ligada del bauprés y en la segunda vuelta rompo su alojamiento en el tajamar, normal, era super delegado, lo refuerzo y vuelvo a la carga, no se hace de cualquier manera, se empieza por el macho de los bauprés, son una gaza, el cabo entra por ella y abraza a este, y luego baja al tajamar, se va cruzando en cada vuelta, y se acaba abrazando la ligada...
He hecho los... pescantes de las amuras de trinquete, ¿puede ser? como son muy finos, los he hechos en tubo de laton de tres diámetros, metidos y soldados, en la punta cáncamo, y en los laterales soldados medias argollas. La otra pieza de la foto, son unos apéndices que salen del pescante de gata, a sable...
a solo nos queda colocar las crucetas, encolarlas, y presentar los machos para empezar a poner los obenques...Unas fotos y hasta dentro de unos días, un saludo y virutas.

.jpeg")

.jpeg")
.jpeg")
.jpeg")

.jpeg")
.jpeg")
.jpeg")

He hecho los... pescantes de las amuras de trinquete, ¿puede ser? como son muy finos, los he hechos en tubo de laton de tres diámetros, metidos y soldados, en la punta cáncamo, y en los laterales soldados medias argollas. La otra pieza de la foto, son unos apéndices que salen del pescante de gata, a sable...
a solo nos queda colocar las crucetas, encolarlas, y presentar los machos para empezar a poner los obenques...Unas fotos y hasta dentro de unos días, un saludo y virutas.
Sorry for writing in Spanish in an English forum, but my English is from Google Translate.
Buenos dias, según voy adelantando, voy encontrando problemas, casi todos de fácil solución, y muchas veces debido al SMA, una de las mejoras o añadidos ha sido siguiendo los planos de Mattew Betts, en la parte de popa, una fila de barriles en ambas bandas, pero...después de hacer más de 40 a escala, me doy cuenta que si los pongo todos, los cabilleros se quedan anulados, pues ni entran los barriles, y si entraran debajo, no se podrían poner las cabillas y mucho menos hacer firmes las maniobras, con lo que solo colocaré los que pueda, asi tengo barriles para otro modelo.
Ya he colocado los acolladores de trinquete y mayor, al final, anulo dos pares de obenques y coloco otras tantas burdas.
Un saludo y virutas

.jpeg")
.jpeg")

.jpeg")
.jpeg")
.jpeg")
.jpeg")
.jpeg")


.jpeg")
.jpeg")
.jpeg")

.jpeg")


Buenos dias, según voy adelantando, voy encontrando problemas, casi todos de fácil solución, y muchas veces debido al SMA, una de las mejoras o añadidos ha sido siguiendo los planos de Mattew Betts, en la parte de popa, una fila de barriles en ambas bandas, pero...después de hacer más de 40 a escala, me doy cuenta que si los pongo todos, los cabilleros se quedan anulados, pues ni entran los barriles, y si entraran debajo, no se podrían poner las cabillas y mucho menos hacer firmes las maniobras, con lo que solo colocaré los que pueda, asi tengo barriles para otro modelo.
Ya he colocado los acolladores de trinquete y mayor, al final, anulo dos pares de obenques y coloco otras tantas burdas.
Un saludo y virutas
Sorry for writing in Spanish in an English forum, but my English is from Google Translate.
Buenos dias, ya lo puse en practica en el SJN, y me resulto mucho más sencillo que como lo hacia antes, que ya no recuerdo como era,

 , se lo via Jean Marie Rochard en su hilo del Nepo, y lo copie, así puede colocar todos los obenques y luego poner los acolladores, solo sueltas de la mesa y se queda ordenaditos los obenques, vas soltando y colocando.
Bueno ya tengo colocados todos los obenques, voy con los estays, para eso tenia que hacer los barriletes, ya sabeis, madera de boj y torno. El primero que coloco es el del bauprés.
Las auxiliares que lleva el kit, son metalicas, y claro, va ser que no, osea que las hago de papel y cola. luego coloco las falsas cuadernas. Me falta colocar alguna mas en proa y popa...He colocado los estais, el de mesana con maniobra de tensado, pues en el kit no lleva, simplemente va "sujeto"
 Casi lo más difícil ha sido el barrilete de los estais pues son muy pequeños, y forrarlos de hilo...He hecho y colocado las vigotas de los masteleros, con alambre de 0´7 abrazo la vigota, hago el cadenote y lo sueldo, luego hago plantilla para taladrarlos para que el agujero para el gancho de la arraigada quede en todos igual. Probé primero con hilo ya pavonado y no me agarraba la soldadura, con lo que no me queda otra que pintar los cadenotes. Un saludo y virutas

.jpeg")
.jpeg")

.jpeg")
.jpeg")
.jpeg")

.jpeg")


.jpeg")
.jpeg")
.jpeg")

.jpeg")
.jpeg")
.jpeg")
.jpeg")


Buenos dias, ya lo puse en practica en el SJN, y me resulto mucho más sencillo que como lo hacia antes, que ya no recuerdo como era,
Bueno ya tengo colocados todos los obenques, voy con los estays, para eso tenia que hacer los barriletes, ya sabeis, madera de boj y torno. El primero que coloco es el del bauprés.
Las auxiliares que lleva el kit, son metalicas, y claro, va ser que no, osea que las hago de papel y cola. luego coloco las falsas cuadernas. Me falta colocar alguna mas en proa y popa...He colocado los estais, el de mesana con maniobra de tensado, pues en el kit no lleva, simplemente va "sujeto"
Sorry for writing in Spanish in an English forum, but my English is from Google Translate.
Hoy me ha cundido, al final me he decidido a montar los cañones, he seguido los planos de Matew Betts , y joer, son pequeños de narices!!! casi me dejo los ojos y los dedos haciéndolos, claro todo a escala, el cañon mide 20 mm y 3-2 de diámetro, las cureñas, 14x5x5. He tenido que ampliar el plano a 200% para tomar medidas, y habrá un error gordo seguro, por que a estos tamaños las decimas ya sabemos. El cañón como veis torneado en boj, luego tinta china, y para finalizar grafito. Las gualderas son también de boj. Unas fotos, un saludo y virutas...
.jpeg")

.jpeg")
.jpeg")
.jpeg")


.jpeg")

.jpeg")

.jpeg")


Hoy me ha cundido, al final me he decidido a montar los cañones, he seguido los planos de Matew Betts , y joer, son pequeños de narices!!! casi me dejo los ojos y los dedos haciéndolos, claro todo a escala, el cañon mide 20 mm y 3-2 de diámetro, las cureñas, 14x5x5. He tenido que ampliar el plano a 200% para tomar medidas, y habrá un error gordo seguro, por que a estos tamaños las decimas ya sabemos. El cañón como veis torneado en boj, luego tinta china, y para finalizar grafito. Las gualderas son también de boj. Unas fotos, un saludo y virutas...
Sorry for writing in Spanish in an English forum, but my English is from Google Translate.
Buenos dias, seguimos avanzando, aunque a veces con pasitos para atrás como los cangrejos, jejejeje, He empezado con los flechastes, no sin antes colocar los guardajarcias en los tres pares de obenques, luego hacer nudos ballestrinques, calculo que sobre unos 800 +- aparte de los de inicio y fin de linea que curiosamente son los que peor se me dan, sobre todo el último, tiene narices! Para no agobiarme mucho, hago tres o cuatro lineas por rato, paro y hago otra cosa, como las vergas que en ello estoy, y dandote cuenta de cosas mal hechas, y que tiene fácil solución, como ha sido la gaza del estay mayor, que no es con vigotas redondas y si con ciegas, y pasa por el tajamar, no solo por el bauprés, un error del kit, otro de tantos. Unas fotos y saludos con virutas.
.jpeg")

.jpeg")
.jpeg")

.jpeg")
.jpeg")

.jpeg")
.jpeg")
.jpeg")

Buenos dias, seguimos avanzando, aunque a veces con pasitos para atrás como los cangrejos, jejejeje, He empezado con los flechastes, no sin antes colocar los guardajarcias en los tres pares de obenques, luego hacer nudos ballestrinques, calculo que sobre unos 800 +- aparte de los de inicio y fin de linea que curiosamente son los que peor se me dan, sobre todo el último, tiene narices! Para no agobiarme mucho, hago tres o cuatro lineas por rato, paro y hago otra cosa, como las vergas que en ello estoy, y dandote cuenta de cosas mal hechas, y que tiene fácil solución, como ha sido la gaza del estay mayor, que no es con vigotas redondas y si con ciegas, y pasa por el tajamar, no solo por el bauprés, un error del kit, otro de tantos. Unas fotos y saludos con virutas.
Sorry for writing in Spanish in an English forum, but my English is from Google Translate.
I was watching videos, which is unusual for me, but when I'm clueless about something, I do look it up. One of the options is baking soda mixed with borax, I think, for areas where it won't bleed or damage the color, and then a fixative or diluted white glue. I'll look into it more, and for the boat, I'll use one of the commercial products. I'm hesitant to mess it up with DIY projects after all that work, haha.
Anyway, I've continued building. I've finished the starboard ratlines, and tomorrow I'll start on the port ones. Meanwhile, to relax after all that clove hitching, I half-finished the boat. I just need to attach the seats to the base, along with the rudder, and make the fittings for it on the stem. I've rigged the 6-pounder cannons. It's crazy how tiny the eyelets are; the eye is 1mm, and they look huge in the photos, of course, compared to the mini-cannons. I haven't been able to install the rear rigging; there's no space on the gun carriage to attach the eyebolt. I'll see if it's too obvious to try and make a makeshift solution that resembles it, even if it's not quite right. The yards are made, just need to be fitted with the blocks and rigging. Best regards and shavings.
Seguimos ayer estuve mirando videos, cosa rara en mi, pero cuando no tengo ni idea de algo si que miro, y una de las opciones es el bicarbonato jusntado con borax me parece recordar, eso para zonas donde no destiña o se coma el color, y luego un fijador o cola balnca diluida. Lo miraré mejor, y para el barco usaré alguno de los productos comerciales, me da yuyu después del trabajo joderlo con inventos, jejeje.
Bueno he seguido construyendo, he terminado los flechastes de estribor, mañana empezare con los de babor, mientras, para relajar de tanto ballestrinque, medio termine el bote, me falta colocar los asientos en la base, junto con el timón, hacerle los herrajes de este en la roda. He colocado aparejados los cañones de 6 libras. Manda narices, los cancamos son super pequños, el ojo es de 1mm y en las fotos parecen super grandes, claro, en comparación con los mini cañones. Me ha sido imposible poner la maniobra trasera, no hay cuerpo en la cureña para colocar el cáncamo, ya vere si canta mucho hacer un apaño que se parezca aunque no sea. Hechas las vergas a falta de vestirlas con los motones y aparejos. Un saludo y virutas
WhatsApp Image 2026-02-16 at 19.06.08.jpeg
201,3 KB · Visitas: 2.446
WhatsApp Image 2026-02-16 at 19.32.17.jpeg
224 KB · Visitas: 2.447.jpeg")
WhatsApp Image 2026-02-16 at 19.32.17 (1).jpeg
178,7 KB · Visitas: 2.447
WhatsApp Image 2026-02-16 at 19.32.18.jpeg
216,4 KB · Visitas: 2.447.jpeg")
WhatsApp Image 2026-02-16 at 19.32.17 (2).jpeg
328,4 KB · Visitas: 2.447.jpeg")
WhatsApp Image 2026-02-16 at 19.32.18 (1).jpeg
256,2 KB · Visitas: 2.447.jpeg")
WhatsApp Image 2026-02-16 at 19.32.49 (1).jpeg
265,5 KB · Visitas: 2.447
Last edited:
Sorry for writing in Spanish in an English forum, but my English is from Google Translate.
We're continuing with the HMS Erebus in Ocher. This business of arrow swivels and their clove hitches is tiresome. Thankfully, I only have a few of the male ones left; I'm finishing the mainmast and just need to do the mizzenmast. Meanwhile, to relax, I'm continuing to make the canisters out of paper and diluted white glue. I use metal canisters, coat them with wax, and then glue strips of paper coated with the glue onto them. About four layers are enough. The structure on deck—I'm not entirely sure what its function was—was it meant to act as a kind of tent? It's getting a good, careful scrubbing with a scouring pad so as not to break it. Cheers and shavings...
Seguimos con el HMS Erebus de Ocre, que canso es esto de los flechastes, y sus ballestrinques, menos mal que ya me quedan pocos de los machos, terminando el de mayor y faltaria mesana. Mientras para relajar, sigo haciendo los botes en papel y cola blanca diluida, uso los botes de metal, los unto de cera y sobre ellos voy pegando tiras de papel untado con la cola, con unas 4 capas es suficiente. La estructura que lleva en cubierta que no se muy bien cual era su función, hacer como una tienda de campaña? Lleva un buen repaso de estropajo con mimo para no romperlo. Un saludo y virutas...
Archivos adjuntos

WhatsApp Image 2026-02-19 at 20.14.09.jpeg
180,1 KB · Visitas: 2.380
WhatsApp Image 2026-02-19 at 20.14.0811.jpeg
199,4 KB · Visitas: 2.379
WhatsApp Image 2026-02-19 at 20.14.08.jpeg
149,4 KB · Visitas: 2.379
WhatsApp Image 2026-02-19 at 20.14.071.jpeg
193,3 KB · Visitas: 2.379
WhatsApp Image 2026-02-19 at 20.14.081.jpeg
180,1 KB · Visitas: 2.379
WhatsApp Image 2026-02-19 at 20.20.19.jpeg
240 KB · Visitas: 2.379
WhatsApp Image 2026-02-19 at 20.20.191.jpeg
207,8 KB · Visitas: 2.379
WhatsApp Image 2026-02-19 at 20.12.10.jpeg
266,1 KB · Visitas: 2.379
WhatsApp Image 2026-02-19 at 20.12.48.jpeg
176,9 KB · Visitas: 2.379
WhatsApp Image 2026-02-19 at 20.13.00.jpeg
135,4 KB · Visitas: 2.379
WhatsApp Image 2026-02-19 at 20.14.07.jpeg
272,4 KB · Visitas: 2.379
WhatsApp Image 2026-02-19 at 20.14.06.jpeg
200,9 KB · Visitas: 2.379
Last edited:
Sorry for writing in Spanish in an English forum, but my English is from Google Translate.
Good evening. The mastheads are secured, but I'm not sure whether to do the lashings. Would that be too complicated? What do you think? I've also made the ring for the staysail tack and the spiders, which we agreed this ship wouldn't have.
What I'm thinking now is, I followed the kit and put a top on the mizzenmast, but I remembered there was a discussion online about whether these ships only had a spreader, since they only have a topmast and a topgallant mast, and lack a topmast. It's already in place, and the rigging is on, so I'd have to take everything down, without being sure either way. In Matthew Betts' plans, it seems to have a spreader, but also a topmast and topgallant mast... I've attached photos from the aforementioned author, where you can see what look like gaffs on each mast... Cheers and shavings.
Buenas noches, hechas las arraigadas de los machos, lo que no se si hacer son las jaretas, será liarse demasiado? que opinais? realizado tambien la argolla para la amura de las velas de estay, y las arañas que ya quedamos que este barco no llevaría.
Lo que estoy ahora pensando, he seguido el kit y he puesto cofa en mesana, pero recorde que habia una discusión en la web, de si estos barco solo llevaban cruceta, al tener solo macho y mastelero, y carecer de mastelillo. Ya esta colocado, y puesta la jarcia, habria que desmontar todo, sin tener claro una cosa u otra. En los planos de Mattew Betts si que pa
Buenas noches, hechas las arraigadas de los machos, lo que no se si hacer son las jaretas, será liarse demasiado? que opinais? realizado tambien la argolla para la amura de las velas de estay, y las arañas que ya quedamos que este barco no llevaría.
Lo que estoy ahora pensando, he seguido el kit y he puesto cofa en mesana, pero recorde que habia una discusión en la web, de si estos barco solo llevaban cruceta, al tener solo macho y mastelero, y carecer de mastelillo. Ya esta colocado, y puesta la jarcia, habria que desmontar todo, sin tener claro una cosa u otra. En los planos de Mattew Betts si que parece que lleva, pero tambien mastelero y mastelillo...
Adjunto fotos del citado autor, donde se aprecian en cada palo picos ? de cangrejera... Saludos y virutas
Lo más probable es que el palo de mesana no tuviera quilla 1.jpg
181,4 KB · Visitas: 2.091
ChatGPT Image 24 feb 2026, 00_36_06.jpg
95,7 KB · Visitas: 2.091
WhatsApp Image 2026-02-24 at 00.41.34.jpeg
99,9 KB · Visitas: 2.091.jpeg")
WhatsApp Image 2026-02-24 at 00.41.34 (2).jpeg
44,3 KB · Visitas: 2.091
Captura de pantalla 2025-12-07 094254.jpg
67,8 KB · Visitas: 2.081.jpeg")
WhatsApp Image 2026-02-24 at 00.41.34 (1).jpeg
153 KB · Visitas: 2.081.jpg")
Erebus (4).jpg
217 KB · Visitas: 2.081.jpg")
Erebus (01).jpg
45,8 KB · Visitas: 2.081
WhatsApp Image 2026-02-25 at 11.04.54.jpeg
240,6 KB · Visitas: 2.028
Last edited:
I'm not getting much done, it's also true that I'm juggling a million things right now, between the bike and the traverse. Well, the masts and their shrouds are in place, now for the ratlines. Not much else to say, just a few photos and we'll continue... Cheers and shavings.
Que poco me cunde, también es verdad que ahora estoy con mil pitos, entre elo la bici y la trave, bueno, colocados masteleros y sus obenquillos, ahora a por los flechastes, poco más que contar, unas fotos y seguimos...Un saludo y virutas
Que poco me cunde, también es verdad que ahora estoy con mil pitos, entre elo la bici y la trave, bueno, colocados masteleros y sus obenquillos, ahora a por los flechastes, poco más que contar, unas fotos y seguimos...Un saludo y virutas
Archivos adjuntos

WhatsApp Image 2026-03-05 at 17.47.37.jpeg
114,4 KB · Visitas: 396.jpeg")
WhatsApp Image 2026-03-05 at 18.32.29 (1).jpeg
179,3 KB · Visitas: 396
WhatsApp Image 2026-03-05 at 18.32.29.jpeg
190,8 KB · Visitas: 396.jpeg")
WhatsApp Image 2026-03-05 at 18.32.28 (1).jpeg
179,3 KB · Visitas: 396
WhatsApp Image 2026-03-05 at 18.32.28.jpeg
262,4 KB · Visitas: 396
WhatsApp Image 2026-03-05 at 17.47.38.jpeg
180,5 KB · Visitas: 396
Last edited:
Good morning, I'm wondering if the Erebus would have furring nets on both the bowsprit and mainmast stays. It's assumed that warships of that era had them, but... I've attached a photo of my Nepomuceno, which does have them. What do you think?
I've already made the shrouds and their topmast ratlines, and I'm currently working on the upper stays, the ones for the topmasts. That's why I'm wondering about the furring nets now, to make them before adding more and having them get in the way. And I didn't know about the cleats going on both sides, whether it's the stay or the stanchion, until yesterday—another thing I've learned. There's no easy solution for the Nepomuceno, but there is for the others, if I remember, of course! hahaha
Buenos dias, me estoy preguntando si el Erebus llevaría Jaretas en ambos stay´s de baupres y mayor, se supone que en los barcos de guerra de la epoca lo llevaban, pero...Os adjunto foto de mi Nepomuceno que si lleva. Que opinais?
Ya tengo hechos los obenquillos y sus flechastes de masteleros, y estoy liado con los stays superiores, los de masteleros, por eso me salta la duda ahora de las jaretas, por hacerlas antes de montar más y que estorbe. Y lo de las piñas que vayan por ambas bandas siendo el de stay o contrastay, no lo sabia hasta ayer, otra cosa más aprendida. En el Nepo ya no tien solución fácil, pero para los siguientes si, si me acuerdo claro! jajajaja
Archivos adjuntos

Captura de pantalla 2026-03-10 102528.jpg
44,1 KB · Visitas: 351.jpg")
San Juan Nepomuceno de AL (10561).jpg
140,7 KB · Visitas: 351.jpg")
San Juan Nepomuceno de AL (10565).jpg
155,2 KB · Visitas: 351
WhatsApp Image 2026-03-10 at 10.40.04.jpeg
174,1 KB · Visitas: 351.jpeg")
WhatsApp Image 2026-03-10 at 10.40.03 (2).jpeg
247,8 KB · Visitas: 351.jpeg")
WhatsApp Image 2026-03-10 at 10.40.03 (1).jpeg
174,3 KB · Visitas: 351
WhatsApp Image 2026-03-10 at 10.40.03.jpeg
243,3 KB · Visitas: 351.jpeg")
WhatsApp Image 2026-03-10 at 10.40.04 (2).jpeg
316,7 KB · Visitas: 351.jpeg")
WhatsApp Image 2026-03-10 at 10.40.04 (1).jpeg
260 KB · Visitas: 351
Last edited:
With the shrouds and their ratlines finished, the next step is more stays. In this case, from bow to stern, there's the stay and stanchion of the lower top, the stay of the topgallant topmast, the stay and stanchion of the main topmast, and the stay of the mizzen topmast. I must say that the plans don't specify very well how or where they end. Many initially suggest they're "tied" to eyebolts, which is completely inaccurate. So I've had to review documentation and do it as best I could, which means there are bound to be mistakes, but...it's better than what was proposed. If someone with more knowledge corrects the rigging, they're welcome to; it will be useful to someone. I'll try to post photos in the order described. The ends of several of the rigging lines aren't yet secured, but that will be done once all the standing rigging is in place. Best regards and shavings.
Note: I asked "experts" if this ship would have a stringer to join the stays, they told me no, so it is not installed.
Terminados los obenquillos y sus flechastes, lo siguiente son más stays, en este caso, de proa a popa, stay y contrastay de cofa menor, stay de mastelerillo de juanete, stay y contrastay del mayor de cofa y el stay de mastelero de mesana. He de decir que en planos no se expecifica muy bien, ni como ni donde acaban, muchos en principio los propone "anudados" a cancamos, algo totalmente incierto, con lo que he tenido que revisar documentación, y hacerlo como mejor he creido, con lo que seguro hay fallos, pero...mejor que lo propuesto está, y si alguien con más conocimiento corrije maniobras, pues bienvenidas sean, a alguno les servirá. Intentaré poner fotos por el orden descrito. Los chicotes de varias de las maniobras estan sin hacer firmes, pero eso ya se hará cuando este toda la jarcia fija vanzada. Un saludo y virutas.
Nota: preguntado a "espertos" si este barco llevaria culebrilla para unir los stays, me dicen que no, con lo que no se pone.
Archivos adjuntos

stays.jpeg
256,9 KB · Visitas: 332.jpeg")
WhatsApp Image 2026-03-11 at 17.42.49 (3).jpeg
152,1 KB · Visitas: 332.jpeg")
WhatsApp Image 2026-03-11 at 17.42.49 (2).jpeg
199,3 KB · Visitas: 332.jpeg")
WhatsApp Image 2026-03-11 at 17.42.50 (3).jpeg
225,5 KB · Visitas: 332.jpeg")
WhatsApp Image 2026-03-11 at 17.42.49 (1).jpeg
133,7 KB · Visitas: 332.jpeg")
WhatsApp Image 2026-03-11 at 17.42.50 (2).jpeg
224,4 KB · Visitas: 332.jpeg")
WhatsApp Image 2026-03-11 at 17.42.50 (1).jpeg
157,1 KB · Visitas: 332
WhatsApp Image 2026-03-11 at 17.42.50.jpeg
135,8 KB · Visitas: 332
WhatsApp Image 2026-03-11 at 18.05.21.jpeg
126,7 KB · Visitas: 329
WhatsApp Image 2026-03-11 at 18.05.20.jpeg
98,1 KB · Visitas: 329.jpeg")
WhatsApp Image 2026-03-11 at 18.05.20 (3).jpeg
131,8 KB · Visitas: 329.jpeg")
WhatsApp Image 2026-03-11 at 18.05.20 (2).jpeg
119 KB · Visitas: 329.jpeg")
WhatsApp Image 2026-03-11 at 18.05.20 (1).jpeg
155,5 KB · Visitas: 329
Last edited:
Good afternoon, despite going out on my bike, getting thoroughly muddy, and ending up exhausted and docile even on an e-bike (I'm getting on in years :lol: :lol") , I made good use of the afternoon. I made a sample rudder fitting and attached the backstays to the three masts: double on the foremast and mainmast, and single on the mizzenmast, halfway up the mast (which will later have two from the tip). I also secured the steering wheel, attaching the tiller's running line. Here are some photos, and as always, greetings and shavings...:dance:
, I made good use of the afternoon. I made a sample rudder fitting and attached the backstays to the three masts: double on the foremast and mainmast, and single on the mizzenmast, halfway up the mast (which will later have two from the tip). I also secured the steering wheel, attaching the tiller's running line. Here are some photos, and as always, greetings and shavings...:dance:
Buenas tardes, a pesar de haber salido con la bici, embarrarme bien, y acabar manso y canso aun con e-bike ( uno ya tiene una edad :lol: :lol: ) me ha cundido la tarde, he hecho un herraje de timón de muestra para [mention id="1736"]@urruti[/mention] y he colocado las burdas de los tres palos, dobles en masteleros de trinquete y mayor, sencilla en mesana, a mitad de palo, este llevará luego dos desde la punta, he fijado la rueda del timón, colocando el cabo de maniobra de la caña. Unas fotos y como siempre, saludos y virutas...:dance:
, I made good use of the afternoon. I made a sample rudder fitting and attached the backstays to the three masts: double on the foremast and mainmast, and single on the mizzenmast, halfway up the mast (which will later have two from the tip). I also secured the steering wheel, attaching the tiller's running line. Here are some photos, and as always, greetings and shavings...:dance:Buenas tardes, a pesar de haber salido con la bici, embarrarme bien, y acabar manso y canso aun con e-bike ( uno ya tiene una edad :lol: :lol: ) me ha cundido la tarde, he hecho un herraje de timón de muestra para [mention id="1736"]@urruti[/mention] y he colocado las burdas de los tres palos, dobles en masteleros de trinquete y mayor, sencilla en mesana, a mitad de palo, este llevará luego dos desde la punta, he fijado la rueda del timón, colocando el cabo de maniobra de la caña. Unas fotos y como siempre, saludos y virutas...:dance:
Archivos adjuntos
.jpeg")
WhatsApp Image 2026-03-12 at 18.33.46 (1).jpeg
157,4 KB · Visitas: 309.jpeg")
WhatsApp Image 2026-03-12 at 18.33.46 (2).jpeg
180,8 KB · Visitas: 309
WhatsApp Image 2026-03-12 at 18.33.46.jpeg
303,5 KB · Visitas: 309.jpeg")
WhatsApp Image 2026-03-12 at 18.33.47 (1).jpeg
164,3 KB · Visitas: 309
Last edited:
- Joined
- Dec 23, 2024
- Messages
- 148
- Points
- 88

Love your inventiveness, using a pan from your kitchen. I would never be allowed to use any of our kitchen equipment, Captains ordersWe continued with short breaks on the Nepo. I lined the bows with 0.5mm board and made cuts every 60mm to simulate planking, then painted it ochre yellow. As I said, I'll try to match its last voyage, and according to reliable sources, its interior changed from green during combat to yellow during the expedition. For 24 hours it rested on a flat surface with clamps to ensure it adhered perfectly with contact adhesive. Next, I began shaping it, starting with the edges of the bowls, but that wasn't enough. Finally, on a block of wood, I drew the curve of the deck at the bow, and with a coping saw, I cut along the line. Now I had a male and female part of the curve, so I lightly sanded it to create more space for the two bows. Little by little, I forced the curve by applying heat and steam with the plate placed on top of the mold, until it reached its full curvature, leaving it for 24 hours to set. Some of the boards glued with superglue shifted out of place, but it's a small section; I'll fix it. Having checked the curvature, I'm drilling 0.8mm holes to insert tacks for securing it against the ribs and ensuring a good glue bond.View attachment 574572View attachment 574573View attachment 574574View attachment 574575View attachment 574576View attachment 574577View attachment 574578View attachment 574579View attachment 574580View attachment 574581
Good afternoon and happy Saturday! We're still here, having installed the topmasts, or rather the foremast and mainmast topgallant, with their shrouds. These don't have ratlines, thankfully, because at this size they would have looked a bit of a mess, I think. I'll install the topgallant backstays almost last so they don't get in the way when I'm putting on the running rigging. I made the davits a few days ago, but to avoid snagging them, they're not installed yet. Cleats that size are tricky, and they break just by looking at them. I'm attaching a sample photo of how they'll look. I did install the stern davits.
I've started dressing the yards; the foremast yards are already done. Tomorrow, in daylight, I'll tackle the sails, which are already attached, but I have to make them. Thanks to @manuelsirgo, who kindly sent me the tissue paper. I'll keep you posted, and you'll see the results.
And that's all for today's updates. As always, best regards and shavings.
buenas tardes y feliz sábado, por aquí seguimos, colocados mastelillos, o seria juanete o sobrejuanete de trinquete y mayor? con sus obenques, estos no llevan flechastes, menos mal por que a este tamaño hubieran quedado un poco churro, creo yo. Las burdas de juanete las colocaré casi al final para que no me estorben al poner las maniobras de la jarcia de labor. Los pescantes los tengo hechos hace dias pero por evitar enganchones estan si poner, las cornamusas de ese tamaño se las traen, que además se rompen con la mirada. pongo foto de muestra de como quedarán. Los pescantes de popa si los puse.
He empezado a vestir las vergas, las de trinquete ya están, y, mañana con luz le tocará a las velas, aferradas, pero tengo que hacerlas, gracias a [mention id="28301" color="#00AA00"]@manuelsirgo[/mention] que amablemente me mandó el papel seda, ya os contaré y vereis espero los resultados.
y por hoy ya están los adelantos, como siempre, un saludo y virutas.
Archivos adjuntos

WhatsApp Image 2026-03-14 at 20.12.28.jpeg
243,3 KB · Visitas: 264
WhatsApp Image 2026-03-14 at 20.12.27.jpeg
144,6 KB · Visitas: 264.jpeg")
WhatsApp Image 2026-03-14 at 20.12.27 (3).jpeg
274,4 KB · Visitas: 264.jpeg")
WhatsApp Image 2026-03-14 at 20.12.27 (2).jpeg
134,6 KB · Visitas: 264.jpeg")
WhatsApp Image 2026-03-14 at 20.12.27 (1).jpeg
148 KB · Visitas: 264
WhatsApp Image 2026-03-14 at 20.19.34.jpeg
296,3 KB · Visitas: 264.jpeg")
WhatsApp Image 2026-03-14 at 20.19.34 (1).jpeg
270,1 KB · Visitas: 264.jpeg")
WhatsApp Image 2026-03-14 at 19.52.19 (2).jpeg
60,1 KB · Visitas: 264.jpeg")
WhatsApp Image 2026-03-14 at 19.52.19 (1).jpeg
61,1 KB · Visitas: 264
WhatsApp Image 2026-03-14 at 19.52.19.jpeg
53,6 KB · Visitas: 264.jpeg")
WhatsApp Image 2026-03-14 at 19.52.21 (1).jpeg
105,6 KB · Visitas: 264.jpeg")
WhatsApp Image 2026-03-14 at 19.52.20 (2).jpeg
65,6 KB · Visitas: 264.jpeg")
WhatsApp Image 2026-03-14 at 19.52.20 (1).jpeg
80,2 KB · Visitas: 264
WhatsApp Image 2026-03-14 at 19.52.20.jpeg
75 KB · Visitas: 264.jpeg")
WhatsApp Image 2026-03-14 at 19.52.19 (3).jpeg
72,8 KB · Visitas: 264
WhatsApp Image 2026-03-14 at 19.52.21.jpeg
93,6 KB · Visitas: 264
Last edited: