Always such nice work Peter...
-

Win a Free Custom Engraved Brass Coin!!!
As a way to introduce our brass coins to the community, we will raffle off a free coin during the month of August. Follow link ABOVE for instructions for entering.
-

PRE-ORDER SHIPS IN SCALE TODAY!
The beloved Ships in Scale Magazine is back and charting a new course for 2026!
Discover new skills, new techniques, and new inspirations in every issue.
NOTE THAT OUR FIRST ISSUE WILL BE JAN/FEB 2026
You are using an out of date browser. It may not display this or other websites correctly.
You should upgrade or use an alternative browser.
You should upgrade or use an alternative browser.
HMS EURYALUS - 36 GUN 1:48 SCALE
- Joined
- Dec 30, 2021
- Messages
- 278
- Points
- 278

Work on the rudder has stalled pending arrival of more brass strip, tube and rod. I did not have the right sizes on hand for the gudgeon pins/pintals.
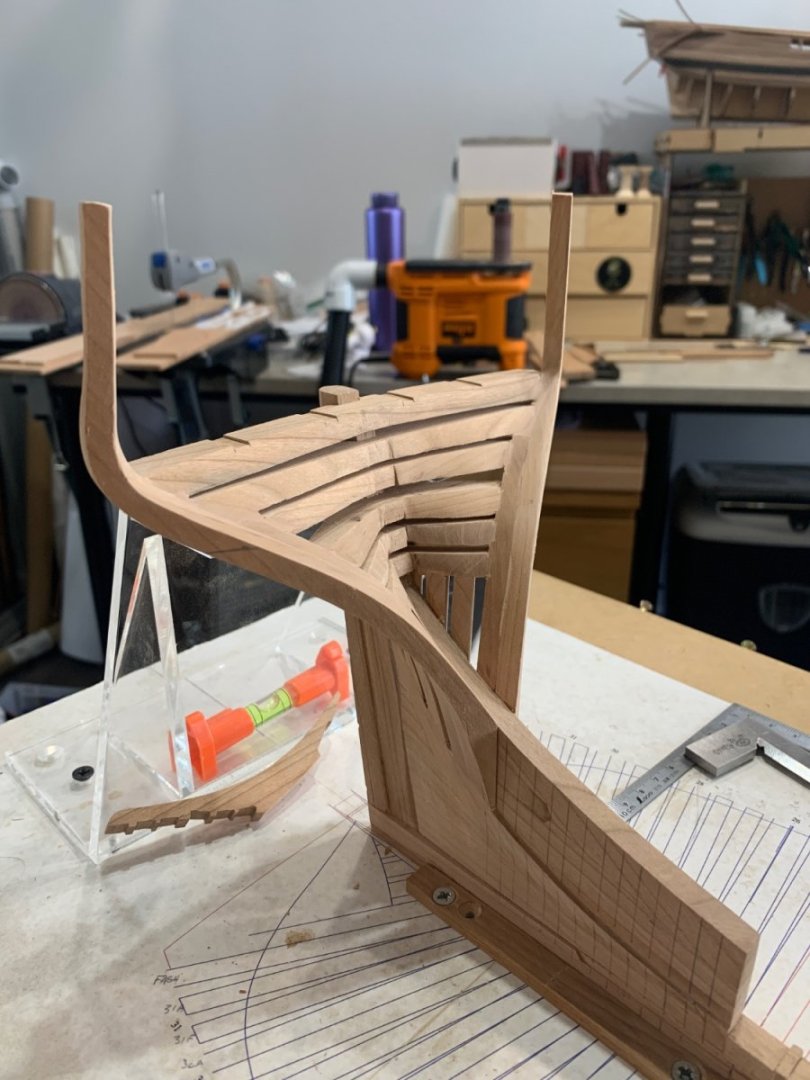
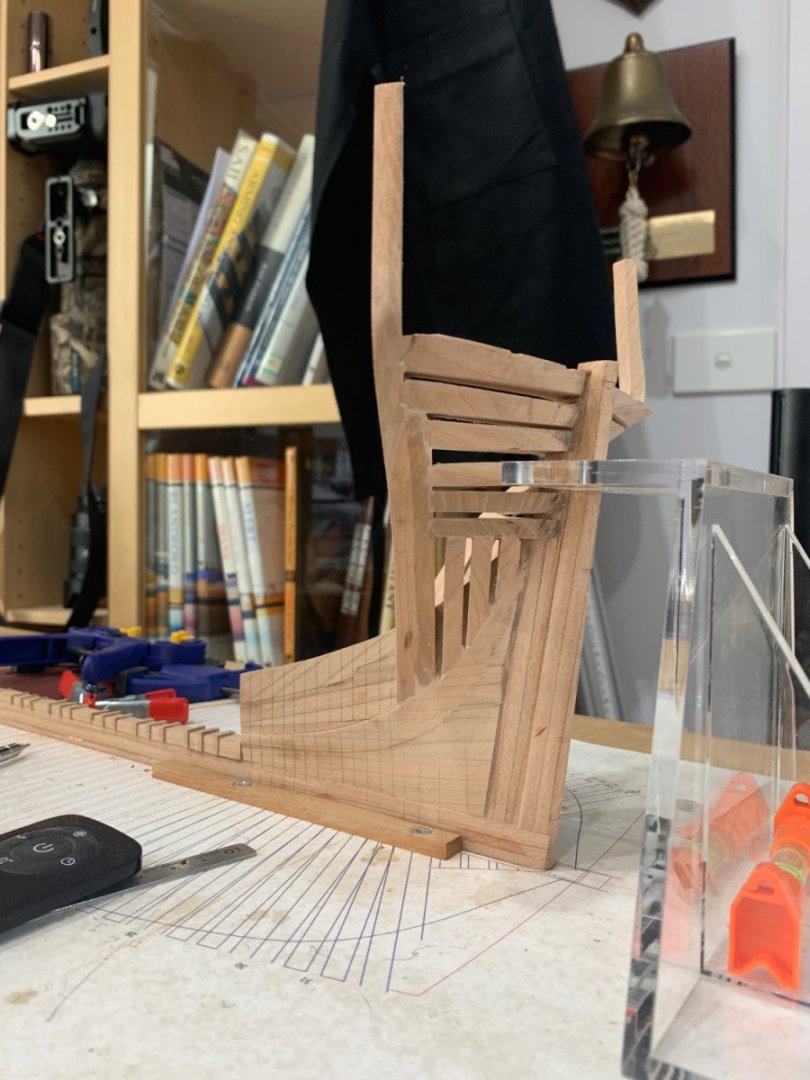
Fashion pieces installed and the whole stern section given its preliminary fairing inside and out. Fashion pieces are still a little oversize so they can be "blended" into the rest of the frames as the go in. I have also used a little filler to help fair the joints (where tenons/mortices did not match tightly) or the beading line joint did not match. Have learned that I need to cut the fill frames closer to their faired shape before glueing in so I can fully see the joins.
I have started on the other can't frames. F31A sections is being glued up with their joining chocks as we speak. Frames 31F, 30A/F and 29A/F are templated and ready to scroll saw out.
The position of the can't frames on the deadwood have also been marked out in pencil.
- Joined
- Dec 30, 2021
- Messages
- 278
- Points
- 278

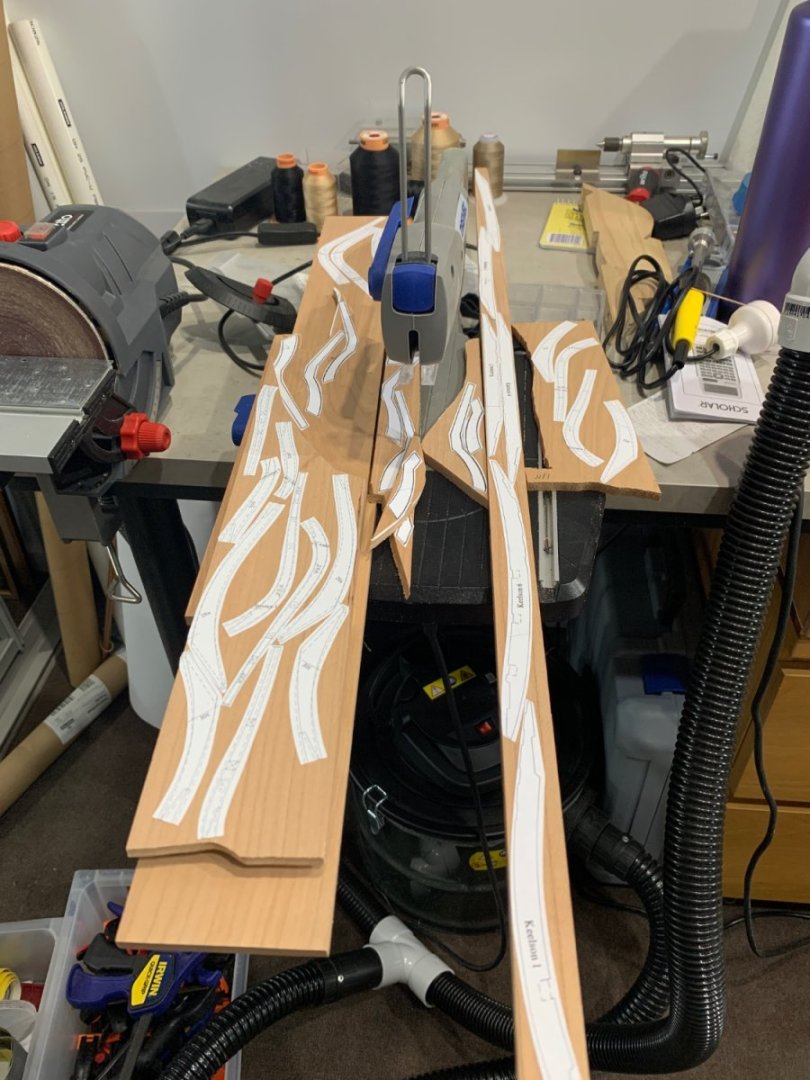
A day spent template ing and cutting framing pieces.....
I have made up half of F30A when I realised that F31A was the aft can't frame....

I am leaving the frames a little oversized (not cut nor faired to the line) so I have wiggle room for fairing.
I have ordered up timber and threaded rods to make up the reference line board to support the frames as I proceed forward. Should pick up the bits tomorrow and spend the day cutting out the support board, lining it up on the building board then drill the support holes. Getting the plan on the reference board aligned with the building board will be undertaken before drilling the supports. More on that tomorrow.
I have made up half of F30A when I realised that F31A was the aft can't frame....
I am leaving the frames a little oversized (not cut nor faired to the line) so I have wiggle room for fairing.
I have ordered up timber and threaded rods to make up the reference line board to support the frames as I proceed forward. Should pick up the bits tomorrow and spend the day cutting out the support board, lining it up on the building board then drill the support holes. Getting the plan on the reference board aligned with the building board will be undertaken before drilling the supports. More on that tomorrow.

- Joined
- Dec 30, 2021
- Messages
- 278
- Points
- 278

Inclement weather today made making up the reference board impossible (not something I can do inside the apartment). So I cut out all of yesterdays frames, sanded them up and them started on the Keelson components.
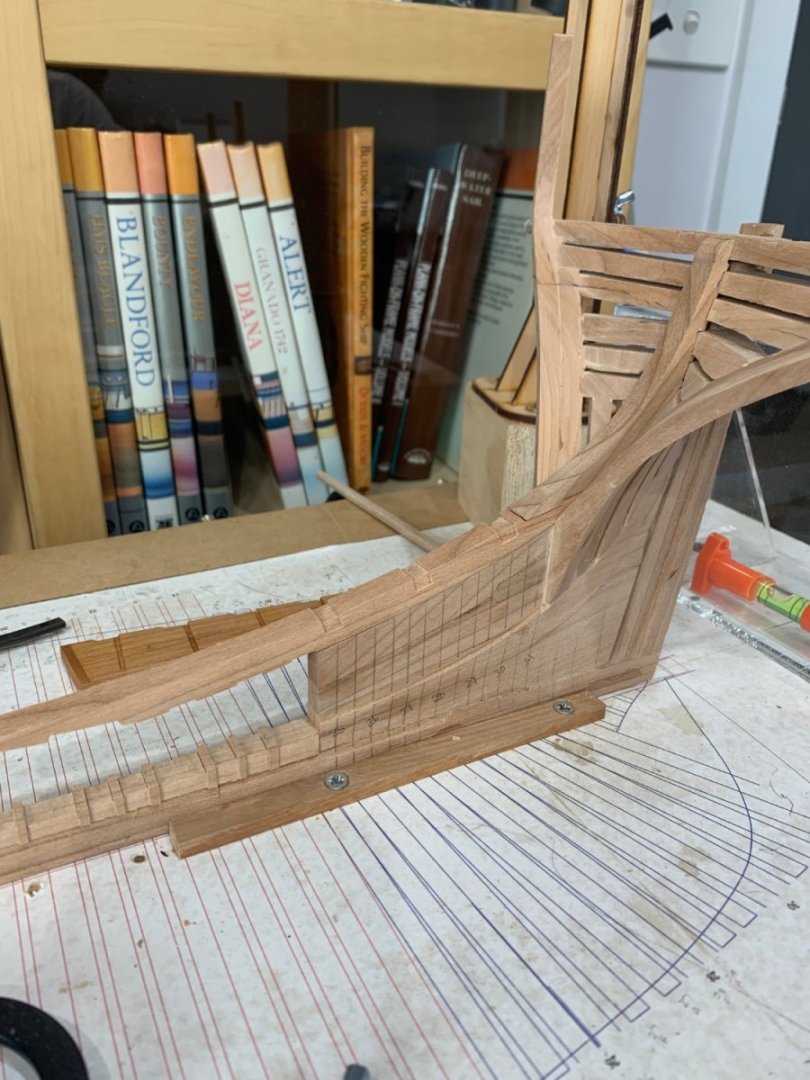
Keelsons sections #2, 3, 4 and 6 are all but finished and #6 fitted up to the aft deadwoods and Steronsom Knee (only dry fitted until all the frames are made and installed).
Keelson sections #1 and 5 are templated, just need scoring and fitting up to the other sections.
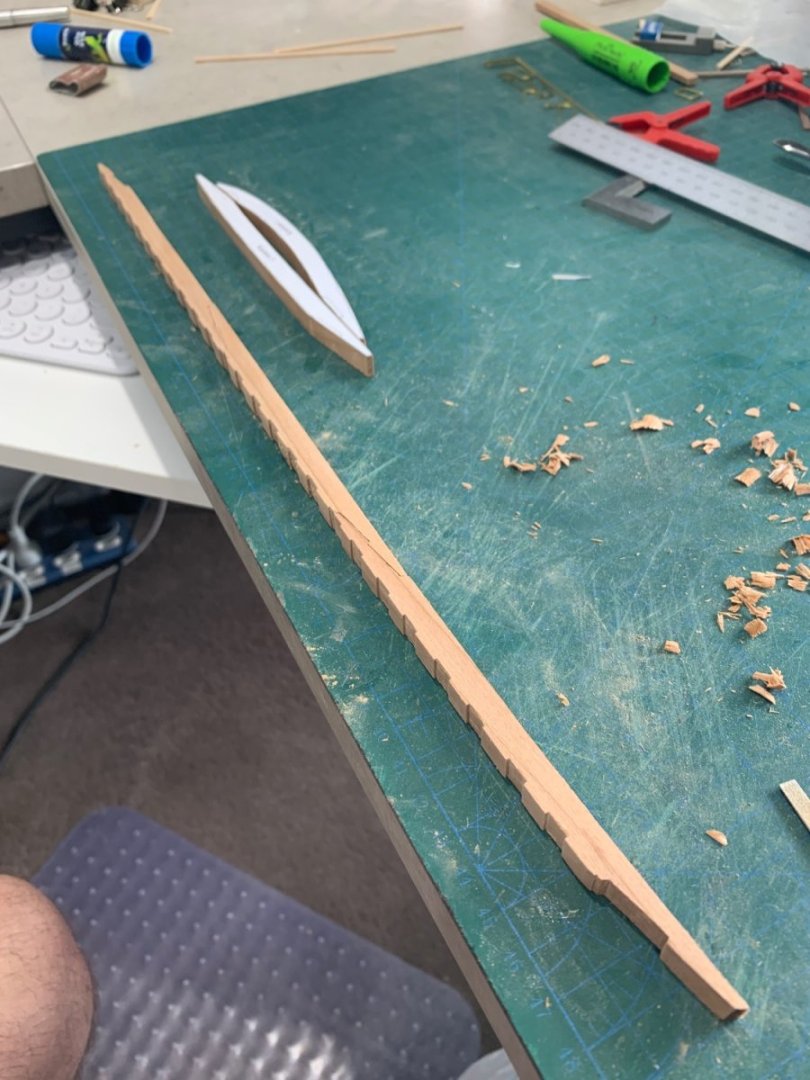
Keelsons sections #2, 3, 4 and 6 are all but finished and #6 fitted up to the aft deadwoods and Steronsom Knee (only dry fitted until all the frames are made and installed).
Keelson sections #1 and 5 are templated, just need scoring and fitting up to the other sections.
Hi Peter your work is very clean and looks fantastic.
Your work is looking very interesting -> means very good work on an interesting ship -> means maybe I should order for me also the books about the EURYALUS
Did you make the notches on the keelson by hand or with a mill?
Looking at your table we can see a lot of wooden chips, so I interpret by hand, or?
Did you make the notches on the keelson by hand or with a mill?
Looking at your table we can see a lot of wooden chips, so I interpret by hand, or?
The books are great and all the plans are excellent, but Volume 1 is sold out. Maik from Sea Watch answered my question last summer and said that he was already planning to reprint part 1.Your work is looking very interesting -> means very good work on an interesting ship -> means maybe I should order for me also the books about the EURYALUS
Did you make the notches on the keelson by hand or with a mill?
Looking at your table we can see a lot of wooden chips, so I interpret by hand, or?
It is making less sense to have only Vol II available - so I can hope that Seawatch will reprint also the first Volume .... many Thanks for the informationThe books are great and all the plans are excellent, but Volume 1 is sold out. Maik from Sea Watch answered my question last summer and said that he was already planning to reprint part 1.
- Joined
- Dec 30, 2021
- Messages
- 278
- Points
- 278

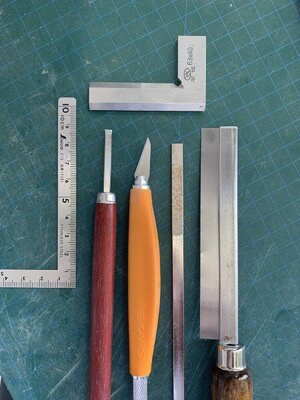
All by hand. Using side template, I score with a scalpel then saw with an ultra fine razor saw (70+tpi) then chisel with 4mm wide chisel. Finally cleaning up with a 6 or 8mm wide diamond file. I do have a mini mill but I like working by hand when I can. Very therapeutic….Your work is looking very interesting -> means very good work on an interesting ship -> means maybe I should order for me also the books about the EURYALUS
Did you make the notches on the keelson by hand or with a mill?
Looking at your table we can see a lot of wooden chips, so I interpret by hand, or?
The photo shot the tools. The razor saw has seen better days; the kinks make life difficult and I have some more blades on order. The chunkier of the squares (which has an edges chamfered to a point) is used to test whether the notches are cut and filed perpendicular to the sides of the timbers. I use the light behind the straight edge technique....
Last edited:
- Joined
- Dec 30, 2021
- Messages
- 278
- Points
- 278

The books are available on the second hand market: Amazon has one set of V0l 1 an 2 for $350 used in very good condition.It is making less sense to have only Vol II available - so I can hope that Seawatch will reprint also the first Volume .... many Thanks for the information
2 Volumes: Frigates of the Royal Navy HMS Euryalus (36) 1803 : A Plank on Frame Model Vol I & II: Yedlinsky, Allan (Text) and Kempson, Wayne (Plans): 9780982057995: Amazon.com: Books
2 Volumes: Frigates of the Royal Navy HMS Euryalus (36) 1803 : A Plank on Frame Model Vol I & II [Yedlinsky, Allan (Text) and Kempson, Wayne (Plans)] on Amazon.com. *FREE* shipping on qualifying offers. 2 Volumes: Frigates of the Royal Navy HMS Euryalus (36) 1803 : A Plank on Frame Model Vol I & II
www.amazon.com
- Joined
- Dec 30, 2021
- Messages
- 278
- Points
- 278

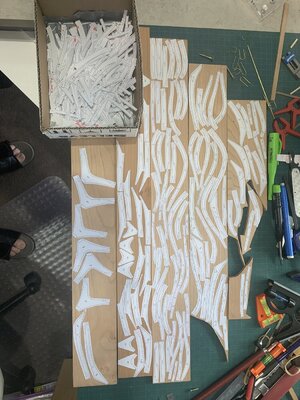
Wow, 2 days and I managed to print and cut out all the aft frame templates and get about 1/5 onto timber ready to saw.
I guess this is the tedious part of fully framed model ships... that and trying to peal off the backing on the self adhesive label material.....
Next job is to sort the templates into the appropriate material thickness piles before working out the best way to fit on the Cherry material.
Jigsaw arrived this afternoon so I will charge it and then cut out the reference board.

Ja Ja - that is scratch POF modeling ......
I suggest to start first with the cutting out with one board and your new saw as a test.
You have to check, if the distance of the frame parts glued on the board is maybe not to small.
Sometimes it is easier to cut and handle when you have more distance between the elements - you need maybe more wood, but cutting out is faster and easier.
Are you using a jigsaw or a scroll saw for cutting the Frame elements?
- Joined
- Dec 30, 2021
- Messages
- 278
- Points
- 278

That's the luxury of the Dremel scroll saw. The blades have a 0.5mm kerf. This means it takes a little longer than using a full size scroll saw but I have much less wastage and can get close to the lines without resorting to the fine blade which I have found wanders too easily. It also means that in many cases, I only have to make one cut for one side of two frames which also saves time. It takes about an hour and one blade per plank which vary from 5.8 to 7.4mm thick (a scale 11"" to 14").Ja Ja - that is scratch POF modeling ......
I suggest to start first with the cutting out with one board and your new saw as a test.
You have to check, if the distance of the frame parts glued on the board is maybe not to small.
Sometimes it is easier to cut and handle when you have more distance between the elements - you need maybe more wood, but cutting out is faster and easier.
Are you using a jigsaw or a scroll saw for cutting the Frame elements?
The blades do get hot cutting the cherry and fatigue if I run continuously for more than 30 minutes. I cut for 10mins take a 5min break then continue but by the end of the hour, the blade really starts to take its own direction (as it gets blunt) ...
I have already cut out 2 of the 11 boards (yep got all the templates stuck down last night) for the aft frames with one blade failure. The second is getting a little blunt but I will continue with it until it slows or wanders.
Excellent progress Peter. 
- Joined
- Dec 30, 2021
- Messages
- 278
- Points
- 278

Would have made more today but the superintendent decided she needed to go to IKEA for a new footstool since I elevated the lounge 3in (75mm). Well needless to say we didn't get out of there for several hours and a boot load....Excellent progress Peter.
Sounds interesting - I never tried it in this way.That's the luxury of the Dremel scroll saw. The blades have a 0.5mm kerf. This means it takes a little longer than using a full size scroll saw but I have much less wastage and can get close to the lines without resorting to the fine blade which I have found wanders too easily. It also means that in many cases, I only have to make one cut for one side of two frames which also saves time. It takes about an hour and one blade per plank which vary from 5.8 to 7.4mm thick (a scale 11"" to 14").
The blades do get hot cutting the cherry and fatigue if I run continuously for more than 30 minutes. I cut for 10mins take a 5min break then continue but by the end of the hour, the blade really starts to take its own direction (as it gets blunt) .... Thankfully I have 15 spares on hand.
I have already cut out 2 of the 11 boards (yep got all the templates stuck down last night) for the aft frames with one blade failure. The second is getting a little blunt but I will continue with it until it slows or wanders.
Maybe you can show us some photos ?
- Joined
- Dec 30, 2021
- Messages
- 278
- Points
- 278

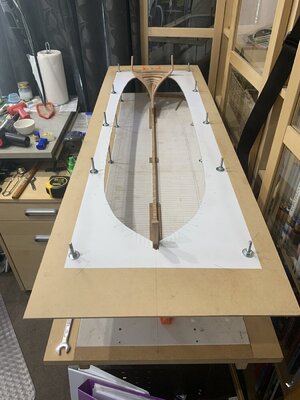
I finally managed to get all the templates for the aft section of EURALUS peeled and stuck to the appropriate thickness cherry planks. I have also managed to get the reference board cut, drilled and mounted to the building board. Some weeks to do at each end is all that remains but I can get onto frame assembly and dry fitting to the keel now.
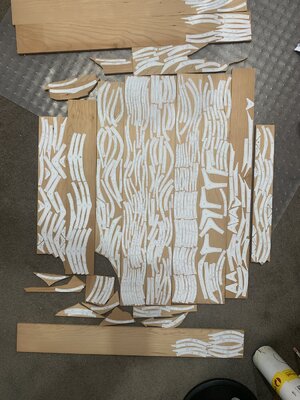


Just curious Peter - are all the cherry panels the same thickness? Scarf joints? Chocks? Butt joints? I'm working on my first POF and I'm in learning mode...
BTW, your picture makes me a bit nauseous just thinking about how much work that is . Respect to all the scratch builders out there!
BTW, your picture makes me a bit nauseous just thinking about how much work that is
 . Respect to all the scratch builders out there!
- Joined
- Dec 30, 2021
- Messages
- 278
- Points
- 278

Nope. They are all scale thickness from 11"" to 14" and some 1/2" in between. This does not mean that all the futtocks on the one frame are the same thickness. In fact most frames have floors, futtocks and top timbers all different thicknesses and which side they align varies depending on where in the hull the frame is located.Just curious Peter - are all the cherry panels the same thickness? Scarf joints? Chocks? Butt joints? I'm working on my first POF and I'm in learning mode...
BTW, your picture makes me a bit nauseous just thinking about how much work that is. Respect to all the scratch builders out there!
The scarf joints (all chocked joints) vary depending on the position of the frame in the hull. As we go further forward or aft, these chocks are cut in at an angle equivalent to the bevel so it gets a bit complex as one moves away from midships.
There are no butt joints in this model. All the joints including those with the floors (or the chock that rests on the rising wood) are scarfed. Once glued they will be fitted with number of 1mm bamboo treenails so I need to start making them by the bucket load.


