Excellent tutorial, Ted! Thanks for posting.
-

Win a Free Custom Engraved Brass Coin!!!
As a way to introduce our brass coins to the community, we will raffle off a free coin during the month of August. Follow link ABOVE for instructions for entering.
-

PRE-ORDER SHIPS IN SCALE TODAY!
The beloved Ships in Scale Magazine is back and charting a new course for 2026!
Discover new skills, new techniques, and new inspirations in every issue.
NOTE THAT OUR FIRST ISSUE WILL BE JAN/FEB 2026
You are using an out of date browser. It may not display this or other websites correctly.
You should upgrade or use an alternative browser.
You should upgrade or use an alternative browser.
HMS Kingfisher/ King's Fisher - Tedboat [COMPLETED BUILD]
Ted,
unfortunately it is only possible to give "one" like - but your post about treenailing deserves much more !
Many thanks for the detailed personal experience, which I can fully underline.
It is very good and detailed tutorial and should be saved in an general area.
Therefore I kindly ask you to copy your post in this area within a new topic:
Ted,
unfortunately it is only possible to give "one" like - but your post about treenailing deserves much more !
Many thanks for the detailed personal experience, which I can fully underline.
It is very good and detailed tutorial and should be saved in an general area.
Therefore I kindly ask you to copy your post in this area within a new topic:
Hi Uwe,
Very good of you to say so - I actually wrote the piece some years ago, but still relevant.
Will see if I can put it on the general area.
Ted
Carrying on - a few more photos of the build:-
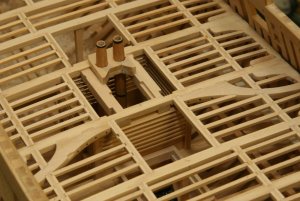
Pretty much the same as last photo, but with the ledges going in, spanning between the carlings, which in turn span on to the deck beams.
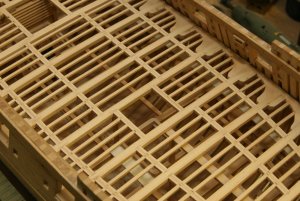
Ready for planking.
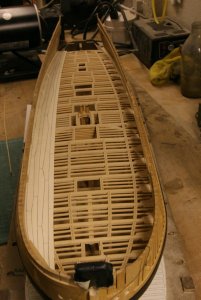
The start of planking the gun deck. The outer planks are laid 'top and butt style - supposed to give extra strength.
The planking also tapers to bow and stern.
Hooding of the planking at the bow, to avoid planking thinning to nothing.
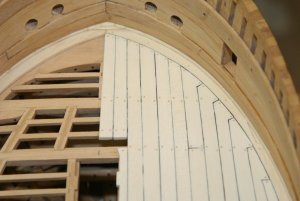
Hooding of the planking at the bow, to avoid planking thinning to nothing.
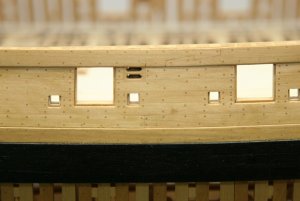
Planking along side of ship, showing scarf joint, gunport and sweep port framing, pulley block and trennels.
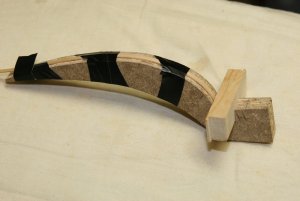
Abit out of sequence, but illustrating how I bend timbers.
Method:-
1. Wait until wife has gone out.
2. 'Borrow' saucepan.
3. Boil timber until pliable.
4. Use folding wedges to secure timber on mould and then use electrical tape to pull in to shape.
5. Forget to remove evidence before wife returns home.
6. Apply lotion to bruises.
7. Leave timber to dry for 24 hours
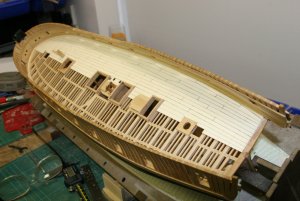
Starboard side deck fully planked. Port side to be left in frame.
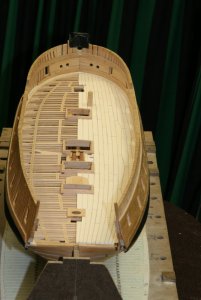
Sweep of deck planking from stern - Very happy with it, but will do better on the next ship.
Ted

Pretty much the same as last photo, but with the ledges going in, spanning between the carlings, which in turn span on to the deck beams.

Ready for planking.

The start of planking the gun deck. The outer planks are laid 'top and butt style - supposed to give extra strength.
The planking also tapers to bow and stern.
Hooding of the planking at the bow, to avoid planking thinning to nothing.

Hooding of the planking at the bow, to avoid planking thinning to nothing.

Planking along side of ship, showing scarf joint, gunport and sweep port framing, pulley block and trennels.

Abit out of sequence, but illustrating how I bend timbers.
Method:-
1. Wait until wife has gone out.
2. 'Borrow' saucepan.
3. Boil timber until pliable.
4. Use folding wedges to secure timber on mould and then use electrical tape to pull in to shape.
5. Forget to remove evidence before wife returns home.
6. Apply lotion to bruises.
7. Leave timber to dry for 24 hours

Starboard side deck fully planked. Port side to be left in frame.

Sweep of deck planking from stern - Very happy with it, but will do better on the next ship.
Ted
Very accurate work - great work of a very good kit.
Did I see it correctly: are every beam and carling made out of 3 parts, so the notches for the carlings and the ledges are not cut out, but prepared by the laser of the outside two parts?
I have the same system with my La Salamandre .....
Did I see it correctly: are every beam and carling made out of 3 parts, so the notches for the carlings and the ledges are not cut out, but prepared by the laser of the outside two parts?
I have the same system with my La Salamandre .....
Very accurate work - great work of a very good kit.
Did I see it correctly: are every beam and carling made out of 3 parts, so the notches for the carlings and the ledges are not cut out, but prepared by the laser of the outside two parts?
I have the same system with my La Salamandre .....
Absolutely right Uwe. All the deck beams and carlings are composed of three laminations. The only difference is that all the parts are milled out, rather than lasered
Ted
Mike,Ted - I am curious... do you have any idea of the total number of hours you put into this build??
Very difficult to say - I started building in early 2012, and in an average week probably spend six to eight hours working on her, which equates to something like 2300 to 3100 hours so far.
The bottom line is that it takes time to do full justice to this kit, so if any of you SABLEs out there have one stashed away, you had better get going!!
(SABLE:- Stash Accumulation Beyond Life Expectancy)
Ted
Magnificent work on the planking. The anchor stock pattern is awesome. Bravo, Ted!
I’m a SABLE with Kingfisher in my stash. Better get going!
I’m a SABLE with Kingfisher in my stash. Better get going!
Well ,I can’t wait to see that DaveMagnificent work on the planking. The anchor stock pattern is awesome. Bravo, Ted!
I’m a SABLE with Kingfisher in my stash. Better get going!
Right - Time for a few more photos!
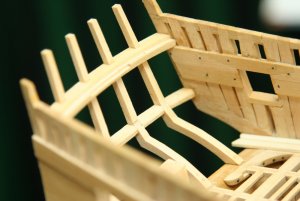
In contrast to the main framing, the stern framing of these ships was very much lighter and weaker, and depended on a couple of transverse transoms and four dog-legged frames.
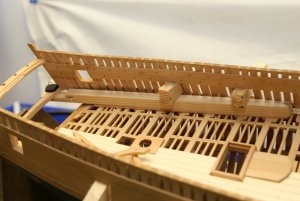
The positioning of these frames are difficult, due to the curved shape of the stern, so a temporary jig was devised. The lower cross-timber is not the lower transom (or counter), but marks the point where the frames change direction.
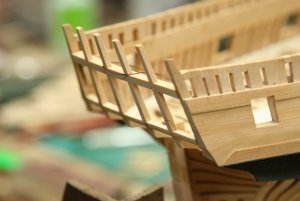
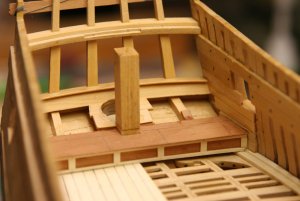
Stern timbers from inside ship. the start of fitting out with window cills and the lockers for the captains possessions. The vertical timber in the centre is the extension to the sternpost. The sternpost on the Swan class sloops generally ended at the level of the lockers, but I elected to add the extension to give support to the rudder trunking.
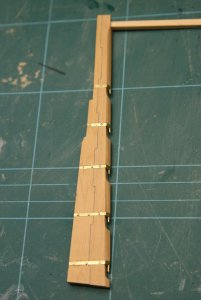
The rudder - part complete
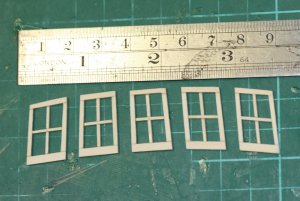
Building the stern windows. Joints halved. Each window has to be shaped to fit the stern framing, and they are all different and fiddly.
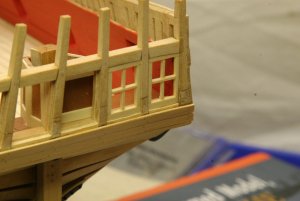
Windows going in. The windows are glazed with microscope slide cover glass - very thin and tricky to cut, but gives a very good result.
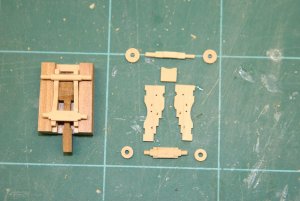
Needed a break after the complexities of the stern, so worked on the cannon. By now, you will have probably realised I am a great believer in the use of jigs to ensure all is as it should be. I made a jig to hold the gun carriage side upside down and with the correct taper while I attached the axles. It worked very well.
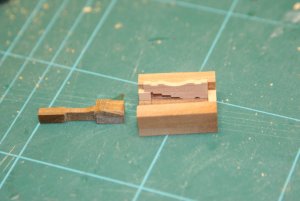
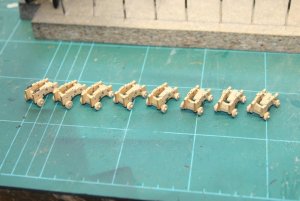
The ship only mounts seven guns on each side, but I made an eighth to be on the safe side. When I finally mounted the cannon (about three years later) I used the spare as part of the display on the base.
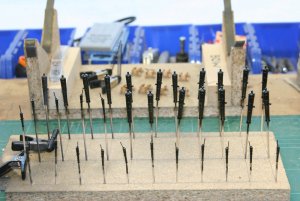
A forest of cannon after spraying. There are far more cannon in the picture than I needed, but I made up a set for a friend down south, and more for a cross-section if I ever get around to it.
That's about it foir today - hope it was of interest.
Ted

In contrast to the main framing, the stern framing of these ships was very much lighter and weaker, and depended on a couple of transverse transoms and four dog-legged frames.

The positioning of these frames are difficult, due to the curved shape of the stern, so a temporary jig was devised. The lower cross-timber is not the lower transom (or counter), but marks the point where the frames change direction.


Stern timbers from inside ship. the start of fitting out with window cills and the lockers for the captains possessions. The vertical timber in the centre is the extension to the sternpost. The sternpost on the Swan class sloops generally ended at the level of the lockers, but I elected to add the extension to give support to the rudder trunking.

The rudder - part complete

Building the stern windows. Joints halved. Each window has to be shaped to fit the stern framing, and they are all different and fiddly.

Windows going in. The windows are glazed with microscope slide cover glass - very thin and tricky to cut, but gives a very good result.

Needed a break after the complexities of the stern, so worked on the cannon. By now, you will have probably realised I am a great believer in the use of jigs to ensure all is as it should be. I made a jig to hold the gun carriage side upside down and with the correct taper while I attached the axles. It worked very well.


The ship only mounts seven guns on each side, but I made an eighth to be on the safe side. When I finally mounted the cannon (about three years later) I used the spare as part of the display on the base.

A forest of cannon after spraying. There are far more cannon in the picture than I needed, but I made up a set for a friend down south, and more for a cross-section if I ever get around to it.
That's about it foir today - hope it was of interest.
Ted
Love it! Fabulous job, Ted!
Very good and accurate precise work - Looking very good
Such jigs can help extremely, I completely agree
Such jigs can help extremely, I completely agree
I use jigs for EVERYTHING!, Cheap insurance that parts fit as they should.
I am not sure if I am the correct Jim, (lately, we get more Jim's, the more the better! YAYMike, Dave, Uwe, Jim, and others
Thanks for your replies - maybe we should form a jig party at the next election - would probably be of more interest than what we're going to get!
Oh Woe! - It appears my last post on Kingfisher has got lost in the recent problems with the SOS site.
I'm re-posting in case you missed it.
Unfortunately, I also lost the last posting on Natterer, my steam launch, but I can't quickly re-post that as my computer is refusing to co-operate and let me open Word, where all the write-up is contained.
My computer is being replaced next week by one that runs on electricity rather than steam, so that should be up and running again soon!
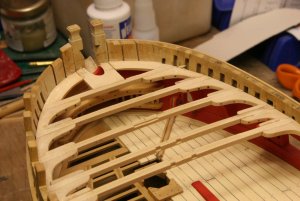
Forecastle beams going in
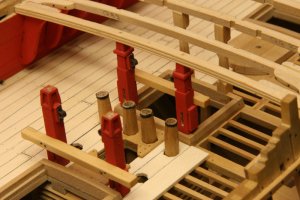
And the quarterdeck beams, with profiling on the fore beam.
The standards and bitts also support the handles for the pumps, the tubes for which can be seen.
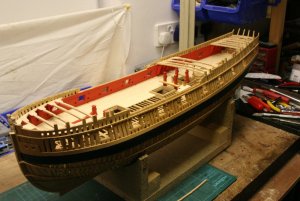
Beams going in. The quarterdeck beams are being worked in from front and rear, to reduce problems with 'creep'
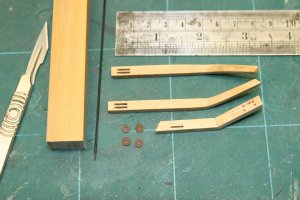
I didn't like the cat-head beams in laminated form, so set too and cut them out of solid. Complex alignment, but greatly helped by the use of the pattern in the foreground.
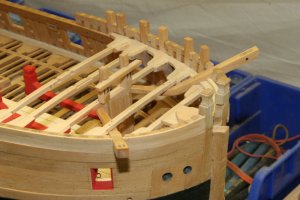
Cat-head beams in place.
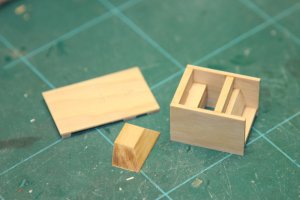
The crew get bad-tempered if not fed, so the stove has to go in under the forecastle. Styrene sheet is supplied in the kit, but I don't like the lack of longevity with plastics, as I would like to think this ship will still be around in one or two hundred years!
Elected to make the core from timber, together with doors straps , etc.
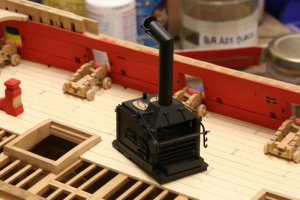
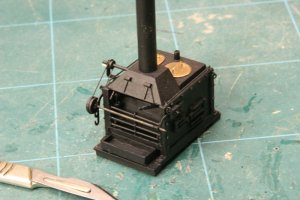
Stove complete.
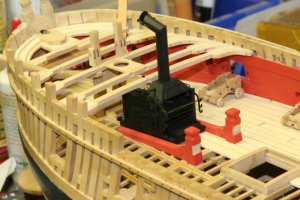
This is where it sits, between the main bitts shoulders.
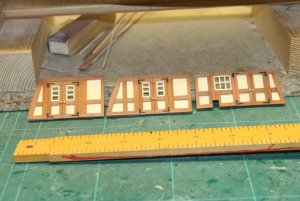
Finally for this post, the partitions that sit under the forecastle and quarterdeck to give protection from the weather, and a degree of privacy for the officers.
Of course the partitions would all be struck down below before action!
All for now - apologies if you did manage to catch it before the site went down.
Ted
I'm re-posting in case you missed it.
Unfortunately, I also lost the last posting on Natterer, my steam launch, but I can't quickly re-post that as my computer is refusing to co-operate and let me open Word, where all the write-up is contained.
My computer is being replaced next week by one that runs on electricity rather than steam, so that should be up and running again soon!

Forecastle beams going in

And the quarterdeck beams, with profiling on the fore beam.
The standards and bitts also support the handles for the pumps, the tubes for which can be seen.

Beams going in. The quarterdeck beams are being worked in from front and rear, to reduce problems with 'creep'

I didn't like the cat-head beams in laminated form, so set too and cut them out of solid. Complex alignment, but greatly helped by the use of the pattern in the foreground.

Cat-head beams in place.

The crew get bad-tempered if not fed, so the stove has to go in under the forecastle. Styrene sheet is supplied in the kit, but I don't like the lack of longevity with plastics, as I would like to think this ship will still be around in one or two hundred years!
Elected to make the core from timber, together with doors straps , etc.

Stove complete.


This is where it sits, between the main bitts shoulders.

Finally for this post, the partitions that sit under the forecastle and quarterdeck to give protection from the weather, and a degree of privacy for the officers.
Of course the partitions would all be struck down below before action!
All for now - apologies if you did manage to catch it before the site went down.
Ted


