-

Win a Free Custom Engraved Brass Coin!!!
As a way to introduce our brass coins to the community, we will raffle off a free coin during the month of August. Follow link ABOVE for instructions for entering.
-

PRE-ORDER SHIPS IN SCALE TODAY!
The beloved Ships in Scale Magazine is back and charting a new course for 2026!
Discover new skills, new techniques, and new inspirations in every issue.
NOTE THAT OUR FIRST ISSUE WILL BE JAN/FEB 2026
You are using an out of date browser. It may not display this or other websites correctly.
You should upgrade or use an alternative browser.
You should upgrade or use an alternative browser.
HMS Royal Caroline kit ZHL 1/30
- Thread starter Maarten
- Start date
- Watchers 112
-
- Tags
- royal caroline zhl
@Peglegreg Any finishing technique would look awesome because of the great deck Maarten made! I LOVE oils, especially in salads!The oil looks so great thanks Jim for showing us.
G'day Maarten, just catching up, hope you had a great Christmas and all the best for the New Year,
You are doing an excellent job on your RC, she is looking fabulous, makes me want to get back to mine, but I have to catch up on my RW first, looking forward to the rest of your build,
best regards John.
You are doing an excellent job on your RC, she is looking fabulous, makes me want to get back to mine, but I have to catch up on my RW first, looking forward to the rest of your build,
best regards John.
Thx Greg, you must have a great dictionary.G'day Maarten
What more can I say again rather then brilliant work.......humm
Marvellousticbrilliant work!......again.The oil looks so great thanks Jim for showing us.
HappyNewYear to everyone and havagoodone
Peglegregtionary...Thx Greg, you must have a great dictionary
Looks fantastic Maarten! The oil was the way to go, brings out the beauty of the wood.
Just a brief update. After finishing the deck it is time to shape the gun ports. For this I prepared a template to give them all exactly the same shape. I use the gun cariage to check the vertical position of the port as well as an additional template strip which I use to determine the position of the lower edge of the gun port.
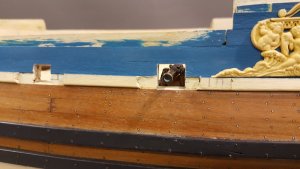
The first gun port trimmed.
The sides I check being perfectly vertical to the waterline. When starting the build I already positioned the ship horizontally on the waterline, not on the keel, this as the stern is deeper in the water then the stem.
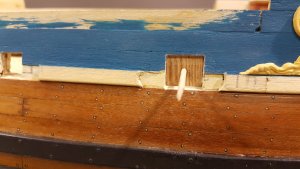
Checking the shape.
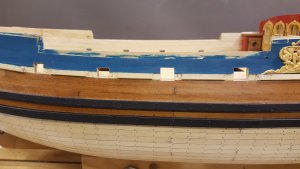
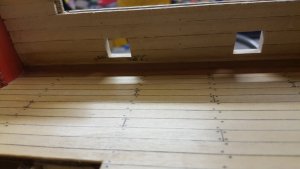
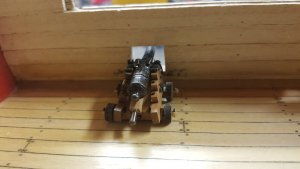
Two finished, 6 to go.

The first gun port trimmed.
The sides I check being perfectly vertical to the waterline. When starting the build I already positioned the ship horizontally on the waterline, not on the keel, this as the stern is deeper in the water then the stem.

Checking the shape.


Two finished, 6 to go.
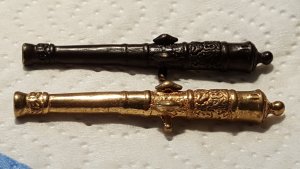
I see a very nice cannon, is the barrel part of the kit or sourced elsewhere?
Always nice to see your latest update Maarten.
Very nice work Maarten, its all coming together nicely, I've got mine hidden under a sheet so I don't get tempted to start on her again, got to wait awhile yet, but I will enjoy watching yours,
best regards John,
best regards John,
Hi Jim,I see a very nice cannon, is the barrel part of the kit or sourced elsewhere?
It is part of the kit but I burnished it. I am thicking if I will oxidize it green but on the other hand it is a Royal yacht and I guess these gun were greatly taken care of. So second option is only to polish the royal crest, dolphins and rear so these parts will shine again.
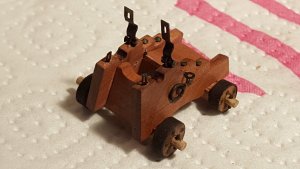
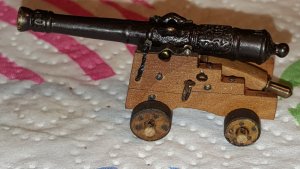
Today again some little progress.
The gun ports on the PS side are now shaped and these can be covered with veneer on the inside.
But first I drilled the holes for the water spills. The I drill in the waterway through the hull to the top of the first plank above the whale.
As water spill pipe I dont use the kit supplied brass pipe but a silver ferrule normaly used for electric contacts. These are there in plenty sizes and I use the 1,5 mm version. This will oxidize and give the look of a lead pipe.
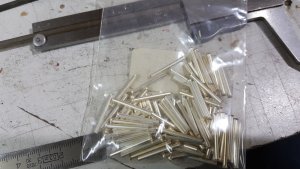
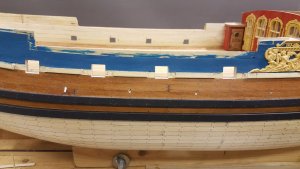
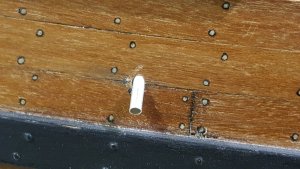
Secondly these have a nice concave shape fitting in the waterway.
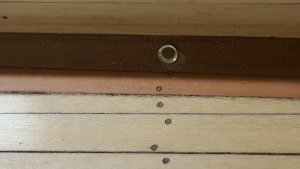
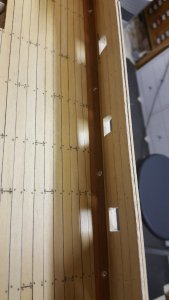
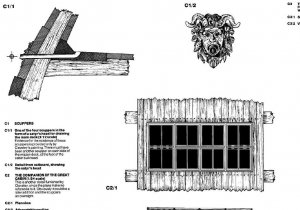
On the outside a carving of a gargoyle will be fitted. First drilling a suitable hole in the carving and dry fitting it.
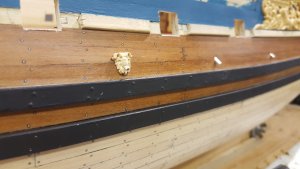
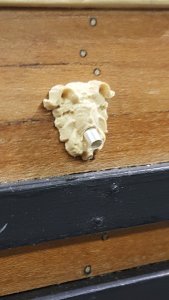
These carvings I still have to finish, this means sanding them down to proper thickness, polishing, waxing and again polishing.
The gun ports on the PS side are now shaped and these can be covered with veneer on the inside.
But first I drilled the holes for the water spills. The I drill in the waterway through the hull to the top of the first plank above the whale.
As water spill pipe I dont use the kit supplied brass pipe but a silver ferrule normaly used for electric contacts. These are there in plenty sizes and I use the 1,5 mm version. This will oxidize and give the look of a lead pipe.


Secondly these have a nice concave shape fitting in the waterway.


On the outside a carving of a gargoyle will be fitted. First drilling a suitable hole in the carving and dry fitting it.


These carvings I still have to finish, this means sanding them down to proper thickness, polishing, waxing and again polishing.
- Joined
- Jul 22, 2017
- Messages
- 331
- Points
- 268

Maarten,
I am a little curious as to know if the RC came with the gargoyles or if you are placing them on her. I have been looking over her drawings and have not seen them on it.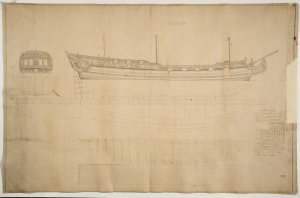
But if you are placing the gargoyles on her as a means of adding more details then I just love the way they look. Any information you can provide would be greatly appreciated.
Ray
I am a little curious as to know if the RC came with the gargoyles or if you are placing them on her. I have been looking over her drawings and have not seen them on it.

But if you are placing the gargoyles on her as a means of adding more details then I just love the way they look. Any information you can provide would be greatly appreciated.
Ray
Excellent workmanship on both cannons and scuppers. She is coming alone gorgeous, the big part of it - is your skills 
There are differences in the chapman drawing and the aots drawings. The chinese kit is based mainly on the aots drawings allthough the hull lines are again based on a different drawing. So building the kit comes with some improvising. Many thx for all your comments and additions, allways welcome.


