-

Win a Free Custom Engraved Brass Coin!!!
As a way to introduce our brass coins to the community, we will raffle off a free coin during the month of August. Follow link ABOVE for instructions for entering.
-

PRE-ORDER SHIPS IN SCALE TODAY!
The beloved Ships in Scale Magazine is back and charting a new course for 2026!
Discover new skills, new techniques, and new inspirations in every issue.
NOTE THAT OUR FIRST ISSUE WILL BE JAN/FEB 2026
You are using an out of date browser. It may not display this or other websites correctly.
You should upgrade or use an alternative browser.
You should upgrade or use an alternative browser.
HMS Sovereign of the Seas - Bashing DeAgostini Beyond Believable Boundaries
- Thread starter DARIVS ARCHITECTVS
- Start date
- Watchers 105
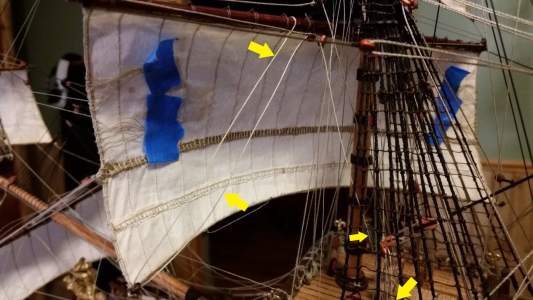
I didn't find the time, I had to make the time, which is always the way things are these days when you have a family and work. I'm really happy you guys like the work and find it helpful in your own model projects! Your mention of the photos reminds me of something. It occurs to me that the method of posting photos of the steps in rigging on the La Couronne model, which used bright yellow arrows to help the viewer trace each line as it was added to the ship, will really be useful in this build log. The plan is to show each line or set of lines as they are rigged so someone not familiar with rigging can learn the routing of and purpose of each line. Here is an example for a fore course clew line:Hey Kurt,
That's amazing. No matter how you did it or where you found the time, it's just incredible!
Well done and thank you for your hard work and the great photos...

Last edited:
- Joined
- Dec 5, 2022
- Messages
- 1,119
- Points
- 443

Hey Kurt,I didn't find the time, I had to make the time, which is always the way things are these days when you have a family and work. I'm really happy you guys like the work and find it helpful in your own model projects! Your mention of the photos reminds me of something. It occurs to me that the method of posting photos of the steps in rigging on the La Couronne model, which used bright yellow arrows to help the viewer trace each line as it was added to the ship, will really be useful in this build log. The plan is to show each line or set of lines as they are rigged so someone not familiar with rigging can learn the routing of and purpose of each line. Here is an example for a fore course clew line:
View attachment 556793
I think it's a great idea. It allows you to see what kind of line it is. Quick question: Wouldn't it be particularly helpful to show the line in colour so that you can really follow its course? For example, where it is attached or which peg is responsible for it? I mean, that way you could tell which line it is just by the colour. Just an idea...
Good morning Kurt. Whew only half way through making all those decorations. Fantastic job Bravo. About how many have you made so far?
Cheers Grant
Cheers Grant
Hi Kurt.
I wish you all the best and a very Happy Birthday .
.
Enjoy this special day.
I wish you all the best and a very Happy Birthday
 .
.Enjoy this special day.
Happy Birthday Kurt. 
 Cheers and many more years.

 Cheers and many more years.
Awesome! I hope you have a wonderful birthday, my friend!
My best wishes for an enjoyable birthday Kurt.
- Joined
- Oct 23, 2018
- Messages
- 886
- Points
- 403

Happy Birthday, Kurt
No, if the line were in color, it would be more difficult to see where the line in question passes behind other lines and through tops. It is easier to use the color and shadows on the line in question to show you where the line passes relative to everything around it. Many new model riggers have trouble seeing how a line passes through other rigging. Photos can help show where lines are run in most rigging circumstances. When showing where a line is routed, I like to use a series of one to three photes to show the route from endpoint to endpoint. That includes the specific belaying point. Not only does a build log help others, but I use it to refer back to when building subsequent models, particularly if the model has similar styles of rigging, such as the continental European (Dutch) style shared by the French man of war La Couronne and the Dutch Prins Willem. I will be building the Corel Prins Willem sometime after HMS Sovereign of the Seas is complete, in about 6-7 years.Hey Kurt,
I think it's a great idea. It allows you to see what kind of line it is. Quick question: Wouldn't it be particularly helpful to show the line in colour so that you can really follow its course? For example, where it is attached or which peg is responsible for it? I mean, that way you could tell which line it is just by the colour. Just an idea...
Last edited:
Thanks @AnobiumPunctatum !Happy Birthday, Kurt
And I am a great admirer of your 17th century ship knowledge! Thanks for all the help researching the Sovereign!Have a most excellent birthday, Kurt. Love your work!
@GrantTyler
@Herman
@Papatotalos
@RogerD
and my friend Paul @dockattner
and everyone else...
Thanks guys! I'm so glad for all of you on this forum.
@Herman
@Papatotalos
@RogerD
and my friend Paul @dockattner
and everyone else...
Thanks guys! I'm so glad for all of you on this forum.
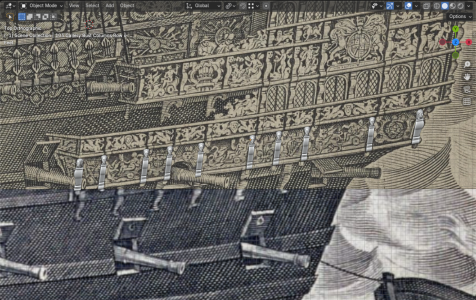
I worked all through the night, last night, cleaning up and re-meshing many of the older decoration models. There's always improvements to be made, and it seems never ending. But now I'm fillingin the holes in the port side set of decorations, a few columns here and there.
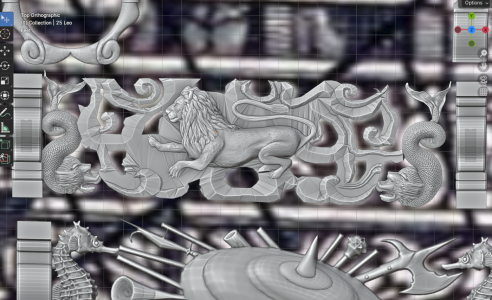
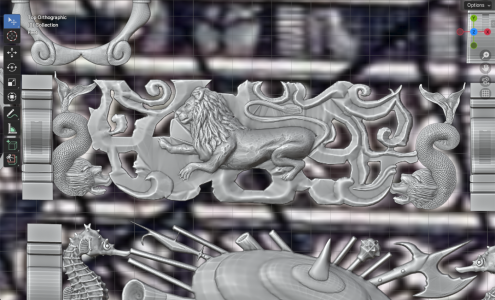
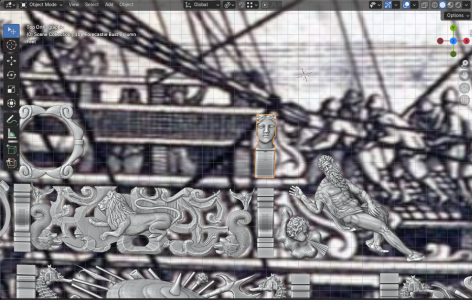
Bust column over the forcastle hancing piece. The lion decoration below it is scheduled for re-work because it is one of the cruder, earlier models.
Corner but column at the stern
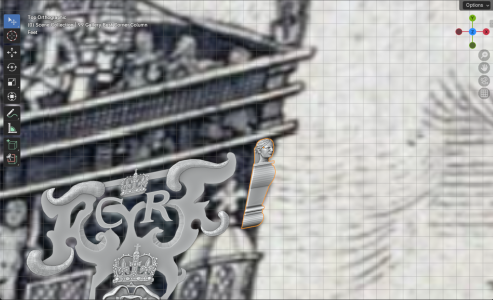
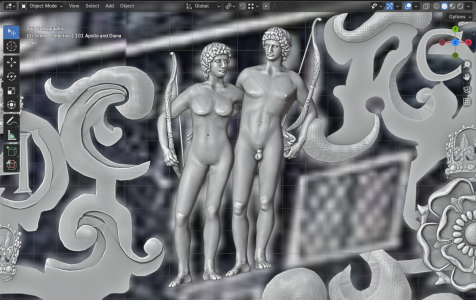
Re-meshing and smoothing some of the larger royal house decorations
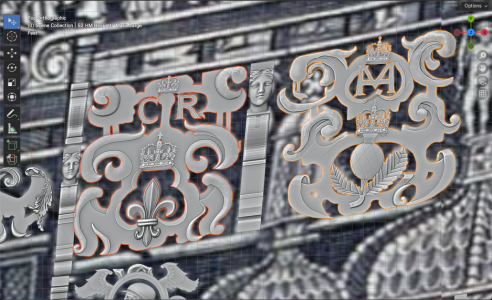
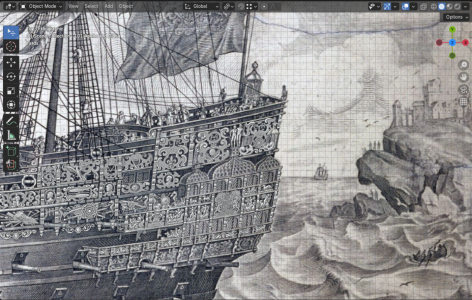
Applying the right amount of shear to all the column pieces such that their outlines match the shear and tilt angles on Payne's engraving. Hopefully this will reduce the amount of resizing, reshaping and re-printing of many of the decorations after the first wave of parts is fitted to the model's hull.
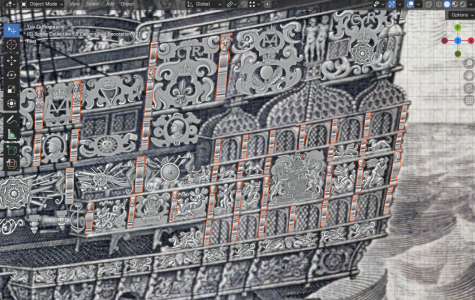
There is still so much to do yet on the port side before moving to the starboard side, stern, and transverse bulkhead decorations.

Bust column over the forcastle hancing piece. The lion decoration below it is scheduled for re-work because it is one of the cruder, earlier models.

Corner but column at the stern

Re-meshing and smoothing some of the larger royal house decorations

Applying the right amount of shear to all the column pieces such that their outlines match the shear and tilt angles on Payne's engraving. Hopefully this will reduce the amount of resizing, reshaping and re-printing of many of the decorations after the first wave of parts is fitted to the model's hull.

There is still so much to do yet on the port side before moving to the starboard side, stern, and transverse bulkhead decorations.

- Joined
- Dec 5, 2022
- Messages
- 1,119
- Points
- 443

Hey Kurt,No, if the line were in color, it would be more difficult to see where the line in question passes behind other lines and through tops. It is easier to use the color and shadows on the line in question to show you where the line passes relative to everything around it. Many new model riggers have trouble seeing how a line passes through other rigging. Photos can help show where lines are run in most rigging circumstances. When showing where a line is routed, I like to use a series of one to three photes to show the route from endpoint to endpoint. That includes the specific belaying point. Not only does a build log help others, but I use it to refer back to when building subsequent models, particularly if the model has similar styles of rigging, such as the continental European (Dutch) style shared by the French man of war La Couronne and the Dutch Prins Willem. I will be building the Corel Prins Willem sometime after HMS Sovereign of the Seas is complete, in about 6-7 years.
Thank you very much for your detailed reply. I look forward to seeing your pictures and how you implement the rigging! I'm excited!

- Joined
- Dec 5, 2022
- Messages
- 1,119
- Points
- 443

Hey Kurt,Thanks @AnobiumPunctatum !
Belated happy birthday... I really hope you had a lovely day with your loved ones.


