-

Win a Free Custom Engraved Brass Coin!!!
As a way to introduce our brass coins to the community, we will raffle off a free coin during the month of August. Follow link ABOVE for instructions for entering.
-

PRE-ORDER SHIPS IN SCALE TODAY!
The beloved Ships in Scale Magazine is back and charting a new course for 2026!
Discover new skills, new techniques, and new inspirations in every issue.
NOTE THAT OUR FIRST ISSUE WILL BE JAN/FEB 2026
You are using an out of date browser. It may not display this or other websites correctly.
You should upgrade or use an alternative browser.
You should upgrade or use an alternative browser.
HMS Sovereign of the Seas - Bashing DeAgostini Beyond Believable Boundaries
- Thread starter DARIVS ARCHITECTVS
- Start date
- Watchers 105
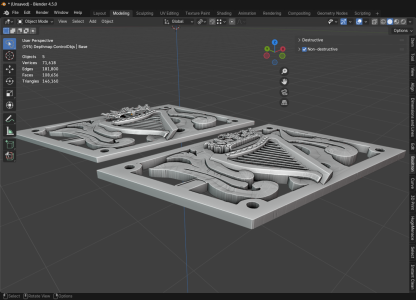
Many of the 3-D objects I've made so far willl not print well because the details are too fine for the resin printer. Reworking the objects using the Basify tool to reform the objects into base reliefs may help. It takes a 3-D object and extrudes it into a new mesh. For example, the Irish harp badge on the beakhead was printed by @WojtasS but the harp strings did not print because they were too fine. Compare the original object on the top left with the newly formed base relief on the bottom right. The strings are extruded vertically and should print now. Attached is the new 3-D object if anyone wants to test print it.

Attachments
Wow, what a project. I struggle to understand some of the terminology and process but fantastic work Kurt. Very impressive indeed.
At this angle the only difference my untrained eye detects is that the modified one looks a bit thicker, and I think I get why that results in cleaner printing of the strings. I wonder if a gentle hit on a belt sander (fine grit) could be used to get it back to the originally intended thickness (or close to it).Many of the 3-D objects I've made so far willl not print well because the details are too fine for the resin printer. Reworking the objects using the Basify tool to reform the objects into base reliefs may help. It takes a 3-D object and extrudes it into a new mesh. For example, the Irish harp badge on the beakhead was printed by @WojtasS but the harp strings did not print because they were too fine. Compare the original object on the top left with the newly formed base relief on the bottom right. The strings are extruded vertically and should print now. Attached is the new 3-D object if anyone wants to test print it.
View attachment 533433
What diameter are the strings at scale?Many of the 3-D objects I've made so far willl not print well because the details are too fine for the resin printer. Reworking the objects using the Basify tool to reform the objects into base reliefs may help. It takes a 3-D object and extrudes it into a new mesh. For example, the Irish harp badge on the beakhead was printed by @WojtasS but the harp strings did not print because they were too fine. Compare the original object on the top left with the newly formed base relief on the bottom right. The strings are extruded vertically and should print now. Attached is the new 3-D object if anyone wants to test print it.
View attachment 533433
I have successfully printed parts with a diameter of .010-.015” on my resin printer.
The orientation of the part is crucial, due to supports and not creating any islands (areas within a sliced section not attached and not having supports). This part would need to be oriented with the strings vertical or at an angle to avoid needing supports. In addition if printed horizontal they would fail. And that failure would not be a result of the size, but rather due to the orientation of the part.
True, orientation is a big factor, especially for thin sections of a 3-D print. When I get to the printing stage, there will be lots of experimentation in getting proper prints of these 3-D models. Various methods of creating supports for printing will need to be learned when the printing phase of this model is reached. Until then, making 3-D models in blender will continue.What diameter are the strings at scale?
I have successfully printed parts with a diameter of .010-.015” on my resin printer.
The orientation of the part is crucial, due to supports and not creating any islands (areas within a sliced section not attached and not having supports). This part would need to be oriented with the strings vertical or at an angle to avoid needing supports. In addition if printed horizontal they would fail. And that failure would not be a result of the size, but rather due to the orientation of the part.
Last edited:
Only the sides that surround the harps are a bit thicker. The thickness at the harp and at the crown are about the same. Sure, you could carefully thin the printed object on a sanding block a bit, but the part will be small and delicate. How the printed part will appear when laid onto the hull and how its thickness compares to the moldings and columns that surround it has yet to be seen. Certainly adjustments can be made and the part re-printed until you get the desired appearance.At this angle the only difference my untrained eye detects is that the modified one looks a bit thicker, and I think I get why that results in cleaner printing of the strings. I wonder if a gentle hit on a belt sander (fine grit) could be used to get it back to the originally intended thickness (or close to it).
Wow indeed -Wow, what a project. I struggle to understand some of the terminology and process but fantastic work Kurt. Very impressive indeed.
In that, regard as an aside, IMO barrels now NEED to only come from 3D printers - for most of us. Yes some are available 3rd party as piece-by-piece bits
not all are available in proper scales.
Cheers,
You need some barrels?Wow indeed -
In that, regard as an aside, IMO barrels now NEED to only come from 3D printers - for most of us. Yes some are available 3rd party as piece-by-piece bits
not all are available in proper scales.
Cheers,
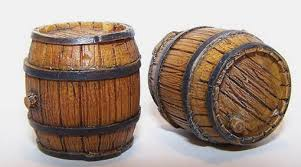
Ohhh.... Cannon barrels. Yeah, gun barrels made using resin printer look excellent and are very detailed.
Last edited:
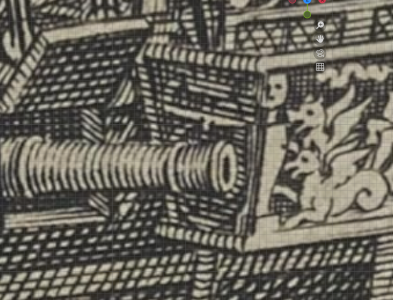
What do you think that squiggly thing is near the chariot rider's head? Hair in the wind? A flying snake? A cloud?
View attachment 535468
Looks to me like the chariot rider has a quality cigar in his left hand and the squiggly thing is the slow exhale trail
 .
.
Last edited:
Sea Serpent?What do you think that squiggly thing is near the chariot rider's head? Hair in the wind? A flying snake? A cloud?
View attachment 535468
A snake/dragon or cloud would be my guess. Looks like the rider is blowing a horn
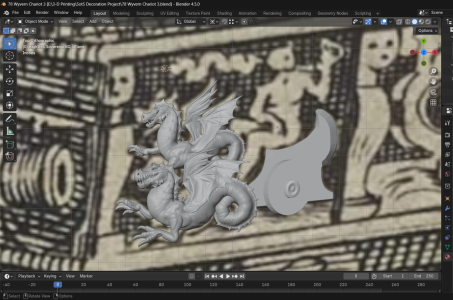
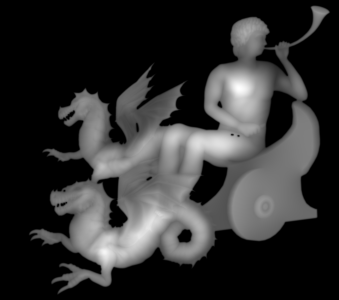
I've been playing around with different tools to turn 3-D objects in Blender into bas relief carvings. The 3-D object is the one in the center below. The first tool I tried was a Blender add-on called Basify, and it created the bas relief on the right. The bas relief on the left was made using the add-on Bildeform, and it turned out better. Whereas Basify makes relief with shallow surface details, like turning your 3-D object into a plateau, Bildeform retained more of the surface detail while still compressing the 3-D object into a flat, bas relief object.
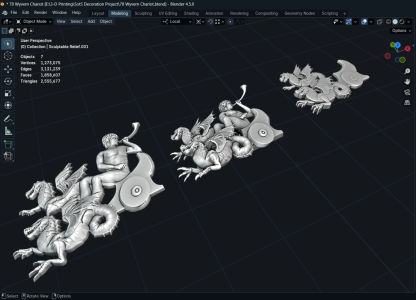
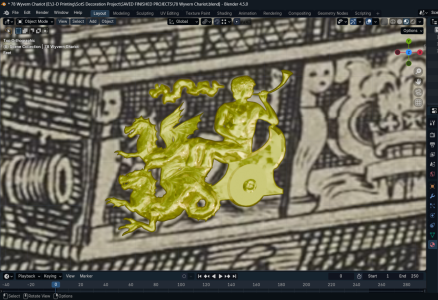
Also, Bildeform can export the UV bitmap to use as a displacement height map onto a finely subdivided grid plane to create the bas relief onto other 3-D objects you may want it on. You will noted in the image below that there were two holes in the leg of the charioteer, and that half the wheel was blended into the side of the chariot. These errors were patched by filling in the holes and replacing the wheel. Many of the previous decoration objects I have made have parts that are too finely detailed to print at such a small scale, so the plan is to remodel those objects into bas relief objects using Bildeform. Some details will be lost, but at such a small scale, they won't be noticed.
So now, all that's left is to decide how to make that snake-like cloud thing. . .
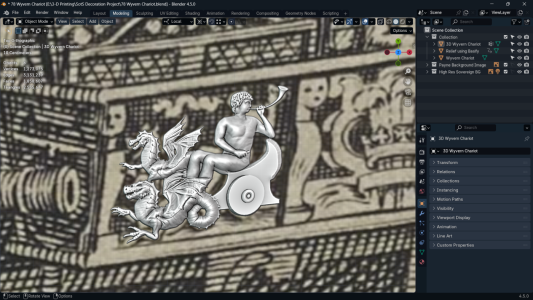

Also, Bildeform can export the UV bitmap to use as a displacement height map onto a finely subdivided grid plane to create the bas relief onto other 3-D objects you may want it on. You will noted in the image below that there were two holes in the leg of the charioteer, and that half the wheel was blended into the side of the chariot. These errors were patched by filling in the holes and replacing the wheel. Many of the previous decoration objects I have made have parts that are too finely detailed to print at such a small scale, so the plan is to remodel those objects into bas relief objects using Bildeform. Some details will be lost, but at such a small scale, they won't be noticed.

So now, all that's left is to decide how to make that snake-like cloud thing. . .

- Joined
- Dec 5, 2022
- Messages
- 1,119
- Points
- 443

Hey Kurt,
I'm stunned by your detailed work. It's amazing. The time and love alone, the way you meticulously work it all up and document it, really world class.
I'm watching your work with great interest. Your expertise in the field of computer representation and modelling leaves me speechless. It's amazing. Your fan
Günther

- Joined
- Sep 10, 2024
- Messages
- 1,025
- Points
- 393

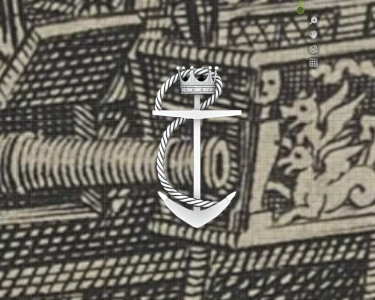
I'm sure it has been said before, but I just have not had time to read every single post on this thread - it just boggles my mind that you are able to pull this much detail from a photo of an engraving! For example, the anchor and crown a few posts back - I would never have even seen that, let alone figure out what it was supposed to be. Also truly amazing is that this is from an engraving! I don't know what the medium was, but can you imagine the pain-staking hours necessary to to inscribe all those little, tiny lines? One also has to wonder what Payne (I assume this is from Payne's engraving) used for reference. Obviously he couldn't refer to a photo. Was the vessel in one place long enough for him to carry his tools to the dock and work on it there? Did he first make a pencil sketch - even that must have required an enormous amount of time to record that level of detail.
And then for you to interpret it so well and render it in 3D. My hat is off to you sir!
And then for you to interpret it so well and render it in 3D. My hat is off to you sir!
Vielen Dank! I am humbled by your kind words.Hey Kurt,
I'm stunned by your detailed work. It's amazing. The time and love alone, the way you meticulously work it all up and document it, really world class.
I'm watching your work with great interest. Your expertise in the field of computer representation and modelling leaves me speechless. It's amazing. Your fan
Günther


