Hms Surprise 1:75 Mamoli

There is another consideration, that of centring the gun when placed on the carriage, in the centre of. The gun port, if the deck is not completed throughout then there will be a small but visible difference in the gun barrel height in the gun port, which, at 9 mm square, is worth considering.
i used the 1-5 mm planking for the gun deck. So being, the centre of the port is 4.5 mm , if there is no decking then the barrel would be at +/- 3 mm in the port ????. Not 4.5mm.


I went ahead and planked the entire gun deck. I share your view and went ahead and put in the effort. I'm glad I did. Good luck with the move dude.
 
Hi all, joined this morning after finding this site. Exactly what I have been seeking for several weeks.
I am starting a Mamoli model of the H.M.S. Surprise, Have the frames , all 17 glued in place and this morning the Gun Deck is now glued and under cramp/tension.
Having already found a couple of,'issues', I thought to seek help/ advice if possible so am delighted to be accepted on this forum. I intend to keep a log of the models progress and post to the forum as and when, supported by photographs if required. Any help and/or advice would be most welcome.
Oh yes, by the way, I live on the second of the Maltese archipelago's islands, called Gozo, there is very little interest here for this sort of pastime which was one reason for searching a source of contact.
Hallo Chris alias @Chris Sayers
we wish you all the BEST and a HAPPY BIRTHDAY
Birthday-Cake
 
Hallo Chris alias @Chris Sayers
we wish you all the BEST and a HAPPY BIRTHDAY
Birthday-Cake


See a couple of posts ago. If I could go back and do it again I would not have glued in the upper deck prior to hull planking. The problem comes from this: The gunport frames are glued in and then somehow you must then place the completed cannon/gun carriage into the frame. As the upper deck is glued down you have to squeeze the gun carriage/cannon in between bulkheads and place it exactly center....and somehow glue it down securely. It would have been much easier to do this from above rather than squeezing in between bulkheads. See the attached picture.

After finished up the lower hull planking I may end up cutting square holes in the upper false deck just for the purpose of installing the gun carriages/cannon.

zdcasx.jpg
 
Closing in on the gap. Almost finished with the first planking, below the gun ports. The stern is coming out beautifully, amidships is just as regular as usual. I have some worry about the bow. As usual I have some dips due to the severe bending of planks.

Yes, I can fill with putty and sand down. But if ever I am to master a single layer planking I gotta figure out how to do the bow correctly the first layer. This ship will be double planked and coppered so these flaws will be hidden. But it bugs me that I keep making the same mistake ship after ship.

20200907_184739.jpg20200907_184748.jpg20200907_184907.jpg20200908_202836.jpg20200908_173753.jpg20200908_202854.jpg20200908_202836.jpg
 
Yes, I can fill with putty and sand down. But if ever I am to master a single layer planking I gotta figure out how to do the bow correctly the first layer. This ship will be double planked and coppered so these flaws will be hidden. But it bugs me that I keep making the same mistake ship after ship.
Hello, Tkam. I can agree with Uwe in regard to the first layer planking. You are making a good job and this will be a good foundation for the final planking. As for the correct planking as any layer, this should involve multiple steps.

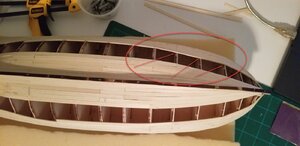
1. First, check the hights of the bulheads\frames across the entire hull. This can be easily achieved by laying a long enough wood strip (technically one of the planking material) and press & hold against 3 or 4 adjacent bulkheads. It should form a nice, even flow. If one of the bulkheads is higher then all others, you need to sand it down. If one of the bulkheads doesn't touch the testing plank - you have to add wood to the edge. This has to be checked for all of the bulkheads from Stern to Stem (bow). This process calling - 'fairing the hull'. If you don't mind, take a look on your photo, I marked the red circle the area that looks like would need to add the wood for bulkheads ( 2 left arrows), and then it could be determined if the bulkhead (right arrow) needed to be sanded down. Why not use long strips for the first layer (from stern to stem)? This will ensure a good way of laying the planks. They should lay naturally, without force.

20200907_184739.jpg

2. If the hull planking will be a single layer, then consider making Stern and Bow filling wood pieces. Balsa wood is a good material for such work. Often, modelers are filling the entire hull between bulkheads to ensure a good foundation for the single planking layer.
3. You would need to taper the planks toward the bow and the stern. You would need to consider using stealers (if required by design). The planks should be bent first and make a good fit.
These are just a few, and we have many books and articles covering planking the hull.
 
Hello, Tkam. I can agree with Uwe in regard to the first layer planking. You are making a good job and this will be a good foundation for the final planking. As for the correct planking as any layer, this should involve multiple steps.

1. First, check the hights of the bulheads\frames across the entire hull. This can be easily achieved by laying a long enough wood strip (technically one of the planking material) and press & hold against 3 or 4 adjacent bulkheads. It should form a nice, even flow. If one of the bulkheads is higher then all others, you need to sand it down. If one of the bulkheads doesn't touch the testing plank - you have to add wood to the edge. This has to be checked for all of the bulkheads from Stern to Stem (bow). This process calling - 'fairing the hull'. If you don't mind, take a look on your photo, I marked the red circle the area that looks like would need to add the wood for bulkheads ( 2 left arrows), and then it could be determined if the bulkhead (right arrow) needed to be sanded down. Why not use long strips for the first layer (from stern to stem)? This will ensure a good way of laying the planks. They should lay naturally, without force.

View attachment 178109

2. If the hull planking will be a single layer, then consider making Stern and Bow filling wood pieces. Balsa wood is a good material for such work. Often, modelers are filling the entire hull between bulkheads to ensure a good foundation for the single planking layer.
3. You would need to taper the planks toward the bow and the stern. You would need to consider using stealers (if required by design). The planks should be bent first and make a good fit.
These are just a few, and we have many books and articles covering planking the hull.


You know, that's the one thing I did not do with this ship, using "stealers". Those hollows/dips I was talking about were do to forcing the strips up towards the bow to curve and to kinda push inwards. I did notice that the more I used narrower strips the less the strip bowed inwards creating the hollow. I think I just answered my own question on how to do it correctly. Well, the first planking below the gun ports is complete, I ended up using 4 drop planks but the rest of the job was just tapering. I'm too tired to post a pic today but tomorrow I'll post a before and after sanding. I think after the first rough sanding I'll know just how hollow those hollows are.
 
Oh crap. OMG. Call me colored pink with embarrassment. I can't believe I hijacked your blog. Sometimes I just respond to the email. Never happen again.
 
@TKAM Hi TKAM - No, it's not my blog - it's Heinrich here. I'm trying to figure out where you are with your HMS Surprise.
 
Ahoy, Chris - I just started my Mamoli Surprise and am enjoying your build log very much. Hope and pray you are well and still working on your Surprise.
 
Ahoy, Chris - I just started my Mamoli Surprise and am enjoying your build log very much. Hope and pray you are well and still working on your Surprise.
Hi Jayray, please accept my apologies for tardy response, but my whole life has changed, hopefully, for the better, I have left the islands and settled back in the U K. so now am awaiting completion of property sales etc across the water. will, if all goes to plan ( ha ha ha be getting back into my modelling soon. So hope to be able to pick up on threads from the last several years.
How are you going along with yours Surprise?, I do hope there is success with the challenge tinged with much achievement for you.
All best wishes for 2021 to you and yours, please feel free to contact with any issues you may have , will be good to correspond.
Kind regards Chris Sayers
Actually, it has just dawned on me, I cannot understand why my post , page three , have all become , I think, TKAM posts!!! am I correct???, is there a little something awry here ?, Anyone on admin able to step up and sort this out please?, or am I still in the realms of sleep land.
Chris.
 
Last edited:
Hi Jayray, did the mix up with the sites ever get sorted out??, I am still packed up, awaiting my new life in the U K, true to say, I have removed to the U K, but still in temporary accommodation, my models and kit remain packed somewhere in a large pile of boxes, life continues on hold, Covid, of course, has not helped, affairs in the Maltese islands still not sorted after 7 months, no work has been done to the surprise for simply ages, hope you are finding success with your build, will try to keep a look out on the site from now onwards.
best wishes. Chris
 
Hi all, joined this morning after finding this site. Exactly what I have been seeking for several weeks.
I am starting a Mamoli model of the H.M.S. Surprise, Have the frames , all 17 glued in place and this morning the Gun Deck is now glued and under cramp/tension.
Having already found a couple of,'issues', I thought to seek help/ advice if possible so am delighted to be accepted on this forum. I intend to keep a log of the models progress and post to the forum as and when, supported by photographs if required. Any help and/or advice would be most welcome.
Oh yes, by the way, I live on the second of the Maltese archipelago's islands, called Gozo, there is very little interest here for this sort of pastime which was one reason for searching a source of contact.
Hallo @Chris Sayers
we wish you all the BEST and a HAPPY BIRTHDAY
Birthday-Cake
 
I'm on Day 2 of building the Surprise, having spent a week cleaning up after finishing The Rattlesnake (which I have renamed "Hazel" since the ship spent some time in Salem MA, where my Dad was born and raised on Hazel Street--I know, TMI).
On the Surprise (which I will not rename) it seems like the keel and bow work should be installed after planking. I have searched the plans for a discussion of this issue, but can't find anything. Any guidance would be great.
Also, is there a Surprise parts list anywhere in English?
Thanks all for any guidance you can provide.
 
Hi all. It has ben a day of some good progress and a little disappointment.
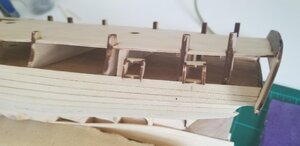
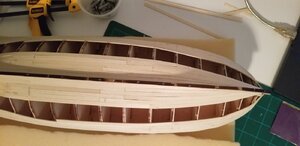
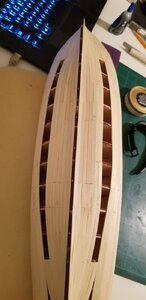
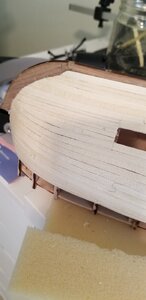
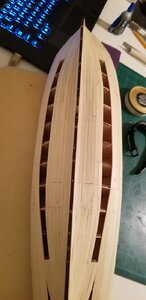
To start I have completed a major part of the Gun Deck planking, in 40/80 mm planks, close to scale I believe. Blackened all edges for that authentic look, you might be able to note a small area that has been lightly sanded to offer an impression.
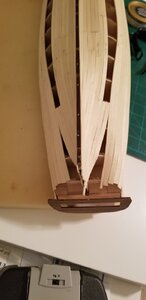
As to the disappointment, well I thought to have a look at the placement of the gun ports relative to the bulkhead positions and that where I found an unwelcome problem. I began with a look at the full size plan and sure enough there were all the gun ports, so I thought place the keel and keel cut out plywood on the frame to get a relative position of the gun. Problem. The plan is not to scale, so I looked at the placement as indicative of several gun ports, close to or at , say masts, then I looked at the bulkhead positions. having measured the placement on the plans they seemed fairly regular, but because the plan is 23mm larger than the real thing a problem exists with some of the gun ports, they are going to have to be placed at irregular intervals, which a sharp eye will pick up no doubt. A little disappointed as such detail should be correct in the conception, shouldn't it!!. The mast poles are inserted after testing the reaming out of the holes after boarding. besides I quite like to see them in place , of sorts.....
I read someplace that the kit was considered to have a few issues, not insurmountable, at least not yet anyway. We all like a challenge.
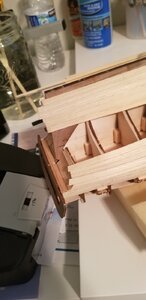
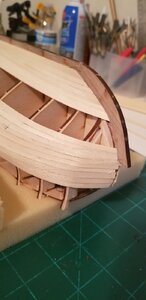
Picture 1 shows start of with centre line, 2 main part planked with the section between upper frames newly glued and under cramp to set the glue. 3 the full size plan with the keel placed on top in order to check placement of all gun ports and subsequent problem to be solved.
Happy modelling y'all
Chris

View attachment 88853View attachment 88854View attachment 88855

I would question this main plan being 23mm larger than the model size as this comp[licates the spacing of the Gun Ports. Which is an issue for many builders over several forums and some years of building this Kit. Whatever, Gun Deck now fully boarded, and I am wondering if the fairing should now be done, together with some additional planking support especially to the Bow section, not a labour as the amount is small but the gain in support will be great. Which brings me to the Stern Transome issues as stated on all blogs. That of the curved support blocks and the placing of the transom itself, also the much talked about '2mm slot', Which I believe to be a step to accommodate the hull boards and give a Finish that is agreeable to the eye. But, 'none-the-less' seems to perplex each modeller. It would be great to be able to see a close up of someones completed planking of this section to see how they handled the issue, any offers?. I will post a shot of the completed Gun Deck once sanded to a finish. Maybe later in the day. Happy modelling to everyone close and far.For the web site guys, there seems to be a problem here as the typing on this edit starts at the centre and radiates out to cover the page, I cannot get the curser to place at the left margin??. any idea's anyone. or Is it me?​
I realize I'm late to the game on this, but appreciate your message on this point. I scanned the Mamoli large drawings (in three stages), then printed the resulting jpg.s at 96% and taped them together. Using the main deck mast holes as a verifying mechanism, 96% is pretty close. The math result is 96.5% but the printer doesn't get that fine.
 
Back
Top