Hms Surprise 1:75 Mamoli

Joined
Apr 11, 2019
Messages
37
Points
68

Location
Gozo, Malta.
Hi all, joined this morning after finding this site. Exactly what I have been seeking for several weeks.
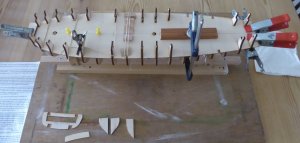
I am starting a Mamoli model of the H.M.S. Surprise, Have the frames , all 17 glued in place and this morning the Gun Deck is now glued and under cramp/tension.
Having already found a couple of,'issues', I thought to seek help/ advice if possible so am delighted to be accepted on this forum. I intend to keep a log of the models progress and post to the forum as and when, supported by photographs if required. Any help and/or advice would be most welcome.
Oh yes, by the way, I live on the second of the Maltese archipelago's islands, called Gozo, there is very little interest here for this sort of pastime which was one reason for searching a source of contact.
 
Hi Chris, If you want, you can use this thread as you build of H.M.S. Surprise. This way if you have any questions, someone can answer and possibly give suggestions.
Thank you Jimsky, that would be great, I have some photographs that will upload soon, but am just starting this project, I must say I have been well pleased with the welcome from this site and its peoples, looking forward to loads of talks in the future.P1030522.jpg
P1030524.jpg

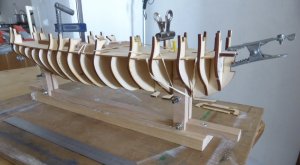
Still trying to get the hang of the site, but here are two images so far today, this second shows the support jig I made from some scrap wood to hold the keel to work on it. The base is a piece of 60 x 20 mm softwood, the rail and support pieces are all from 20 x 13 mm beech , scrap from making my own picture frames a while ago. I let the verticles into the bottom rail leaving a space equal to the keel thickness, then used the bolts to grip the keel. Simple but workable and re-usable. The whole stands on a board and may be screwed down if required.
Hope this proves useful to others. As i said earlier I am building the Mamoli Kit of The Surprise. Which I found on Amazon Deutschland , at a reasonable price , as a starter project. Voila!!
 
Hi Chris, If you want, you can use this thread as you build of H.M.S. Surprise. This way if you have any questions, someone can answer and possibly give suggestions.
Hi Jimsky, I have just spent some time , did not know it was possible, looking at the kit you did, the Charles Royal Yacht, brilliant posting, I must spend more time looking at posts, Love the photo's you posted and the manner one can enlarge to see detail so clearly. I have much to learn from this site. Thank heaven I'm retired!!!. I will be visiting the U K shortly on family business, am hoping to stock up on essentials, having seen some of the things being used I have a growing shopping list. Need a drill, small enough to have a collet to accommodate drill sizes from -25mm upwards, some form of Table mounted Clamp as well. Also the different woods I am seeing in use are simply not available here on this tiny island. somewhat difficult to deal with so am approaching my new hobby/passtime very thoughtfully. Any recommendations would be well received...... Stay well, Chris
 
Hi all. It has ben a day of some good progress and a little disappointment.
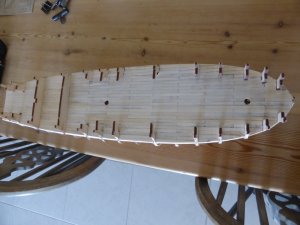
To start I have completed a major part of the Gun Deck planking, in 40/80 mm planks, close to scale I believe. Blackened all edges for that authentic look, you might be able to note a small area that has been lightly sanded to offer an impression.
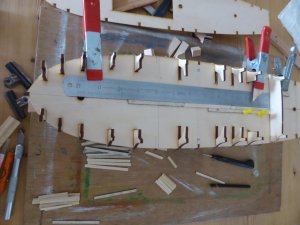
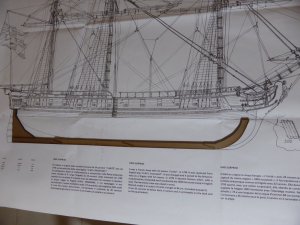
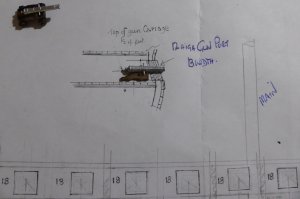
As to the disappointment, well I thought to have a look at the placement of the gun ports relative to the bulkhead positions and that where I found an unwelcome problem. I began with a look at the full size plan and sure enough there were all the gun ports, so I thought place the keel and keel cut out plywood on the frame to get a relative position of the gun. Problem. The plan is not to scale, so I looked at the placement as indicative of several gun ports, close to or at , say masts, then I looked at the bulkhead positions. having measured the placement on the plans they seemed fairly regular, but because the plan is 23mm larger than the real thing a problem exists with some of the gun ports, they are going to have to be placed at irregular intervals, which a sharp eye will pick up no doubt. A little disappointed as such detail should be correct in the conception, shouldn't it!!. The mast poles are inserted after testing the reaming out of the holes after boarding. besides I quite like to see them in place , of sorts.....
I read someplace that the kit was considered to have a few issues, not insurmountable, at least not yet anyway. We all like a challenge.
Picture 1 shows start of with centre line, 2 main part planked with the section between upper frames newly glued and under cramp to set the glue. 3 the full size plan with the keel placed on top in order to check placement of all gun ports and subsequent problem to be solved.
Happy modelling y'all
Chris

P1030530.JPGP1030537.JPGP1030539.JPG

I would question this main plan being 23mm larger than the model size as this comp[licates the spacing of the Gun Ports. Which is an issue for many builders over several forums and some years of building this Kit. Whatever, Gun Deck now fully boarded, and I am wondering if the fairing should now be done, together with some additional planking support especially to the Bow section, not a labour as the amount is small but the gain in support will be great. Which brings me to the Stern Transome issues as stated on all blogs. That of the curved support blocks and the placing of the transom itself, also the much talked about '2mm slot', Which I believe to be a step to accommodate the hull boards and give a Finish that is agreeable to the eye. But, 'none-the-less' seems to perplex each modeller. It would be great to be able to see a close up of someones completed planking of this section to see how they handled the issue, any offers?. I will post a shot of the completed Gun Deck once sanded to a finish. Maybe later in the day. Happy modelling to everyone close and far.For the web site guys, there seems to be a problem here as the typing on this edit starts at the centre and radiates out to cover the page, I cannot get the curser to place at the left margin??. any idea's anyone. or Is it me?​
 
Last edited:
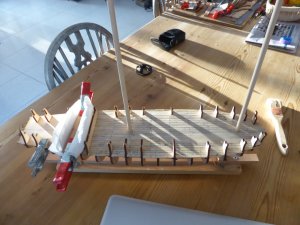
Gun Deck now planked, the two full width frames are loose. Also all faring is completed including the bow section.
P1030540.JPG


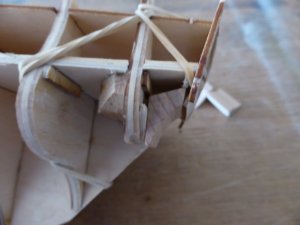
Below here one can see the extra strengthening I have used as well to hold all in place whilst the faring is completed, also the bands are to hold the transom to try and work out how best to proceed. I am thinking it would be better to fix the curved blocks as positioned ( later when all lower boarding and gun ports etc are placed) leaving the blocks to hang 2mm below the frame to accept the hull boarding, It will offer a clean finish. Any viewpoints on this issue please feel free to comment,

P1030543.JPG

P1030543.JPG


The top two picture's show the problem with the Transome. It has to be completely wrong sized both in width and height. I have glued a 2mm packer to the rear of frame 17 to advance the curved blocks to make contact with the transom but still it is not right, being so fragile it is already showing signs of damage and distortion, might have to re-cut it, in which case I will be able to adjust the piece to actually fit. Still trying to figure out what to do. Are there any others out there that might be able to offer advice or have gotten around the issue please??.
 
Last edited:
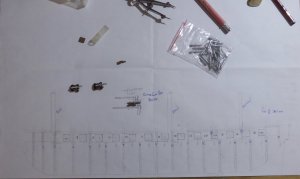
Today, I have been doing a little research into possible issues, as previously stated the ' full size plan' is not accurate, so I drew out the hull in order to look at the spacing of the gun ports relative to bulkhead placement, good thing as well as there was some jiggling about with dividers to space the ports as regular as possible, I had to set into Upper bulkhead part'25' by 3 mm a gun port otherwise the spacing would have been a problem, the alternative is to re-position the frame but then it would need doing before the gun deck is planked, Caveat for any future builder.
P1030548.jpg

The re-drawn plans, I used the keel section as a template, then placed all decking and frames as needed, then was able to work out a workable spacing of the gun ports, relatively simple and full build size.
I have noted the spacing between ports, overall port size not the opening. Above that I drew out full size the deck spacing and gun sizes, gun port position etc to get some idea how to proceed.

P1030549.jpg

A clearer shot of the gun port and spacing.

P1030556.JPG


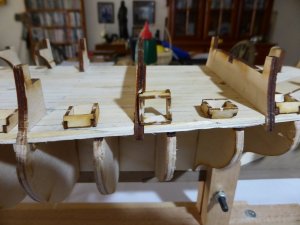
This shot shows the recessing of a gun port into the frame 25, which also serves to position the port relative to the start of planking, as it is 2mm above deck line.which will leave 3mm to underside of the upper, or weather deck.P1030546.JPG

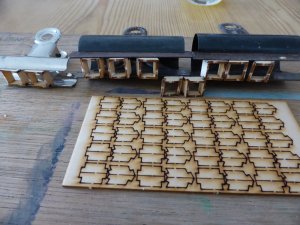
This shot shows the assembly of the gun ports, firstly in two halves, then using bulldog clips to hold up to 5 at a time to glue up square. It is small fiddly work but with the clips it was made easier. I use anything from from washing pegs through to 'G Clamps', whatever is needed. Adhesive used so far has been Evostick 'green tub' exterior PVA glue, I know it's values having used it throughout my manufacturing years without fault, the second adhesive which likewise is water based but in this case waterproof once set is Cascamite powdered resin, Used in the boatbuilding trade, probably the strongest available but a little messy and wasteful as it must be mixed up. The Evostick has an interesting asset side because as it dries slowly, with air contact it thickens, this makes it a little more like a contact glue which is helpful to make a hand held semi bond with time to adjust whilst finding a perfect alignment, sometimes quite helpful and worth bearing in mind. I speak of minutes no longer for clarity.
 
Last edited:
Certainly will help other builders, as others might give you insight into your problem areas. This is the real value of a step by step build log - to help others who face the same problem. Thanks, Chris.
I must say Dave this kit is not an easy one, the language is a problem as there is a good amount of miss usage of the English, one cannot find a good translation engine for Czech as well , so that compounds the issues found. There are mistakes in the referencing of parts and the assembly instructions are sometimes difficult to understand, so it is absolutely essential that anyone building the kit spends time getting very familiar with the build. I would not suggest anyone buying the kit if a starter, or without a good practice aptitude. Problem solving in design conception was a part of my manufacturing business so I am quite happy with the kit, it offers a good challenge. Thank you for your interest, happy modelling. Chris
 
Hi all, today I have been, as is the case of the last week near enough, studying the planking job now afore me, something else for sure!. I have glued on the false keel, something not suggested in the instructions, after looking at the Bearding procedure , all seems relatively straight forward, oops!, it's an illusion, no it is not straight forward, With planking at 1.5 mm and the keel thickness at 4 mm one must be careful not to go too deep, relying on both bearding and a little feathering of the boarding. O K so that's the work today, will complete the front part of the keel together with the Ram tomorrow, then maybe post a shot or two.
 
Back
Top