HMS Victory, Inside out

Joined
Apr 10, 2020
Messages
100
Points
143

Hi all,
A few years ago I build the HMS Victory with the DeAgostino kit. And then I found the book of John McKay "The 100 gun-gun ship Victory". This book shows all the details necessary to build the Victory from scratch.
After the DeAgostini model was finished, and visited the Victory in Portsmouth, I decided to build the Victory from scratch, included all the internal details.
Of that build I made a report on the dutch forum: https://www.modelbouwforum.nl/threads/hms-victory-binnenste-buiten.212385/
It is in Dutch, but I will post here the most essential things, so you can follow it also.
 
Update 1.

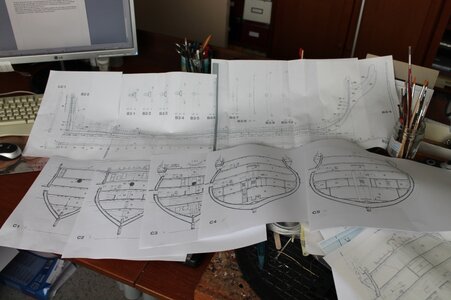
I started this project with copying the drawings from the book of McKay. And rescaling them to 1:72, the scale of the Caldercraft kit. Then I could use their brass etchings.

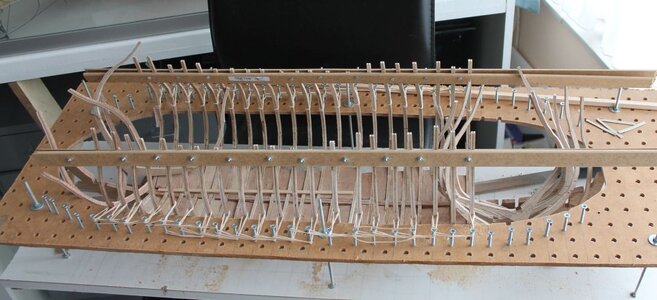
After printing them I draw the frames on plywood and saw them.01-1-Prints.jpg


The frames were mounted on the keel and I placed them in a structure01-2-Geraamte.jpg

01-3-geraamte.jpg
And I filled the bow.
01-4-boeg.jpg
Then I placed the Gunports between the frames with pies op plywood between de frames for rigidity.

01-5-MetSteunlat.jpg

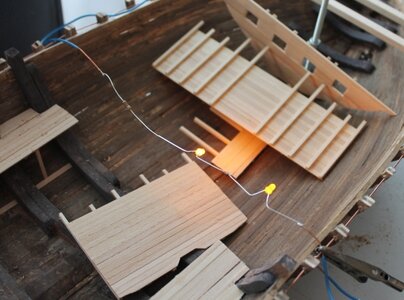
I was intended to put led-lights for the lanterns, so I put a connection for the power and the wiring.
01-6-Electra.jpg
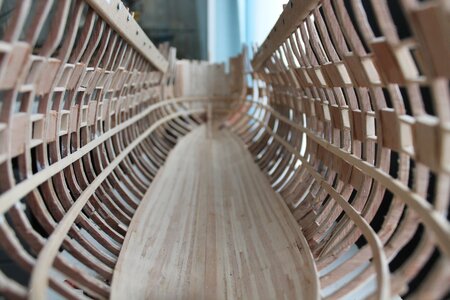
Then I started with the internal planking.

01-7-Doorkijkje.jpg

The levels of the decks are also determined.

To be continued
 
Last edited:
Hello Jan. It is great to see you here on SOS! To those who are unfamiliar with Jan's work - you are in for a real treat! Watch this one!
 
Update 2.
Now is it time to separate the hull from the rest of the model.
The complete hull:

1709581266388.png

The part of the hold
And the rest of the model for the upper decks.
Started with putting details in the model. Here are the “wrangen”
1709581402295.png

And the “lady's hole” at the stern.

1709581481370.png

As the project fails, there always rest a fruit bowl.4-Fruitschaal.jpg

Then I made some bulkheads and made the first test of the lighting

5-Lichttest.jpg
5-Lichttest.jpg

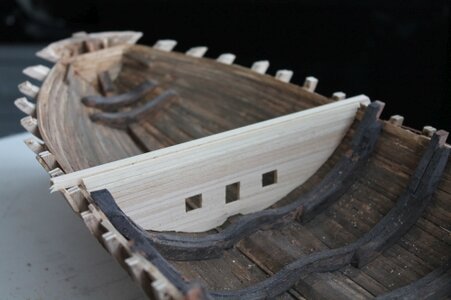
The bottom is made of lime wood and weathered with vinaigre with some iron diluted in it.6-Ruim.jpg

The bow-part with the space for the gun powder room.

7-SchotInRuim.jpg

And the stern part.
8-Achterschot.jpg

To be continued
 
Last edited:
Hi Jan,
This is a really exciting and different kind of model!
When I see this one, and Paul's model (Paulmodel) I can't help thinking this kind of model build should be in museums and places like Portsmouth where people go to see "the real thing".

. . . And if "wrangen" are these 4 beams that lie across the hull 'floor', then in English they're called "riders".

Jim.
 
Hi all,
A few years ago I build the HMS Victory with the DeAgostino kit. And then I found the book of John McKay "The 100 gun-gun ship Victory". This book shows all the details necessary to build the Victory from scratch.
After the DeAgostini model was finished, and visited the Victory in Portsmouth, I decided to build the Victory from scratch, included all the internal details.
Of that build I made a report on the dutch forum: https://www.modelbouwforum.nl/threads/hms-victory-binnenste-buiten.212385/
It is in Dutch, but I will post here the most essential things, so you can follow it also.
I followed the link to the dutch forum. I didn't understand the commentry but the pictures are impressive.
 
@Knut,
I don't live in Norway but in the Netherlands. The flag below my name was derived, I think, from my IP adress.
I don't know how to change that.
 
I don't live in Norway but in the Netherlands. The flag below my name was derived, I think, from my IP adress.
I don't know how to change that.
Staff comments, sorry for the spam folks. You are correct Jan, forum's software 'add on' will pick an IP address and will link to the geographical location this IP address belongs to. Is it possible you are using a VPN of any kind? If yes, then it may explain. Unfortunately, neither user nor staff cannot change it as of now. We will contact the 'add on' manufacturer to find out. Until then, you are Knut's neighbor:D
 
Yes I use a VPN. And Knut is a very nice neighbour.
Bingo!!! This explains, most likely VPN selected an IP range belongs to the Norvegian region! ...and BTW, Knut is a very good\knolegeble neighbor and source of good timber he processed himself!!
 
Update 3.
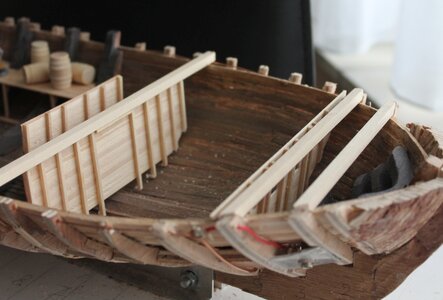
After some internal details I started with the outer planking.

1-Bodem.jpg

Also I made a lot of bulkheads2-Onderdelen.jpg

And put them in place.

3-RuimOverzicht.jpg

I laid some deckbeams and carlings showing how much of them exists. I put them only here otherwise the visibility beneath them is minimal. Left of it is the breadroom with ventilationpipes. On the far right is the filling room for gunpowder.4-Kruitkamer.jpg

I made the details of the fillingroom separate of the model. And you can compare it with the real one. The filling trunk and the floor are covered with lead which doesn't sparkle. When in use a layer of water is put on the floor. Also the gunpowder storeroom is covered in copper.5-Kruitkamerverlichting.jpg

And this is the finished gunpowderroom. There are two lanterns in a separate (white) room, only accessable from above. The lanterns are in a cove which walls are covered with shiny metal working as a mirror. They also give light to the gunpowder storeroom. That floor consists of a kind of wooden tiles with coal below, which takes moisture out.

6-KrtuitOpVic.jpg


The real gunpowder storeroom. Some floorpanels are made of plexiglas and illuminates below showing the coal7-Grind.jpg

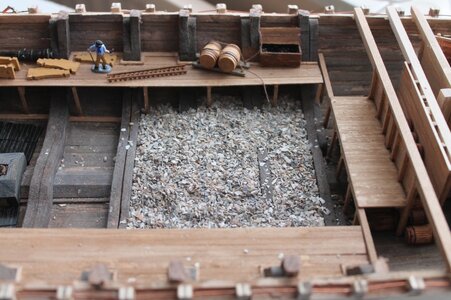
The bottom of the hold is coverd with iron blocks (far left) and gravel. The big watercasks then lay stable.8-TonnenInRuim.jpg

Left from the middle the black iron blocks are visible, besides the mast step. Left and right between the deckbeams are the floors of the hanging magazines, the storerooms for gunpowder bags. They are a bit lowered so they are complete below the waterline and therefore safe for enemy fire. The ridge in the middle is leading bilgewater tot the pumps.9-ManInRuim.jpg

A sailor moves gravel from one side tot the other to stabilize the vessel.10-Overzicht.jpg

An overview and next some impressions.

The platform with left a box with cannon balls
11-Lampje.jpg

The filling room with and without light.12-Kruitkamer.jpg

The hold filled with large water casks.
13-Tonnen.jpg

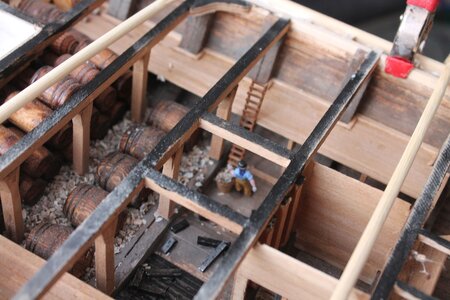
A sailor working in the hold.

14-Ladder.jpg

The final version. Remarks that when the deckbeams are black you can see what is below them, when they are light you can not.15-Final.jpg
Will be continued with the orlopdeck.

When you have any questions about something I have showed, I can and will explain more in detail.
Just ask it
.
 
Last edited:
Update 3.
After some internal details I started with the outer planking.

20201015083855-7cc2184b.jpg


Also I made a lot of bulkheads

20201014142620-328ded9c.jpg


And put them in place.

20201015083854-1e477d6a.jpg


I laid some deckbeams and carlings showing how much of them exists. I put them only here otherwise the visibility beneath them is minimal. Left of it is the breadroom with ventilationpipes. On the far right is the filling room for gunpowder.

20201015184558-3b4b9c50.jpg


I made the details of the fillingroom separate of the model. And you can compare it with the real one. The filling trunk and the floor are covered with lead which doesn't sparkle. When in use a layer of water is put on the floor. Also the gunpowder storeroom is covered in copper.

20201015110339-b0dc7eb5.jpg


And this is the finished gunpowderroom. There are two lanterns in a separate (white) room, only accessable from above. The lanterns are in a cove which walls are covered with shiny metal working as a mirror. They also give light to the gunpowder storeroom. That floor consists of a kind of wooden tiles with coal below, which takes moisture out.

20201015113020-f75963ac.jpg


The real gunpowder storeroom. Some floorpanels are made of plexiglas and illuminates below showing the coal.

20201015114149-c69b4740.jpg


The bottom of the hold is coverd with iron blocks (far left) and gravel. The big watercasks then lay stable.

20201015114202-9758f6ef.jpg


Left from the middle the black iron blocks are visible, besides the mast step. Left and right between the deckbeams are the floors of the hanging magazines, the storerooms for gunpowder bags. They are a bit lowered so they are complete below the waterline and therefore safe for enemy fire. The ridge in the middle is leading bilgewater tot the pumps.

20201015124111-01782b87-xl.jpg


A sailor moves gravel from one side tot the other to stabilize the vessel.

20201015124113-36690dd5.jpg


An overview and next some impressions.

20201015131237-bf836c62.jpg


The platform with left a box with cannon balls

20201015131240-96dca79c-la.jpg


The filling room with and without light.

20201015131241-59f1646b-la.jpg


The hold filled with large water casks.

20201015131239-620d3702.jpg


A sailor working in the hold.

20201020113506-06c465b0.jpg


The final version. Remarks that when the deckbeams are black you can see what is below them, when they are light you can not.

Will be continued with the orlopdeck.

When you have any questions about something I have showed, I can and will explain more in detail.

Just ask it.
fantastic work !!
 
Update 4
After finishing the hold I started with the orlopdeck. But first I have to reassemble the model.1-RUIne.jpg

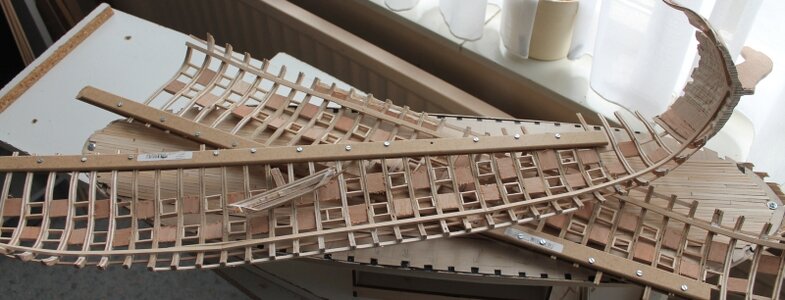
You remember that I sawed the upper structure from the hold. Unfortunately that upperstructure was not very rigid as you can see2-dek.jpg

First I made the orlopdeck itself (plywood of 1mm thick) while it was fixed on the hold.I used the 5-planks method for lying planks on the deck.

3-Wandversteviging.jpg

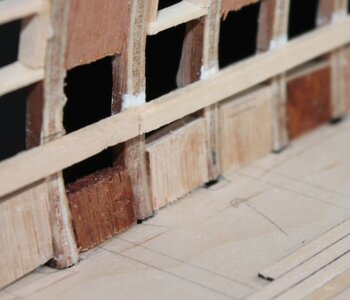
Then I placed pieces of plywood between the frames of the upperstructure and glued it all on the orlopdeck,
resulting in:
4-EenWand.jpg
4-EenWand.jpg


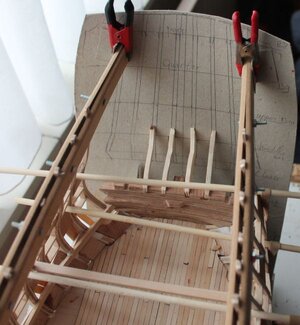
Then I made the stern timbers using some cardboard as guide resulting in:
6-Spiegellatten.jpg
5-KartonnenSpiegel.jpg


6-Spiegellatten.jpg

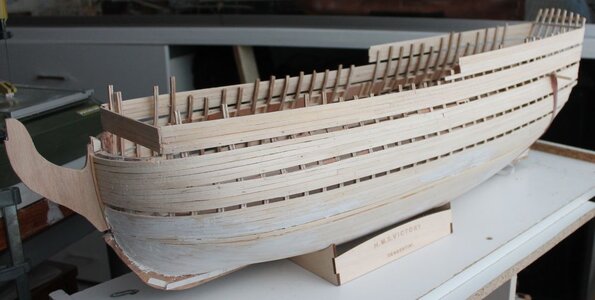
On the outside I continued with planking the outer skin of the orlopdeck.7-Allesopelkaar.jpg

With elastic bands I keep everything together to be sure all fits correctly.8-5-dekken.jpg

And I continued all the way up. Some strakes are left empty. That are the levels of the other decks, which will be sawn off later on.8-DrieDelen.jpg

Here is the orlopdeck sawn off the upperstructure resulting in “three” Victories. From now on I will detailing the oprlopdeck.

Will be continued.
 
Last edited:
Back
Top