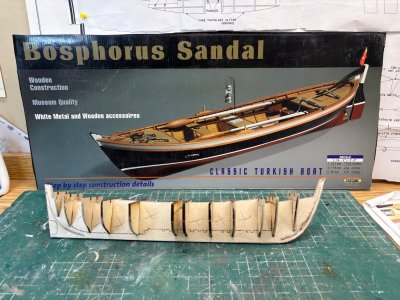
The box cover is an open boat.
Your central spine/ molds build is standard double planking support.
Using a single plank for each strake will be difficult. Each end will be a complex and unforgiving shape.
Remember that the top edge of the garboard is a straight line. It does not walk up the stem or sternpost.
It looks like the dotted lines on the spine - in the middle at the bottom of the molds is designed for a breakout once there is a planking shell.
The wide spacing of the molds will do you no favors.
First, you should become familiar with basic boat building:
https://shipsofscale.com/sosforums/threads/building-a-cutter.17081/#post-447416
https://shipsofscale.com/sosforums/threads/building-a-pinnace.17541/
https://shipsofscale.com/sosforums/threads/building-a-ships-boat.14490/
I would mount the what you have upside down.
I would develop patterns for the planking. I would use crisp cardboard.
I do not know what is available at commercial office supply. I would use 5x8 card. I would use yellow wood glue to make it a stiff three layers and longer than any plank. No real cost there - so many misses is no problem.
The pattern should save on actual wood loss.
When the mold is mounted on a baseboard upside down - there should be secure separate attachment for the middle breakout section. This way the middle can be made free of the rest before you start but it still be exactly where it would be if still attached.
I would give serious consideration to doing an inner planking over molds first. I would use single layer 5x8 card. PVA bonded to the middle section and Duco bonded to the end molds that are the bow and stern cubby for the first layer and PVA for however many layers are needed to get a fair and smooth surface for the real planking. This would need serious design consideration for just how the release the part that you will not keep with the model.
The actual planking should be pre-bent so that when placed, it stays without springing out.