• Win a Free Custom Engraved Brass Coin!!!
    As a way to introduce our brass coins to the community, we will raffle off a free coin during the month of August. Follow link ABOVE for instructions for entering.

I have decided to start over…….

Joined
Jul 12, 2023
Messages
68
Points
78

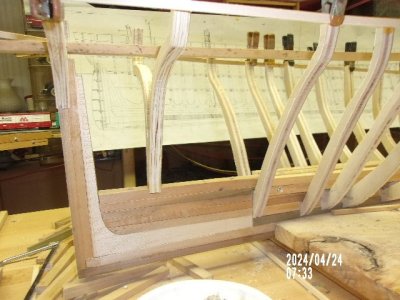
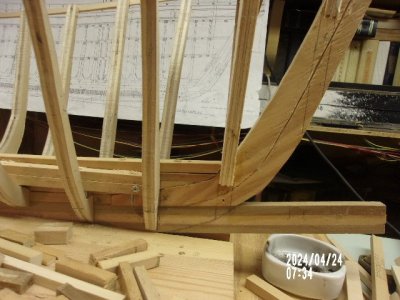
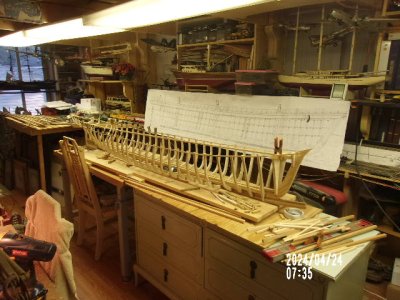
Having recently decided to “pick up where I left off” I have confirmed I have a good project and tracked down a lot of history and sourced some very informative copies of the original plans. However auditing my approach and early attempt at some frame parts I see I was heading towards some serious issues with fitting the frames to the keel, mainly caused by the deadwood, keelson and frame interface. I have decided to start again from scratch, use fewer frames and finalise the jointing arrangement. One question should the internal surface of the keel be fully planked or use stringers as is suggested on the plans. Are plywood frames an alternative to totally fabricated and pinned frames?
 
Hello Seagull Shipwright,

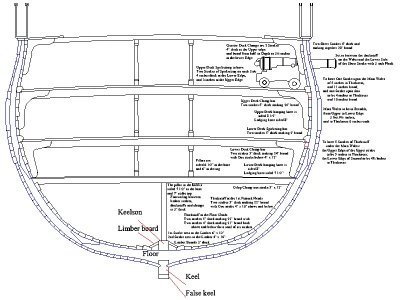
What ship is this to be? Frames sat on the keel differently in different nations and eras. Not sure what you mean about the keel being planked internally. Maybe the cross section will help understand more clearly. Ignore the dimensions, they are for a particular ship.
Allan
1759279634677.jpeg
 
Are plywood frames an alternative to totally fabricated and pinned frames?

Plywood is a poor candidate for frames. The edges of plywood, being laminations of alternating grain direction, are difficult to fair because they don't plane or, for that matter, sand, very well at all. Cutting full length frames from solid stock is also a poor practice because the curved shape of frames virtually guarantees grain runout which will result at some point along the length of the frame with grain running across the frame which creates a very weak spot that will almost certainly break. Moreover, due to the edge grain presented on the edges of plywood, it is a poor surface for gluing or trying to drive pins or trunnels into.

The practice that is seen when fully framed models are built which purport to replicate the actual construction details of a vessel by cutting futtocks and pinning them, while impressive in a "masterpiece" project that will take years to complete, is only necessary when one undertakes the challenges of such models. For fully planked models where the frames serve to define the shape of the hull, but not to depict the actual period construction practices, one useful solution is to laminate wide, but relatively short, strips of wood with the butts staggered, such that the grain of each strip is more or less parallel to the direction of the frame's length. This yields a "frame shaped" laminated piece out of which the actual frame shape can be sawn without grain crossing the narrow width of the frame. I have found clear birch wood (I think) tongue depressor sticks, which are about 3/4" X 1/16" X 6" and can be inexpensively purchased in bulk from most craft stores, work well for this purpose because the wood is correct for the purpose, as is the size. Tongue depressors can also easily be cut with a standard classroom paper cutter or a pair of large sharp shears... or sawn, at the required angles to form the frame shape, and then glued up with PVA and clamped with binder clips to set overnight. While these frame blanks are laminated, they don't have plywood's disadvantage of presenting edge grain at alternating laminations and can be sanded much like solid wood.

When purchasing tongue depressors, note that some are sold as "popsicle sticks," or "craft sticks," and others as "tongue depressors" and they come in a variety of sizes. I'm not certain, but I believe the tongue depressors are slightly thinner than the popsicle sticks and I'd advise getting the thinner ones because they are easier to cut. Don't worry about buying too many. If you do any amount of modeling, you'll find their hard "white" wood with no visible grain or tendency to splinter or "fuzz," is practically a "poor man's boxwood or holly" and useful for all sorts of modeling purposes.

See: https://www.amazon.com/s?k=tongue+depressor+for+craft&adgrpid=1337008617574518&hvadid=83563313357721&hvbmt=be&hvdev=c&hvlocphy=88716&hvnetw=o&hvqmt=e&hvtargid=kwd-83564162493210:loc-190&hydadcr=4831_13229909&mcid=72b204a64dac39a09cd92fc707007c3e&msclkid=5bb074256d751189d5fc1cf99d165158&tag=mh0b-20&ref=pd_sl_u0b9kc6qs_e
 
Last edited:
Bob and Ab, thanks for the heads up. It looks like Plywood is a non-starter and I will heed your advice.

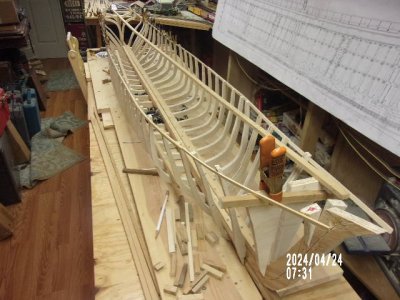
As you can see from my early posts I bought some Sycamore and cut it down to size. Then jointed as futtocks with pinned joints. Took a very long time and ran into problems fitting to keel.

Just ordered the tongue depressors and will assemble the laminate as recommended to the desired thickness, then cut and sand.

Another question if I may….. I have got my head around the frames that sit directly on the keel, but wondered how to find the height above the keel on the deadwood. Can someone explain it for me?

Thanks everyone, whilst out of my depth still I have some new options to explore.
 
I have got my head around the frames that sit directly on the keel but wondered how to find the height above the keel on the deadwood. Can someone explain it for me?

I'm not understanding your question. I suspect there's a lack of fluency with the nomenclature. Frames are fastened to the keel in a variety of ways. Sometimes floor timbers are bolted to the top of the keel, and the frames are bolted to the sides of the floor timbers. Sometimes frame heels are also let into the top of the keel adjacent to the rabbet. Sometimes the frames are constructed so that the floor timber is integral with the entire frame assembly which is then bolted to the top of the keel. Frame heels at the ends of a vessel are often fastened to the sides of the deadwood or stem assembly. Bottom line, it depends on the shape of the hull and the method of assembly. If you have plans, they should show the rabbet line and that would be your benchmark for the intersection of frame heel, rabbet, and garboard.

Of course, if you are building a planked hull and nobody's going to see the frames, you can fashion any sort of support for the planking at the ends that you wish, since nobody's going to ever see what's beneath it. This one reason why many experienced scratch modelers opt to avoid fiddling with structural framing at all and simply construct hull shapes using the lift, or "bread and butter," method in which the waterlines are used to stack up into an accurate hull shape and the excess "steps" between the waterlines simply removed and the hull shape faired using the cut waterline shapes as guides.
 
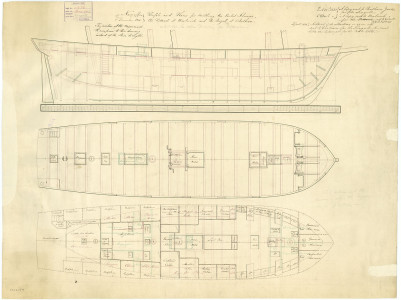
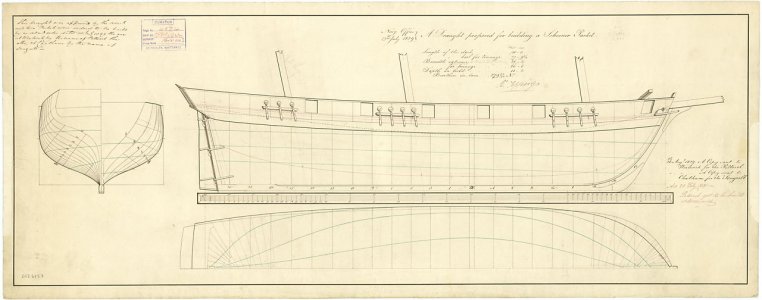
Bob and Allan, thanks again for your support. The vessel I am building is the HMP Seagull from the original c1830 drawings. I have posted the drawings in my thread Seagull in the section on SOS Build Logs from Scratch or Plans. Thanks for the tips on joining the frames on the keel and the deadwood. Whilst I can set any frame at the correct spacing and location along the length of the keel the frames that are not directly on the keel i.e. on the deadwood, I am not sure how to establish or confirm the height above the keel. Do you use the top of the deadwood or the bearding line as the datum?

Thanks again Seagull Shipwright.
 
Do you use the top of the deadwood or the bearding line as the datum?
If there is bearding line on the deadwood forward and aft, the shelf along the line is where the frames usually ended. The problem with the plans I found is that they do no show the lines. I was surprised not to see a body plan. Did you find a contemporary body plan for Seagull 1830 at RMG or was it elsewhere?
Thanks
Allan
1759453121045.png
 
Last edited:
Back
Top