• Win a Free Custom Engraved Brass Coin!!!
    As a way to introduce our brass coins to the community, we will raffle off a free coin during the month of August. Follow link ABOVE for instructions for entering.

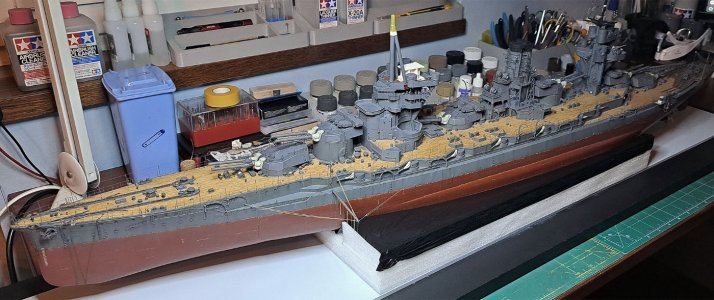
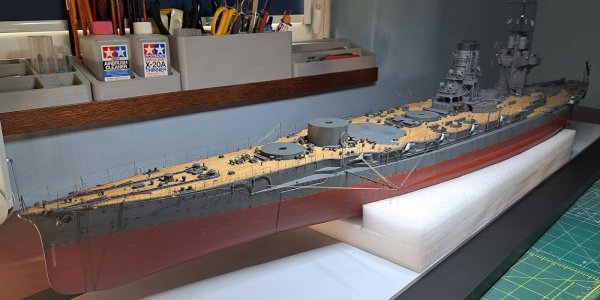
IJN Fuso 1944 by wieslaw_ - Halinski - 1/200 - CARD - with 3D print

that is a fantastic build, 3D printing really enhances build quality. the painting of the model is a good affect. I only 3d print the air vents and other small stuff on 1:400, but might increase that knowing how it will look. can't wait to see the finished model.
 
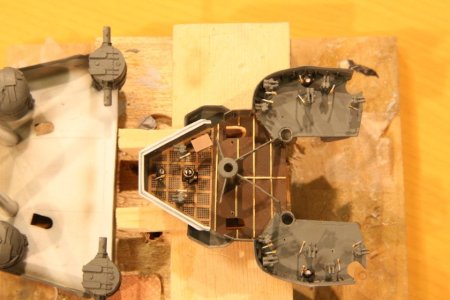
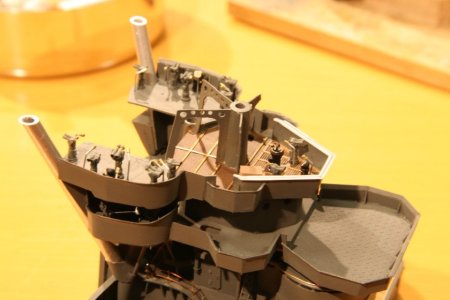
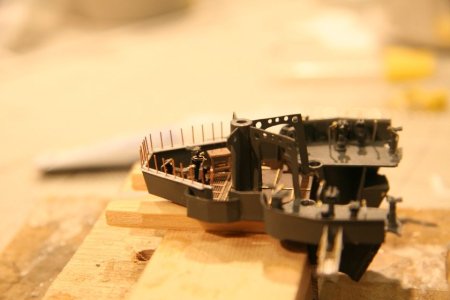
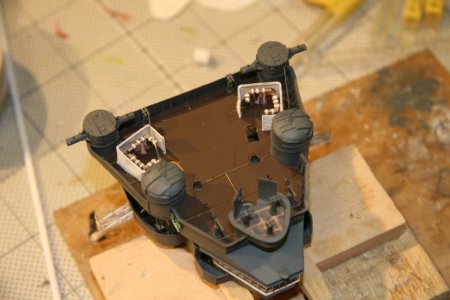
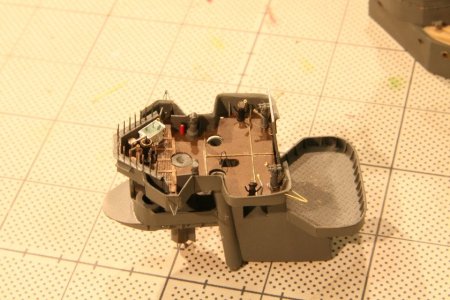
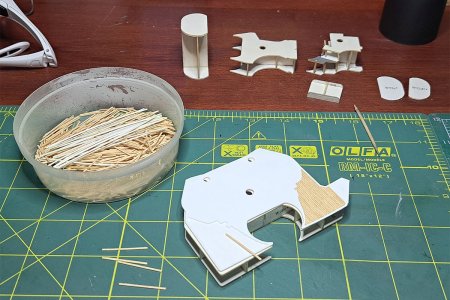
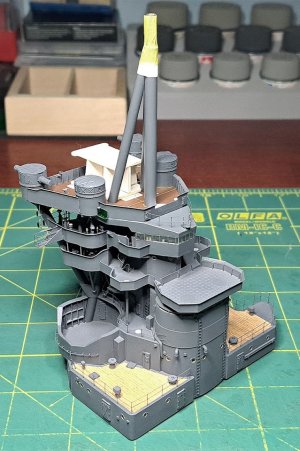
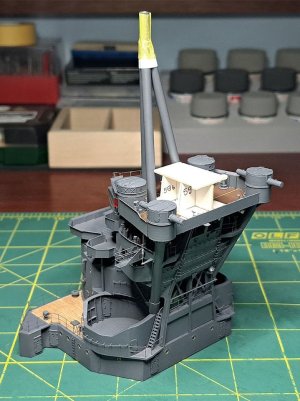
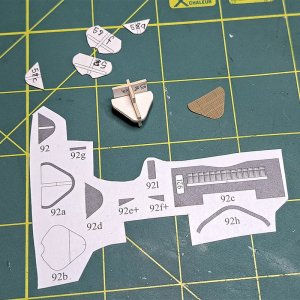
I have a question. I found a detail from a Japanese modeler — as shown in the photos below — namely anti-slip mats like those found on an aircraft deck, but placed on various platforms of the superstructure. I haven’t found anything like this in Anatomy of the Ship by Skulski, and I also don’t have photographic documentation that would confirm something similar.
So the question is: does this make sense?

003.jpg

004.jpg

006.jpg

008.jpg

009.jpg
 
I mess around with it every now and then. You could say I’m about halfway through the “pagoda.” Next up, I need to fix up that little “chicken coop” at the front of the bridge with the rangefinders. But for now, everything’s going back into the display case - my daughter’s flying in from far away to visit her folks. And, as the saying goes, some things just matter more than others.

215.jpg

221.jpg

225.jpg

229.jpg

230.jpg
 
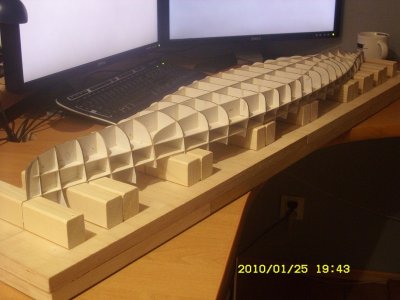
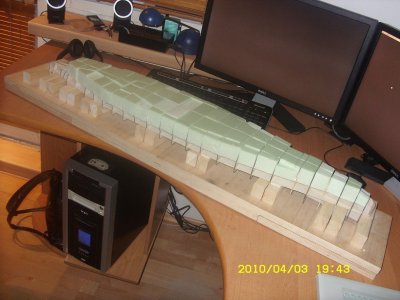
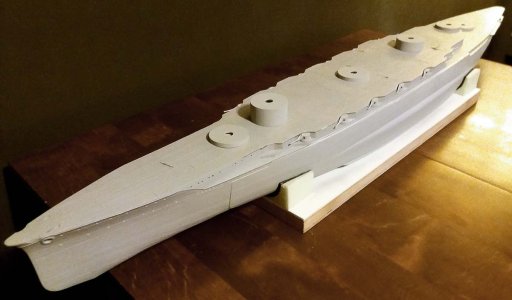
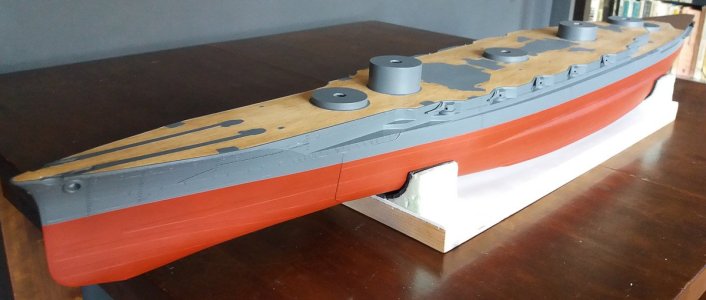
I am trying to understand the paper hull. What gives it the strength and smoothness. Is the paper soaked in epoxy resin or did you cover the hull in 3D printed panels?
 
@Paulpk
I’ll try to explain this to you as clearly as I can, step by step, illustrating it with photos:
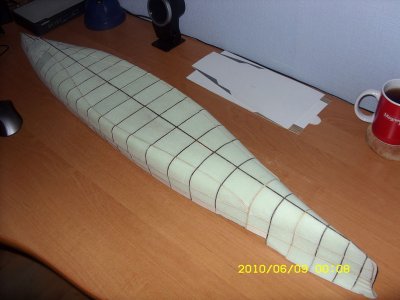
  1. First, I built the framework that came with the kit, which had to be glued onto cardboard and cut out.
  2. Then I filled the spaces between the bulkheads with construction foam to avoid the so-called “cow ribs effect” when covering the frame with paper.
  3. Next, I covered the framework with the parts that also came in the kit.
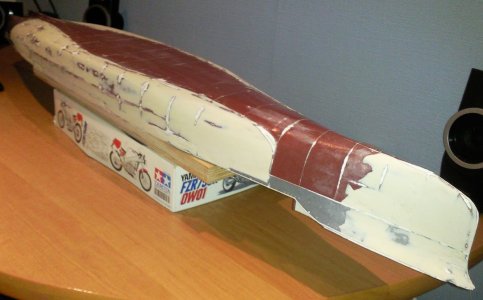
Some modelers stop at this stage — this is the so-called modeling standard for paper models. I continued working on the hull because I wanted to achieve a plastic-like effect:
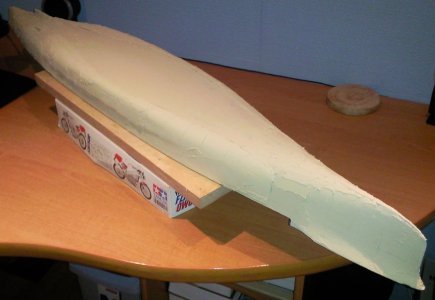
  1. I put filler on the hull and then sanded it for a long time, correcting imperfections as I went.
  2. At this stage, I primed the hull with gray primer to make it easier to spot any flaws.
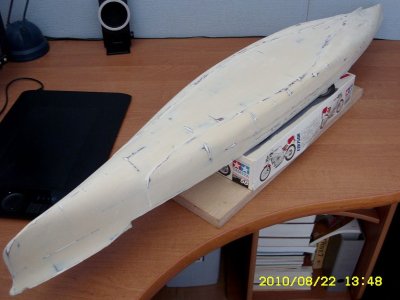
  3. On top of that, I glued small strips of paper that now imitate the panel joints on the hull.
  4. Finally, the standard steps: applying base colors and adding weathering effects such as wear and rust.

That’s it - I hope this helps.

004.jpg

019.jpg

023.jpg

027.jpg

028.jpg

032.jpg

088.jpg

097.jpg

171.jpg
 
@Paulpk
I’ll try to explain this to you as clearly as I can, step by step, illustrating it with photos:
  1. First, I built the framework that came with the kit, which had to be glued onto cardboard and cut out.
  2. Then I filled the spaces between the bulkheads with construction foam to avoid the so-called “cow ribs effect” when covering the frame with paper.
  3. Next, I covered the framework with the parts that also came in the kit.
Some modelers stop at this stage — this is the so-called modeling standard for paper models. I continued working on the hull because I wanted to achieve a plastic-like effect:
  1. I put filler on the hull and then sanded it for a long time, correcting imperfections as I went.
  2. At this stage, I primed the hull with gray primer to make it easier to spot any flaws.
  3. On top of that, I glued small strips of paper that now imitate the panel joints on the hull.
  4. Finally, the standard steps: applying base colors and adding weathering effects such as wear and rust.

That’s it - I hope this helps.

Great results! Thank you for the explanation.
Paul
 
Hey Wieslaw,

this is a kit that is second to none. This attention to detail is exactly to my taste. The realisation: unique, with a lot of love and feeling. I'm amazed that you chose the Fuso. Unfortunately, it met a tragic end, with almost the entire crew dying.

Your build is amazing. I'll definitely be sticking with it. Quick question:

You're a pro at 3D printing and modelling? It certainly looks like it!

You asked the question about the slide mats and whether this was the right thing to do. I can only say that they may have existed, but they were not the norm. Most anti-slip mats tended to be made of hard rubber, as wood has the property that when it's wet you can slip and fall overboard at height, which wouldn't have ended well.

Spectacular construction ... Respect for the attention to detail ...

Cheers, Günther Ship-1
 
Wieslaw, I can't believe what I'm looking at, your skills are amazing, as is the model!

I'm not a big fan of 3D resin printing... a technique I'll never get my head around.
But how else can these details be produced?
 
Back
Top