
-

SUBSCRIBE TO SHIPS IN SCALE TODAY!
The beloved Ships in Scale Magazine is back and charting a new course for 2026!
Discover new skills, new techniques, and new inspirations in every issue.
NOTE THAT OUR NEXT ISSUE WILL BE July/August 2026 -

Win a Free Custom Engraved Brass Coin!!!
As a way to introduce our brass coins to the community, we will raffle off a free coin during the month of August. Follow link ABOVE for instructions for entering.


You are using an out of date browser. It may not display this or other websites correctly.
You should upgrade or use an alternative browser.
You should upgrade or use an alternative browser.


- Joined
- Sep 18, 2022
- Messages
- 335
- Points
- 168

Started making up the various rope coils.
My method is using an appropriate sized brass tube, polished smooth with a rounded down end - to make sure there are no burrs. Then run the same line/rigging you used for the lines you need the coils for over bee's wax to keep the fuzz down and to cause the lines to stick together. Start with a single overhand knot, then wrap 3,4 or 5 loops, make sure to cross over the other end of the line. Then using a granny knot, tie the lines together, then pull the long lead hard to set and remove any slack. Carefully slide the coil off the brass tube, touching the knot with a tiny drop of acc glue.
Using several different types of tweezers, place the coils where needed. Also make up several extra coils to lay about the deck.
I added the rice bags and small wooded barrels to give a cluttered deck appearance as well; I need to add more coils and she will be completed.
- Joined
- Sep 18, 2022
- Messages
- 335
- Points
- 168
For what's its worth, its done. Chinese junks tacked by steering the boat directly through the wind; the sail's semi-rigid, battened structure automatically swung to the new side without the need for sailors to physically pull it across, adjust lines, or worry about dangerous, uncontrolled jibes, I had the last two pics taken off a filtered screen, that why the colors look a bit faded. Next up will be the old Aurora Wanderer Whale, pressed in 1966 which I've been meaning to build since the 1990, there will be a LOT of modifications. I don't think I can pull off a convincing level of detail on the thick molded plastic sails as I did with the Junk. Stay Tuned.


Nice work Jake. Very impressive! I hope mime looks half as good 
You don't seem to have added the sheets? At least, not the way I imagined them (in the file I sent). Was that wrong? Or was there another reason?
Cheers. I hope to start painting mine next week - as a break from the Golden Hind after I get the deck guns done.
You don't seem to have added the sheets? At least, not the way I imagined them (in the file I sent). Was that wrong? Or was there another reason?
Cheers. I hope to start painting mine next week - as a break from the Golden Hind after I get the deck guns done.
Cap'n Jake:OK, just spent an hour researching, general consensuses is the use of a long tiller sweep, so I think I need to make something up.
Yup. They are specialized sculling oars called yulohs. Quite a bit has been written about them. Fair winds!


- Joined
- Sep 18, 2022
- Messages
- 335
- Points
- 168
I still need to make one for the boat, I have a post it note on it, for the next few days I'll hopping with the storm approaching, I serve as a supt. of a water and wastewater plant, so I'll prob be at the plant for a day or two.Cap'n Jake:
Yup. They are specialized sculling oars called yulohs. Quite a bit has been written about them. Fair winds!
View attachment 620826View attachment 620827
- Joined
- Sep 18, 2022
- Messages
- 335
- Points
- 168
I have not rig them up yet, I need to mount it perm. to the stand, its sits off center and wants to fall over easy with the main sail hang so far over.Nice work Jake. Very impressive! I hope mime looks half as good
You don't seem to have added the sheets? At least, not the way I imagined them (in the file I sent). Was that wrong? Or was there another reason?
Cheers. I hope to start painting mine next week - as a break from the Golden Hind after I get the deck guns done.
Hi Jake
I have finally started my Junk. Just tidying pieces and doing a dry fit, so far.
There is a belaying rail that goes on each side - part #33. It has 7 holes in it and there are only 5 pins to be inserted (part #13).
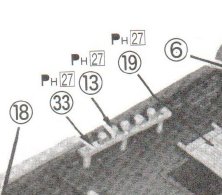
This seems to be what you have done.
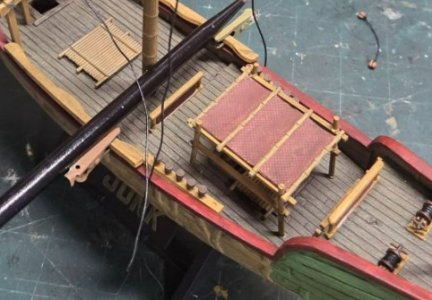
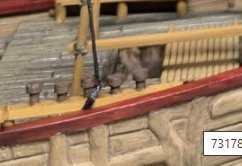
I was thinking of filling the extra 2 holes? They look sort of weird with nothing in them...
I was also thinking of using actual belaying pins - you know, this shape....
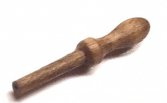
...rather than the (uglier) ones in the kit? Probably not historically accurate though...
Indeed, didn't you say they rarely used pins at all?
Cheers
John L
I have finally started my Junk. Just tidying pieces and doing a dry fit, so far.
There is a belaying rail that goes on each side - part #33. It has 7 holes in it and there are only 5 pins to be inserted (part #13).
This seems to be what you have done.
I was thinking of filling the extra 2 holes? They look sort of weird with nothing in them...
I was also thinking of using actual belaying pins - you know, this shape....
...rather than the (uglier) ones in the kit? Probably not historically accurate though...
Indeed, didn't you say they rarely used pins at all?
Cheers
John L
- Joined
- Sep 18, 2022
- Messages
- 335
- Points
- 168
Yep, everything I've read, the Chinese did not use the pins, BUT those anchor points are just strange, and search as I might, there are no pictures I could find of olden junks with any detail.Hi Jake
I have finally started my Junk. Just tidying pieces and doing a dry fit, so far.
There is a belaying rail that goes on each side - part #33. It has 7 holes in it and there are only 5 pins to be inserted (part #13).
View attachment 629433
This seems to be what you have done.
View attachment 629436
View attachment 629437
I was thinking of filling the extra 2 holes? They look sort of weird with nothing in them...
I was also thinking of using actual belaying pins - you know, this shape....
View attachment 629434
...rather than the (uglier) ones in the kit? Probably not historically accurate though...
Indeed, didn't you say they rarely used pins at all?
Cheers
John L
I don't have any knowledge of Chinese vessels but I do have practical experience with pinrails on small craft. My 16' Sea Bright skiff has pinrails on the quarters principally for the main sheet, which is belayed on flat top pins. A "standard" belaying pin is unnecessary and could get in the way if you needed to ease the sheet quickly. Regarding filling in the "extra" holes on the junk's pintails, that seems wrong. You never know when you might have to belay another line. Fair winds!
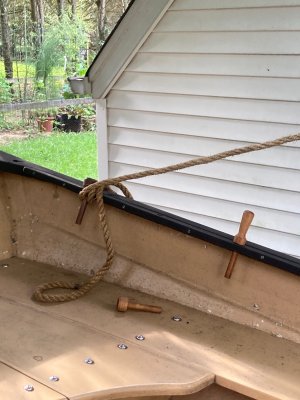
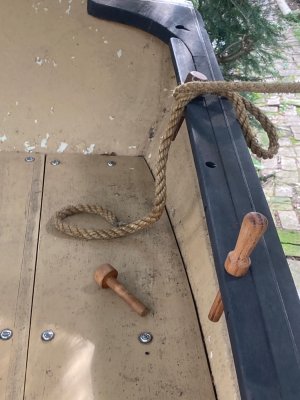
Thanks from me, also. I think I will go with the flat topped pins for the central 5 holes and the others (one at each end) I will add a spare traditional belaying pin. The hole does not go all the way through (at the ends) because the pin rail legs are o nthe ends But the top of a curved belaying pin will look OK and could be used for various things...something like this:
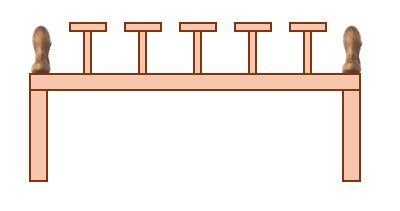
But the top of a curved belaying pin will look OK and could be used for various things...something like this: