Yes, this is a high-quality kit. Not only are there a variety of aids to help in assembly, but the parts are extremely well engineered. Everything fits as they should. I have had to do very little sanding or filing.This really is a nice kit. Love the jigs that help you you keep everything in line on the paddle wheels.
-

Win a Free Custom Engraved Brass Coin!!!
As a way to introduce our brass coins to the community, we will raffle off a free coin during the month of August. Follow link ABOVE for instructions for entering.
-

PRE-ORDER SHIPS IN SCALE TODAY!
The beloved Ships in Scale Magazine is back and charting a new course for 2026!
Discover new skills, new techniques, and new inspirations in every issue.
NOTE THAT OUR FIRST ISSUE WILL BE JAN/FEB 2026
You are using an out of date browser. It may not display this or other websites correctly.
You should upgrade or use an alternative browser.
You should upgrade or use an alternative browser.
That is some very fine work on the paddlewheel Carl! Bravo!
Thanks Paul!That is some very fine work on the paddlewheel Carl! Bravo!
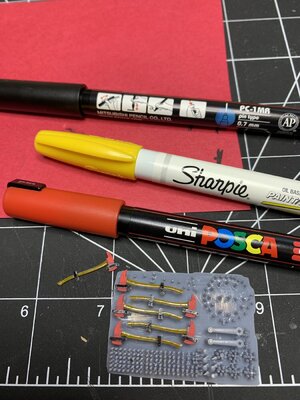
Recent work on the lifeboats and davits. I highlighted the planks using a thin black marker and then smudged it a bit to give the lifeboats an aged look and to bring out the detail of the planks. The boats are plastic, but with slight grooves between the planks. The davits are made from thin aluminum tubing that is provided. The suggestion is to drill a very small hole at the upper end to attach the pulleys. However, the tube is very thin and I ended up breaking two 3mm drill bits trying to make the required hole. I gave up on this and instead cut a very small groove on the top to hold a thread which I knotted in place. This thread will be what I use to attach the pulleys. The original instructions is to use a 0.12" wire.
To begin the pulley cords, I tied a thread to the bottom of the upper pulley. Here too, I diverged from the instructions which suggested gluing the end of the thread to the bottom of the top pulley. There is a gap where you can do this, and I thought that this would create a stronger bond that just gluing the end of a thread to a flat surface on the pulley. I then ran the cord through the pulleys as shown in the instructions.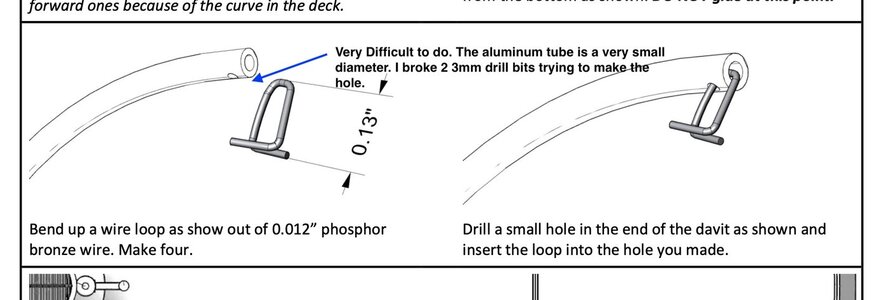
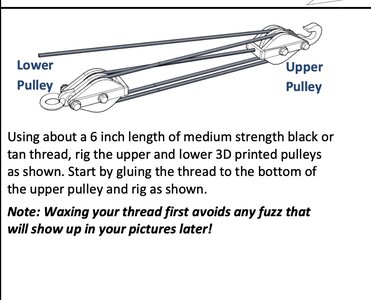
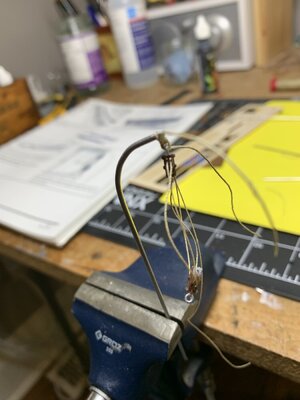
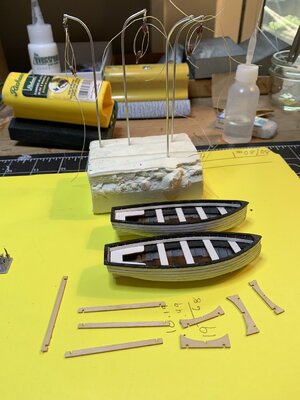
To begin the pulley cords, I tied a thread to the bottom of the upper pulley. Here too, I diverged from the instructions which suggested gluing the end of the thread to the bottom of the top pulley. There is a gap where you can do this, and I thought that this would create a stronger bond that just gluing the end of a thread to a flat surface on the pulley. I then ran the cord through the pulleys as shown in the instructions.


I am close to the end of this build. I put together the duck rudders and installed the paddlewheel and associated parts and pieces.I have to admit that I altered the duck rudder assembly. There were a number of very small parts - not a surprise as this kit has everything exactly, or close to exact scale. I have had success in putting much of it together, but my shaky hands caused me a bit of trouble with the very small rudder arm pieces. So, I did my own version, with less pieces. In the end, it's hard to see any difference. For those who are following this log in their building of this kit, I would recommend putting all the duck rudder pieces together as a separate piece, and afterwards gluing it to the stern of the boat. With a separate build it was easy to turn things around, flip it upside down, etc.. Some of the assembly would have been difficult for me, if I assembled it directly on the boat - at least for me!
I also soldered the last of the LED wires and attached these to my 9V battery pack. And to my pleasant surprise, all the lights worked perfectly!! I now have to figure a way to hide the 18" or so wire "snake" that I created. I have plans to hide these in a recess in the pine stand that I will build, so that only the on/off switch will be visible.
I only have one more thing to do to finish this kit. I am waiting for a replacement set of lifeboat pulleys. Once I get these and put the davits together for the remaining lifeboat, I will be done. In my next post, I will include photos, as well as a review of my experience with this kit.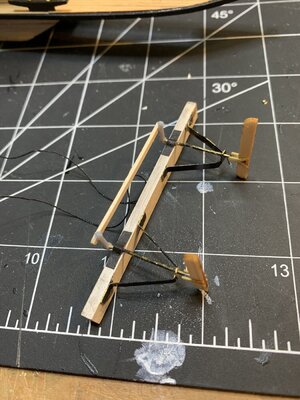 done!!

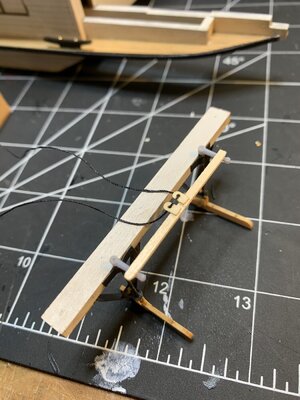
I also soldered the last of the LED wires and attached these to my 9V battery pack. And to my pleasant surprise, all the lights worked perfectly!! I now have to figure a way to hide the 18" or so wire "snake" that I created. I have plans to hide these in a recess in the pine stand that I will build, so that only the on/off switch will be visible.
I only have one more thing to do to finish this kit. I am waiting for a replacement set of lifeboat pulleys. Once I get these and put the davits together for the remaining lifeboat, I will be done. In my next post, I will include photos, as well as a review of my experience with this kit.
 done!!

I assembled the paddle wheel, rudder mechanism and various other supporting struts. This was fairly straightforward, but inserting the Pitman arms into the engine was a bit troublesome. It is almost impossible to see what you are doing - you have to position the arms through a narrow slot. In the end I positioned it as best I could. It doesn't really matter if you attach it properly, since you can't see that far inside the engine room. The important thing is to connect the arms to the Paddle wheel, and this was not difficult. I also worked on various bits and pieces, installing the fire buckets, axes, etc.. I decided not to put the axes on the front of the wheelhouse, as in the original ship, but added an extra decal with the ship's name instead. I thought it looked better. I also tested the lights and was happy with the result. The only thing left to do is install the second lifeboat. I am missing a few pulleys for the davits and am waiting for them to be delivered...hopefully soon. Then, the final act is to put together the base.
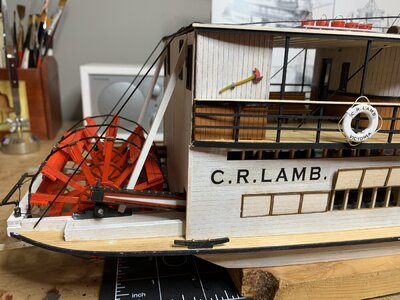
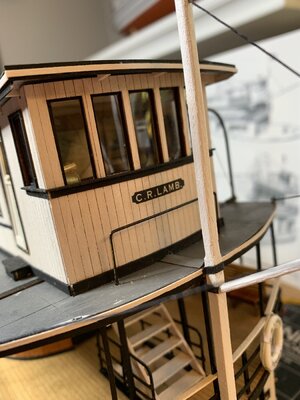
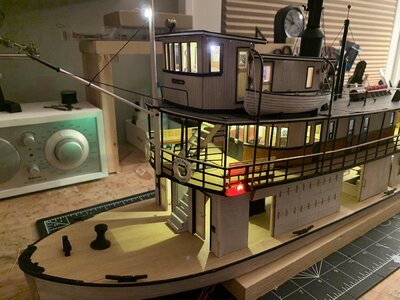
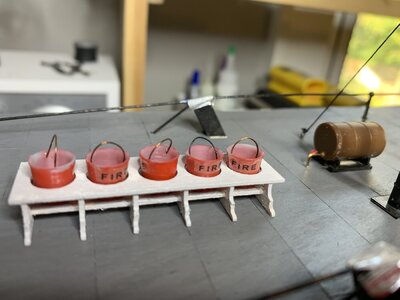


She is looking better and more impressive, Carl. The picture with the lights looks great.I assembled the paddle wheel, rudder mechanism and various other supporting struts. This was fairly straightforward, but inserting the Pitman arms into the engine was a bit troublesome. It is almost impossible to see what you are doing - you have to position the arms through a narrow slot. In the end I positioned it as best I could. It doesn't really matter if you attach it properly, since you can't see that far inside the engine room. The important thing is to connect the arms to the Paddle wheel, and this was not difficult. I also worked on various bits and pieces, installing the fire buckets, axes, etc.. I decided not to put the axes on the front of the wheelhouse, as in the original ship, but added an extra decal with the ship's name instead. I thought it looked better. I also tested the lights and was happy with the result. The only thing left to do is install the second lifeboat. I am missing a few pulleys for the davits and am waiting for them to be delivered...hopefully soon. Then, the final act is to put together the base.
View attachment 400235View attachment 400236View attachment 400237View attachment 400238
Regards, Peter
Thanks Peter!! I was seriously worried about this. I never worked with LED lights before, so the wiring, soldering, etc.. was a high learning curve.She is looking better and more impressive, Carl. The picture with the lights looks great.
Regards, Peter
Thanks Frank.A paddle steamer is definitely on my list of wanting-to-do... looking great, especially lit up!!
So very cool. Cheers GrI assembled the paddle wheel, rudder mechanism and various other supporting struts. This was fairly straightforward, but inserting the Pitman arms into the engine was a bit troublesome. It is almost impossible to see what you are doing - you have to position the arms through a narrow slot. In the end I positioned it as best I could. It doesn't really matter if you attach it properly, since you can't see that far inside the engine room. The important thing is to connect the arms to the Paddle wheel, and this was not difficult. I also worked on various bits and pieces, installing the fire buckets, axes, etc.. I decided not to put the axes on the front of the wheelhouse, as in the original ship, but added an extra decal with the ship's name instead. I thought it looked better. I also tested the lights and was happy with the result. The only thing left to do is install the second lifeboat. I am missing a few pulleys for the davits and am waiting for them to be delivered...hopefully soon. Then, the final act is to put together the base.
View attachment 400235View attachment 400236View attachment 400237View attachment 400238
- Joined
- Jan 26, 2021
- Messages
- 161
- Points
- 213

Congratulations for your fanrastic build, specially the add ons that provide an increased realism to the already very detailed kit.
Very interesting to note that this is not a kit from a traditional ship modeling company and I fact it’s their first and (hopefully not their) only one !
Very interesting to note that this is not a kit from a traditional ship modeling company and I fact it’s their first and (hopefully not their) only one !
Hallo @CarlerooThis is the beginning of my build log for the CR Lamb, an early 20th century sternwheeler. I found this kit thanks to a fellow modeller. Inter-Action is a Canadian-based hobby supplier that seems to be focussed on train scenery and diorama items. This is their only ship kit (as far as I know). I was very impressed when I opened the box. The materials seem first-rate in quality and there are 2 cerlox bound binders with detailed descriptions, photos and illustrations.This is the most detailed and comprehensive set of build instructions I have seen in a kit - a sample of a a few pages is included below
we wish you all the BEST and a HAPPY BIRTHDAY

Enjoy your special day
Hope you have a great birthday!
Happy Birthday! 

Also from my side a Happy Birthday, Carl.
Regards, Peter
Regards, Peter
Thanks for the birthday wishes. Much appreciated!Also from my side a Happy Birthday, Carl.
Regards, Peter
Many thanks!!Happy Birthday!


